Use Invoice4U with Virtual Terminal
Overview
Invoice4U payment documents will be available in Virtual Terminal after the service is activated by Verifone.
The payment documents will be generated automatically after the transaction is captured and will be sent to the shopper's mailbox. For each transaction, the details regarding the payment document will be available in your Verifone Central account.
Availability
Invoice4U via Virtual Terminal is available for Merchant Cashier and Merchant Supervisor roles.
Workflow
-
Log in to your Verifone Central account.
-
Navigate to the Payment Tools tab and click on the Virtual Terminal section from the drop-down menu.
-
Fill in the Payment Settings page with your Organization information, Payment Provider Contract, Transaction type, and Authorization Type.
-
Go to the Payment Documents section which details the following mandatory fields:
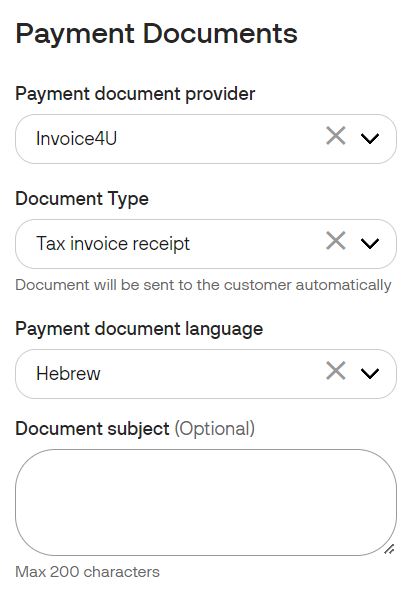
- Payment document provider - Select which Invoice provider you want to use for this transaction. You can choose:
- None - if you do not wish to generate a commercial document for this transaction
- Invoice4U - if you want to generate a commercial document for this transaction
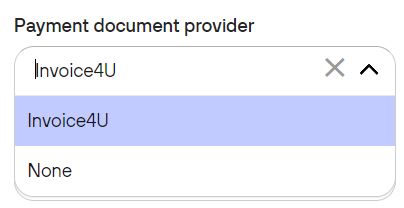
- Document Type - If you select Invoice4U, the following options will become available:
- Tax Invoice
- Receipt
- Tax Invoice Receipt
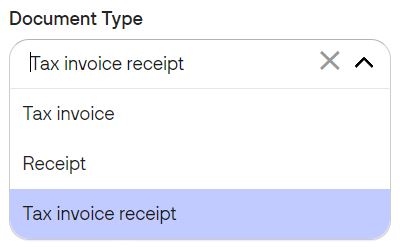
- Payment document language – Select Hebrew or English.
- Document subject (Optional field) - where the merchant can specify a general description of the document (a maximum of 200 characters are allowed), which is not necessarily reflected in the line items. Such subjects can be "Monthly subscription", "Invoice for services rendered", etc. The Document subject field corresponds to the
sales_descriptionfield from Checkout API.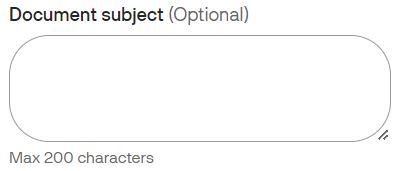
- Payment document provider - Select which Invoice provider you want to use for this transaction. You can choose:
-
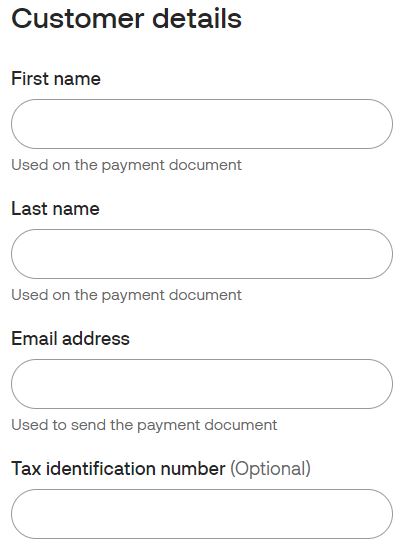
Go to the Customer Details section and fill in the specific information (First name/Last name/ Email address - used to send the payment document).
-
Go to the Transaction Settings section. Several workflows are possible here:
- Without line items - If the Receipt document type is chosen in the Payment Documents section, the transaction amount is required while the line items are not.

- With line items - If the Tax invoice and Tax invoice receipt document type is chosen, the line items are required.

- Without line items - If the Receipt document type is chosen in the Payment Documents section, the transaction amount is required while the line items are not.
-
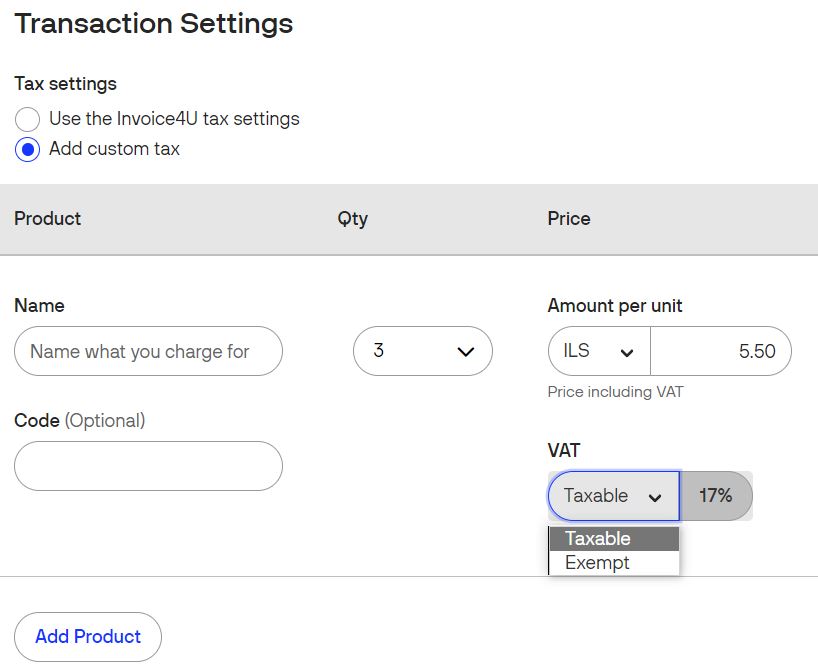
Go to Tax settings. When selecting payment documents with line items for Tax invoice and Tax invoice receipt, the following two radio button options will be available:
- Invoice4U tax settings - the default tax settings set in your Invoice4U account will be applied to your products. Set the Product Name, quantity (Qty), Amount per unit (tax included), and the optional stock keeping unit ID (Code). Use the Add Product button to add additional product lines.
- Add custom tax - where in addition to the aforementioned details, you can also specify per product line item, by selecting from the dropdown menu, whether it it is Taxable (with current value of 17%, as per Israeli VAT) or Exempt (0% tax rate).
-
After adding your products, click on the Continue to Payment button.
-
Complete your Payment Form with Credit card information and click the Pay button.
-
The Payment Completed page with information on your Transaction will now show up.