Integration Guide for PayPal Express Checkout
Overview
PayPal Express Checkout gives your customer a simplified checkout experience, replacing the classic full-page redirect flow. By using this type of checkout, your customer does not have to leave your website, thus benefitting from an enhanced shopping experience.
On desktops, the PayPal payment flow takes place in a secure overlay window that opens in front of the merchant website, while on small-screen devices (tablets and smartphones) the PayPal payment screens are optimized for the full-page mode.
Express Checkout flow offers a streamlined checkout flow that keeps customers on your website throughout the payment authorization process. The redesigned flow presents PayPal screens in a secure overlay window that sits atop your webpage, providing a seamless and user-friendly checkout experience.
PayPal Express Checkout Flow
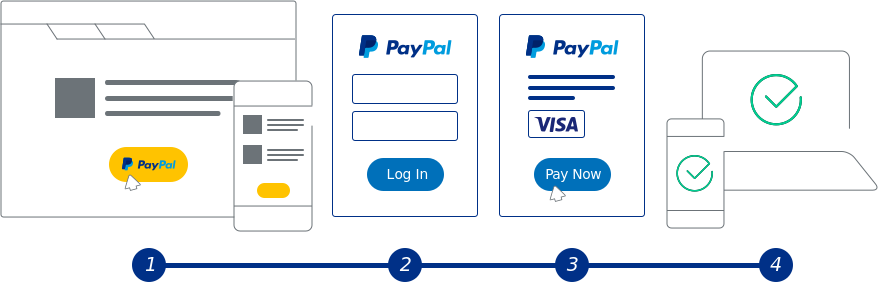
- The buyer chooses to checkout with PayPal and clicks on the button.
- The buyer logs in to PayPal in a secure window that overlays your website.
- The buyer also authorizes the payment in the secure window.
- PayPal returns the buyer to your website to review the charges and transaction details on your confirmation page.
PayPal Express Checkout Integration Steps
Prerequisites
- An Onboarded Payment Provider Contract (PPC)
- PayPal Merchant ID
- Valid JWT Token
Add the Buttons
Add Smart Payment Buttons to your website. This integration guide helps you:
- Render the PayPal Smart Payment Buttons
- Set up a one-time transaction and immediately capture the funds into your account
- Test the button and make it live on your site
Set Up Your Development Environment
- Get the Payment Provider Contract ID to be used while calling the APIs. Make sure it is onboarded with PayPal.
- Get your PayPal Merchant ID to be used with the SDK.
- Get the ClientId to be used with the SDK.
Add the PayPal JavaScript SDK to your web page
Once you have the above details, the next step is to add the PayPal JavaScript SDK on your page.
Include the PayPal JavaScript SDK on the page hosting the PayPal button, then add your sandbox client-id to the script tag. Do not download a local copy. Use the full PayPal URL for the JavaScript file as follows:
<!DOCTYPE html>

<head>
  <meta name="viewport" content="width=device-width, initial-scale=1"> <!-- Ensures optimal rendering on mobile devices. -->
  <meta http-equiv="X-UA-Compatible" content="IE=edge" /> <!-- Optimal Internet Explorer compatibility -->
</head>

<body>
  <script
    src="https://www.paypal.com/sdk/js?client-id=YOUR_CLIENT_ID&merchant-id=YOUR_MERCHANT_ID"> // Required. Replace YOUR_CLIENT_ID with your client ID  and YOUR_MERCHANT_ID with your PayPal merchantId
  </script>
</body>
To streamline the integration, the PayPal JavaScript SDK uses default values for parameters you do not pass. Depending on how you want your integration to work, you might want to override these default values by explicitly passing a different value. A few common parameters you might override:
currency- The PayPal JavaScript SDK defaults toUSD.intent- The PayPal JavaScript SDK defaults tocapture, which results in capturing the funds immediately. If you want to authorize funds immediately but capture the funds later, you have to explicitly pass authorize as the intent for the transaction.
Learn more about valid values for parameters you can pass to the PayPal JavaScript SDK at Customize the PayPal JavaScript SDK Script.
Render the Smart Payment Buttons
Render the PayPal Smart Payment Buttons to a container element on your web page.
<body>
  <script
    src="https://www.paypal.com/sdk/js?client-id=YOUR_CLIENT_ID"> // Required. Replace YOUR_CLIENT_ID with your client ID.
  </script>

  <div id="paypal-button-container"></div>

  <script>
    paypal.Buttons().render('#paypal-button-container');
    // This function displays Smart Payment Buttons on your web page.
  </script>
</body>
Set up the transaction
Implement the createOrder function, which is called when the buyer clicks the PayPal button. This step:
- Calls your server to set up the details of a one-time transaction, including the amount, line item details, and more
- Your server should call the Create PayPal Transaction API with the valid Payment Provider Contract ID and the line items
- Launches the PayPal Checkout window so the buyer can log in and approve the transaction on paypal.com
For the list of parameters which you can pass to the server to set up the transaction, and example responses, see Create PayPal Transaction.
<script>
    paypal.Buttons({
        createOrder: function () {
            // replace the below URL with your own server URL
            return fetch('/my-server/create-paypal-transaction', {
                method: 'post',
                headers: {
                    'content-type': 'application/json',
                },
            })
                .then(function (res) {
                    return res.json();
                })
                .then(function (data) {
                    return data.orderId;
                });
        },
    })
        .render('#paypal-button-container');
</script>
In the Create Transaction API request, you need to pass line items to make sure the buyers can see the amount while completing the checkout at PayPal. The total amount of the transaction will not be displayed in the PayPal screen if line items are not passed. This is also a recommended and ideal way of implementing Express Checkout.
This is how the line items show up in the user interface:

Now, your client and server are set up to call the PayPal Orders API to create a transaction.
Once on the PayPal payment page, the buyer does the following:
- Logs into PayPal
- Selects shipping and a funding source
- Continues the transaction and returns to your site
Capture the transaction
Implement the onApprove function, which is called after the buyer approves the transaction on paypal.com. This function:
- Calls your server to capture the funds from the transaction
- Shows a message to the buyer to let them know the transaction is successful
onApprove: function() {
  return fetch('/my-server/capture-paypal-transaction', {
    headers: {
      'content-type': 'application/json'
    },
    body: JSON.stringify({
      transactionId: transactionId // transactionId is available as id in the create transaction response
    })
  }).then(function(res) {
    return res.json();
  }).then(function(details) {
    alert('Transaction funds captured');
  })
}
Test the integration
To test your buttons, complete these steps:
Run test transactions
- Create a new sandbox test account.
- Click the Smart Payment Buttons.
- Log in to PayPal using the test buyer account you created.
- Complete a transaction.
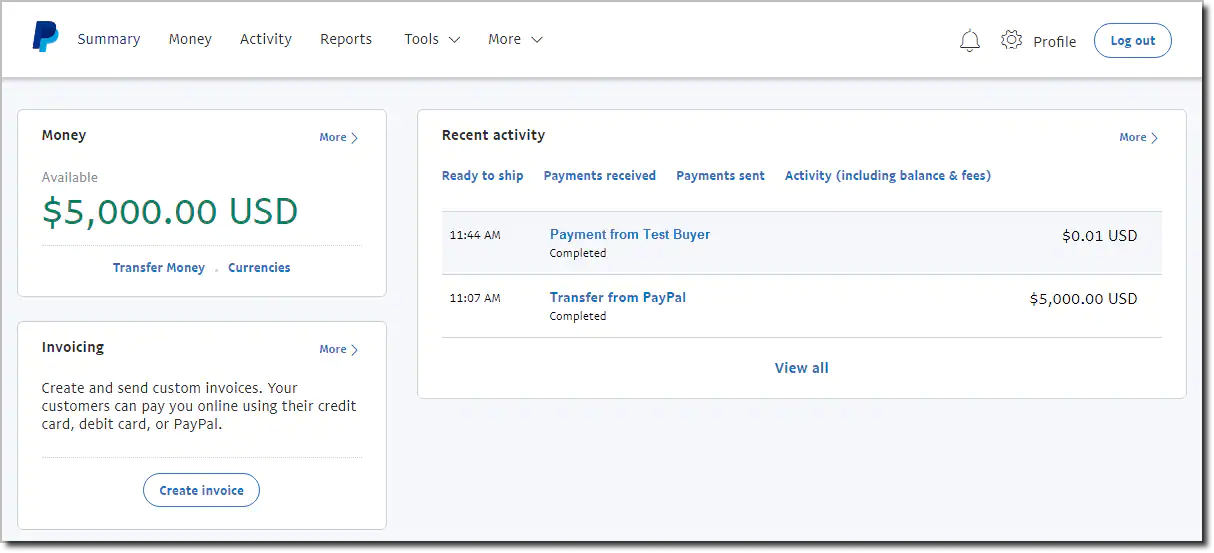
Verify test transactions
Verify your test transactions from both the merchant's and buyer's perspective:
- Log in to the sandbox using your sandbox merchant account to confirm that the funds have been received (minus any processing fees).
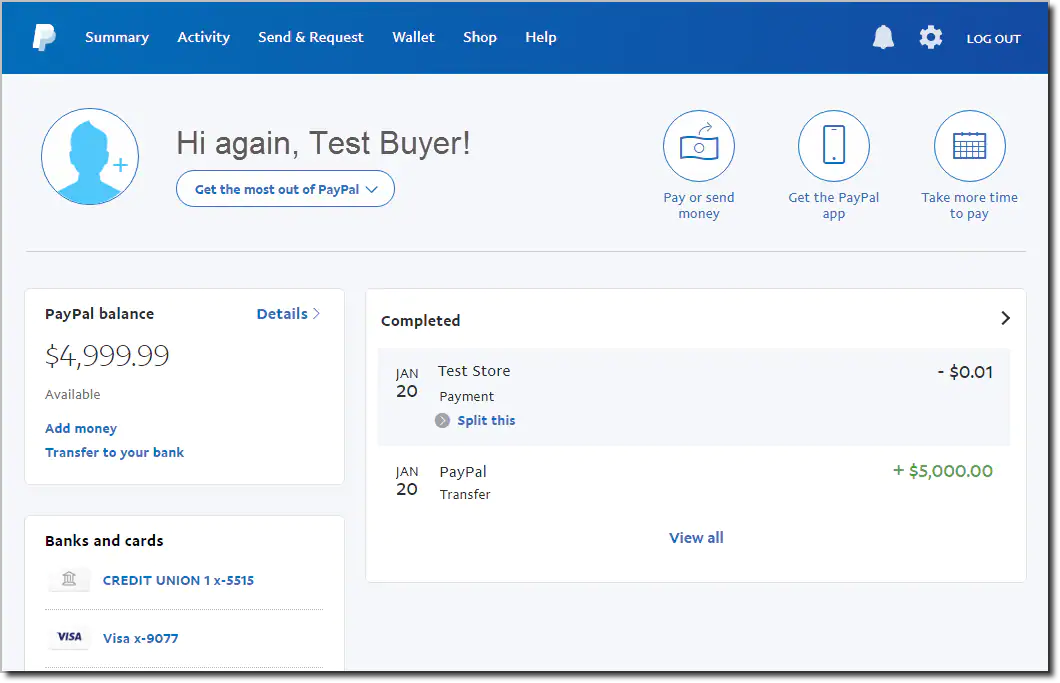
2. Log in to the sandbox using your sandbox buyer account to confirm that the funds have been sent.
Authorize the transaction (optional)
If you have created the transaction using the intent as AUTHORIZE, then you would need to authorize the transaction instead of capturing. So, you would have to change the onApprove function to:
onApprove: function() {
  return fetch('/my-server/authorize-paypal-transaction', {
    headers: {
      'content-type': 'application/json'
    },
    body: JSON.stringify({
      transactionId: transactionId // transactionId is available as id in the create transaction response
    })
  }).then(function(res) {
    return res.json();
  }).then(function(details) {
    alert('Transaction funds authorized');
  })
}
Listen for Shipping Changes
The Shipping Change callback is a feature of Smart Payment Buttons that extends your Smart Payment Buttons integration. While the buyer is on the PayPal site, you can update the contents of their shopping cart to reflect the shipping address they chose on PayPal.
You can also use the callback to:
- Validate that you support the shipping address
- Update shipping costs
- Inform the buyer that you do not support their shipping address
To integrate the callback, pass the onShippingChange function to your paypal.Buttons component. For example:
paypal.Buttons({
    onShippingChange: function(data, actions) {
        // ...
    }
}).render('#paypal-button-container');
PayPal calls your onShippingChange function when:
- The buyer initially logs into their account (if the buyer already has a PayPal account)
- The buyer submits their billing/payment information (if the buyer does not have a PayPal account)
- The buyer makes a change to their shipping address on the review your payment page
PayPal provides the following parameters to your onShippingChange function:
-
data: An object containing the buyer’s shipping address. Consists of the following fields:orderID: The ID represents an orderpaymentID: The ID represents a paymentpaymentToken: The ID/token which represents the resourceshipping_address: The buyer's selected city, state, and postal codeselected_shipping_option: Shipping option selected by the buyer
-
actions: An object that contains methods to update the contents of the buyer’s cart and interact with PayPal Checkout. Consists of the following methods:resolve: Indicates to PayPal that you do not need to make any changes to the buyer’s cartreject: Indicates to PayPal that you will not support the shipping address provided by the buyer
Examples
Consider a use case where you do not support international transactions:
paypal.Buttons({
    onShippingChange: function(data, actions) {
        if (data.shipping_address.country_code !== 'US') {
            return actions.reject();
        }

        return actions.resolve();
    }
}).render('#paypal-button-container');
For more complex scenarios, you can send the payload to your server for any validations and patching operations.
const baseOrderAmount = '15.00';

paypal.Buttons({
    onShippingChange: function (data, actions) {
        // Reject non-US addresses
        if (data.shipping_address.country_code !== 'US') {
            return actions.reject();
        }

        // You can make a callback to your server and perform any necessary validation and patching operations from there

        return fetch('/my-server/update-paypal-transaction', {
            headers: {
                'content-type': 'application/json'
            },
            body: JSON.stringify({
                shippingAmount: shippingAmount
            })
        })
            .then(res => {
                if (!res || res.error) {
                    return actions.reject();
                }
                return actions.resolve();
            });
    }
})
    .render('#paypal-button-container');