P630/UX700 - User Interface
Idle Screen
The Idle Screen displays upon device power up, after reboot, and after transaction completion. SCA supports the following merchant controlled media areas: Idle Screen Video, Idle Screen Animation, and Idle Screen Full Image.

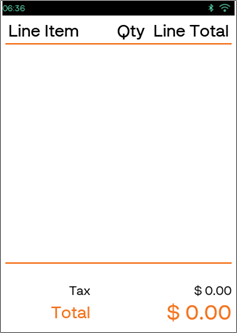
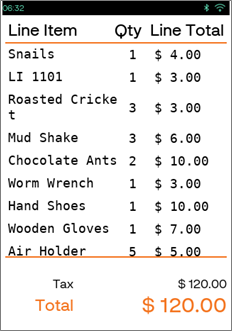
Line Items Screen
The Line Item Screen displays when the POS sends start transaction message or interactively as the POS scans line items.
| Display | Description | |
|---|---|---|
|
|
|
Transaction Flows
Sale (EMV CT and CTLS with Quick chip enabled)
Sale - Tap
| Display | Description |
|---|---|
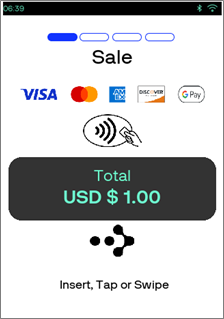
|
Select the card entry mode: Tap |
|
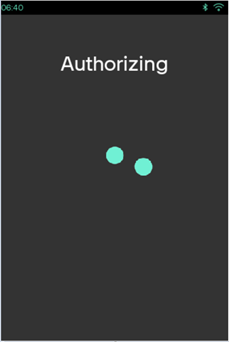
Authorization in progress screen. |
|
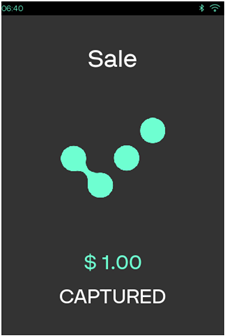
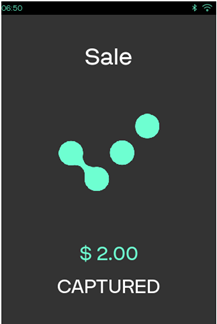
Transaction is approved screen. After the transaction is complete, the device will return to the Idle Screen. |
Sale - Insert
| Display | Description |
|---|---|

|
Select the card entry mode: Insert or Swipe. |
|
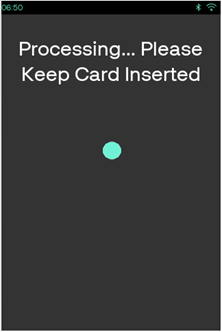
Processing screen and card should be inserted. |
|
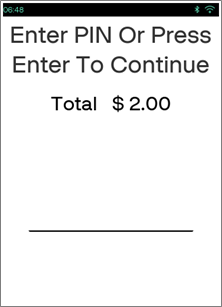
Tap the text box for keyboard input and type the PIN or press the Enter key to continue to next screen. |
|
|
Authorization in progress screen. |
|
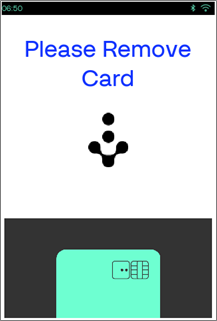
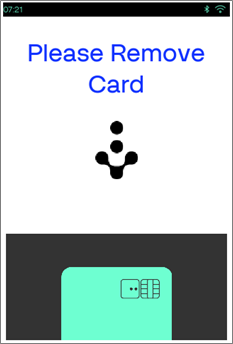
The transaction is completed, and the card can be removed. After the card is removed the status screen is displayed, until the next command is sent. |
|
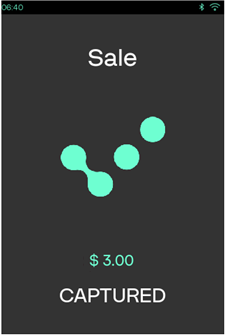
This is the Status screen as Sale Approved. |

|
This is the Status screen as Sale Declined. |
Additional Sale Screens
Manual Entry - For the transactions with manual card entry, following are the additional screens to gather card details. After three failed card swipe attempts, SCA will display ‘Please Wait for the Cashier’. If the merchant configuration is enabled, then the device may next prompt for manual card entry.
| Display | Description |
|---|---|
|
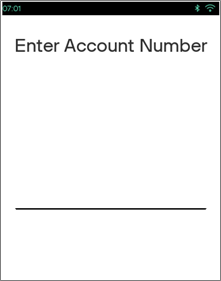
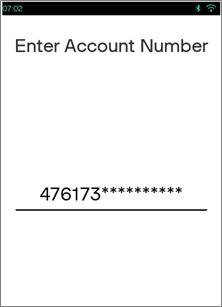
Tap the text box for keyboard input and type card number. |
|
Press the green Enter key on the device keyboard to proceed to Card Type selection screen. |
|
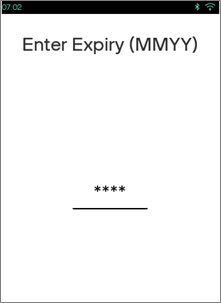
Tap the text box for keyboard input and type the expiration date in MMYY format. Press the green Enter key on the device keyboard. The device will next prompt for CVV Number. |
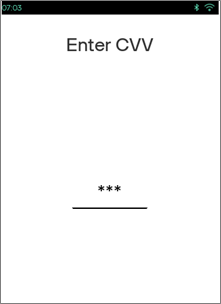
|
Tap the text box for keyboard input and type the Security Code. Press the green Enter key on the device keyboard. |
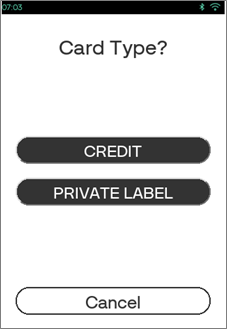
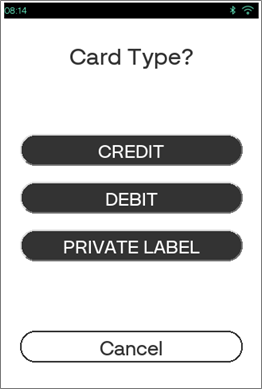
|
Select the Card type and proceed to next screen. |
|
|
Authorization in progress screen. |
|
This is the Status screen as Sale Approved. |

|
Cancel by Customer - This screen will be displayed if the transaction is cancelled manually at any point. |

|
Cancel by Timeout - This is the Status screen if the Sale is cancelled due to Time out. |
Refund
Refund - Tap
| Display | Description |
|---|---|
|
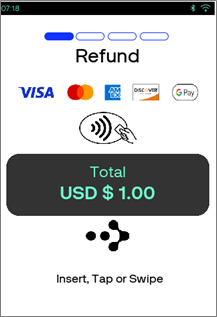
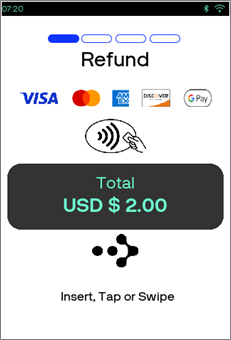
Select the card entry mode: Tap |
|
|
Authorization in progress screen. |
|
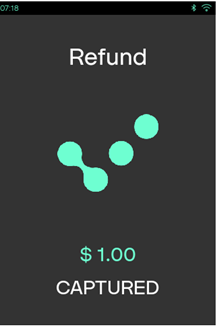
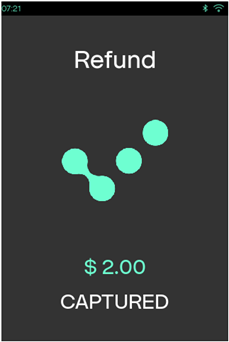
Transaction is approved screen. After the transaction is complete, the device will return to the Idle Screen. |

|
This is the status screen as Refund Declined if the transaction is not approved. |
Refund - Insert
| Display | Description |
|---|---|
|
Select the card entry mode: Insert or Swipe. |
|
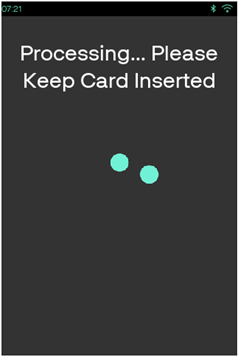
Processing screen and card should be inserted. |
|
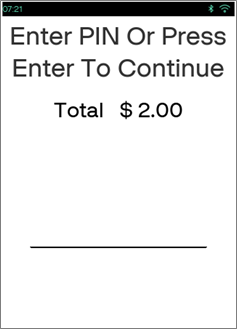
Tap the text box for keyboard input and type the PIN or press the Enter key to continue to next screen. |
|
|
Authorization is in progress screen. |
|
The transaction is completed, and the card can be removed. After the card is removed the status screen is displayed, until the next command is sent. |
|
This is the Status screen as Refund Approved. |
Void
| Display | Description |
|---|---|
|
|
Void transaction is processed, and authorization is in progress screen. |
|
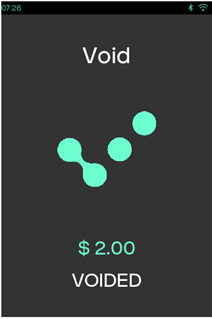
This is the Status screen as Voided (success). |

|
Void declined status screen. |
Optional Screens
Optional Screens are displayed during the Sale flow and these screens can be configured based on required parameters.
Welcome Screen
| Display | Description |
|---|---|

|
This is the screen within the session when LINEITEMDISPLAY parameter should be set to 0 (disabled) and pre-swipe (SWIPE_AHEAD) field should be sent as 0 (disabled) in Start session command. |
Split Tender
| Display | Description |
|---|---|
|
|
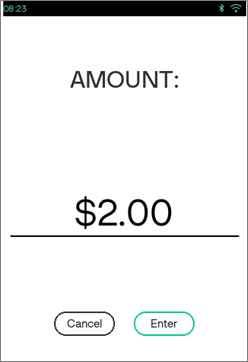
|
Enter the amount. |
|
|
Card Read screen. |
Cash Back
| Display | Description |
|---|---|
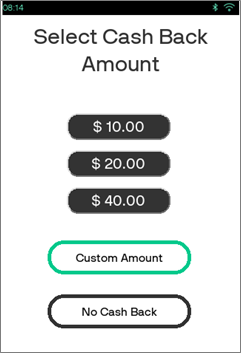
|
Select any Cashback amount or No Cash Back option. This selection will prompt for Enter PIN screen. If Other option selected, then Enter Cash Back screen will be prompt. |
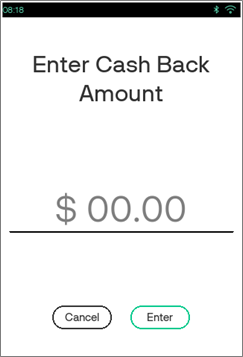
|
Enter the cashback amount. |

|
Press Enter and proceed to next screen. |
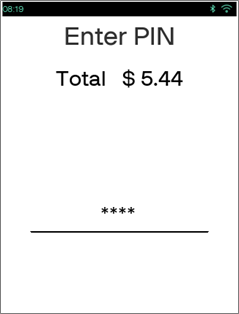
|
Enter the PIN and press Enter key to prompt for Card Entry screen. |
Card Type/Payment Type Selection
Loyalty Entry Method
| Display | Description |
|---|---|
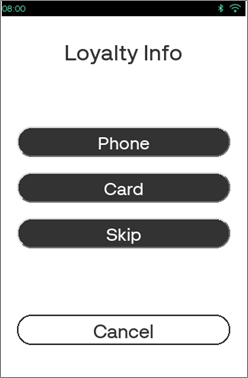
|
Select Phone option to enter phone number or select Card option to go to Loyalty Card for card swipe or entering account number. Select Skip if Loyalty Entry Method is not required. |
Phone Number
| Display | Description |
|---|---|
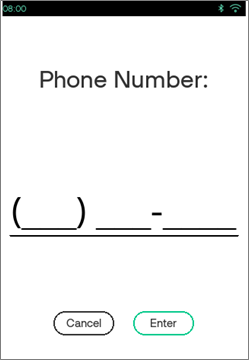
|
Tap the text box for keyboard input and type the phone number. |

|
Press Enter to process. |

|
Status screen as Loyalty details captured. |
Device Command Screens
| Display | Description |
|---|---|

|
Charity Donation. |

|
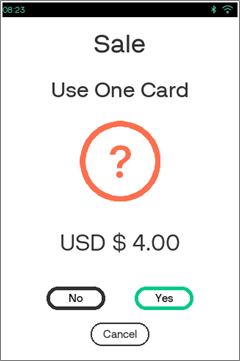
Customer Question. |

|
Customer Button. |
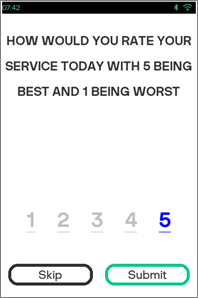
|
Customer survey 5. |
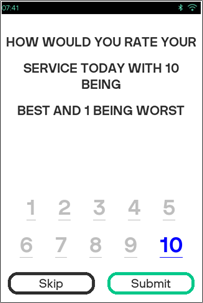
|
Customer survey 10. |
|
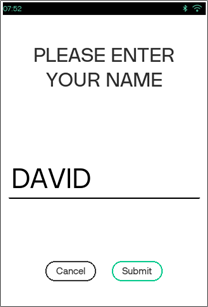
Credit Application - Tap the text box for keyboard input to type the name. |
|
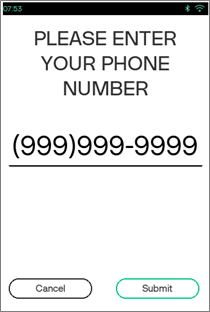
Credit Application - Tap the text box for keyboard input to type the phone number. Once the number is added then press Enter. |
|
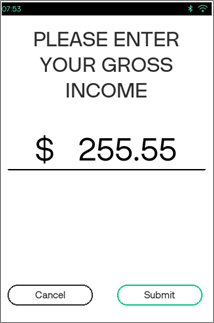
Credit Application - Tap the text box for keyboard input to type the gross income and press Enter to confirm. |
|
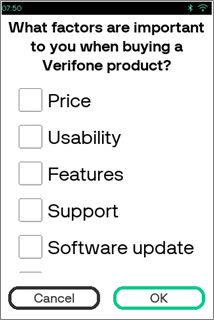
Check box. |
|
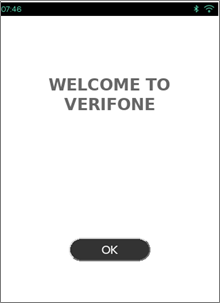
Display message. |

|
Enter the Email address. |
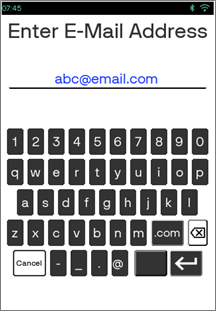
|
Press Ok or Enter. |
|
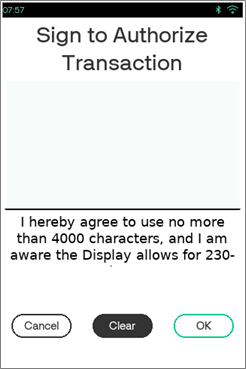
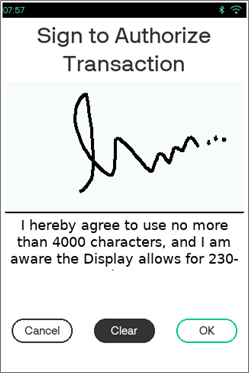
Signature Extended. |
|
Signature captured. |