ConvertPlus checkout with review page
Overview
ConvertPlus offers support for multiple checkout options with/without a review page. As a merchant, you have the possibility to define your own purchase flows with/without review and offer your shoppers the optimal checkout experience. By including a review page before your shoppers finalize their purchase you give them the opportunity to review their order and go back to update their checkout details.
Availability
Available to merchants using the ConvertPlus shopping cart, only for default and one-column templates.
Benefits
- According to our research, the checkout with review is currently among the best converting shopping flows on the 2Checkout platform
- It can increase your conversion rate in some countries
- Shoppers can review all the information in their shopping cart on an all-in-one page (shopping cart, billing form, and credit card form)
Workflow
To implement the checkout with review follow these steps:
- Log in to your 2Checkout Merchant Control Panel account.
- Navigate to Setup → Generate links.
- On the Checkout links page, click on the ConvertPlus tab.
- In the ConvertPlus flows section, select the Checkout with review option.
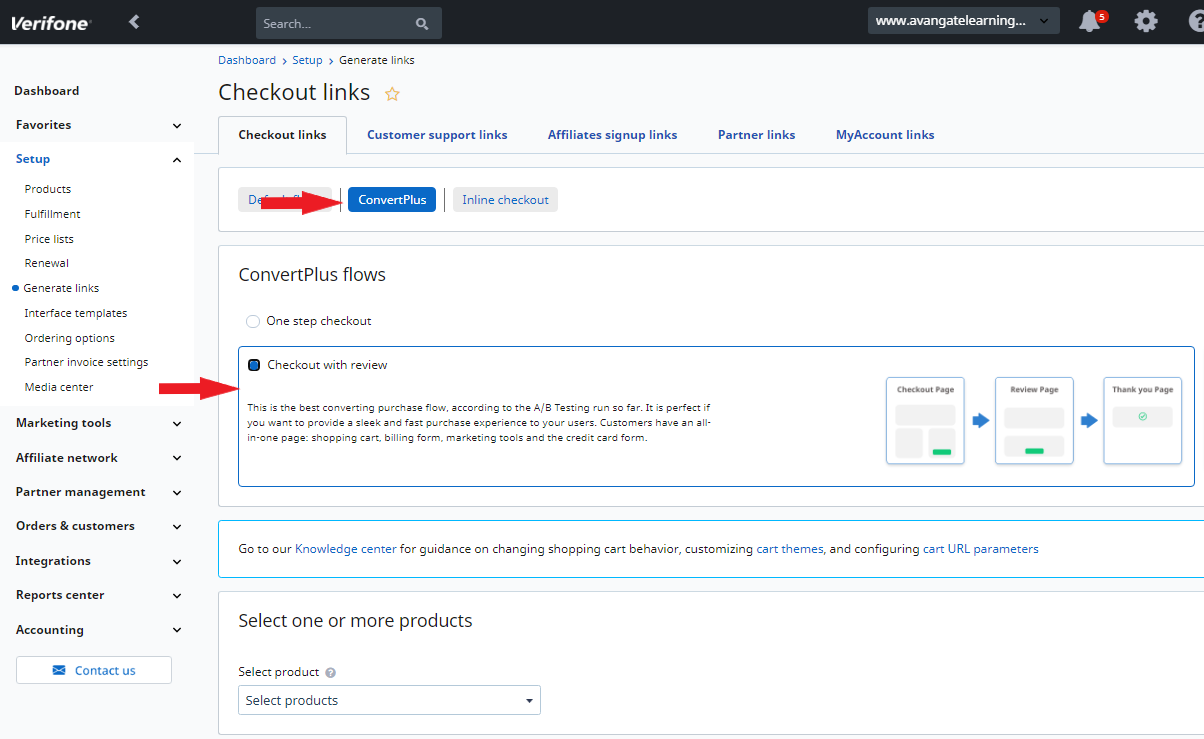
5. Continue with the selection of one or more products from the drop-down list.
6. Scroll down to the Checkout link section and click on Generate link.
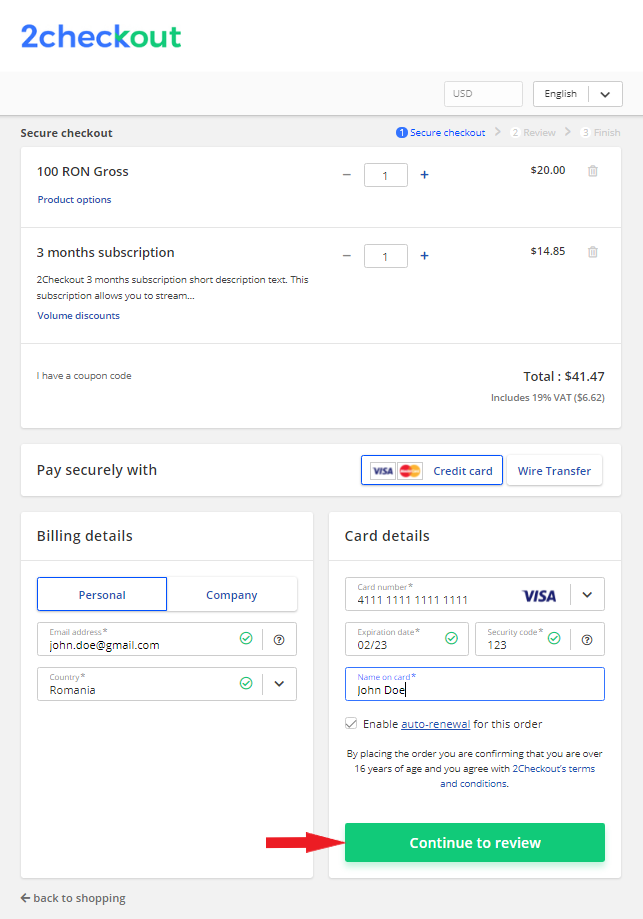
7. After you generate a buy-link in with the review flow enabled, the buy-link contains the review=1 parameter and the checkout page will look like in the image below. At this point, the shopper can click on Continue to review before they place the order.
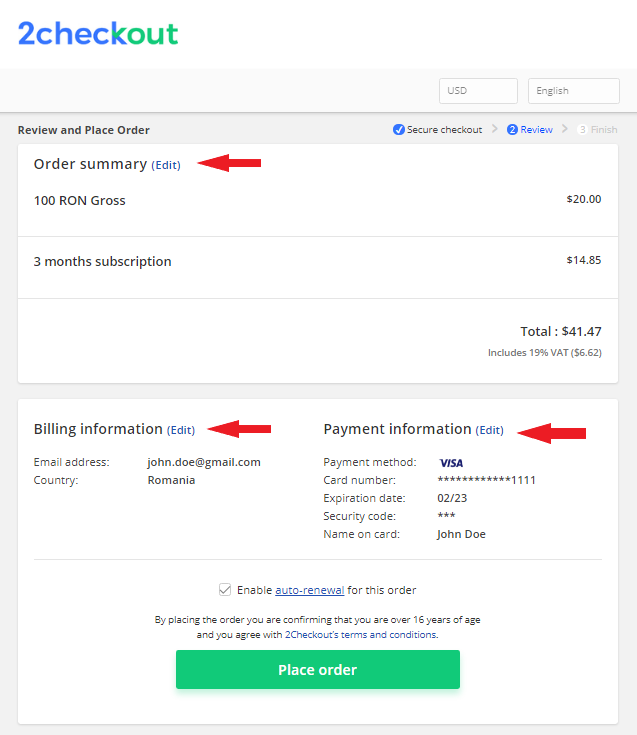
8. On the Review page, before hitting the Place order button, the shopper can edit the order details, the billing details, and/or the card details by clicking on the Edit links, as shown below.
- When clicking on the Edit link in the Order summary section, the shopper is redirected to the Secure Checkout page to edit the order details
- When clicking on the Edit link in the Billing information section, the shopper is redirected to the Secure Checkout page to edit his details
- When clicking on the Edit link in the Payment information section (card no. and security code obfuscated), the shopper is prompted with the Payment details form to edit CC details
- When clicking on the Edit link in the Delivery information section, the shopper is redirected to the Secure Checkout page to edit the delivery details
- When selecting a different payment method from the review page, the shopper is redirected to the checkout page with the new payment method