Integrate WIX
Overview
Wix is a complete web solution that offers a global user base, open SDK, and unparalleled design capabilities to create a unique ecosystem. Partners, developers, web designers, and other online professionals can effectively market their apps and services to millions through Wix.
The Wix connector enables merchants to process orders with 2Checkout.
Availability
WiX integration is available only for 2Checkout accounts that handle their own tax and invoice management (2Sell and 2Subscribe accounts).
Recurring payments are not yet available.
Wix Settings
Follow the instructions below to integrate your WiX account with 2Checkout:
- Log into your WIX dashboard.
- Under Settings, click on Select Payments.
- Under the Credit/Debit Cards tab, click on Change provider, and then click on Connect, under the 2Checkout logo.
- If you want to sign up for a 2Checkout account, click on Create an Account and follow the instructions.
- If you already have a 2Checkout account, click on Connect Existing Account and follow the instructions below.
- Make sure your account has been approved by 2Checkout (this can take several days if you have just opened one).
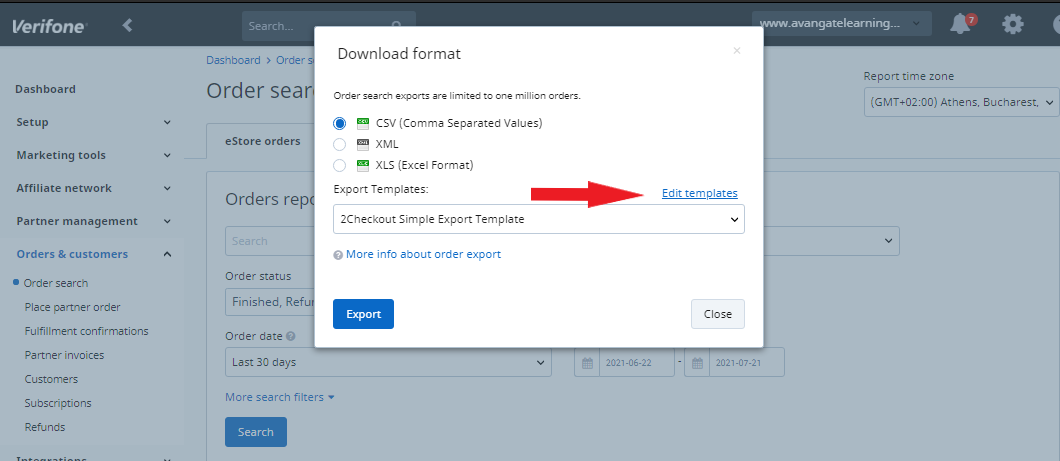
- Log into your 2Checkout account, navigate to the Integrations → Webhooks & API section and retrieve your Publishable Key and Private Key.
- Retrieve your Seller ID from the 2Checkout Merchant Code in the API section.
6. Insert the keys (see the above steps) and the Seller ID into the Wix Connect your Account Form.
7. Click on Connect My Account button. Once you are connected, you can accept payments with 2Checkout.
2Checkout Settings
- Sign in to your 2Checkout account.
- Navigate to Dashboard → Integrations → Webhooks & API section.
- Follow these steps to activate Redirect URL:
- In the Redirect URL section check “Enable return after sale”
- For the Return method, select Header Redirect or Link in Thank You page
- Set the Approved URL to your Wix URL
4. (Optional) In the Instant Notification System (INS) section check the “Enable INS” box → Set up a Global URL Endpoint.
5. Click Update to save your settings.
About WiX
Wix is the brainchild of Avishai Abrahami, Nadav Abrahami, and Giora Kaplan. Like many great ideas, it was discovered through accidental fate (on the beach). While constructing a website to be the basis of another start-up idea, the tech-savvy threesome quickly discovered that creating their own website was difficult, frustrating, and very costly. It was this agonizing experience that led them to a light bulb moment - build a platform that empowered anyone to create their own website with no coding or design skills needed. Better yet, make it free. Find out more about WiX here.