Create products and sync to Salesforce
Overview
Before creating and sending a proposal (offer) you first need to create your products in the Merchant Control Panel and then sync them to Salesforce by following the instructions below.
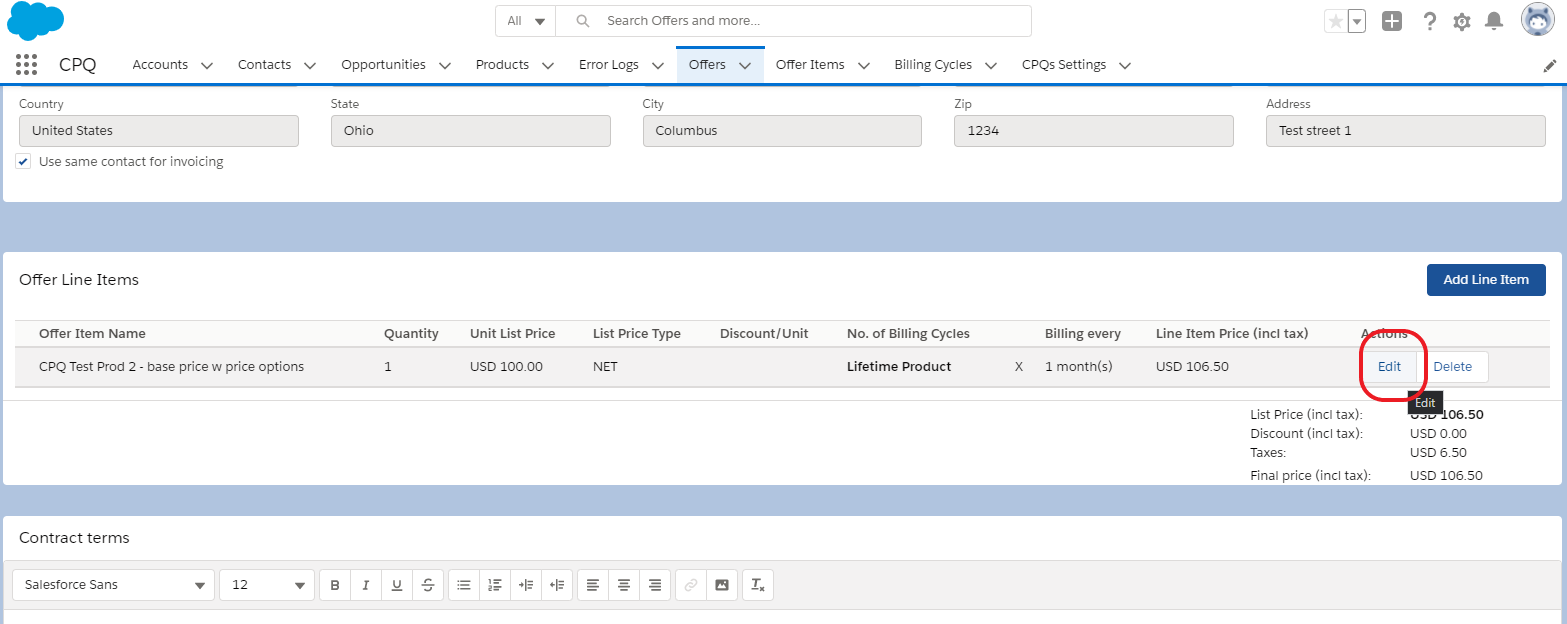
In the Verifone CPQ app, under Products, you can find the products that are synced with 2Checkout.
Only products synced in 2Checkout can be used to send out offers. Using products created in Salesforce to send an offer will result in error on the Add Line Item page.
Workflow
For this integration you need your credentials for both the Merchant Control Panel and the Salesforce admin at hand.
1. Log in to your 2Checkout Merchant Control Panel.
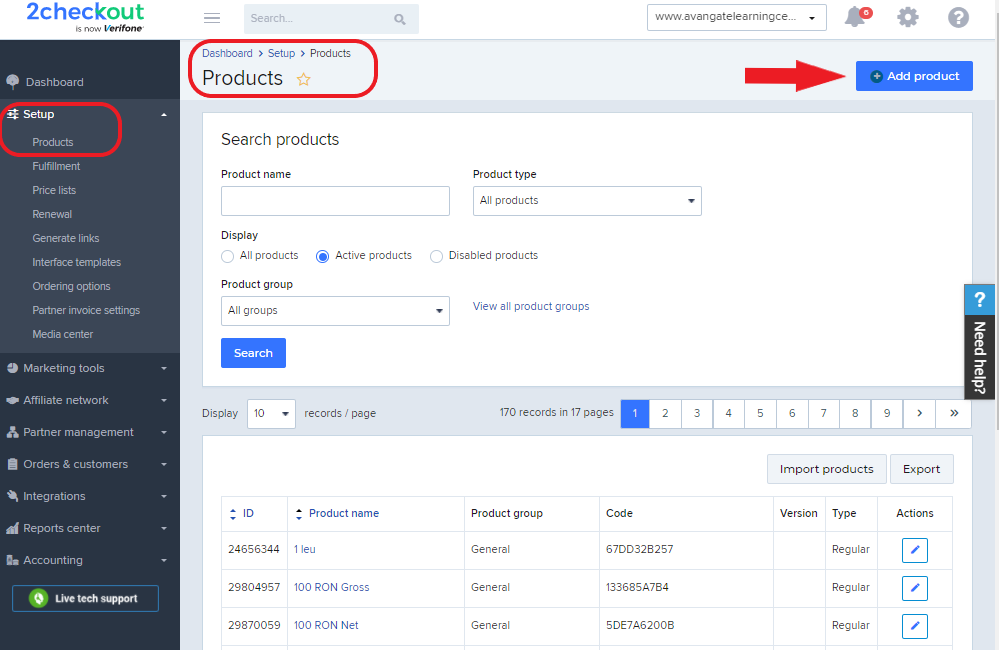
2. Navigate to Setup → Products and click on the Add product button.
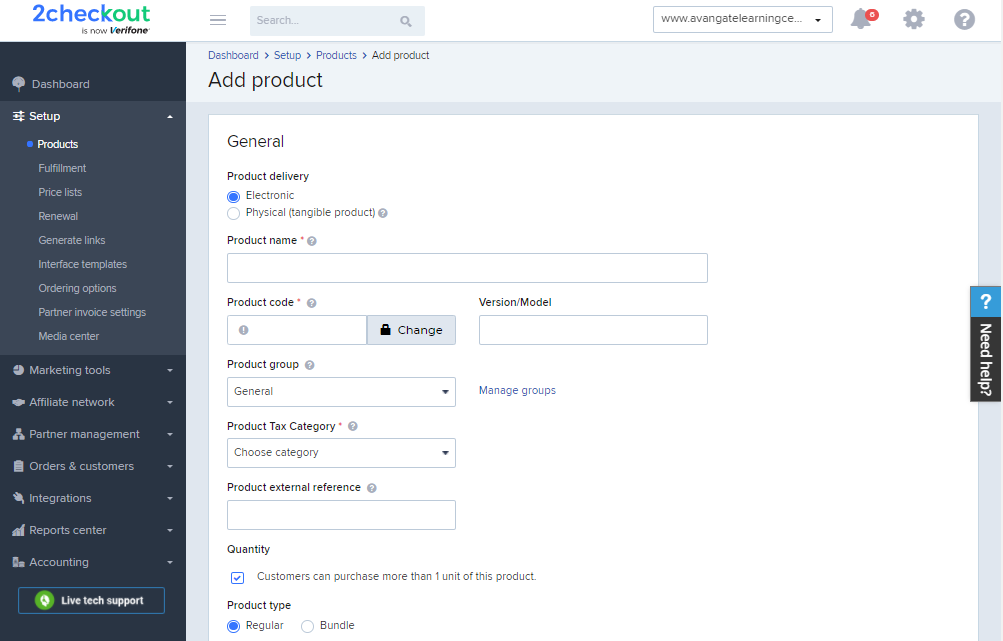
3. Add the product:
- Name
- Code
- Product Group (You can create a B2B group by clicking on View all product groups and then on the Add product group button.)
- Tax category (Set the Product Tax Category to one of the following: Electronically Delivered Software, Digital Products or SaaS.)
- Product External Reference (if the case)
4. Fill in the rest of the product fields with any options you want and click on the Add product button at the bottom of the page to save it.
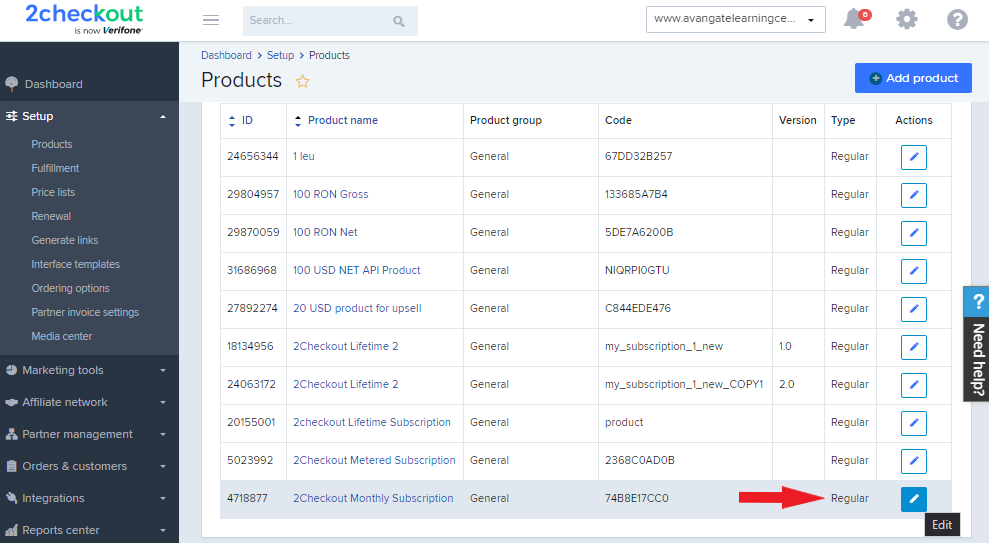
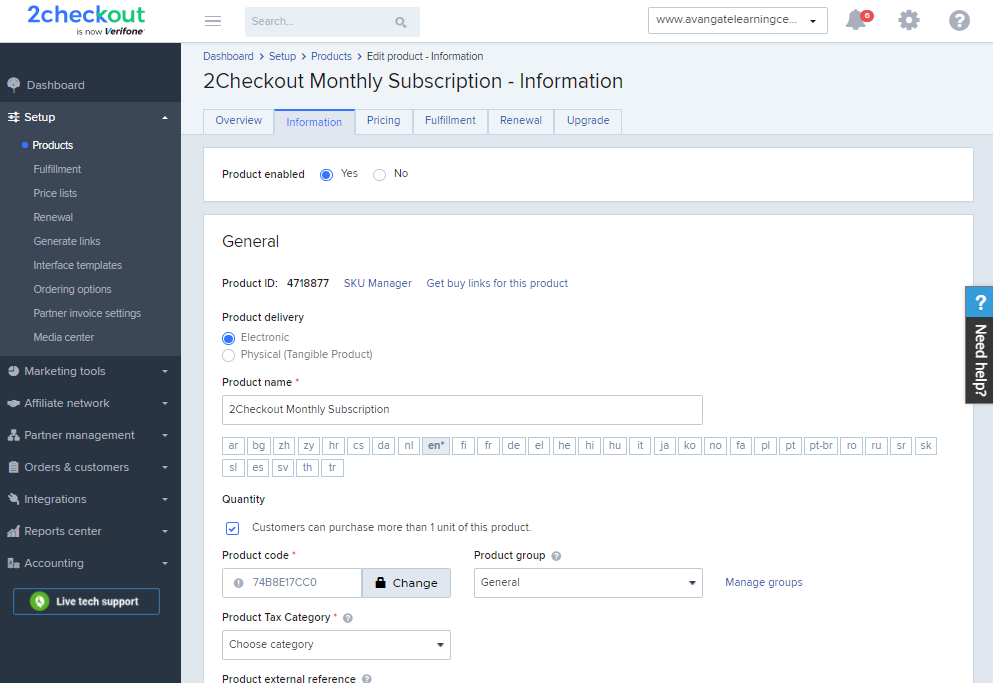
5. Edit the created product by clicking on the Edit icon, as shown in the image below:
- Edit pricing and price options
- Edit Renewal & upgrade as needed
- Disregard fulfillment
6. Log in to the Salesforce admin panel.
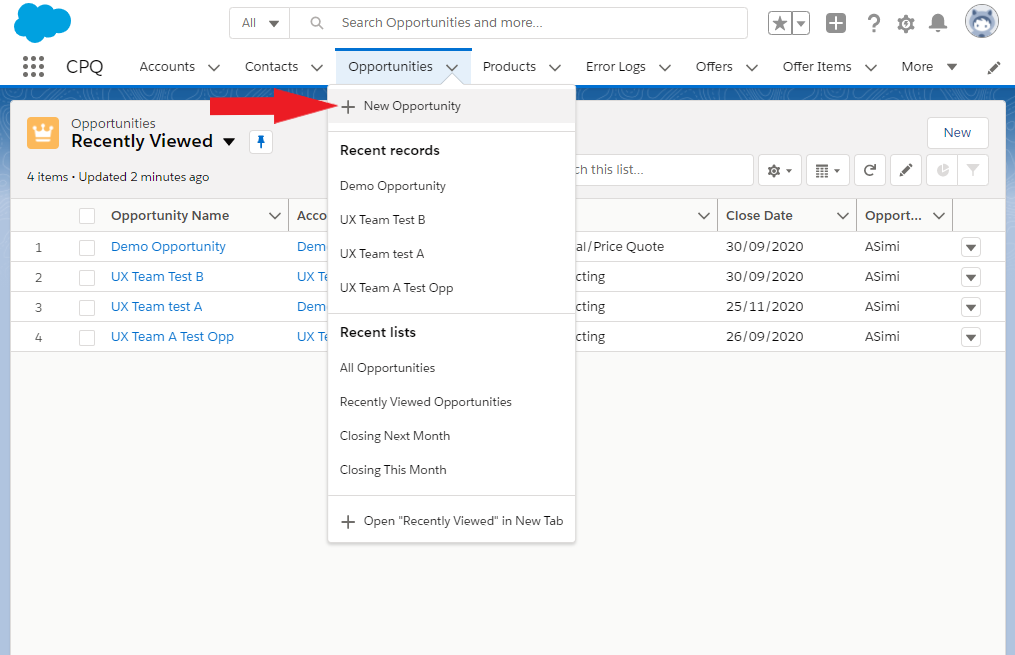
7. Create an Opportunity, by navigating to the Opportunities tab and clicking on New Opportunity.
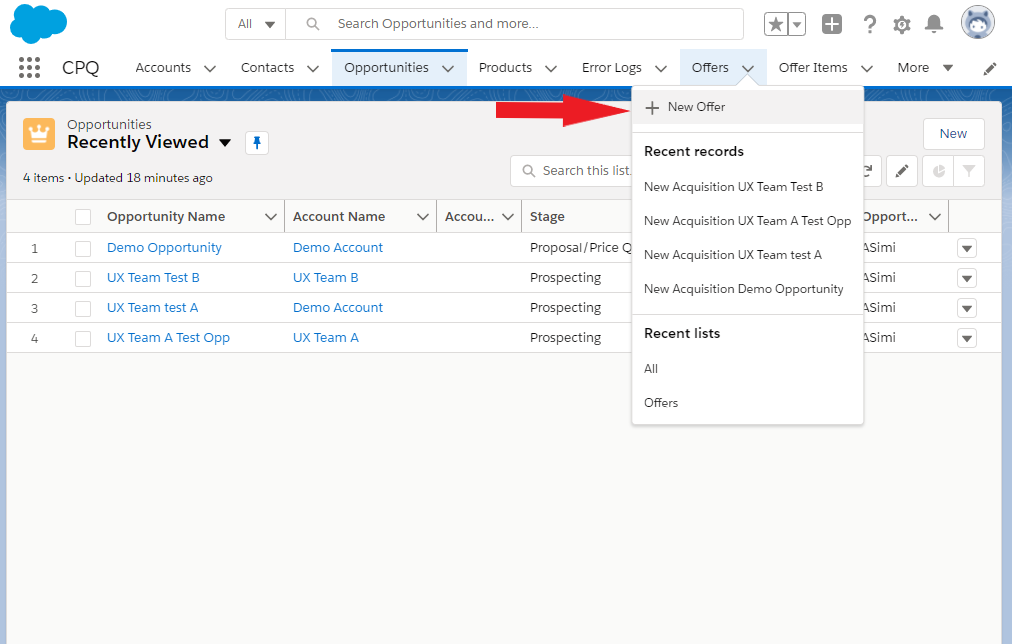
8. Create an Offer, by clicking on Offers → New Offer.
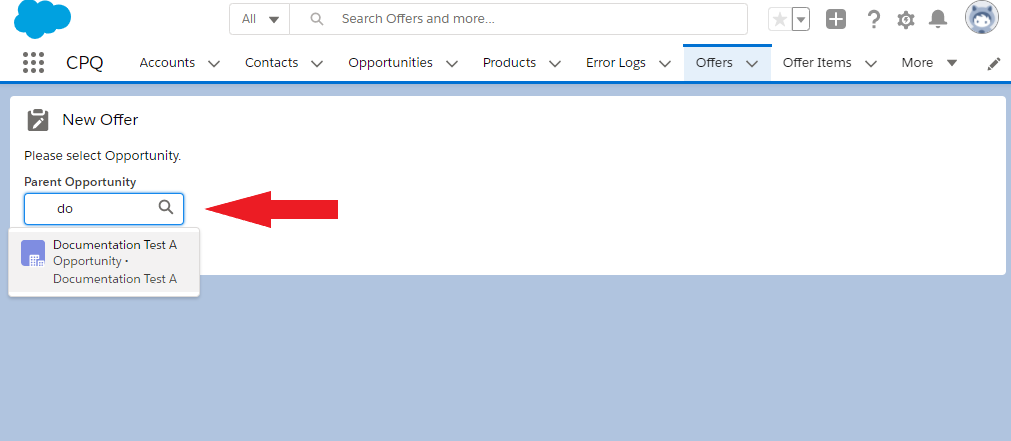
9. On the next page, search and select the parent opportunity.
10. Fill in the details of the offer and click on the Add Line Item button.
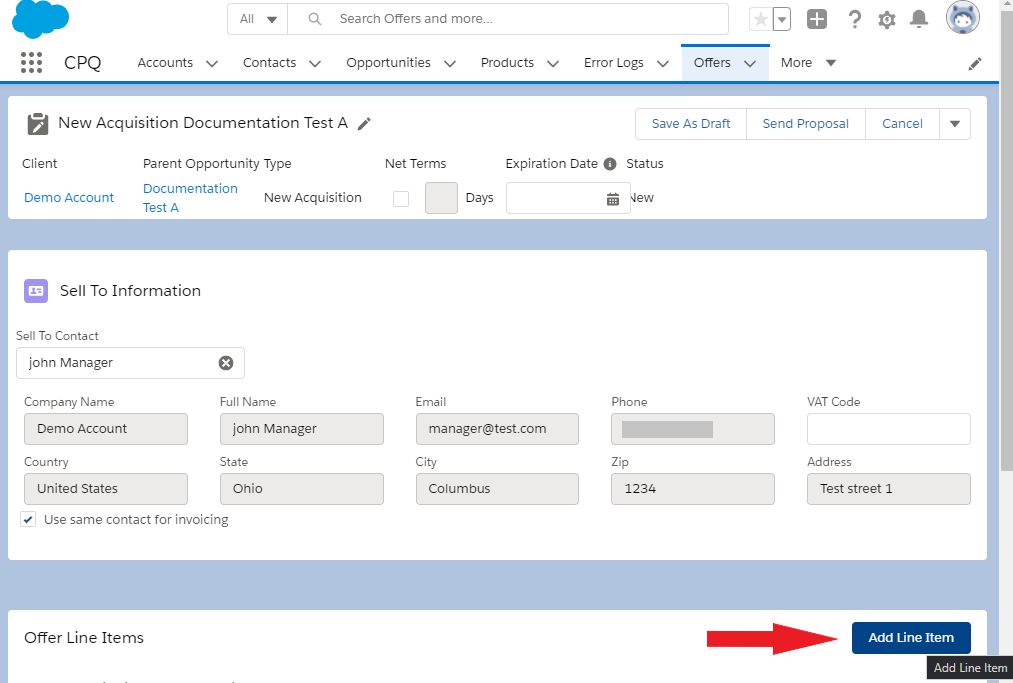
11. Search and select the product you have created earlier in the Merchant Control Panel.
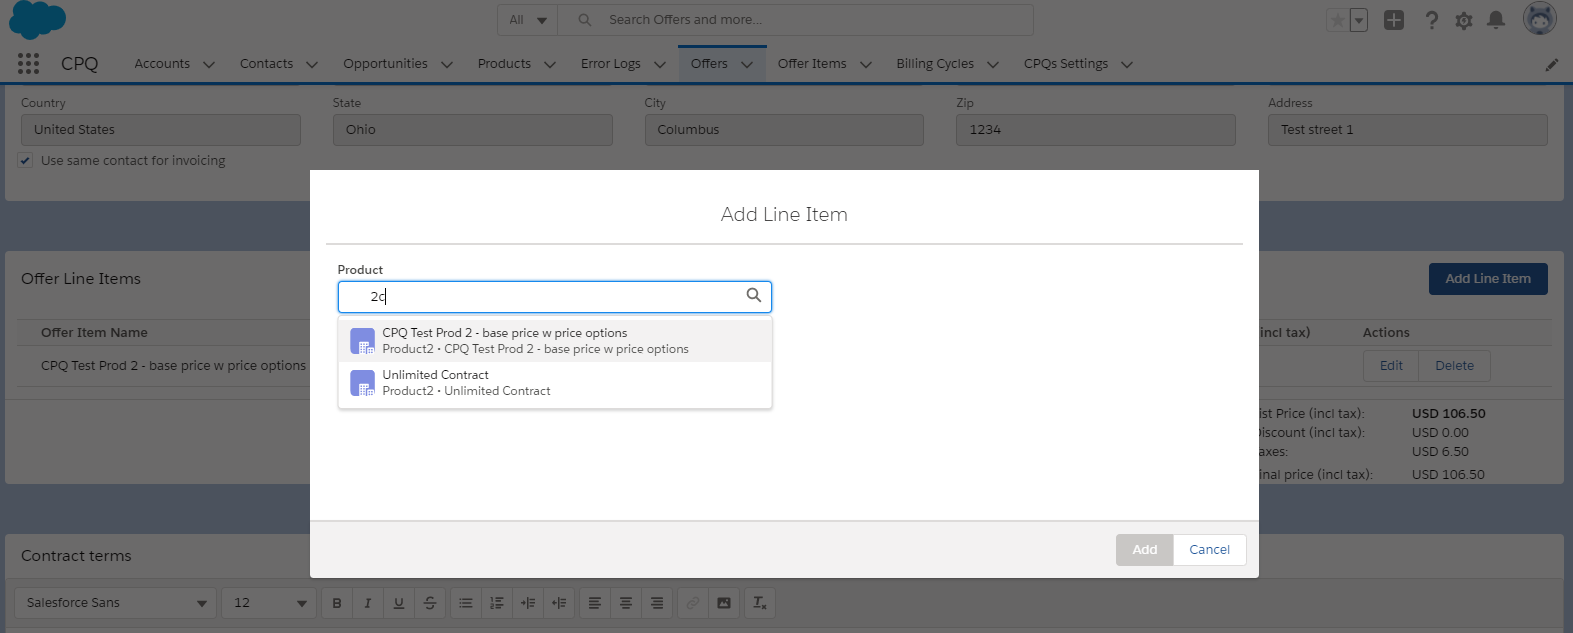
12. Once you find the created product, you can start editing it.
