Create and send a proposal
Overview
Send customers customized offers (proposals) using the Verifone CPQ application. Create an account, contacts, opportunities, and offers for both regular non-net and net terms offer.
Create and send a proposal without net terms
Access Salesforce CPQ
1. Log in to the Salesforce CPQ.
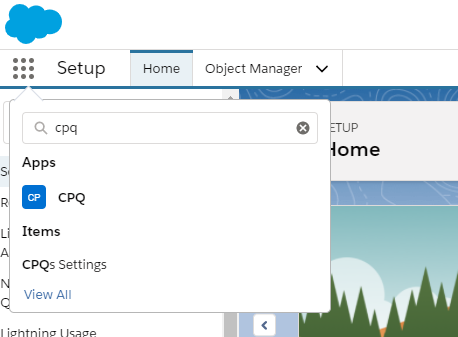
2. If you land on any other page than on CPQ, access CPQ like shown here.
Create an Account
An account represents the company for which you create the offer.
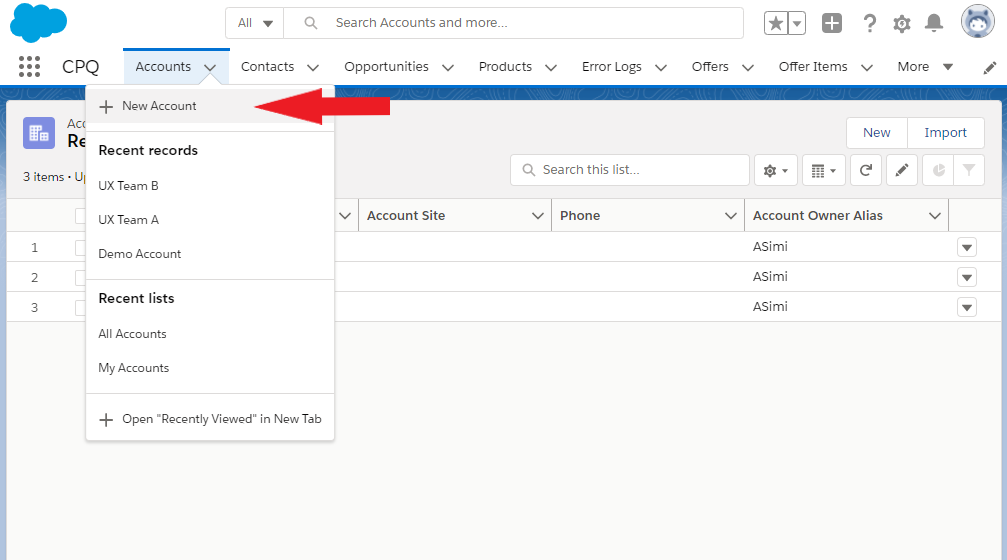
1. After logging in the CPQ app, go to the Accounts tab and click on New Account.
2. In the newly opened window, fill in the required fields, otherwise, CPQ will not allow you to continue.
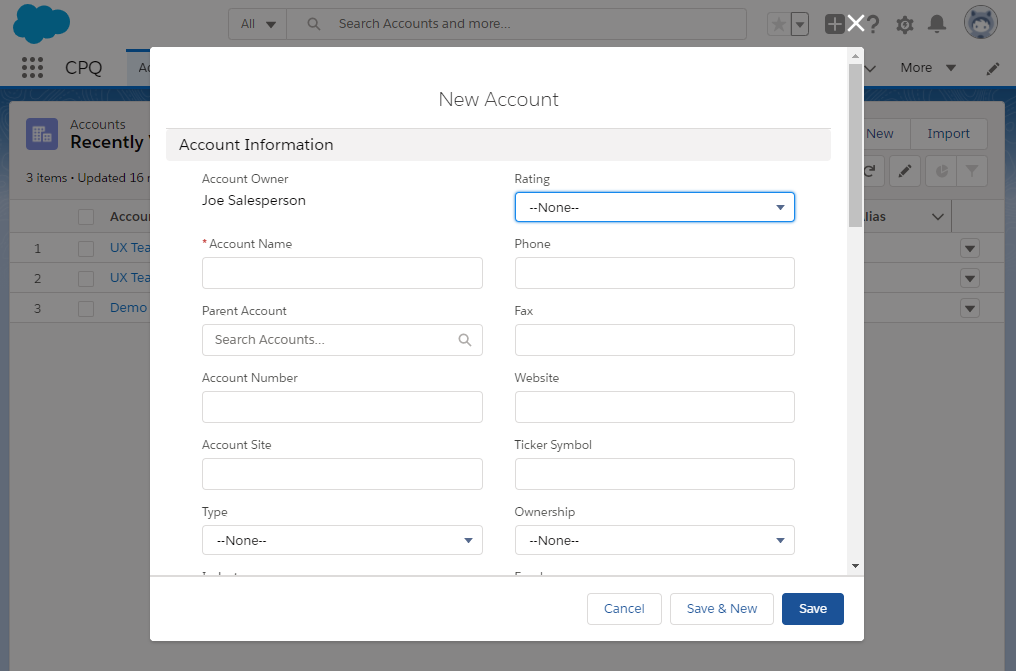
3. Click Save to finish.
Create two contacts
Contacts are the company representatives with whom you interact, as a salesperson.
Create Sell To contact
This account is the contact that you, as a salesperson, are talking to. In a way, the SellTo contact can be regarded as the manager of the team who will be using the subscriptions from your offer.
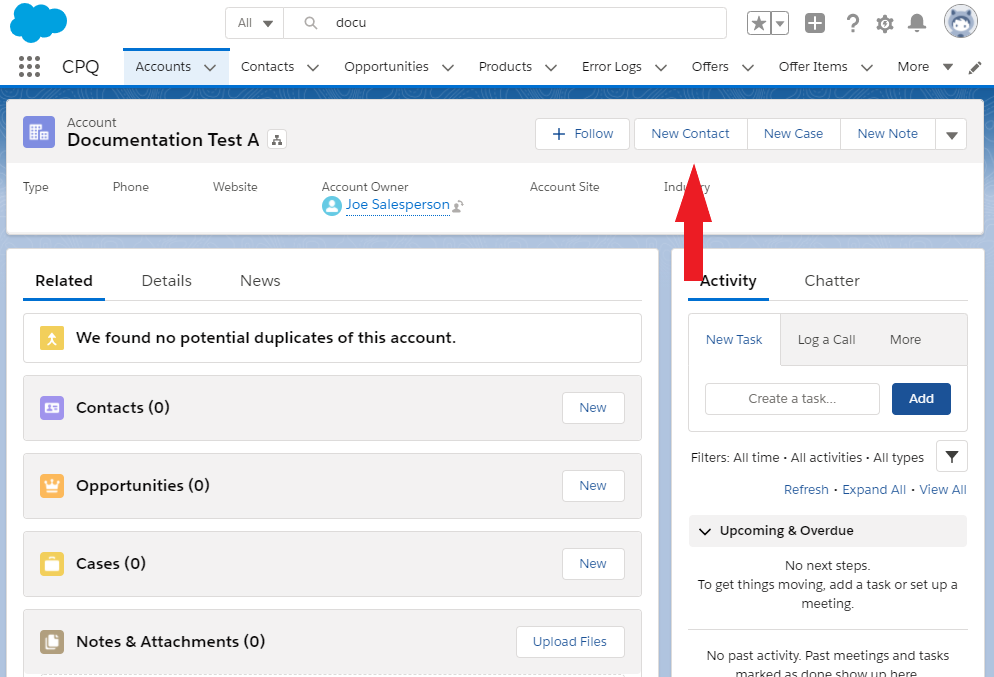
1. On the page of the newly created account, click on the New Contact button.
2. A new window will open and you need to fill in ALL fields (even if not mandatory).
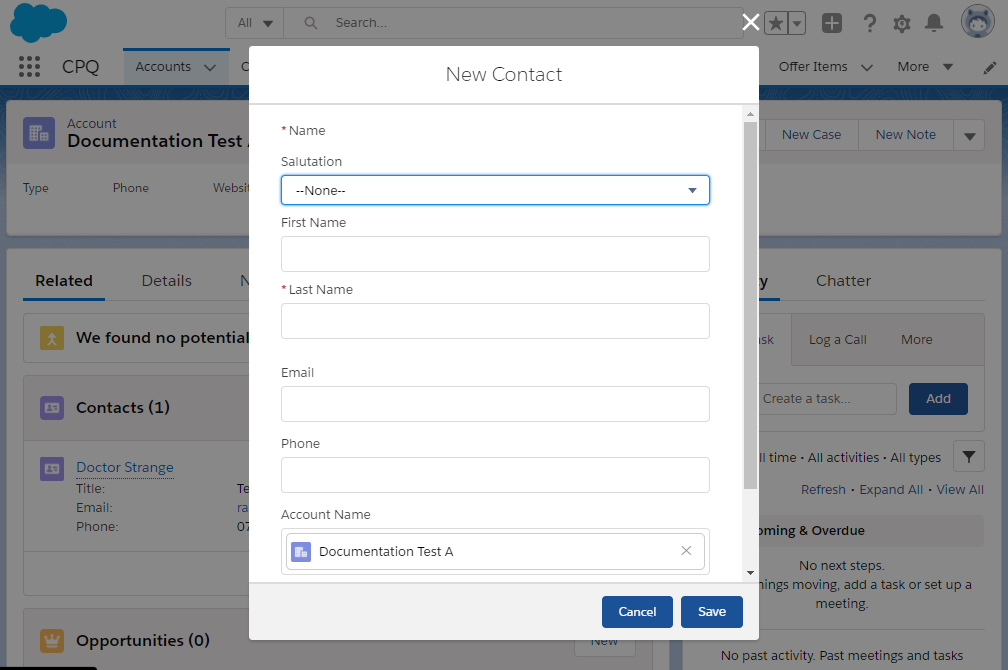
3. Click Save.
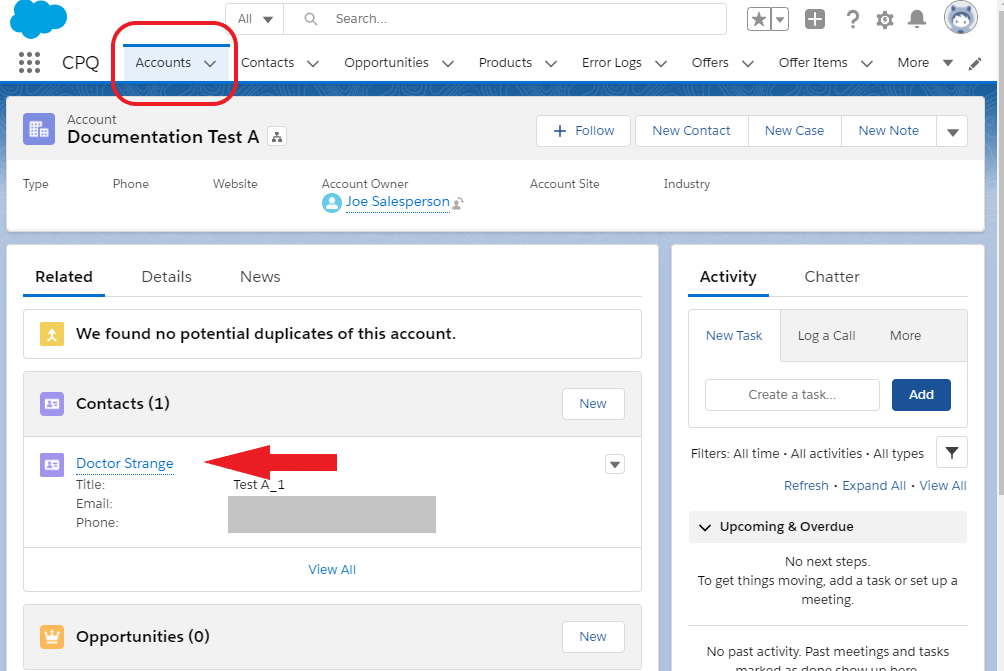
4. In the account page, click the name of the newly created contact.
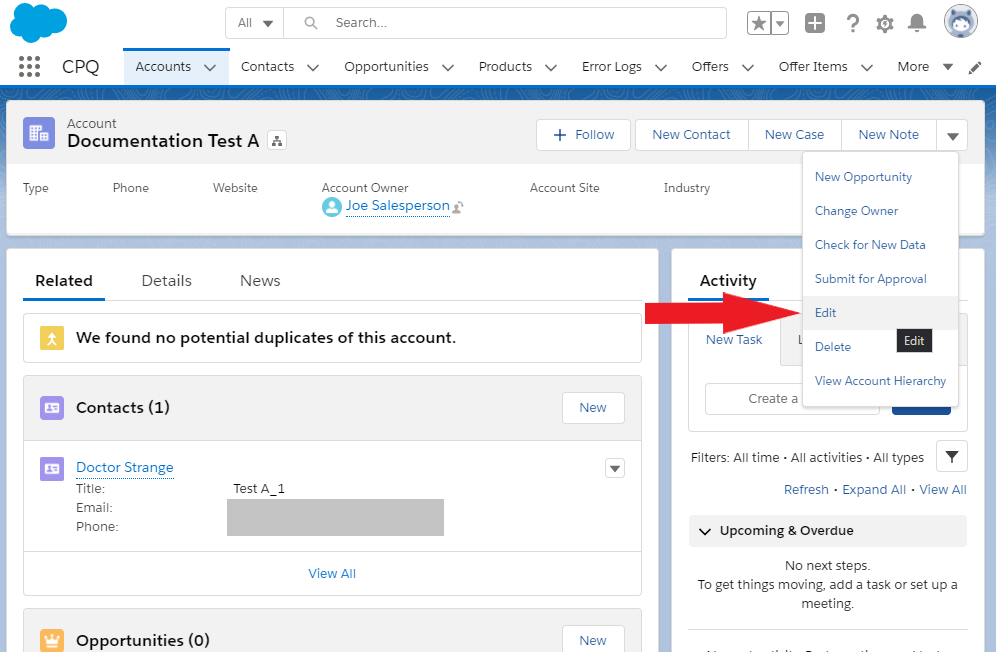
5. Click the additional actions button and select Edit.
6. In the newly opened window, scroll down and fill in the Mailing Address & Other Address section.
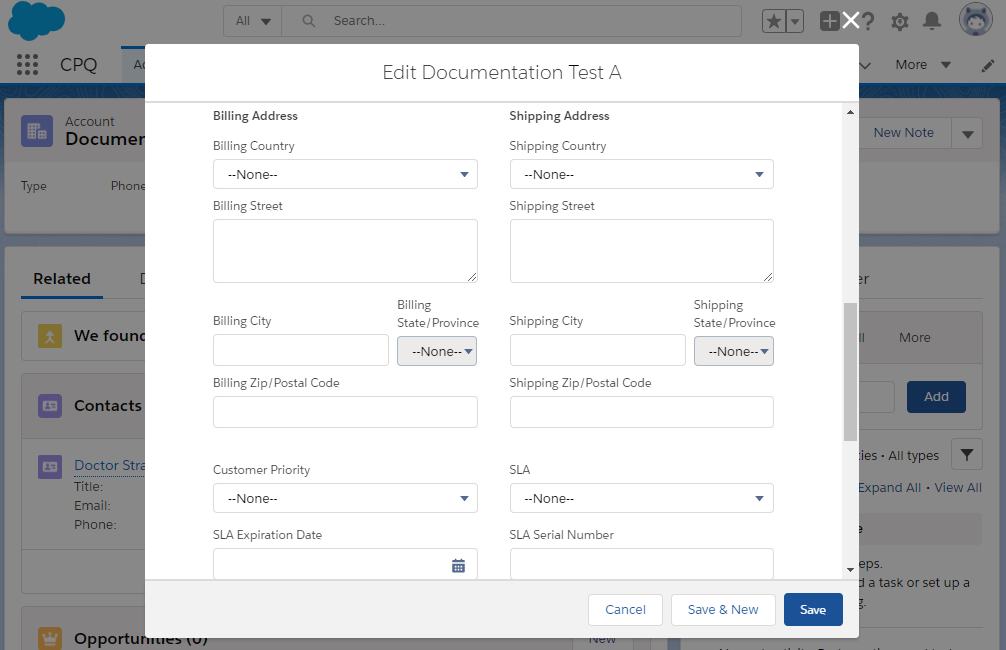
7. Click Save.
Create Bill To account (optional)
This account is the contact that will be paying the offer. The Bill To contact can be regarded as the finance person who is paying the invoices.
Repeat all steps above from Create Sell To account.
Create Opportunity
The opportunity is where you, as a salesperson, track the entire interaction with a company (account) and its representatives (contacts). To create an opportunity, follow these steps:
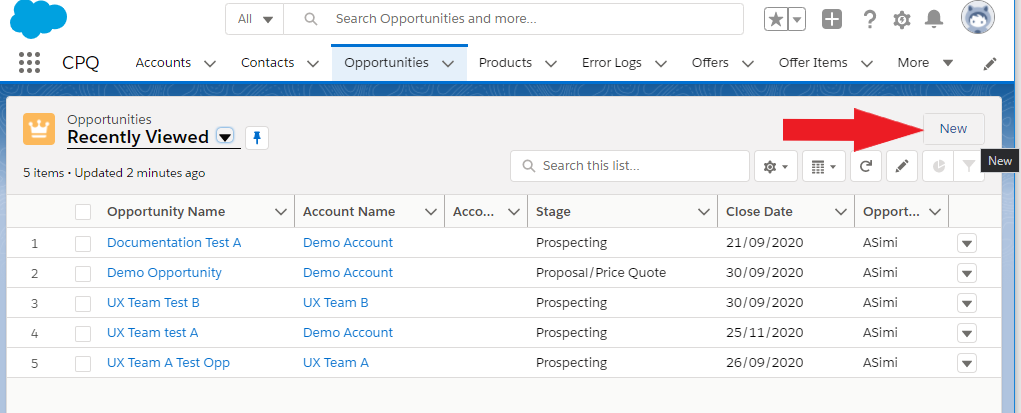
1. Click on the Opportunities tab in the CPQ app.
2. Click the New button in the top right corner of the panel.
3. Fill in required fields (the ones marked with *), otherwise, CPQ will not allow you to continue.
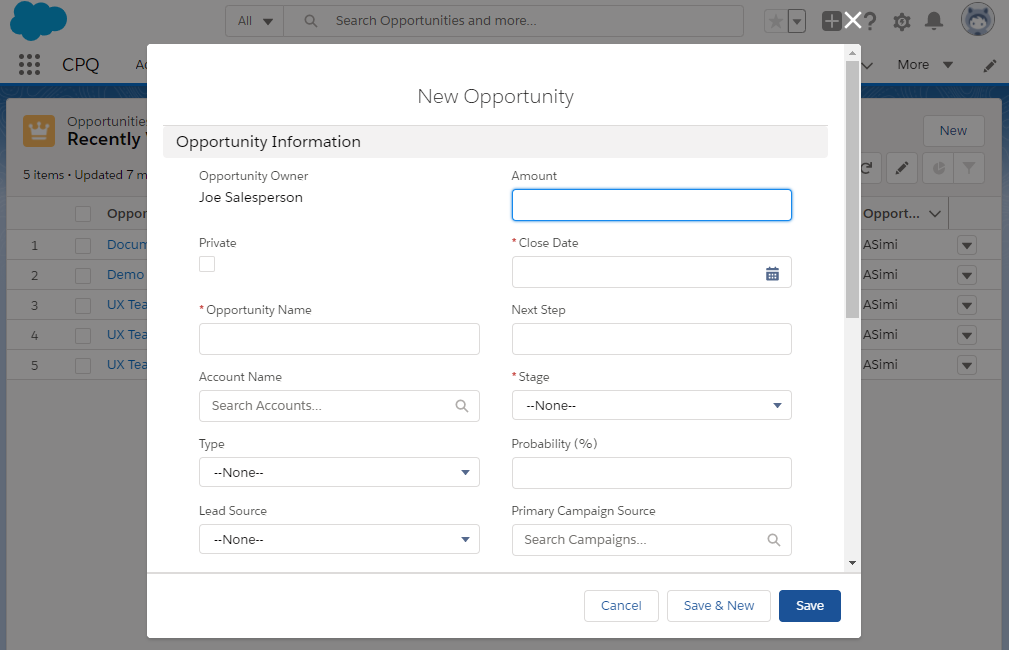
4. Fill in the account name with the previously created account.
5. Click Save.
Create Offer
The offer is the commercial interaction between you as a salesperson and the potential customer.
The offer contains:
- Offer settings
- SellTo & BillTo contacts
- Offer line items (the product configuration)
- Contract terms
Configure offer
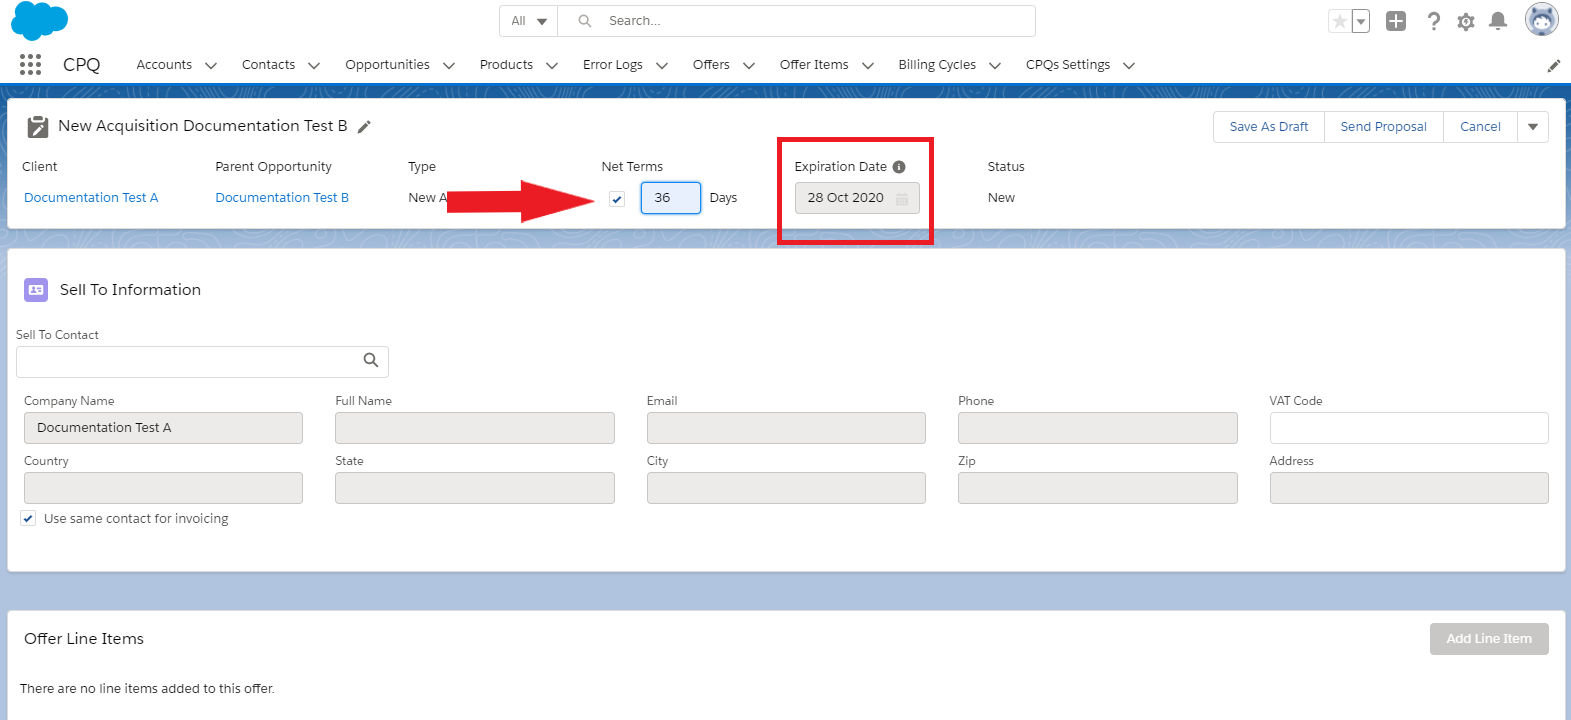
- Set the offer Expiration date. This represents the date when the offer expires and the salesperson is notified that no action was taken.
- Select SellTo contact (the contact created above).
- Deselect Use same contact for invoicing (optional).
- Select BillTo contact (the contact created above).
Configure offer line items
1. Click on Add Line Item.
2. Search for a product that you created previously or write the name of a product in the search bar to use predefined products.
3. Fill in the following fields:
- Unit list price = the catalog price for the billing cycle length defined at Billing every. If you change Billing every from the default value after selecting the product, the unit list price will adjust to your change to provide the correlated price
- Discount % = % for discount (you can use this to get the amount)
- Discount Amount = the resulting discount (you can use this to get the %)
- Quantity
- Unit Custom Price = the price after discount
- Line Item Price = quantity X unit custom price
- Price type = Net/Gross, taken from the product catalog
- No. of Billing Cycles = number of billing cycles
- Billing every = number of months in a billing cycle
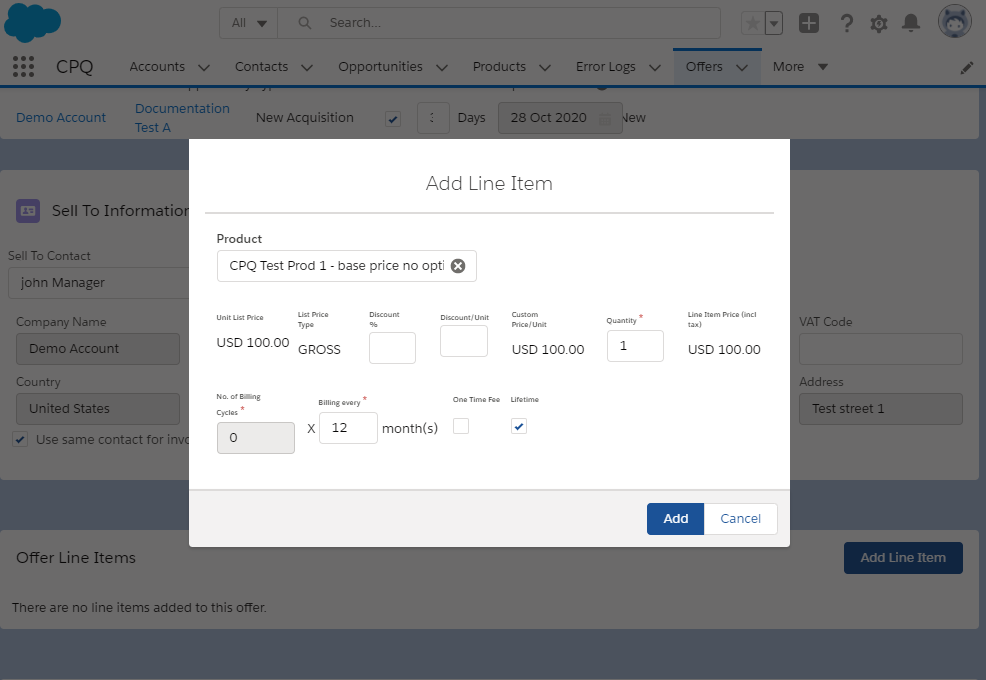
4. Click Add.
5. Click Edit to change anything in the product configuration.
6. Add some text in the Terms and Conditions section.
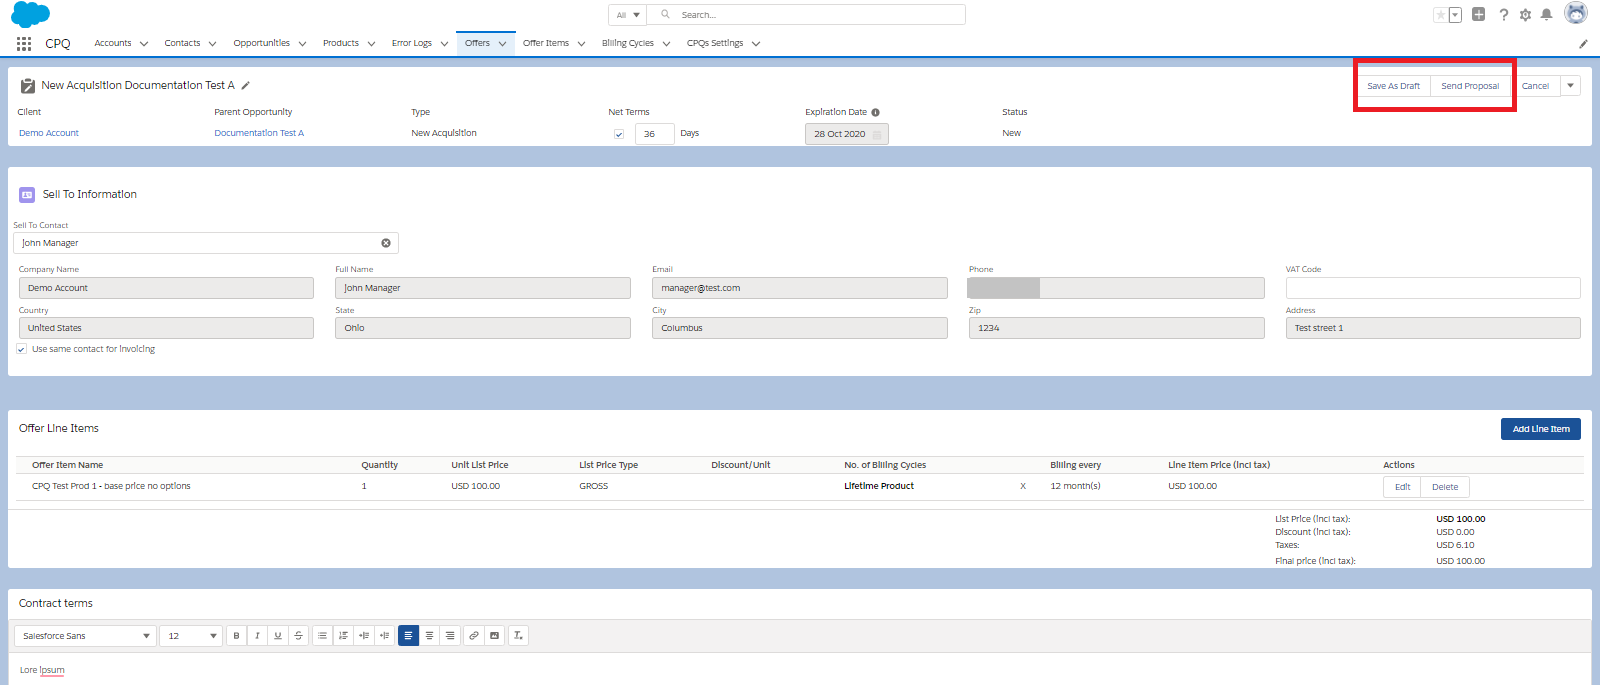
Save as draft or send the proposal
After you created the offer, you can either send it for approval or save the offer as a draft (you can come back to a saved offer).
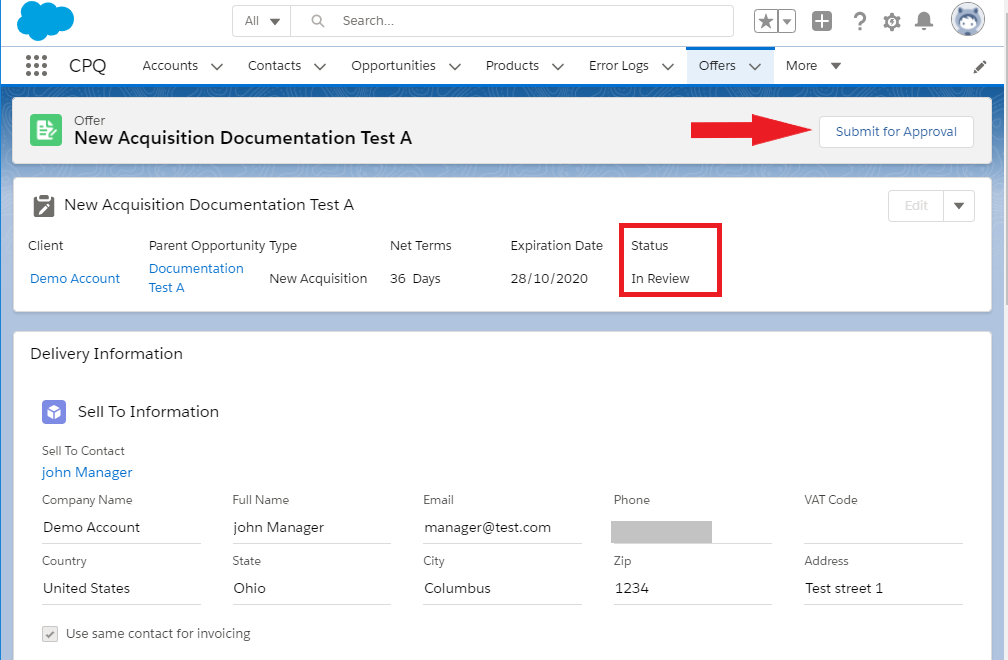
Approval flow
Once you send the offer, this goes through an approval process before reaching the end customer.
The offer is set to In Review status that can be used by Salesforce admins to automate approval processes with all the complexities that Salesforce enables. The 2Checkout merchant is not blocked by our tools' approval flows.
1. In the view offer screen, click on Submit Approval.
2. Scroll down to the bottom of the page and go to Approval History and click on Approve.

3. This will set the Offer status to Reviewed.
4. The CPQ app will pick up any “Reviewed” offers and send them to the end customer.
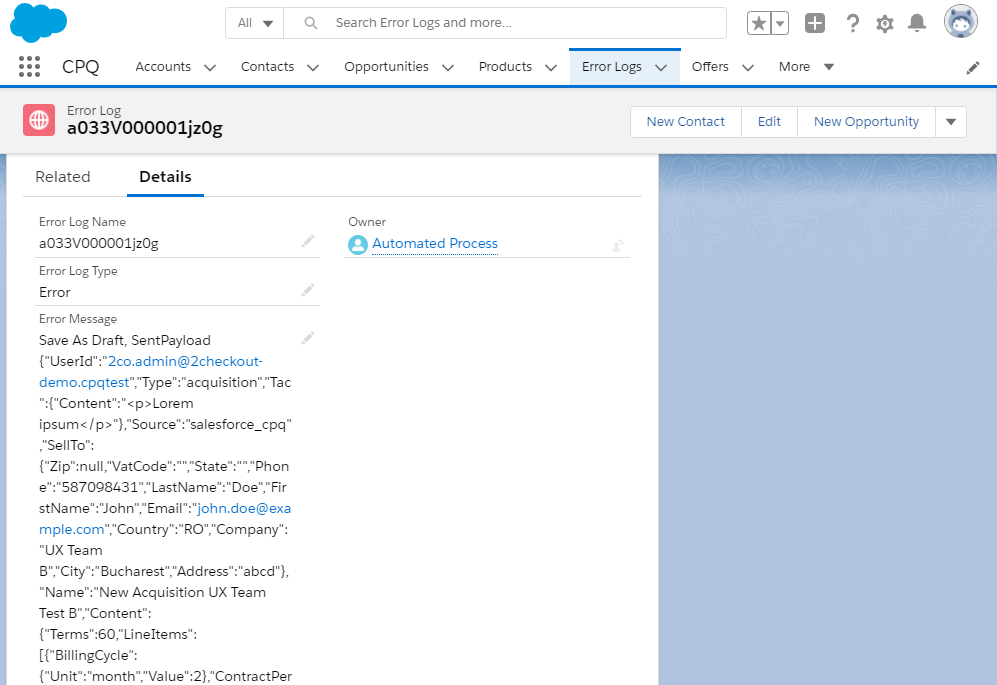
Check sending
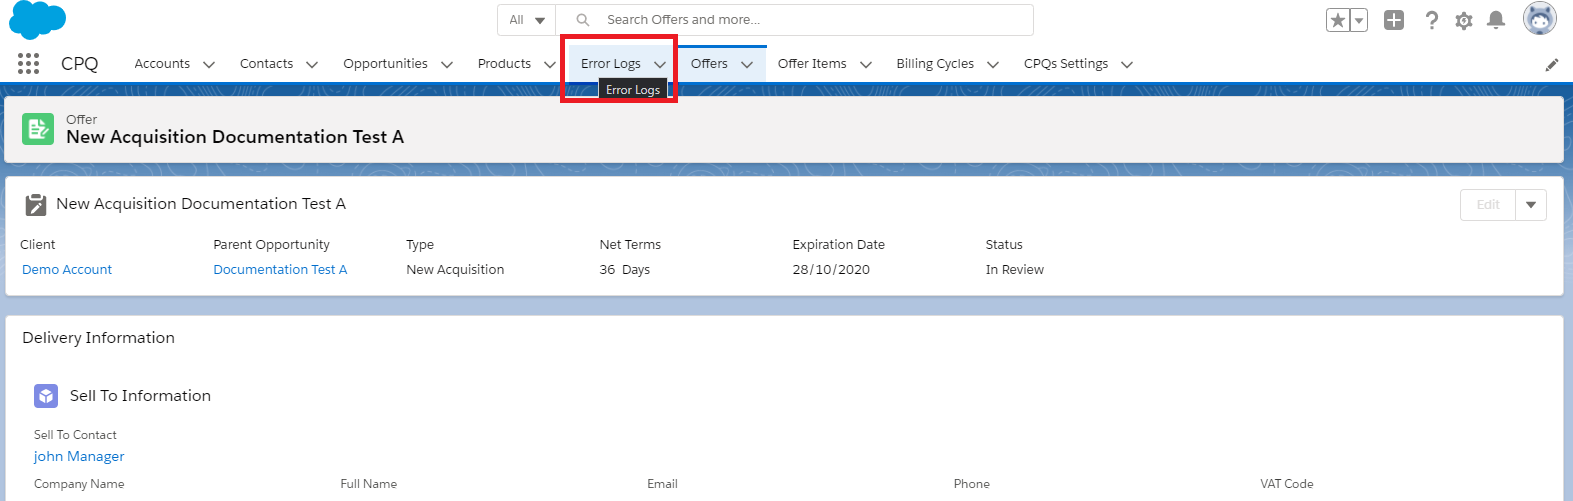
You can check if the proposal was sent without error by performing these steps:
1. Refresh the Offer page.
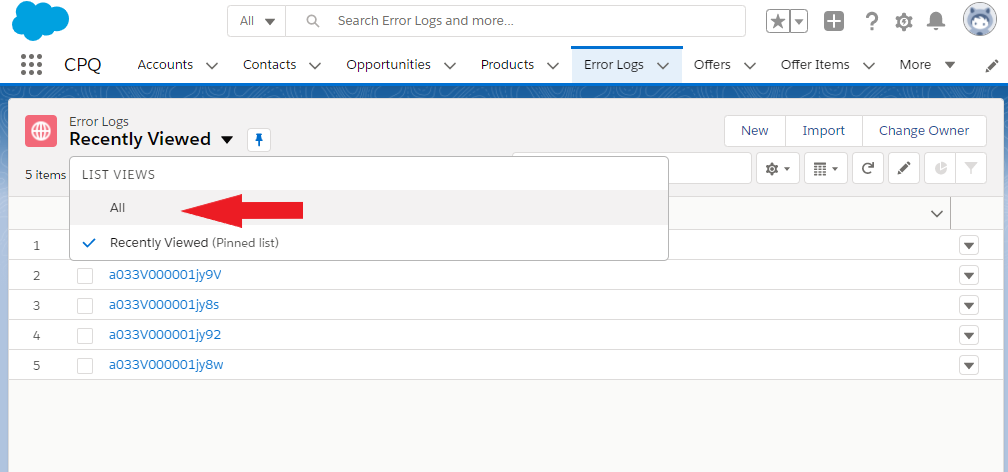
2. Check the Offer status for any failed statuses. If you get a failed status, click on Error Logs.
3. On this page, click on Recently Viewed and select All.
4. Click on the first item in the log.
5. Send 2Checkout one of these screenshots:
Create and send a proposal with net terms
To create and send a proposal with net terms, you need to follow all the steps above as with creating an offer without net terms.
The only difference is when you configure the offer, you need to select the Net terms checkbox, as shown in this image: