Approval flow integration with Salesforce
Overview
After the opportunity is created and saved as a draft, it needs to be sent for approval.
The approval flow needs to be set up as per your organization's needs and procedures. The CPQ provides an "In Review" status for offers ready to be sent and is expecting a "Reviewed" status to proceed with sending the proposal to your customers.
The CPQ solution requires an approval flow in order to change the status of the offer and continue the flow.
Approval process configuration
The approval flow needs to be set up before proceeding with the approval of a proposal.
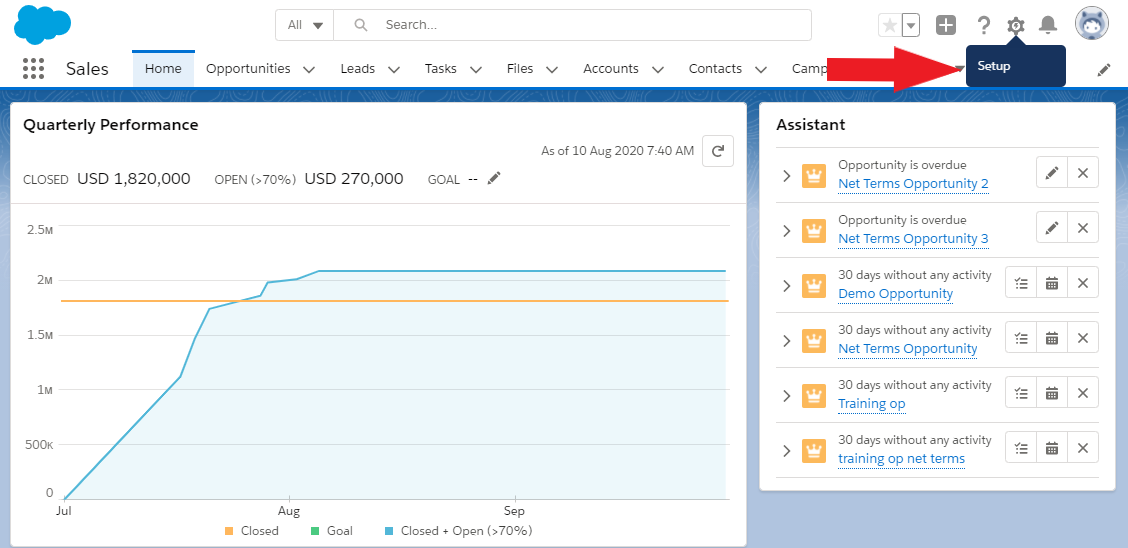
1. Log in to the CPQ application, navigate to the Setup cogwheel and click on it.
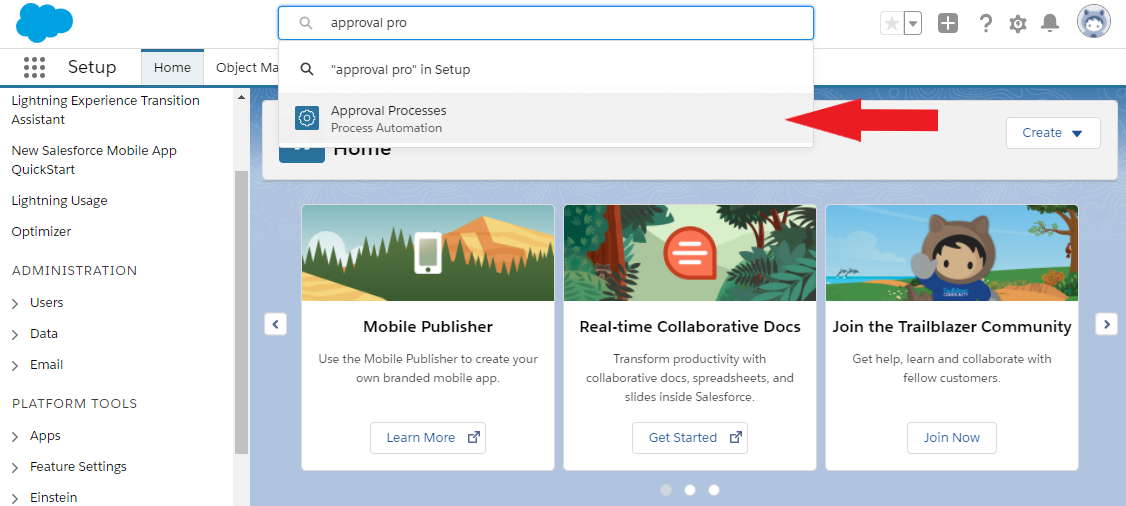
2. Enter “Approval Processes” in the Quick Find text box and select Approval Processes.
3. From the Manage Approval Process For pick list, select the needed object to create the approval on (Offer).
4. Click Create New Approval Process pick list and select Use Standard Setup Wizard (Note: Standard Setup gives more configuration options when creating the process).
5. Fill in the new approval process details (Process Name, Unique Name, Description – if any).
6. Click Next.
7. In the “Use this approval process if the following” field, select criteria are met or formula evaluates to true, then fill in the criteria as desired.
8. Click Next.
9. Set the “Next Automated Approver Determined By” to Manager value (this will route the record to the Manager for review).
10. From the “Record Editability Properties” section, click the Administrators ONLY can edit records during the approval process radio button (or choose what works best for your environment).
11. Click Next.
12. In Step 5, leave the “Approval Assignment Email Template” field blank (for this step: the ability to choose a custom email template to use when notifying approvers that an approval request is assigned to them. Leaving the field blank will automatically assign the default email template for this process, to use).
13. Click Next, then determine the fields that will be displayed on the approval request page (left click on fields in the “Available Fields” section, click Add to move to “Selected Fields” section; use CTRL/SHIFT for multiple selections where needed), leave “Approval Page Fields” and “Security Settings” sections as they are, then click Next.
14. On Step 6, specify the initial submitter by completing the submitter details in the “Initial Submitters” section (this will specify the users allowed to submit the initial request to approve; choose according to your environment requirements). Based on the “Submitter Type” the user has chosen, the “Available Submitters” section will return different results (left click on fields in the “Available Submitters” section, click Add to move to “Allowed Submitters” section; use CTRL/SHIFT for multiple selections where needed).
15. On Step 7, in the “Page Layout Settings” section, the Add the Submit for Approval button and Approval History related list to all Offer page layouts checkbox should be checked.
16. On Step 7, in the “Submission Settings” section, the Allow submitters to recall approval requests should be disabled (If selected, submitters can recall their approval requests. If deselected, only admins can recall requests).
Note: The option is useful for situations where things change on the submitter’s side while waiting for approval (example: an opportunity could be lost after the user submits it for approval).
17. Click Save.
18. On the “What Would You Like To Do Now?” page, select I'll do this later, take me to the approval detail page to review what I've just created.
19. The newly created approval process page will show: in the “APPROVAL STEPS” section click New Approval Step and complete the details: enter a name for the step and click Next and from the “Specify Step Criteria” section, select Enter this step if the following: “formula evaluates to true, else reject record” and insert formula: NOT(ISBLANK(CreatedDate)) and click Save; on Step 3, from the “Select Approver” section, choose Automatically assign using the user field selected earlier (Manager).
20. Click Save.
21. Move forward with the “FINAL APPROVAL ACTIONS” section, and click New Field Update; fill in the Name in the “Identification” section and select A specific value Reviewed, in the “Specify New Field Value” section, and click Save
22. Move forward with the “FINAL REJECTION ACTIONS” section, and click New Field Update; fill in the Name in the “Identification” section and select A specific value Rejected, in the “Specify New Field Value” section, and click Save
Send the proposal for approval
Perform these steps to send a proposal for approval:
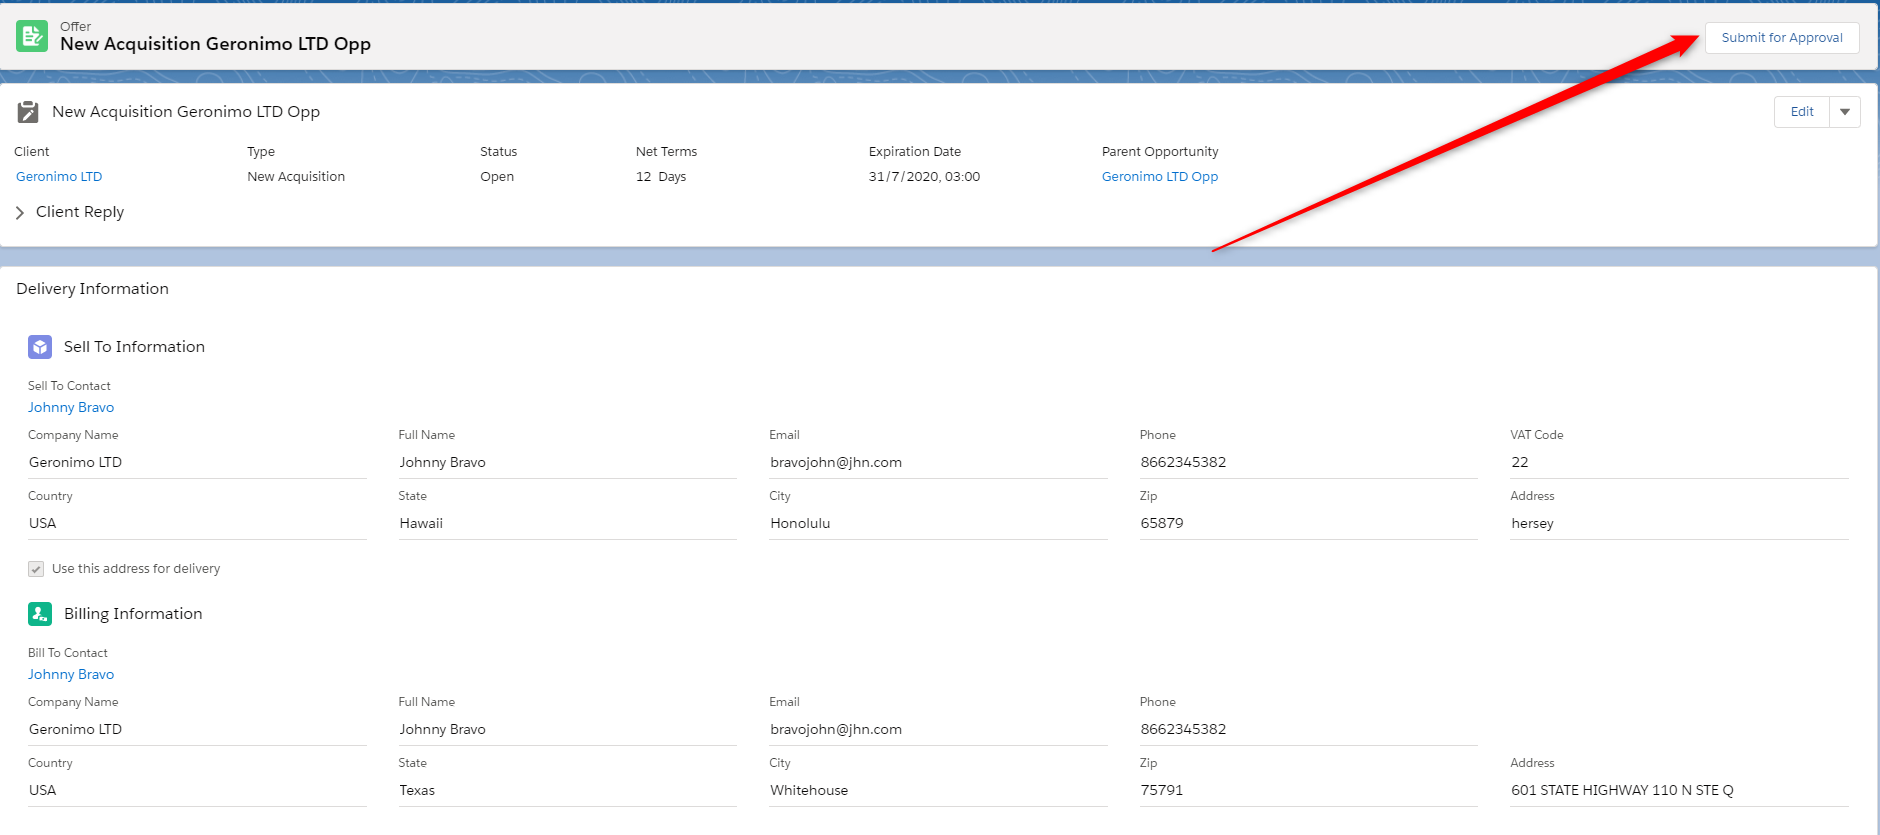
1. In order to send the proposal for approval, you need to click on the Submit for Approval button.
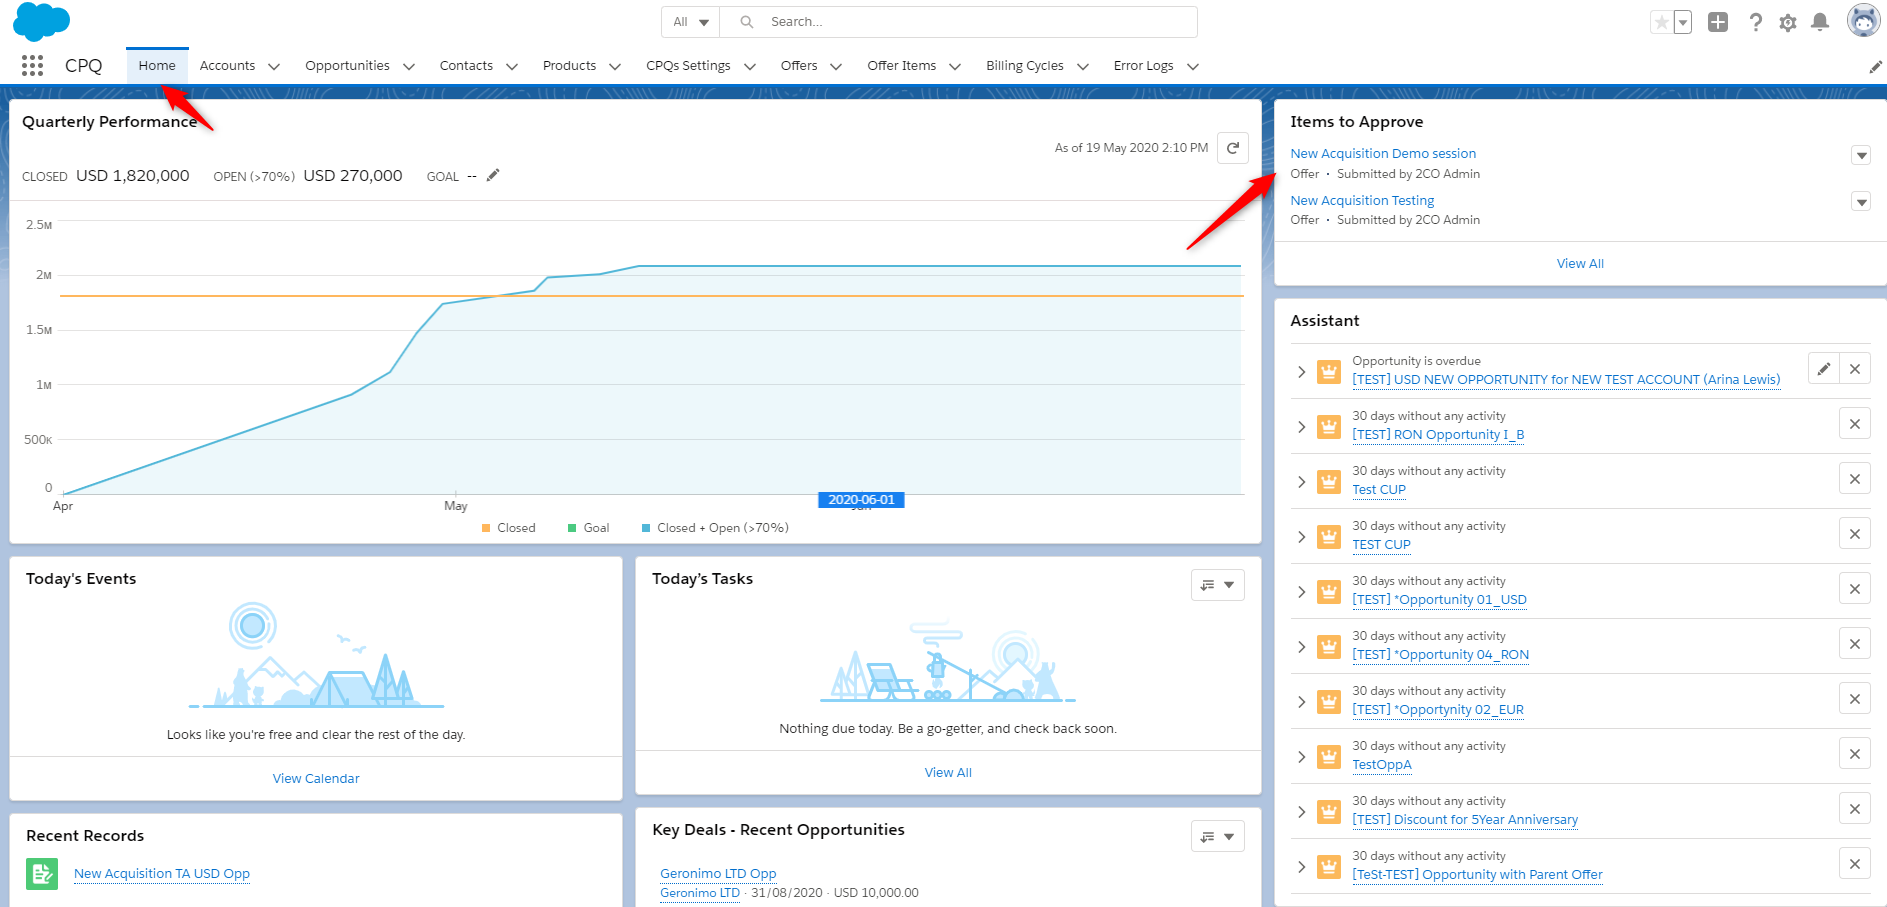
2. The offer will be sent for approval to the Sales Rep Manager who can see the list of items to approve on the home screen of the CPQ app.
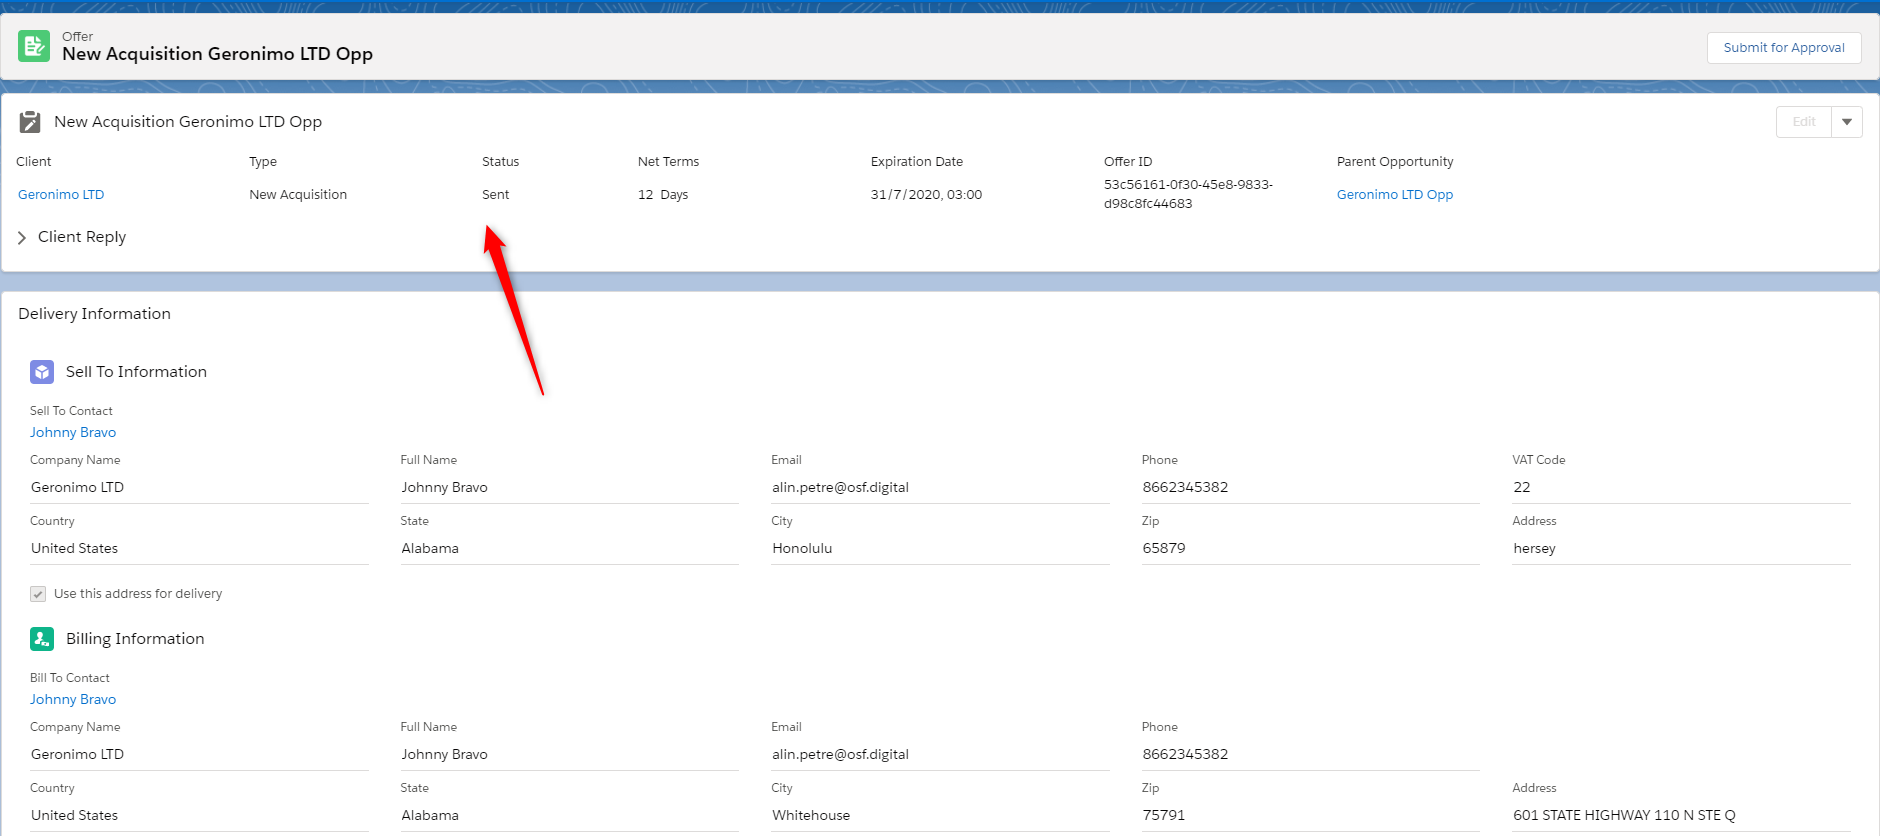
3. After the offer is reviewed, its status is changed to Reviewed and then to Sent automatically.
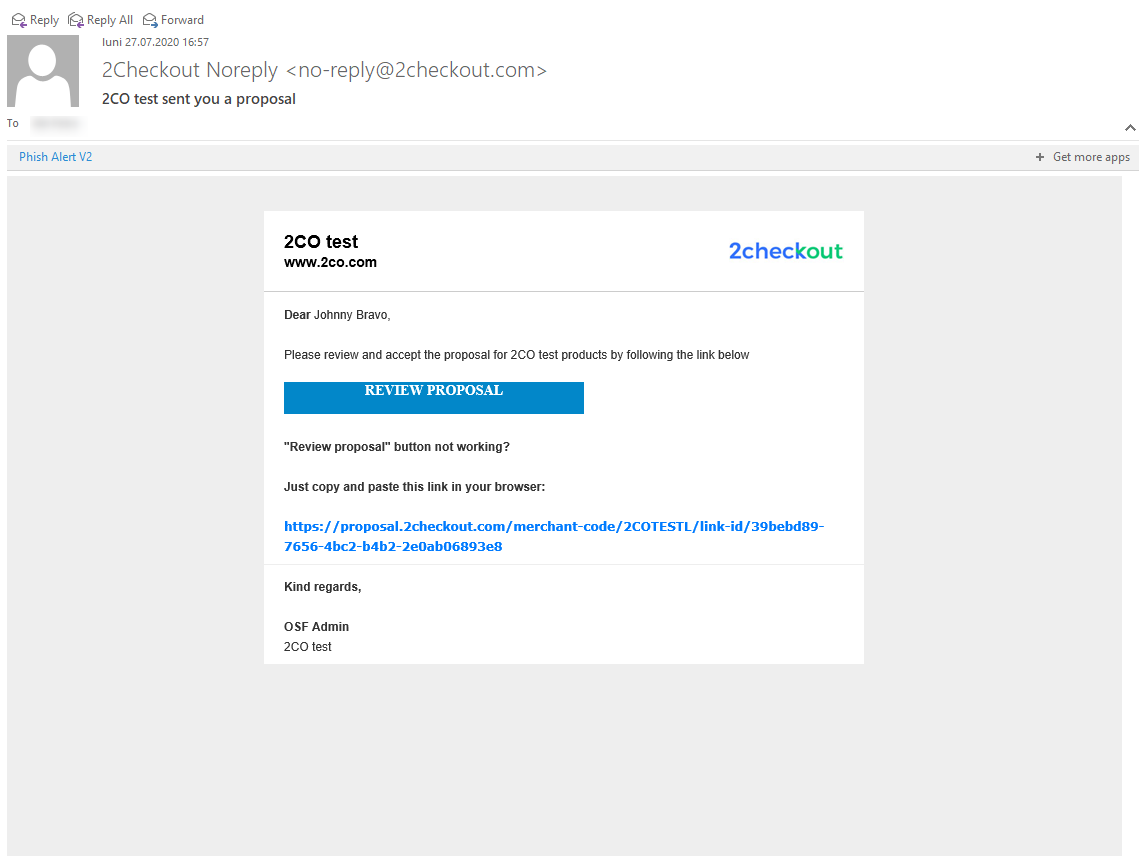
4. The customer will receive an email in order to check the Offer.
5. If the offer is accepted then its status is changed to Completed.
