Configure upselling campaigns

Overview

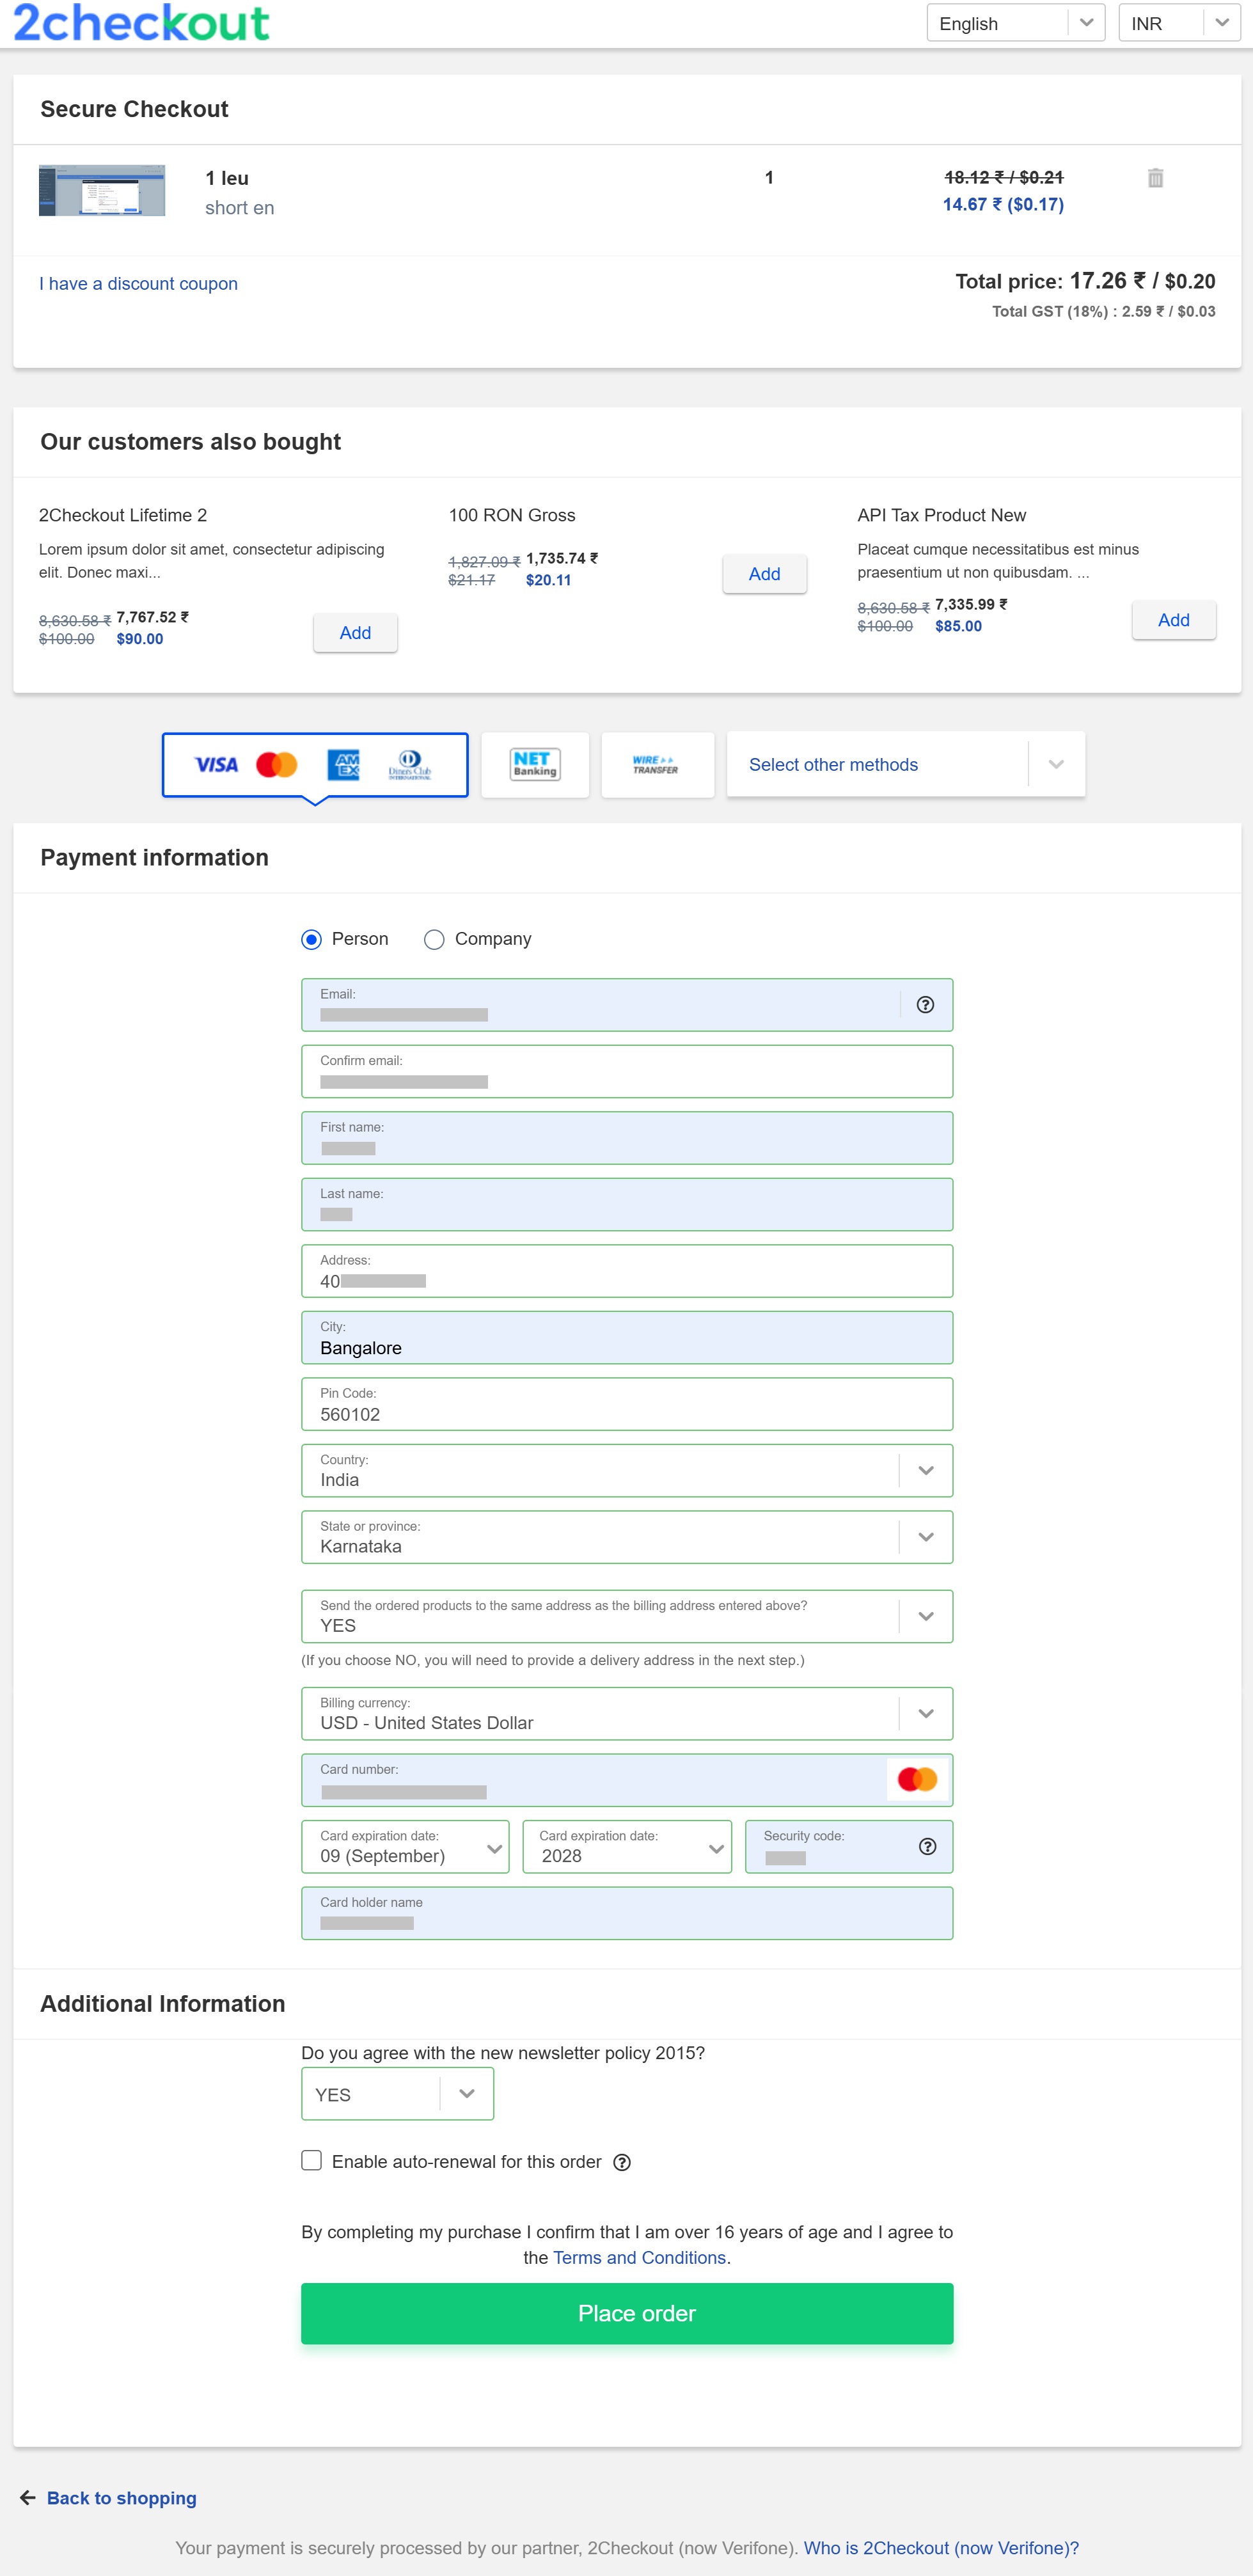
Use 2Checkout's built in upselling capabilities to give your customers the chance to purchase superior offerings once they add specific products to cart. Extra options, feature-rich SKUs, newer product versions, enhanced support and other recommendations bring additional value to customers while boosting your revenue.

Note: Since upselling recommendations are traditionally more expensive than the products initially added to cart by the shoppers, make sure that the offerings come with incremental value justifying the extra cost.

Requirements

In order to configure an upselling campaign you need to have at least one product set in the 2Checkout Control Panel.

Basic upselling campaigns

You can create basic upselling campaigns for products that do not feature any pricing options.

  1. To set up an upselling campaign, once you defined at least one product, go to the Upselling area under Marketing tools and click Create new campaign.
  2. Select the Primary product. This is the offering that will trigger the campaign when shoppers add it to cart and start the purchase processes. Note: The upselling tool is available for the Shopping Cart page only.
  3. Select a Recommended product. This is the offering suggested to your shoppers by 2Checkout once the campaign triggers.

You can define specific start and end dates for your upselling campaigns. This feature ensures that you can schedule a campaign by configuring the interval of time during which it will be active. Leave the Start date and End date fields empty to have the upselling campaign apply indefinitely.

An active upselling campaign will only be triggered during the interval you configure. The campaign remains active even after the end date is reached, but it will no longer trigger.

To start a campaign immediately, leave the start date empty. If you don't set an end date, the campaign stops when you disable it.

Note: The upselling recommendation is triggered only once per browser session, for every product upsell combination defined (closing the browser window will reset the browser session). 2Checkout sets cookies once an upselling campaign triggers and the recommended product is displayed to a shopper. Adding the Primary product to cart a second time while the initial browser session is still active does not cause the campaign to be triggered again.

In addition to selecting the primary and recommended product, you can also define their respective quantities. If you want the campaign to trigger regardless of the primary product's quantity found in the cart, check the Any quantity checkbox.

IMPORTANT: If you specify a primary product quantity that is lower than the minimum quantity configured in that product's page, you will get a notification informing you about this issue. You can still save the campaign, but it only triggers if you modify the quantity accordingly.

To offer the same quantity of the recommended product as the primary product to the shopper, check the Match quantity checkbox in the Recommended quantity section.

Upselling campaigns with advanced pricing options

You can create upselling campaigns for products with pricing options. You can define pricing options under Pricing configuration when creating/editing products under the Pricing tab.

The necessary steps to set up an upselling campaign with advanced pricing options are the same as described above. However, in addition to defining product quantities, you need to configure the pricing options of both the Primary and the Recommended offerings.

Upselling discounts

Use the Discount field to reduce the price of recommended products part of the up-selling campaign.

The discount will impact the price per unit of recommended products. A $20 discount for a $100 product will become $40 if the quantity of products added to cart is increased to 2.

You can create 2 types of discounts:

Percent

A percentage from 0 to 100% of the price per unit of the recommended product is discounted. Note: Only integer values are supported, i.e. 10% and not 10.5%.

Fixed

A fixed amount is deducted from the price per unit of the recommended product added to cart. You need to select the default currency and configure its associated discount. Note: the value of the discount needs to be a positive number larger than 0, or the field can be left blank.

Fixed discount values can be set:

  • Individually, for each currency. In this scenario, shoppers will see the discount you configured in accordance with the currency used in the shopping cart Note: the display currency does not impact the discount. For example, if the promotion you created offers $10, 15EUR and £5 discounts, shoppers in the US and those selecting US dollars as the cart currency will get $10 off. Similarly, customers buying your products using Euro will get a 15 EUR discount, while those transacting in £ will get £5 discounts.
  • Default promotional value. Upsell discount will be triggered regardless of the cart currency. The 2Checkout system will automatically convert the value of the promotion for all customers making payments in non-default currencies.
  • For the default currency and a selection of other currencies. Shoppers will get either:
  • Specific discount you configured if the cart currency is the same as the default discount currency;
  • Value of the discount configured for the default currency converted to the non-default currency used in the cart.

Upselling description

Add text and HTML tags in the field under the Upselling description area for each up-selling campaign to have a custom message displayed to shoppers. Furthermore, you can customize the message in a number of languages, according to your account settings.

Upselling display type

In the Upselling area, scroll down to change the way your campaigns are displayed to customers.

Two options are available:

  • Interstitial webpage - The recommended product is displayed in an interstitial window, the shopper has to add the offering to cart to continue the purchase process.
  • Overlay window - The recommended product is displayed in a pop-up window, the shopper never leaves the shopping cart. When the recommended product is added to cart, the page in the background is refreshed to reflect the new selection.

Both options offer customers the chance to replace the initial product or stick with it and move on with the ordering process. As clearly visible in the screenshots above, the Replace Product call to action is more prominent compared to the alternative.

Upselling scenarios

1. Primary product without pricing options in Default pricing configuration - Recommended product without pricing options in Default pricing configuration

Upselling

Up-selling campaign will always start. Note: the quantity (number of units) of the Primary product cannot be changed (will always be 1).

2. Primary product without pricing options in Default pricing configuration - Recommended product with pricing options in Default pricing configuration

Upselling

Up-selling campaign will always start.

3. Primary product with pricing options in Default pricing configuration - Recommended product without pricing options in Default pricing configuration

Upselling

For the Primary product, you can select a specific pricing option (only if it's defined for the Default pricing configuration created for the product).

The up-sell campaign will only start when shoppers add to cart the primary product with the specific pricing options you selected when defining the campaign.

4. Primary product with pricing options in Default pricing configuration - Recommended product with pricing options in Default pricing configuration

Upselling

For the Primary product, you can select a specific pricing option (only if it's defined for the Default pricing configuration created for the product) - campaign will start only when the primary product with specific pricing option is added to cart.

Recommended products will be offered only with the specific pricing options you selected, although shoppers will be able to change it once they add the offering to cart.

How to test whether an upselling campaign works

Once you're done configuring the up-selling campaign, go to Generate links. Select the primary product of the up-selling campaign, and generate a buy link for this offering.

The guidance available in the Place a test order in the 2Checkout platform is valid for all products, regardless of whether they're part of an up-selling campaign or not.

Important: Always place test orders after refreshing the browser session (deleting cookies). Alternatively, use InPrivate Browsing in Internet Explorer 9 and above, Incognito mode in Google Chrome, and Private browsing in Firefox, ensuring that no cookies are set.

Scenario 1: Upselling campaign always start

Up-selling campaign will always start in the following two cases:

  • Primary product without pricing options in Default pricing configuration - Recommended product without pricing options in Default pricing configuration
  • Primary product without pricing options in Default pricing configuration - Recommended product with pricing options in Default pricing configuration

Step 1: Generate the buy link for the Primary product of your up-selling campaign.

Step 2: Instead of hitting the Place test order button, copy the buy link generated and add &DOTEST=1 to the end of the link, per the guidance available here: Place a test order in the 2Checkout platform.

Step 3: Open a new window in your browser using InPrivate Browsing in Internet Explorer 9 and above, Incognito mode in Google Chrome, and Private browsing in Firefox. Paste the link you tweaked by adding the &DOTEST=1 parameter.

Step 4: The upselling campaign will be triggered automatically. Select to replace the Primary product with the Recommended offering and continue through the steps of placing a test order as described here:  Place a test order in the 2Checkout platform.

Scenario 2: Upselling campaign start for specific pricing options

Upselling campaigns will only start for specific pricing options in the following two cases:

  • Primary product with pricing options in Default pricing configuration - Recommended product without pricing options in Default pricing configuration
  • Primary product with pricing options in Default pricing configuration - Recommended product with pricing options in Default pricing configuration
  1. Go to Generate links and select the Primary product of your upselling campaign.
  2. In the Main Settings area, enter the specific pricing option unique code that will trigger the up-selling campaign in the Additional pricing options field. The unique code can be accessed by editing the primary product, selecting the Pricing tab, scrolling down to the Pricing options groups area, and clicking to edit the active pricing options group. Next you will need to edit the specific pricing option designed to trigger the campaign and copy the value inserted under the Unique code field. Once you copied this value, paste it in the Additional pricing options field.
  3. Generate the buy link for the Primary product of your upselling campaign.
  4. Copy the buy link and add &DOTEST=1 to the end of the link, per the guidance available here:  Place a test order in the 2Checkout platform.
  5. Open a new window in your browser using InPrivate Browsing in Internet Explorer 9 and above, Incognito mode in Google Chrome, and Private browsing in Firefox. Paste the link you tweaked by adding the &DOTEST=1 parameter.
  6. The up-selling campaign will be triggered automatically. Select to replace the Primary product with the Recommended offering and continue through the steps of placing a test order as described here:  Place a test order in the 2Checkout platform.

Upselling scenarios priority

If multiple campaigns are configured for the same products, the 2Checkout system triggers the campaigns based on specificity criteria, as follows:

  1. The system primarily triggers the up-selling campaigns that have both specific product quantity and specific pricing options configured.
  2. If the first case is not detected, the system triggers the campaigns that have a specified product quantity configured, regardless of the pricing options.
  3. If the first two cases are not detected, the system triggers the campaigns that have specific pricing options configured, regardless of the product quantity.
  4. Ultimately, the system triggers the campaigns with any pricing options and any product quantity.

To give you a better overview of the scenarios priority, refer to the diagram below.

Upselling campaigns and localization strategies (regional prices)

When configuring up-selling campaigns, you'll need to factor in localized pricing strategies for the primary and recommended products. There are four scenarios you need to consider, related to the type of up-selling campaigns available.

The upselling report

This is an entirely new report introduced in July 2012 to help you monitor the evolution and performance of the up-selling campaigns configured for your account. The Up-selling report centralizes up-selling campaign statistics recorded in the selected time period; however, data is only available starting with July 21st, 2012, when tracking began. The report includes finished orders only, without refunds, for products involved in up-selling campaigns.

FAQ

  1. Are cascading upselling campaigns possible?
    • No. While you can set two upselling campaigns Product A to Product B and Product B to Product C, the system will not recommend products in cascade to shoppers. This means that if a customer adds Product A to cart and then replaces it with Product B, the 2Checkout system will not recommend Product C in this particular scenario even if a valid up-selling campaign is set.
  2. What happens when multiple Primary products are added to cart? Are all upselling campaigns started?
    • Only the upselling campaign for the first product added to cart will be started.​
  3. Why can't I change the quantity (number of units) for the Primary product of my up-selling campaign?
    • The quantity (number of units) of the primary product can only be changed when the configuration of at least one of the products in the upselling campaign has a specific pricing option selected. Otherwise, the default value if 1 and the up-selling campaign will always start.
  4. If both an auto-apply promotion and an upselling campaign discount impact a product, which one will work?
    • ​​The upselling discount will take precedence over the auto-apply promotion when shoppers add the recommended product to cart.
  5. Can I use both cross-sell and upsell for the same product?
    • ​​Yes, however, shoppers will only be able to benefit from either the cross-sell or the upselling, not both.​
  6. Can I set multiple upselling campaigns impacting the same product?
    • ​​​​​​​​​No. A product can be used only for a single up-sell campaign.​​​​​​​​
  7. Can multiple upselling campaigns be triggered?
    • ​​​​​​​​​​​​​​​​No. Only a single upselling campaign per browser session.

Copy payment info

Overview

Copy card-on-file data available in the Avangate system from a source subscription to an imported target subscription. Avangate uses the existing payment information to charge customers as a part of the recurring billing (renewal) process.

Use the copyPaymentInfo method.

Requirements

The imported target subscription and the source subscription must belong to the same customer. The Avangate system checks to make sure that the Avangate Customer Reference (internal identifier) coincides for the customer accounts associated to the target and source subscriptions.

Availability

Please contact Avangate directly if you wish to take advantage of this feature.

How does this method work?

  1. Customer A purchases Subscription A using a VISA credit card and you import Subscription B for the same customer with no data or with an AMEX card.
  2. When Avangate renews Subscription A, it charges Customer A using the VISA, while using the AMEX (if the data was provided) for Subscription B charges.
  3. When you copy the payment data from Subscription A to Subscription B, the Avangate system uses the VISA credit card to renew both subscriptions according with their respective recurring billing cycles. Avangate charges customers during the recurring billing process for the imported target subscription using the payment method they used to purchase the source subscription.

Parameters

Parameters

Type/Description

sessionID

Required (string)


Session identifier, the output of the Login method. Include sessionID into all your requests. Avangate throws an exception if the values are incorrect.  The sessionID expires in 10 minutes.

TargetSubscriptionReference

Required (string)


The Avangate Subscription Reference of the imported target subscription, to which Avangate copies the payment on file data associated with the source subscription.

SubscriptionReference

Required (string)


The Avangate Subscription Reference of the source subscription whose attached payment on file data Avangate copies to the target subscription.

Request

<?php

require ('PATH_TO_AUTH');

var_dump($sessionID);
$TargetSubscription = 'FFAE3C9429';
$SourceSubscription = '9F4154733C';

$jsonRpcRequest = array (
'method' => 'copyPaymentInfo',
'params' => array($sessionID, $TargetSubscription, $SourceSubscription),
'id' => $i++,
'jsonrpc' => '2.0');

var_dump (callRPC((Object)$jsonRpcRequest, $host, true));

?>

Response

Parameter Type/Description

Boolean

true or false depending on whether or not the operation succeeded.

Usage management

Overview

The usage-based/on-demand/pay-as-you-go pricing model allows merchants to charge their customers on the consumption or overage of a billable service or resource, usually on top of a recurring flat rate. 

Use the Usage object to manage (add, update, delete, retrieve, and import) usage via the 2Checkout API (JSON-RPC APIv6).

Parameters

Parameters for the Usage object via JSON-RPC APIv6
Parameters Type Required/Optional Description
UsageReference Integer Optional The unique usage identifier. Example: 123459876.
SubscriptionReference String Required Unique code that represents a subscription. Example: 83FE4FEF2.
OptionCode String Required Unique 2Checkout option code. The pay-per-usage price options group for which the usage is uploaded. Example: metered pricing.
UsageStart Datetime Required The datetime when the usage started; can be the same as UsageEnd.  Example: 2018-09-03 17:28:32.
UsageEnd Datetime Required The datetime when the usage ended and was recorded. Example: 2018-09-03 17:28:32.
Units Integer Required Number of units recorded. Example: 10.
Description String Optional It can be used to store a short merchant comment of the usage being uploaded. This can be anything, from the source of usage (mobile, web, etc.), to why changes occurred, etc. Example: Subscription usage for September.


Retrieve an order

Overview

Use the getOrder method to retrieve details on a specific order placed with dynamic product information, or catalog products, using its unique, system generated reference.

Parameters

Parameters Type/Description

sessionID

Required (string)


Session identifier, the output of the Login method. Include sessionID into all your requests. Avangate throws an exception if the values are incorrect.  The sessionID expires in 10 minutes.

orderReference

Required (string)


Order reference number of older order, which is already approved/paid.

skipPartnerOrders Optional (boolean)
 

Default value = TRUE. 

Decides if the partner orders should be retrieved or not. By default, they are skipped and instead of returning the partner order according to the orderReference, it will return the master order.

Response

Parameters Type/Description

Order information

Object (orders with catalog products)

Order information Object (orders with dynamic product information)

Request 

<?php

require ('PATH_TO_AUTH');

$orderReference = 'YOUR_ORDER_REFERENCE';
$skipPartnerOrders = 'FALSE';

$jsonRpcRequest = array (
'method' => 'getOrder',
'params' => array($sessionID, $orderReference, $skipPartnerOrders),
'id' => $i++,
'jsonrpc' => '2.0'
);

var_dump (callRPC((Object)$jsonRpcRequest, $host, true));


Increase subscriber retention

Overview

As we are going through a crisis period, 2Checkout is dedicated to helping your business grow, and minimize the effects the global economic slowdown might have on the eCommerce environment. Check out our Voluntary Churn Prevention tools below, which can help you access new markets, retain your customers, and offer subscribers just what they need right now.

Offer subscribers alternatives to extend or cancel subscriptions. Be transparent! 

Some of your subscribers will want to cancel their existing subscriptions for various reasons (to temporarily reduce costs or simply because they are not using your services at the moment). Winning back these customers will cost you time and money, so it is recommended you offer them some alternatives to canceling their subscriptions. 

  • Offer discounts during the churning process to entice price-sensitive subscribers to stay. Activate a churn prevention campaign, and make discounts attractive enough to secure a purchase.  
  • Offer subscribers the option to pause subscriptions instead and then have these automatically resume at a specific date without reacquisition costs, using the pause a subscription option from your Control Panel, or by using the pauseSubscription API method.
  • Extend the subscription duration and ask subscribers to re-enable automatic renewal right after they cancel it, to minimize the chances of them churning. You can extend subscriptions by:
  • Allow subscribers to downgrade to basic plans by using custom downgrade links.  

Don’t wait until your subscribers cancel. Be proactive about it!

You shouldn’t wait until a customer cancels a subscription to address the situation. We’ve outlined several measures you can take to ensure support to your most loyal customers: 

  • Extend subscription expiration for upcoming renewals by a couple of months is advisable for annual subscriptions that are due to expire in the coming period. This is done by:
  • Temporarily cut down renewal prices to reduce cost pressure for subscribers. You can do this by:
  • Upgrade customers for free so they make the best of your product during these times. To make it easy to revert after this period, you can create a temporary plan to upgrade to with the same price as your low-end plan and have a subscription set to upgrade to that, instead of your main upgrade plan.  
  • Upgrade individual subscriptions by:
    • using the Upgrade button on the "Subscription Details" page in the Merchant Control Panel. Make sure to apply a 100% discount code so that your customers get the upgrade for free
    • using custom upgrade links (not available in ConvertPlus)
    • via API using the setSubscriptionUpgrade method 
  • Communicate the value of your product appropriately with your customers through email communications going out from the 2Checkout platform (renewal notifications and unfinished payment notifications for recurring charges) or through additional marketing automation sequences you have on winning back customers. 

Don’t assume why subscribers are churning. Know it!

If your subscribers eventually do end up churning, it is important that you are able to distinguish which subscribers churned because of the pandemic and which churned because of other reasons. To help you make that distinction we added “Coronavirus” as a cancelation reason in our subscription cancelation feedback form, part of our churn prevention campaign capability. You can see what the reasons for churn are using the churn prevention feedback report, and act only on those subscriptions which you see fit. 

For any additional information on how to use any of these features, reach out to our Merchant Support Team or your account manager.


Apple Pay

Overview

As of 2020, there were 230 million global Apple Pay users or 48% of active iPhones had activated Apple Pay, out of which international accounts for 85%, and the U.S. for 15%. ​The number of transactions exceeded 10 billion in 2019 and registered 70% of global card payment volumes.

Apple Pay is available in 20 countries spread across the globe and provides an easy and secure way to make payments via iOS apps, watchOS apps, and websites on Safari. Nonprofits can accept donations within their apps and websites with Apple Pay. 

Availability

Apple Pay is available for MoR business model accounts using all or any of our ordering engines (hosted shopping cart, ConvertPlus, and InLine). 
For PSP business model, Apple Pay is available for activation only if your contract country is the United States.

Benefits

  • Seamless payment experience. Shoppers are finalizing orders with minimum effort, with only a few clicks.
  • Cross-platform support. The checkout experience is consistent across many platforms and devices: computers, tablets, or smartphones. 
  • Enhanced security. Shoppers benefit from a frictionless checkout experience by using Face ID, Touch ID, or double-clicking Apple Watch, while the payment information is sent by Apple Pay in a tokenized form. Shoppers can quickly and securely provide their payment, shipping, and contact information to check out. 

Requirements

Shoppers need to use a device that supports Apple Pay (check the full list of devices in the FAQ section below). 

Apple Pay is available only for a selected list of countries.

To display the Apple Pay buy button in the cart include the "DESIGN_TYPE = 2" parameter in your buy links. See more information about the Express payments checkout flow here. This parameter does not apply to the ConvertPlus ordering engine.

Pricing

2Checkout does not apply any cost to orders paid via Apply Pay. Your incoming orders will be commissioned based on the credit card method used during the purchase (Visa/MasterCard).

Workflow

  1. When the shopper enters the cart, the Apple Pay button is displayed along with the other Payment options.
  2. The shopper clicks on the Buy with Apple Pay button on the checkout page.
  3. The Apple Pay payment sheet opens on top of the checkout page.
  4. The shopper selects one of the cards associated with their iCloud account and verifies the billing/shipping information.
  5. Simultaneously, a confirmation request will be sent to the registered mobile device iPhone, iPad, or iWatch.
  6. The shopper authorizes the payment by using Face ID, Touch ID, or double-clicking on the Apple Watch.
  7. Payment is confirmed and the order is finalized with the information retrieved from the shopper's iCloud account.
  8. The 2Checkout 'Thank You' page will be displayed once the purchase is successfully finalized.


Picture2.png

FAQs

1. What devices are supported by Apple Pay? 

Apple Pay is available on the following devices:

  • iPhone & iPad: iPhone X, 8/8 Plus, iPhone 7/7 Plus, iPhone 6S/6S Plus, iPhone 6/6 Plus, iPad Air 2, iPad mini 3, iPad mini 4, iPad Pro with iOS 10 or later installed
  • Mac: All the Macs with macOS Sierra or later installed but only available via an iPhone X, 8/8 Plus, iPhone 7/7 Plus, iPhone 6S/6S Plus, iPhone 6/6 Plus, iPhone SE, or an Apple Watch/Apple Watch Series 2 and only via Safari.
  • Users with iPhone 5, 5C and 5S can use the service through an Apple Watch, activated with a passcode.

2. How can I find out if Apple Pay is available in my country?

Check here the list of countries where Apple Pay is available.

3. What card networks are available in Apple Pay?

Supported networks: Visa, Mastercard.

4. Does Apple Pay work on other devices (other than Apple devices)?

No. It works only with Apple devices with Safari web browser.

5. Will pop-up blockers prevent the Apple Pay window from being displayed?

No. As the popup is generated by the browser it will not be blocked.

6. Does Apple Pay support automatic renewal?

Yes, orders placed via Apple Pay can be automatically renewed, according to the subscription settings.

7. Can refunds or chargebacks be processed for orders placed via Apple Pay?

A: Yes, as Apple Pay is an express flow for orders placed through credit cards, automatic refunds can be issued, and customers can open disputes from their bank.

Partner product download

Overview

Manage download files for your products directly into Partner Control Panel.

Benefits

  • Improve partner communication, educating them about the products within their assigned pricing lists.
  • Automate and streamline access to your product files, making it easier for your partners to distribute them to end-users.

You can enable download links for partners either per product or per file. 

Enable product files

Follow the steps below to provide access to a product file.

Method 1

  1. Go to Setup → Products.
  2. Click Edit on a specific product.
  3. Go to the Fulfillment tab. The option is only available for products for which you're delivering a file for download.
  4. Scroll down to the Product File area.
  5. Enable the Display to partners in their Partner Control Panel option.

Method 2

  1. Go to Setup → Fulfillment.
  2. Click the Product Files tab.
  3. Identify the file to share with your partners.
  4. Click Edit.
  5. Scroll down to the Available products for this file section.
  6. Check the box next to the Partners option.
  7. Click Update settings.

Once you have enabled this feature, your partners receive immediate access to product files. The Partner Control Panel is updated with direct links to product files (all of which are available for download). Direct links to your products are displayed in Dashboard → Resources → Products, under the Download file column.

Partners can take advantage of direct access to product download files to enhance the shopping experience for their buyers. Shoppers will be able to download the files directly from the servers partners/vendors choose for hosting.

Subscription

Overview

Retrieve information and manage subscriptions for your account. Subscriptions can be retrieved starting with 5 minutes after their orders are generated in the 2Checkout system.

Object parameters

Parameters Type/Description

SubscriptionReference

String


Unique, system-generated subscription identifier.

StartDate

String


Subscription start date(YYYY-MM-DD) - StartDate is mandatory when importing subscription data. If you changed the time zone for the Avangate API by editing system settings under Account settings, then the StartDate you provide must be in accordance with your custom configuration.

ExpirationDate

String


Subscription expiration date(YYYY-MM-DD) - ExpirationDate is mandatory when importing subscription data. If you changed the time zone for the Avangate API by editing system settings under Account settings, then the ExpirationDate you provide must be in accordance with your custom configuration.

RecurringEnabled

Boolean


Possible values:

TRUE – recurring billing/automatic subscription renewals enabled

FALSE– recurring billing/automatic subscription renewals disabled

SubscriptionEnabled

Boolean

Possible values:

TRUE –subscription enabled

FALSE–subscription disabled

Product

Required (object)


The product for which Avangate generated the subscription. Details below.


ProductCode

String


Unique product identifier that you control.


ProductId

Int


Unique, system-generated product identifier.


ProductName

String


Product name.


ProductQuantity

Int


Ordered number of units.


ProductVersion

String


Product version.


PriceOptionCodes

Array


The product options codes the customer selected when acquiring the subscription. Pricing options codes are case sensitive.

EndUser

Object


The end user of the subscription. Details below.


Person

Object


FirstName

String


End user's first name


LastName

String


End user's last name


CountryCode

String


End user country code [ISO3166-1 Alpha 2].


State

String


End user state.


City

String


End user city.


Address1

String


End user first address line.


Address2

String


End user second address line.


Zip

String


End user zip code.


Email

String


End user email address.


Phone

String


End user phone number.


Company

String


Company name.


Fax

String


End user fax.


Language

String


Language [ISO639-2] the Avangate system uses for communications.

SKU

String


Stock keeping unit you defined.

DeliveryInfo

Object


The object contains information about the delivery/fulfillment made to the customer.


Description

String


Delivery description.


Codes

Array of objects


Code

String


Activation key/license code of the first order from this subscription. Use getSubscriptionHistory method if you want to retrieve the activation keys/license codes for all orders belonging to a subscription.


Description

String


Code description for dynamic lists from your key generator. 


ExtraInfo

Object


Info set by your key generator for dynamic lists only.


CodeExtraInfo

Object


Type

String


Label

String


Value

String


File

Array of objects


Content

String


Content of the file (base64 encoded).


ContentLength

Int


File size.


Filename

String


The name of the delivered file.


FileType

String


The type of the delivered file.

ReceiveNotifications

Boolean


1 – Subscribe: Avangate sends subscription notifications to the end user.

0 – Unsubscribe – Avangate does not send subscription notifications to the end user.

Lifetime

Boolean


Possible values:

  • True – the subscription is evergreen

False – the subscription has a recurring billing cycle less than or equal to three years.

PartnerCode

String


  • Empty: for ecommerce orders

Partner Code

AvangateCustomerReference

Int


Unique, system-generated customer identifier.

ExternalCustomerReference

String


Customer identifier that you control.

TestSubscription

Boolean


True for test subscriptions, false otherwise.

IsTrial

Boolean


True for trial subscriptions, false otherwise.

MerchantCode String
  Unique, system-generated ID in the Avangate system.


Place new partner orders

Overview

When placing an order on behalf of your partners, you can purchase new products in addition to upgrades and subscription renewals.

Requirements

  • It's mandatory to associate products to price lists. Do this by connecting a single or multiple pricing configurations of the items you sell through 2Checkout with a price list. You also have to assign price lists to the partners that you want to be able to access your offerings. Products that are not part of price lists assigned to partners will not be available for purchase.
  • The new purchase option is only available for active subscriptions/licenses, and not for disabled products.

Place new partner orders

  1. Go to Orders & customers -> Place partner order.
  2. Select the partner for which you're placing the order, either by typing the name in the Select partner box, or by using the drop down menu available. Alternatively, provided that you already placed orders on behalf of your partners, a list of Last used partners will be available in this area, and clicking on a name will automatically select it.
  3. You'll now get the possibility to order a new license, a renewal or an upgrade.
  4. Select the desired price list under the New license area.
  5. On the next page, choose the product for your order from the drop down menu. You will now be able to customize your order using values such as quantity, and additional settings (if available). Once finished, click the Add to cart button.
  6. Click Add more products to be redirected to the Edit Order screen where you can select additional products from the same pricing list as the last added to chart.
  7. Click the Change link to add products from different pricing lists.
  8. Click Add to cart.
  9. When you place orders on behalf of your partners, their value will automatically be deducted from the amount of available credit you awarded them with, provided that you configured a Credit limit for partner accounts.
  10. View Shopping Cart - You can now introduce an External Reference No. / PO, remove some or all items in the cart, change quantity details, add more products, and even leave a comment for the order that your partners will be able to read, by editing orders that haven't been placed. The Comments field supports direct communication with your partner. Any comments added will become part of the order information once you hit the Place order button. If the partner posts a reply, then a new comment is added and will be available in this area. Additional comments can be introduced by editing orders once they have been placed. Make sure to also enter a value for the External Reference No. / PO, if you want your order to have one. The parameter you introduce in this field will be visible both to you and to the partner, and synchronized across both Control Panels.
  11. Add extra margin / discount: To edit the discount details of a partner order you need to select Order search in the left hand side pane of the Vendor Control Panel, click on Partner orders and filter existing items to show only those with the Pending approval status. You can always also just search for a partner order, if you have specific details on hand. Once you identified the order you'd like to refresh, click View and then Edit Order. Additional information is available here.
  12. Attach end user information - Please read Require end user information for partner (reseller) orders for guidance and Require end user information before placing the order for the steps detailing the process.
  13. Place Order - click on the Place Order button once all the details of your order are finalized.
  14. Order confirmation - orders placed by you on the behalf of your partners are approved automatically.
  15. Attach end user information - Please read Require end user information for partner (reseller) orders for guidance and Require end user information after placing the order for the steps detailing the process.
  16. Partners have to provide the necessary details to push the order to the delivery/fulfillment stage, but you can also provide the details if you have them.
    • Alternatively, fulfillment be done exclusively to partners, leaving them to deal with their customers, and in this case, no additional info is required.
    • When the system configuration is set to distribute products/keys to end users, customers are required to first register ahead of delivery/fulfillment.
  17. Attach reseller information - You'll need to provide reseller information for the order to move to the delivery/fulfillment stage, if the reseller information is required according to the Partner's commercial settings. Partners are required to enter the necessary information to push the order to the delivery/fulfillment stage, but you can also provide the details if you have them.
  18. You can view and search through the full list of your partner resellers by clicking the View partner resellers button at the bottom of the Partners page.
  19. Partner invoices - Partner invoices can be generated manually or automatically, depending on partner account settings. If the order is placed without any available credit, or your partners do not enjoy a credit limit, they will first need to pay the partner invoice and only then will the process advance to the delivery/fulfillment stage. To manually issue a partner invoice, navigate to Partner partner invoices under Orders & customers.
  20. Click on the item in the list of available orders on the left hand side of the page to add them to the partner invoice you're generating, and click Preview.
  21. Hit Save to create the partner partner invoice. On the next screen you'll have the option to notify your partner of the newly generated partner invoice or to cancel it if necessary.
  22. Delivery/fulfillment. When delivery/fulfillment is handled by 2Checkout, not required or has been confirmed by you, the system will give green light to deliveries immediately for order that are paid in full or placed within available credit. Fulfillment for partner orders guidance is available here.
  23. Cancelling an order: To cancel an order make your way to Partner orders under Order search and identify the item you'd like to call off. Click to view the order, and get access to the Cancel button on the next screen. Cancelling orders automatically disables all associated licenses.

FAQ

  • Can I edit pricing details for placed orders?

Yes. If no partner was generated then you'll be able to add extra margin and to increase the discount. When the partner was already issued you'll need to first cancel it to edit the order's extra margin and discount.

  • How is the upgrade price calculated?

The upgrade price is calculated according to the upgrade settings and then applied to the upgrade promotion on the resulted price.

  • How is the price calculated when applying an extra promotion?

Applying an extra promotion to the final price of a product in the Channel Manager shopping cart will discount the price further.

  • What happens when you add extra margin?

Adding extra margin means that a particular partner will benefit from an extra discount applied to an order. The extra margin can be cumulated with an extra discount.

Generate SKU Schema

Overview

Stock keeping unit or SKU is a number assigned to a particular product by a digital or physical retail store for easy identification and inventory tracking purposes. The SKU number is a string of alphanumeric characters that uniquely identify details such as price, product options and manufacturer of a particular product or service. SKUs are used in order notifications, electronic delivery, export files, etc.

SKU Management

For companies that manage large product catalogs with defined SKUs and that make regular changes to their prices and products (new versions, new options), the manual process performed in the Merchant Control Panel needs to be supported by an automatic solution as well. By using an automated flow, merchants decrease the time needed for this process, and also reduce the risk of human errors associated with the manual process.

In the 2Checkout platform, SKUs can be associated with a unique combination made up of:

  • Product identification element
  • Pricing configuration
  • Plus minimum one of the following:
    • Currency – defined as applicable to all currencies or only to specific ones
    • Volume Discounts – defined as specific quantity or intervals (applicable only according to the volume discounts that are defined at pricing configuration level)
    • Purchase Types – possible values: new purchase, renewal, upgrade and trial
    • Pricing Options – will be available considering the pricing option groups assigned to the selected pricing configuration


Need help?

Do you have a question? If you didn’t find the answer you are looking for in our documentation, you can contact our Support teams for more information. If you have a technical issue or question, please contact us. We are happy to help.

Not yet a Verifone customer?

We’ll help you choose the right payment solution for your business, wherever you want to sell, in-person or online. Our team of experts will happily discuss your needs.

Verifone logo