Webhooks upgrade to the SHA algorithm
- Log in to your 2Checkout account.
- Navigate to Dashboard > Integrations > Webhooks and API.
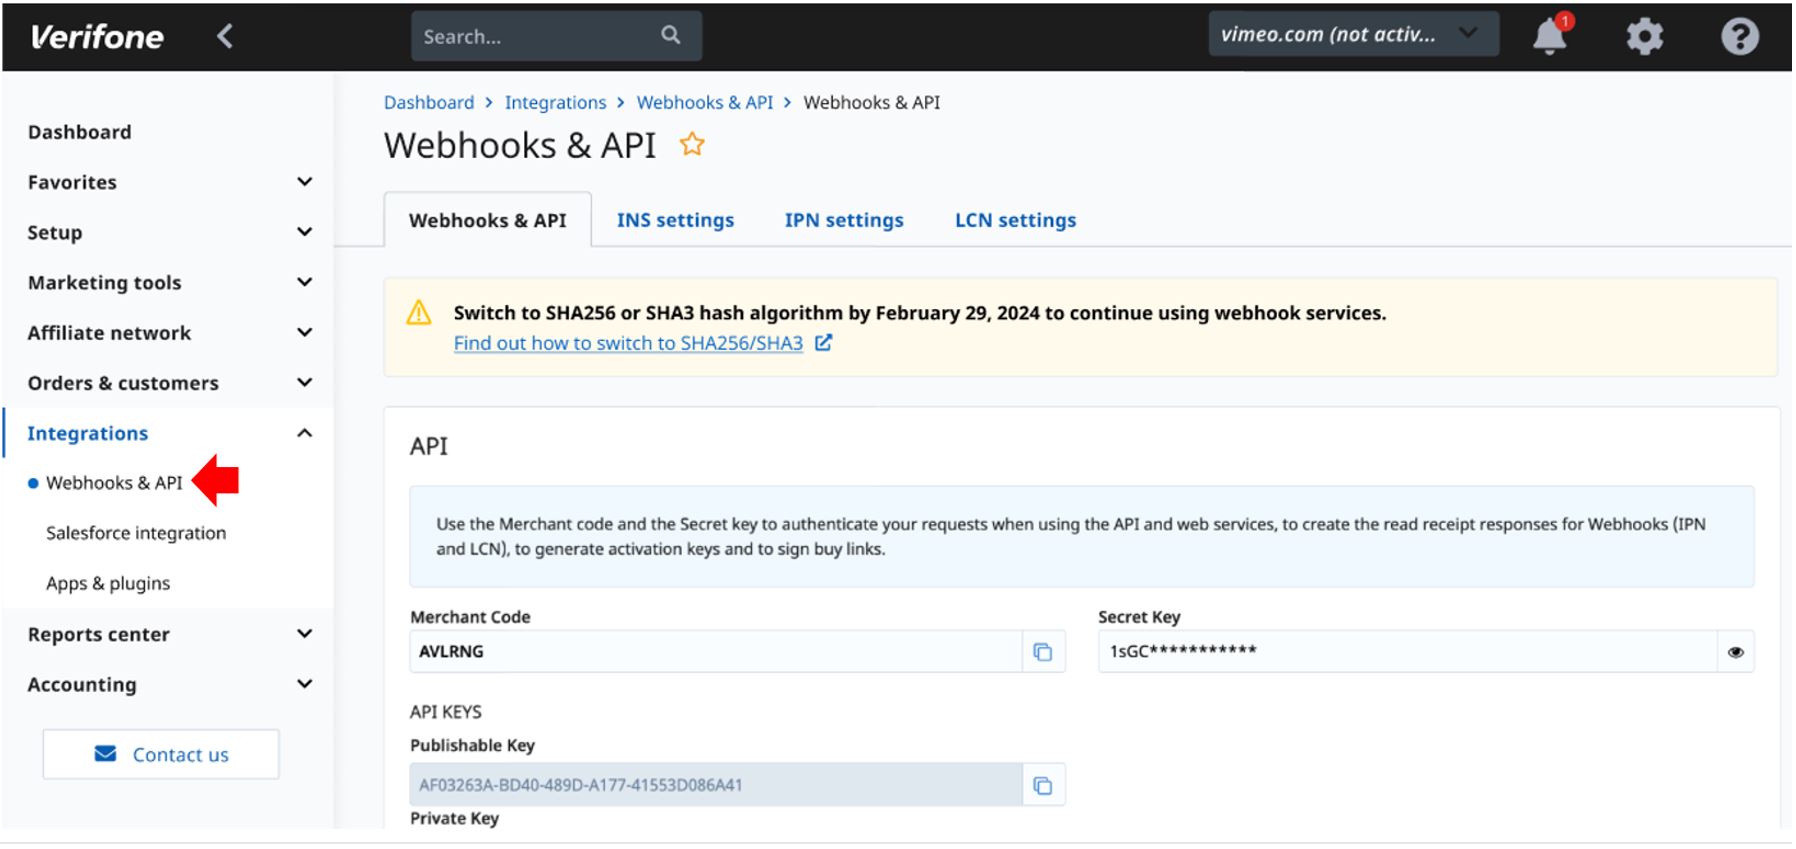
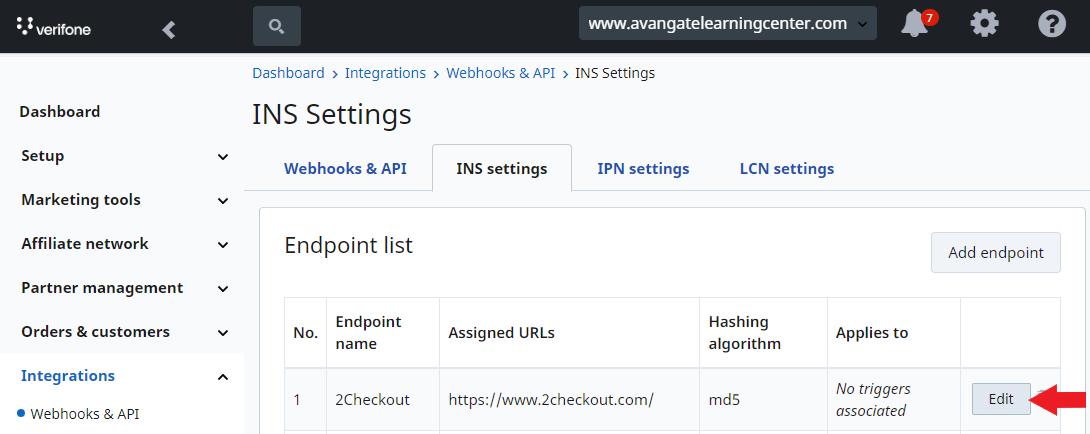
- Click on the INS Settings/IPN Settings/LCN Settings tab.
Depending on your needs, there are several options for making the switch, as shown below.
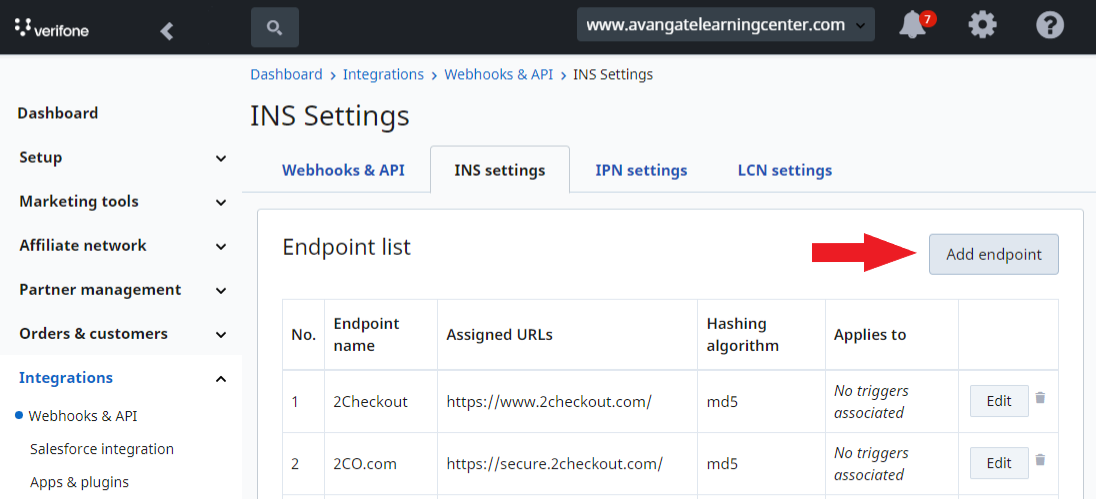
Add a new URL with SHA2/3 hash Recommended
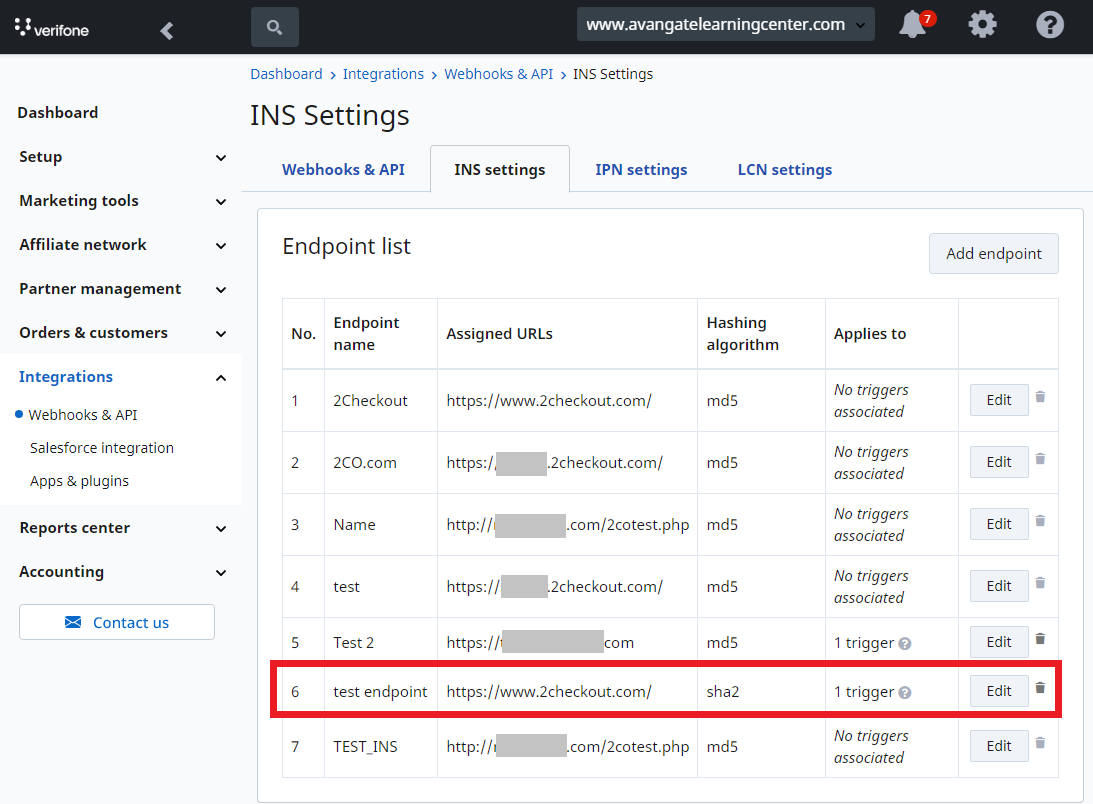
- Click on Add endpoint.
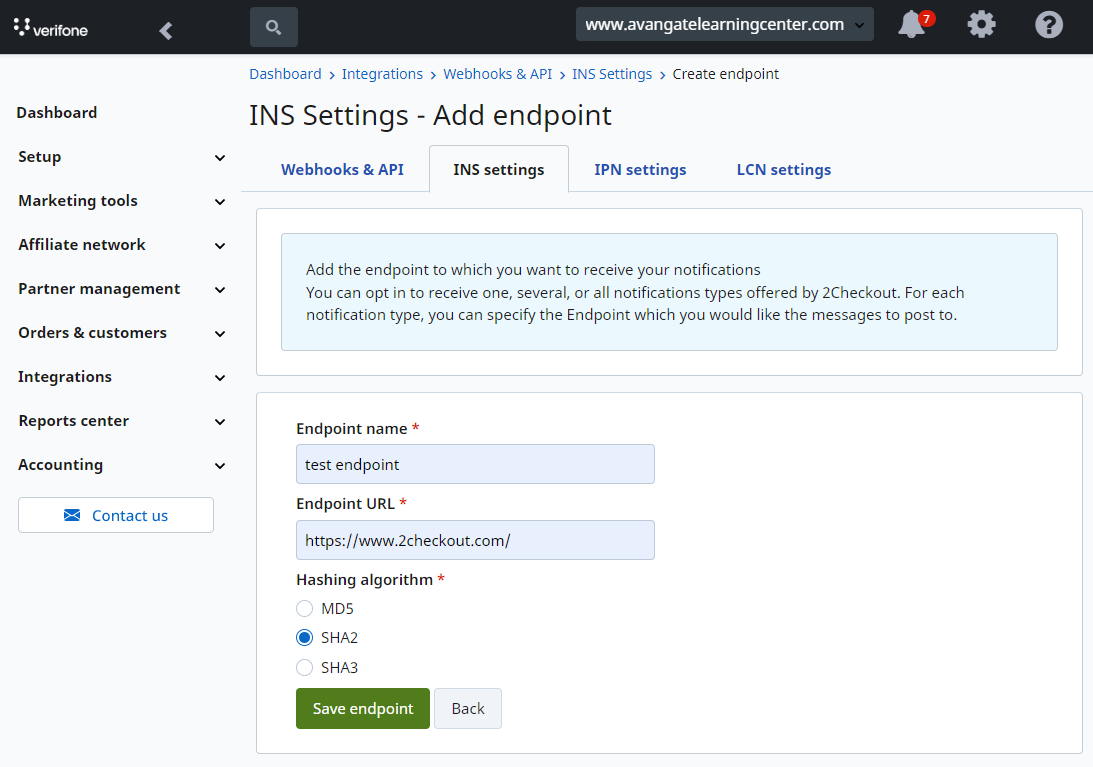
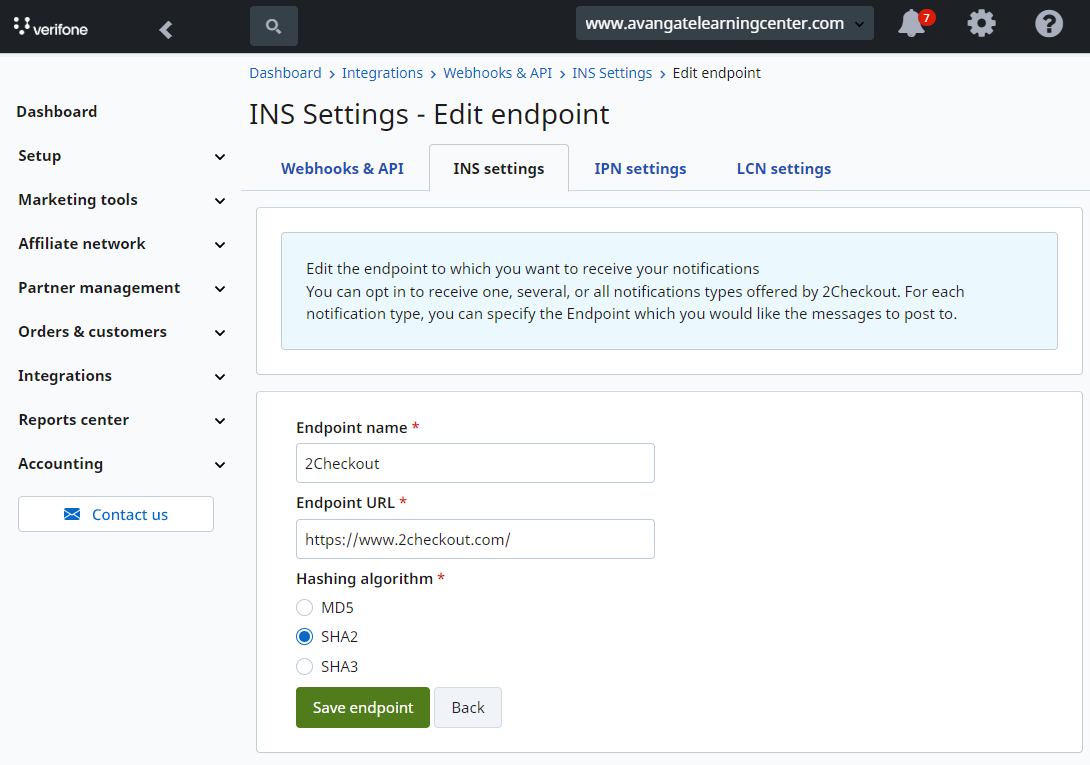
- Add the new INS name, and URL and select the hashing algorithm. Then click on Save endpoint.
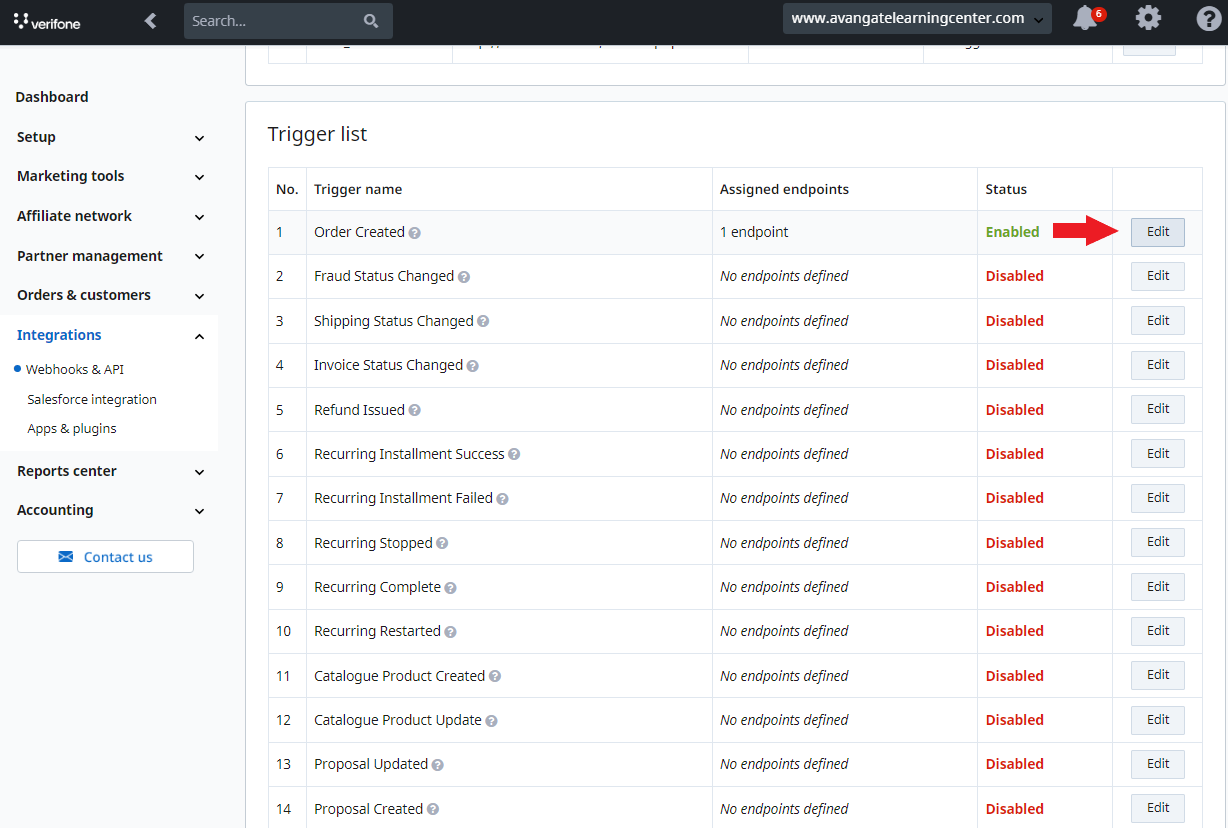
- After setting up the URL for the new endpoint, navigate to the trigger list associated with the endpoint and click on Edit to edit the trigger.

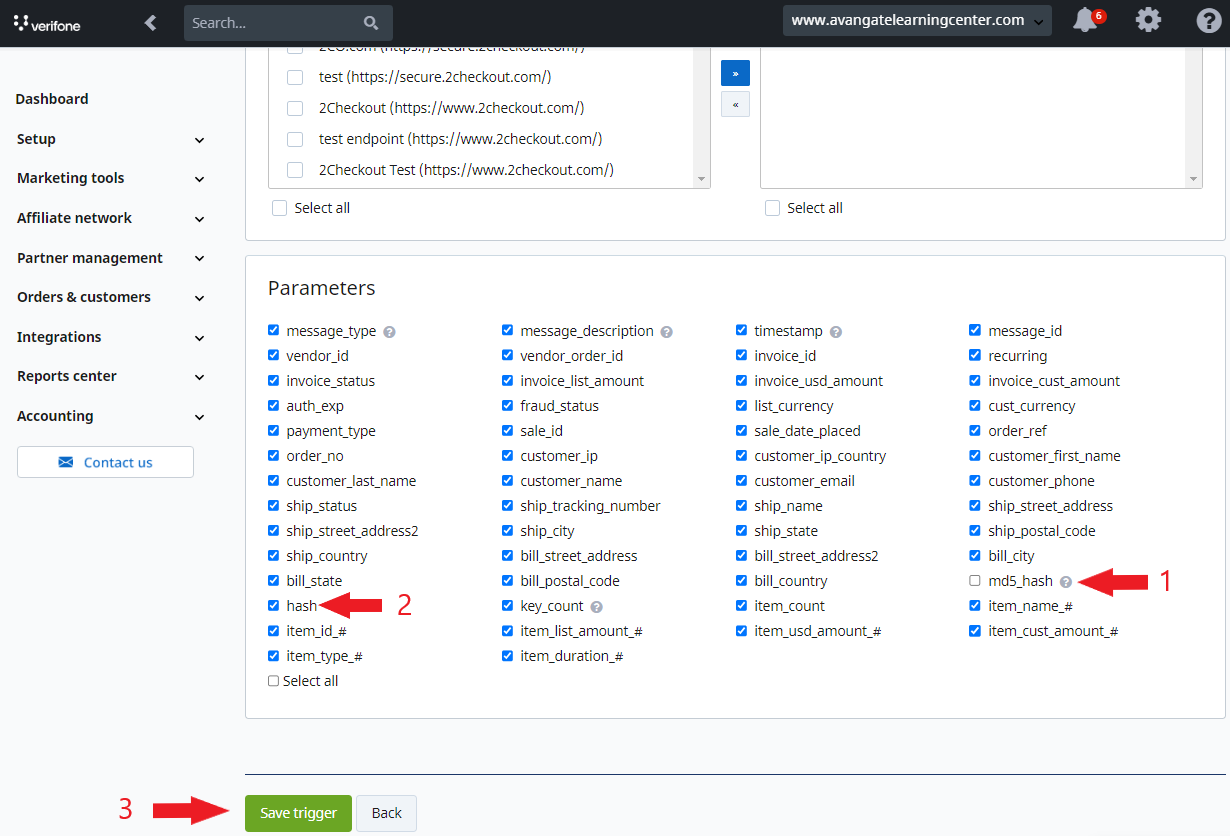
- On the next page, scroll down to the Parameters section, deselect the md5_hash parameter, select the hash parameter, and click on Save trigger.

-
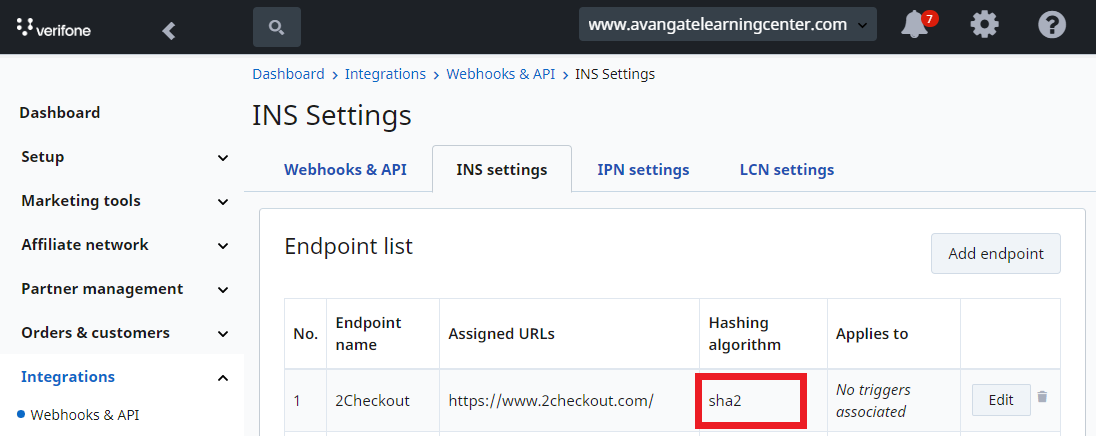
The new INS endpoint with its hashing algorithm will be displayed in the URL list. When you’re ready, remove the old endpoint with MD5 and use only the one with the SHA algorithm.
-
Optionally, for enhanced security of your webhooks, you can validate the hash received in INS. Click here to learn how.
- Click on Add IPN URL.
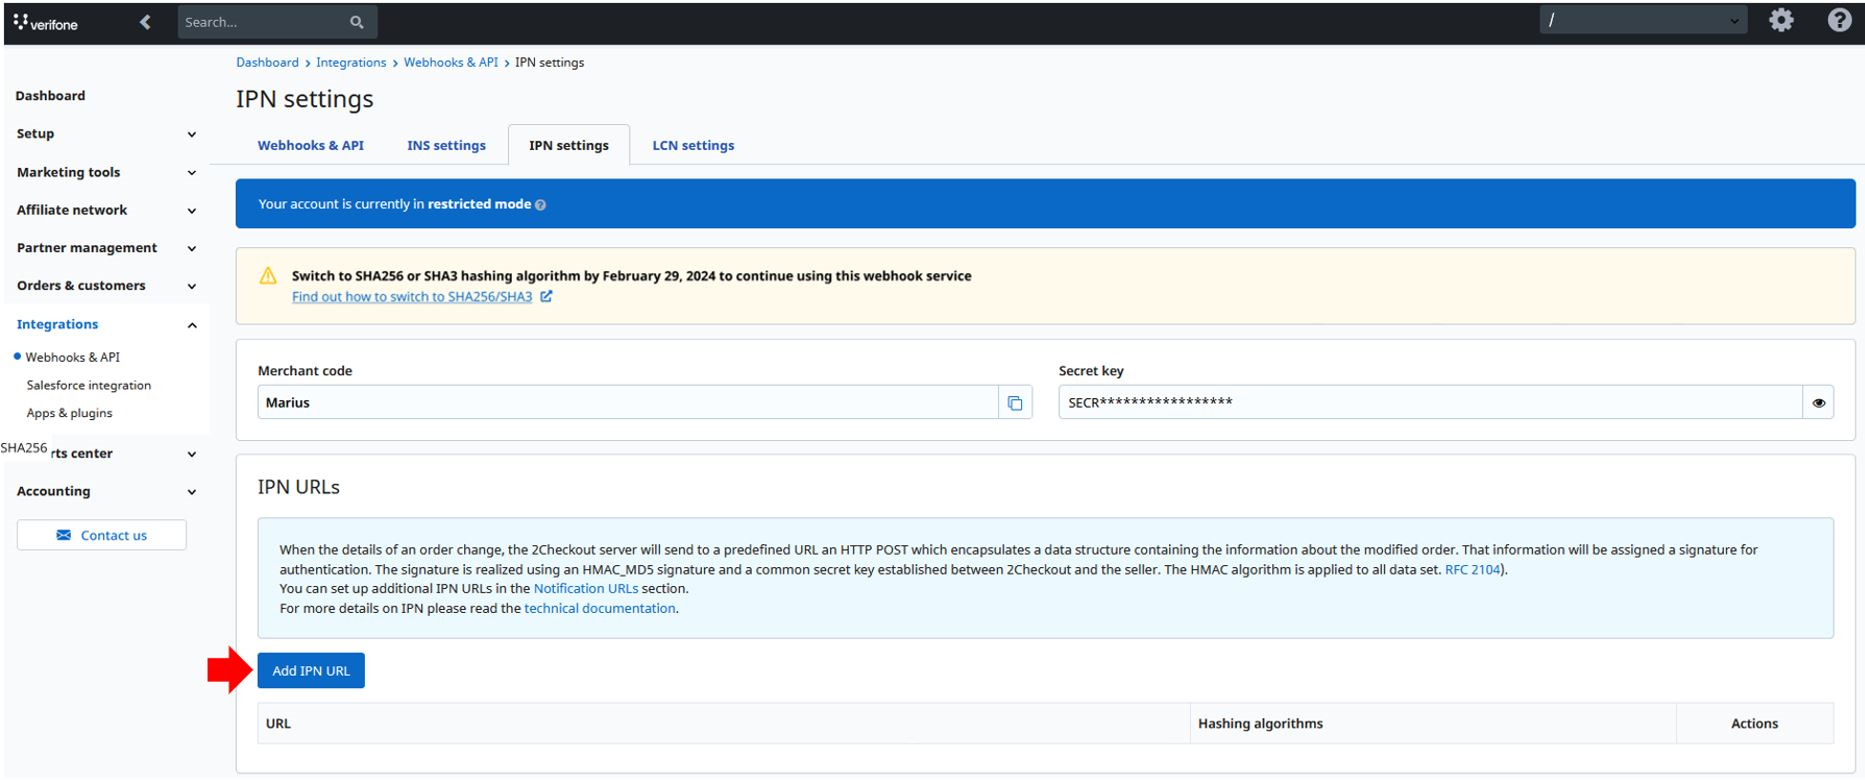
- Add the IPN URL and select the hash algorithm.
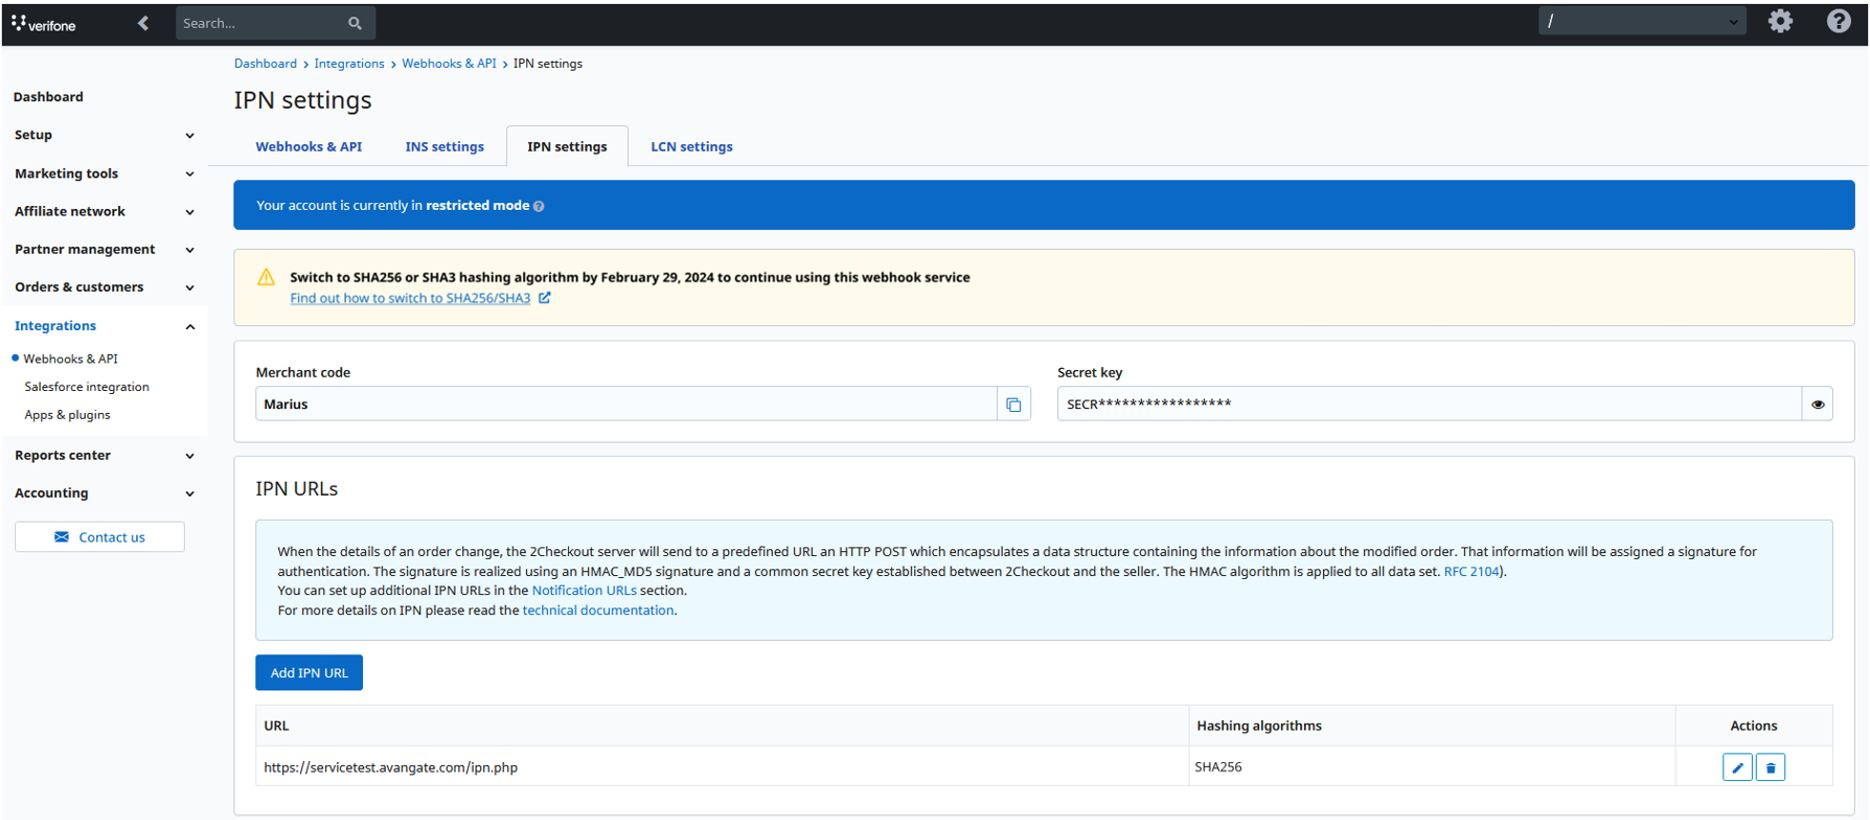
- The new IPN URL with its hashing algorithm will be displayed in the URL list. When you’re ready, remove the old endpoint with MD5 and use only the one with the SHA algorithm.
This option is suitable for merchants already using the LCN in a production environment and processing orders through the platform.
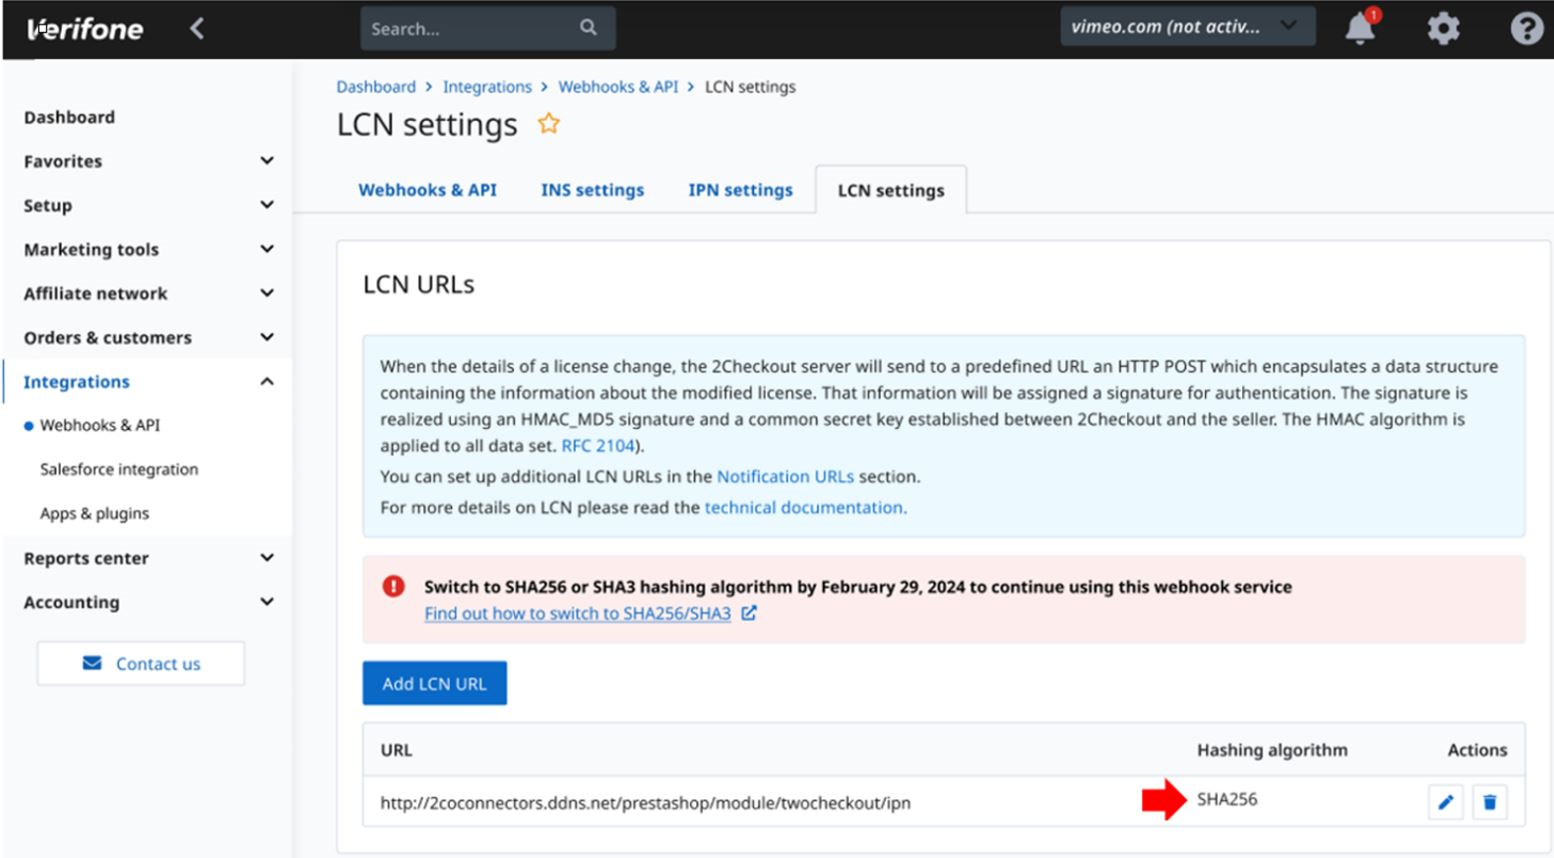
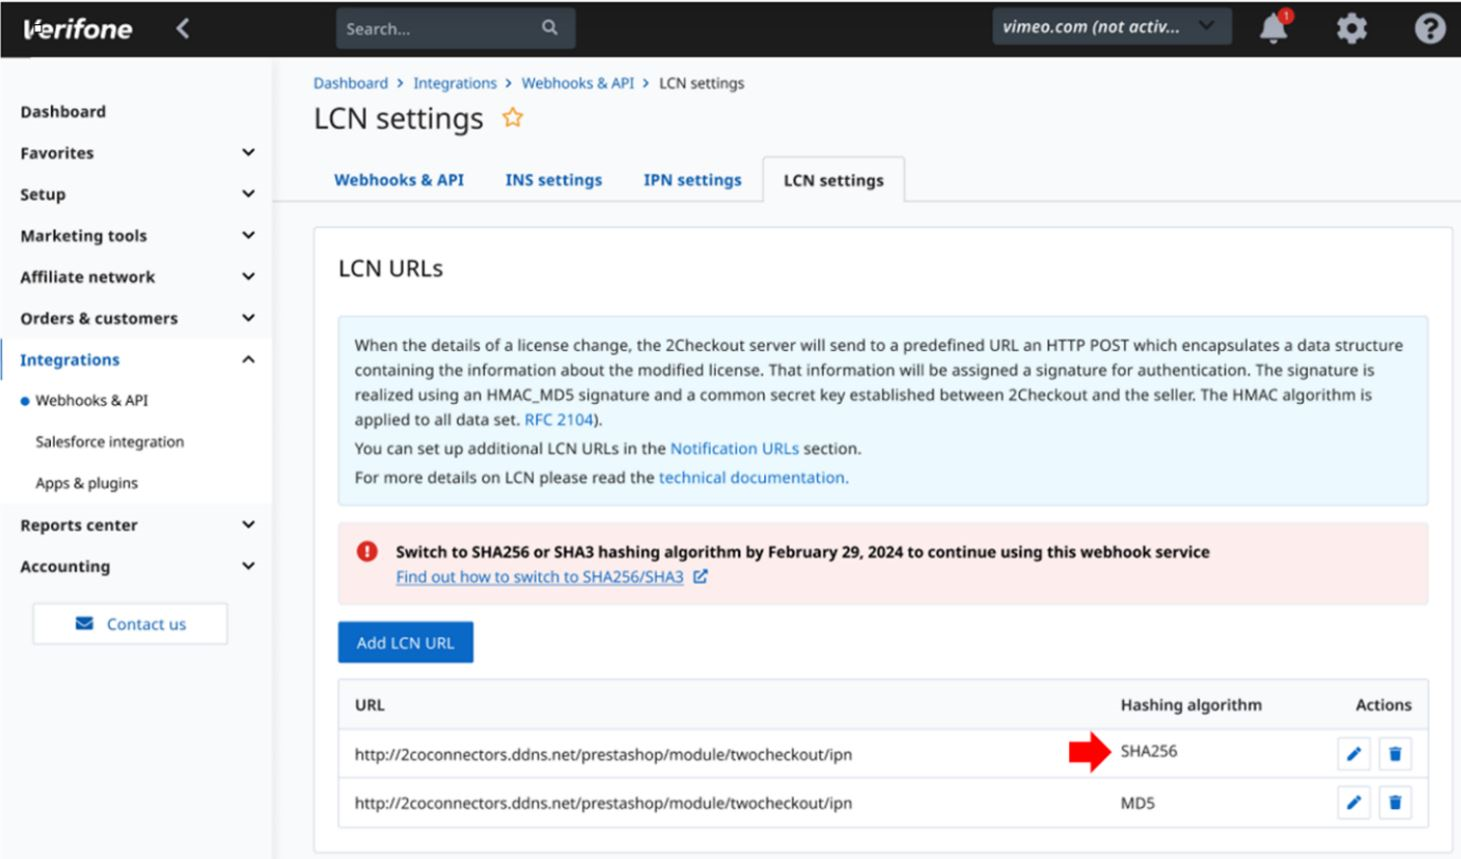
- Click on Add LCN URL.
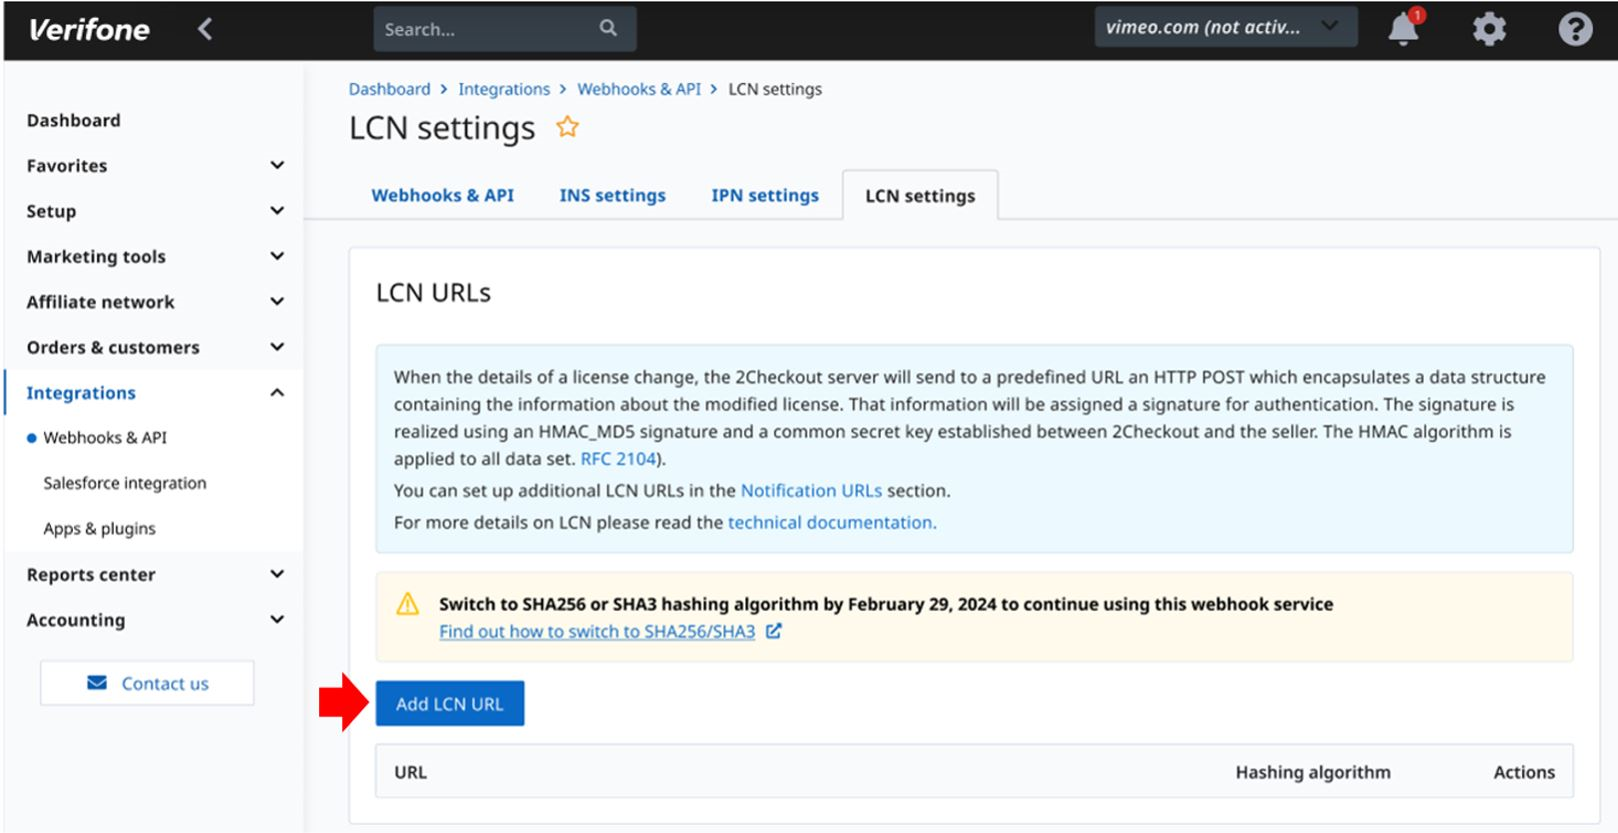
- Add the LCN URL and select the hash algorithm.
- The new LCN URL with its hashing algorithm will be displayed in the URL list. When you’re ready, remove the old endpoint with MD5 and use only the one with the SHA algorithm.
Keep both the SHA2/SHA3 and MD5 hash
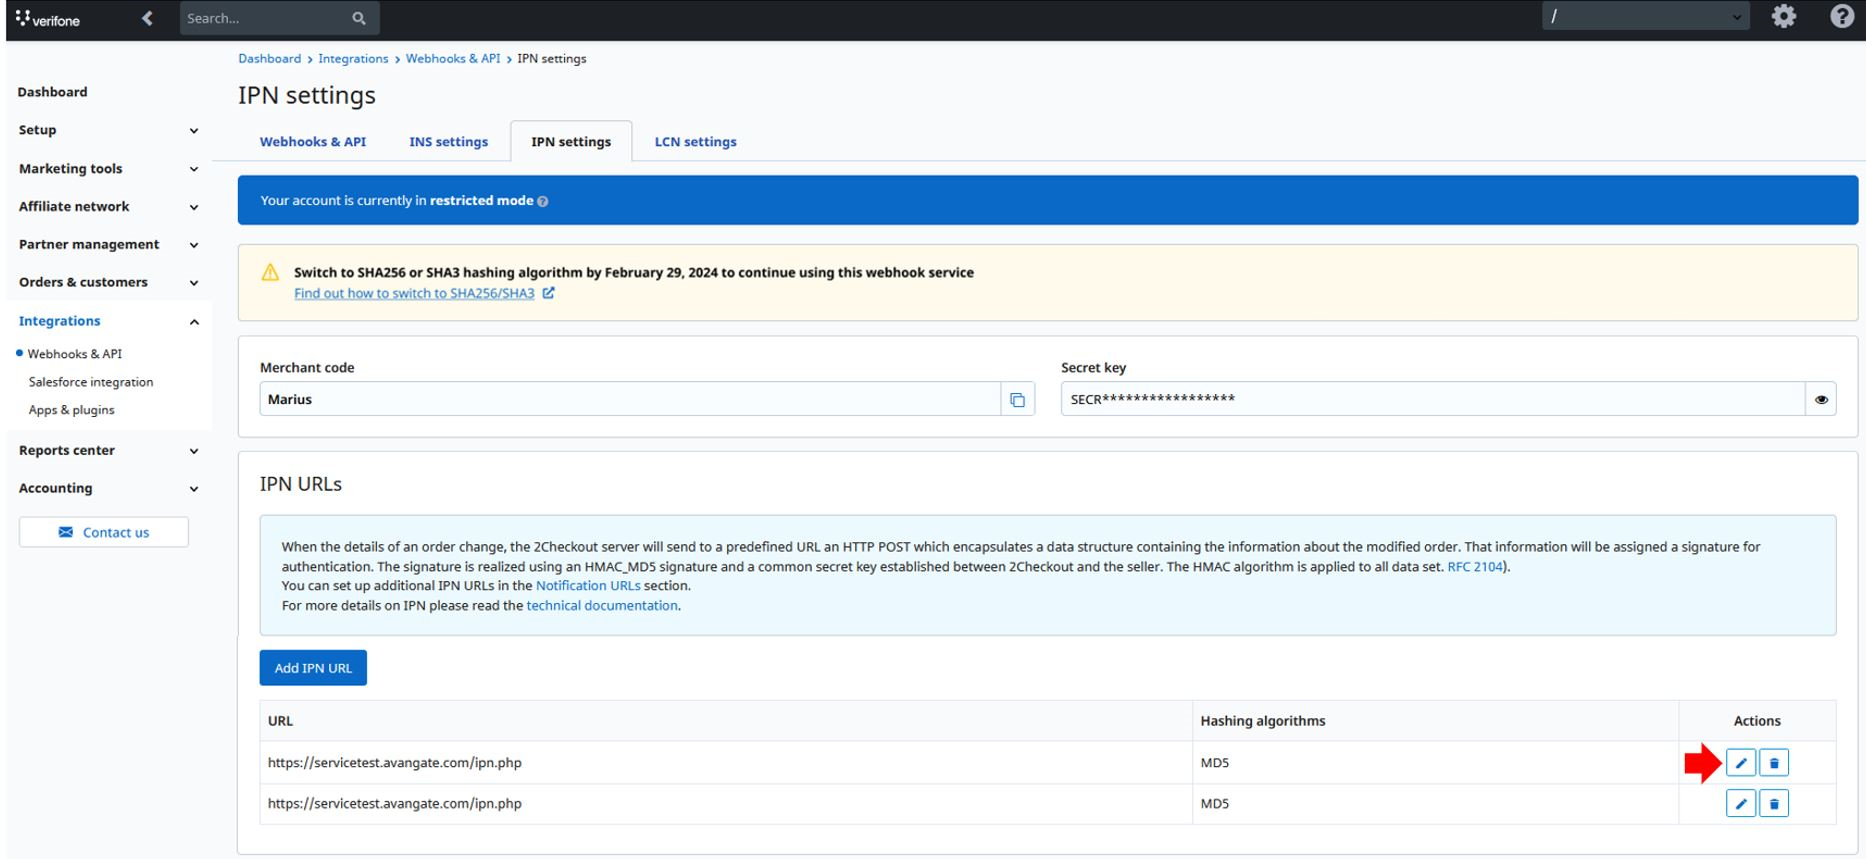
- Click on the Edit button to edit an existing URL corresponding to your default IPN listener.

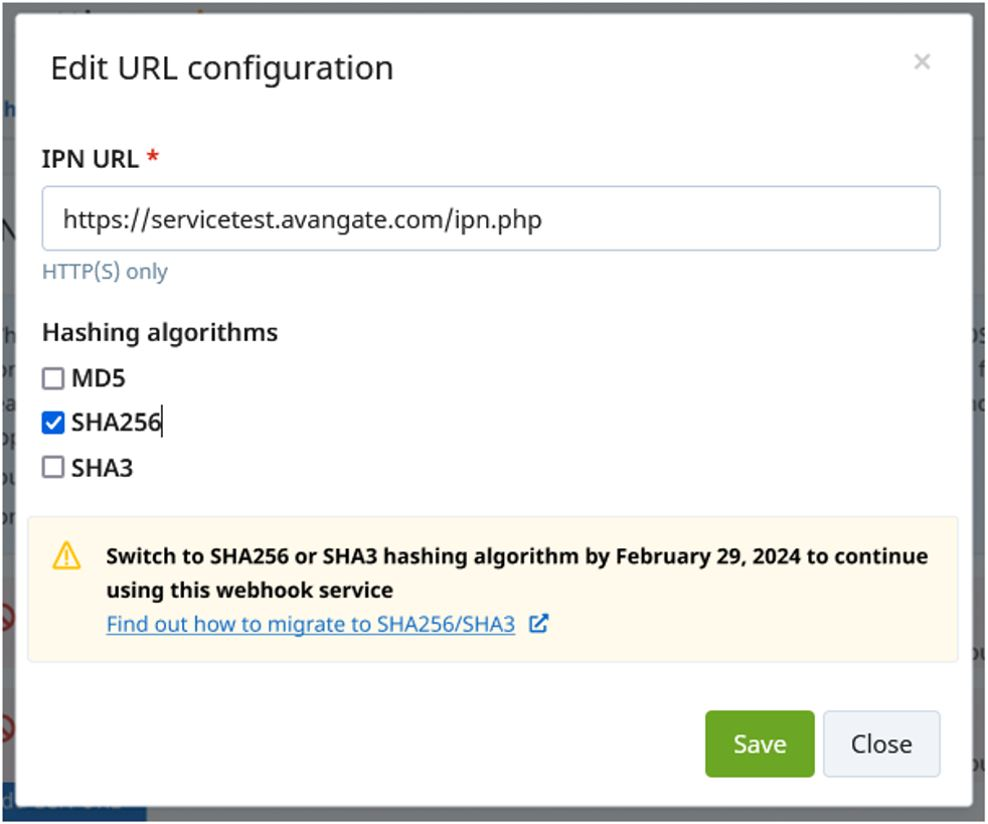
- Select the additional hash algorithm. Click on Save.
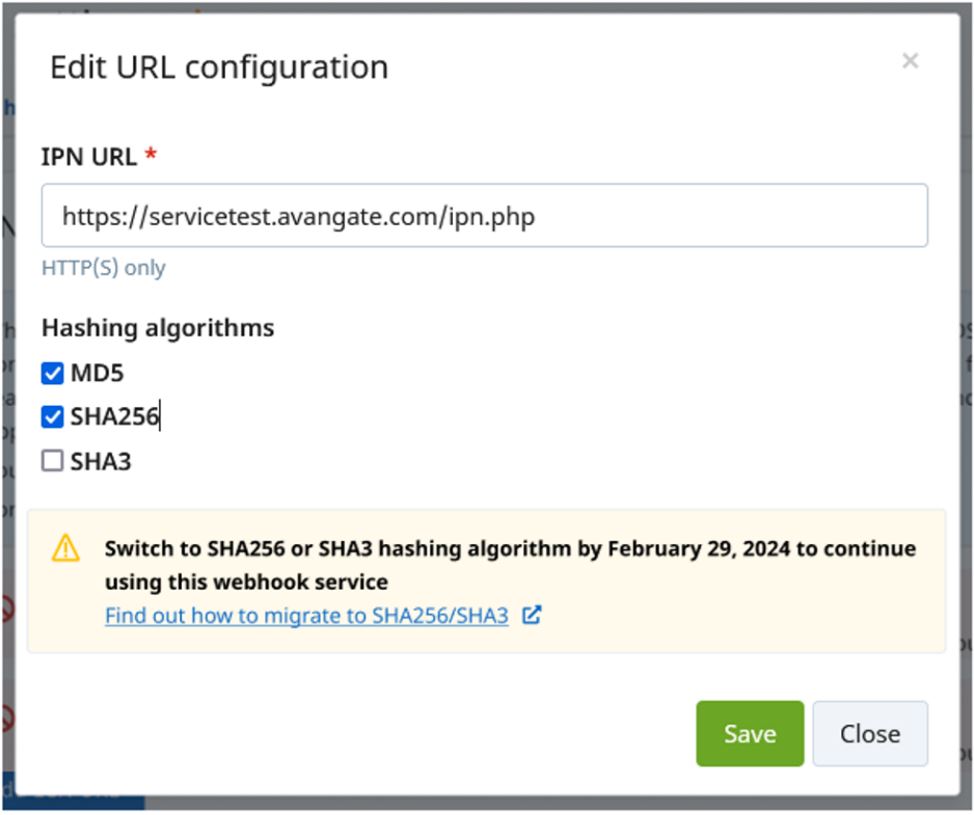
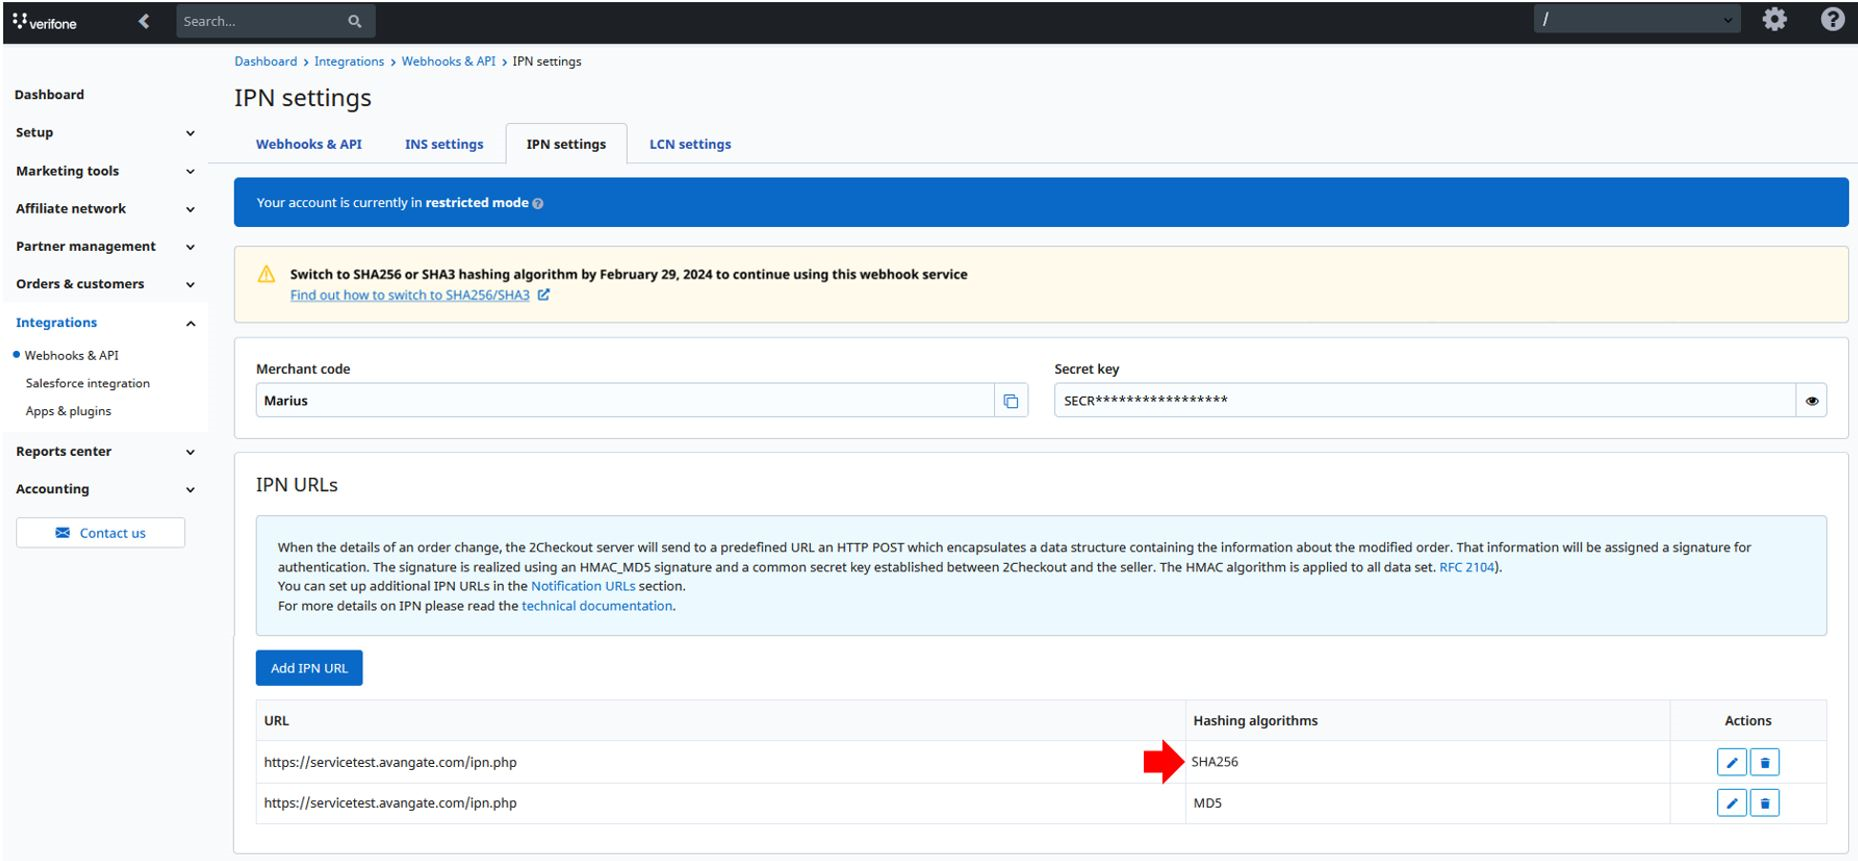
- The changes in the hashing algorithm will be displayed in the URL list.

- After you successfully manage to validate the notification using the SHA2/SHA3 hash algorithm, remove the MD5 hash from your endpoint.
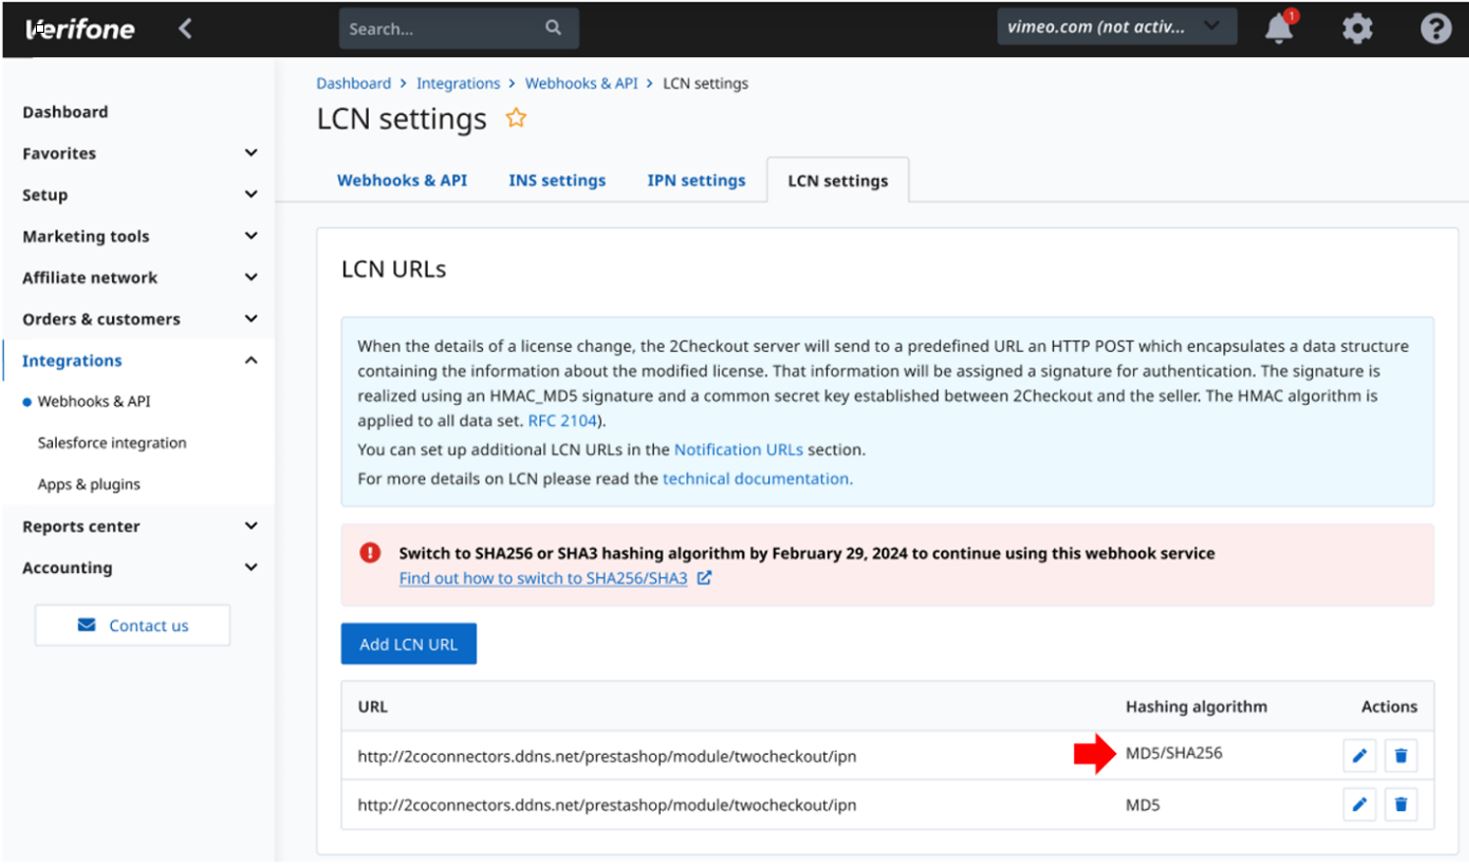
This approach might be suitable for merchants that have been selling through the platform and have been using LCNs. This will allow a smooth transition from one hashing algorithm to another, as both will be sent in the LCN until August 15th, 2024.
- Click on the Edit button to edit an existing URL corresponding to your default LCN listener.

- Select the additional hash algorithm. Click on Save.
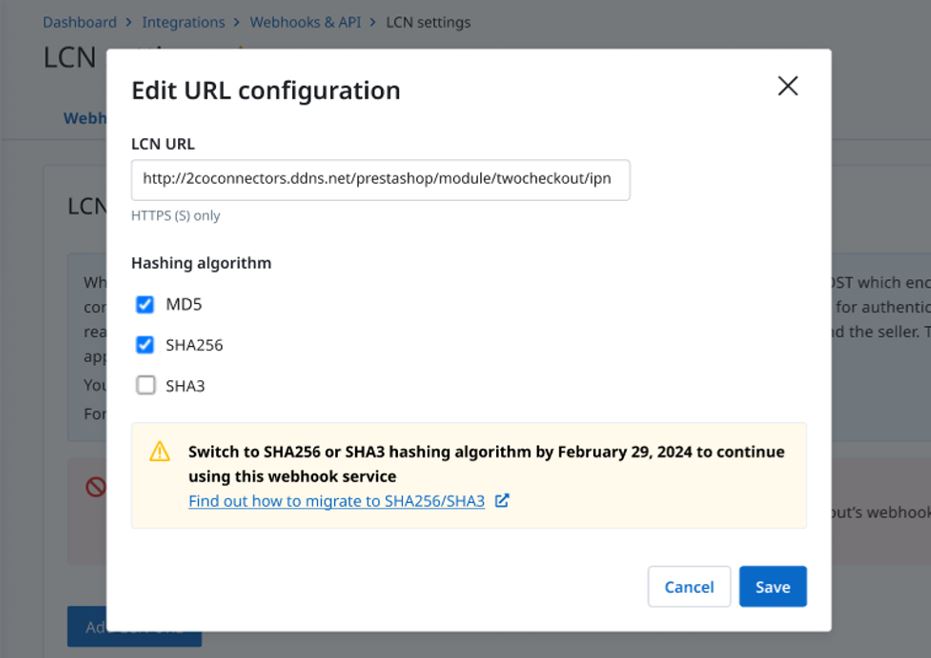
- The changes in the hashing algorithm will be displayed in the URL list.
- After you successfully manage to validate the notification using the SHA2/SHA3 hash algorithm, remove the MD5 hash from your endpoint.
Replace the MD5 hash with SHA2/SHA3
This approach is best if you are using a sandbox environment, or you can afford some service interruption. This is because we will no longer send MD5 hash to this IPN endpoint, and you will need to adapt your integration to support the SHA2/SHA3 algorithm. Check this link for more details.
- Click on the Edit button to edit an existing endpoint corresponding to your default INS listener.
- Selecting any of the SHA algorithms automatically deselects the MD5 hash. Click on Save endpoint.
- The changes in the hashing algorithm will be displayed in the endpoint list.
- After setting up the URL for the new endpoint, navigate to the trigger list associated with the endpoint and click on Edit to edit the trigger.
- On the next page, scroll down to the Parameters section, deselect the md5_hash parameter, select the hash parameter, and click on Save trigger.
- Optionally, for enhanced security of your webhooks, you can validate the hash received in INS. Click here to learn how.
- Click on the Edit button to edit an existing URL corresponding to your default IPN listener.
- Select the additional hash algorithm and deselect the MD5 hash. Click on Save.
- The changes in the hashing algorithm will be displayed in the URL list.
- Click on the Edit button to edit an existing URL corresponding to your default LCN listener.

- Select the additional hash algorithm and deselect the MD5 hash. Click on Save.

- The changes in the hashing algorithm will be displayed in the URL list.
Troubleshooting
Even after upgrading your INS/IPN/LCN webhooks from MD5 to the SHA2/SHA3 algorithm, you can make sure your daily operations are not impacted, by following these steps:
- Log into your 2Checkout account.
-
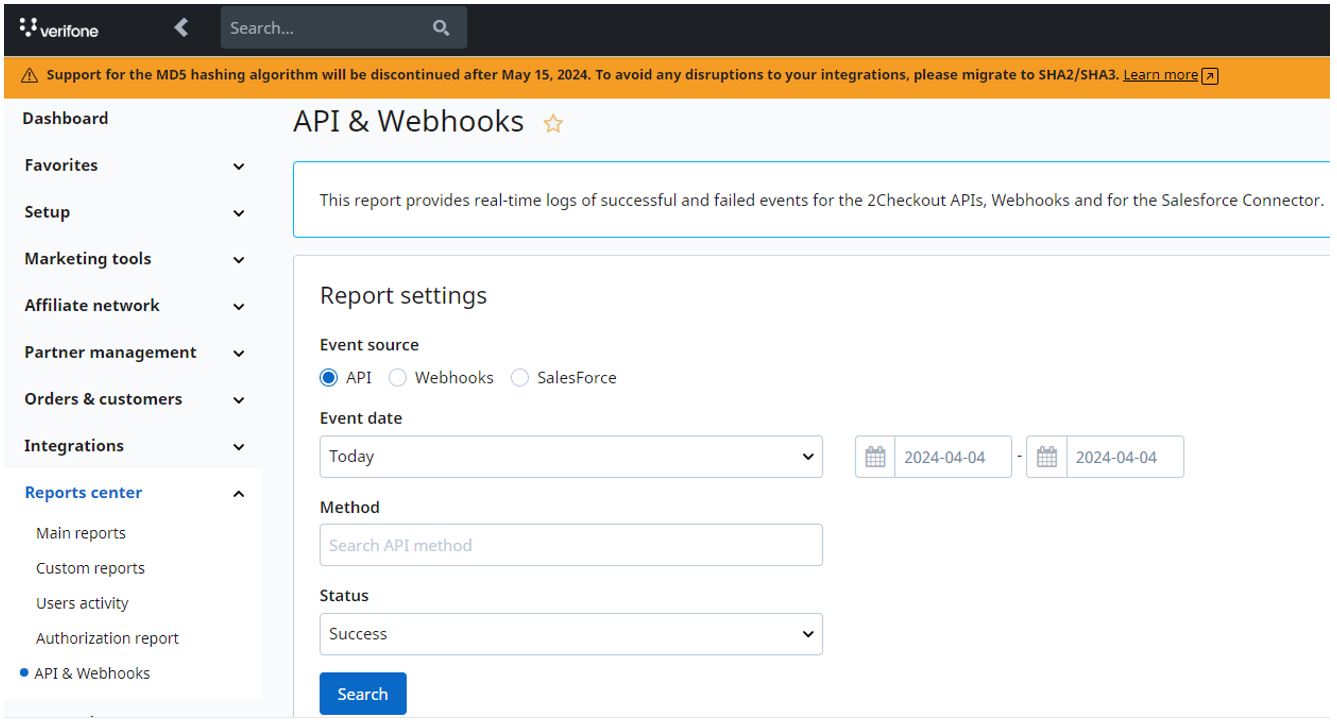
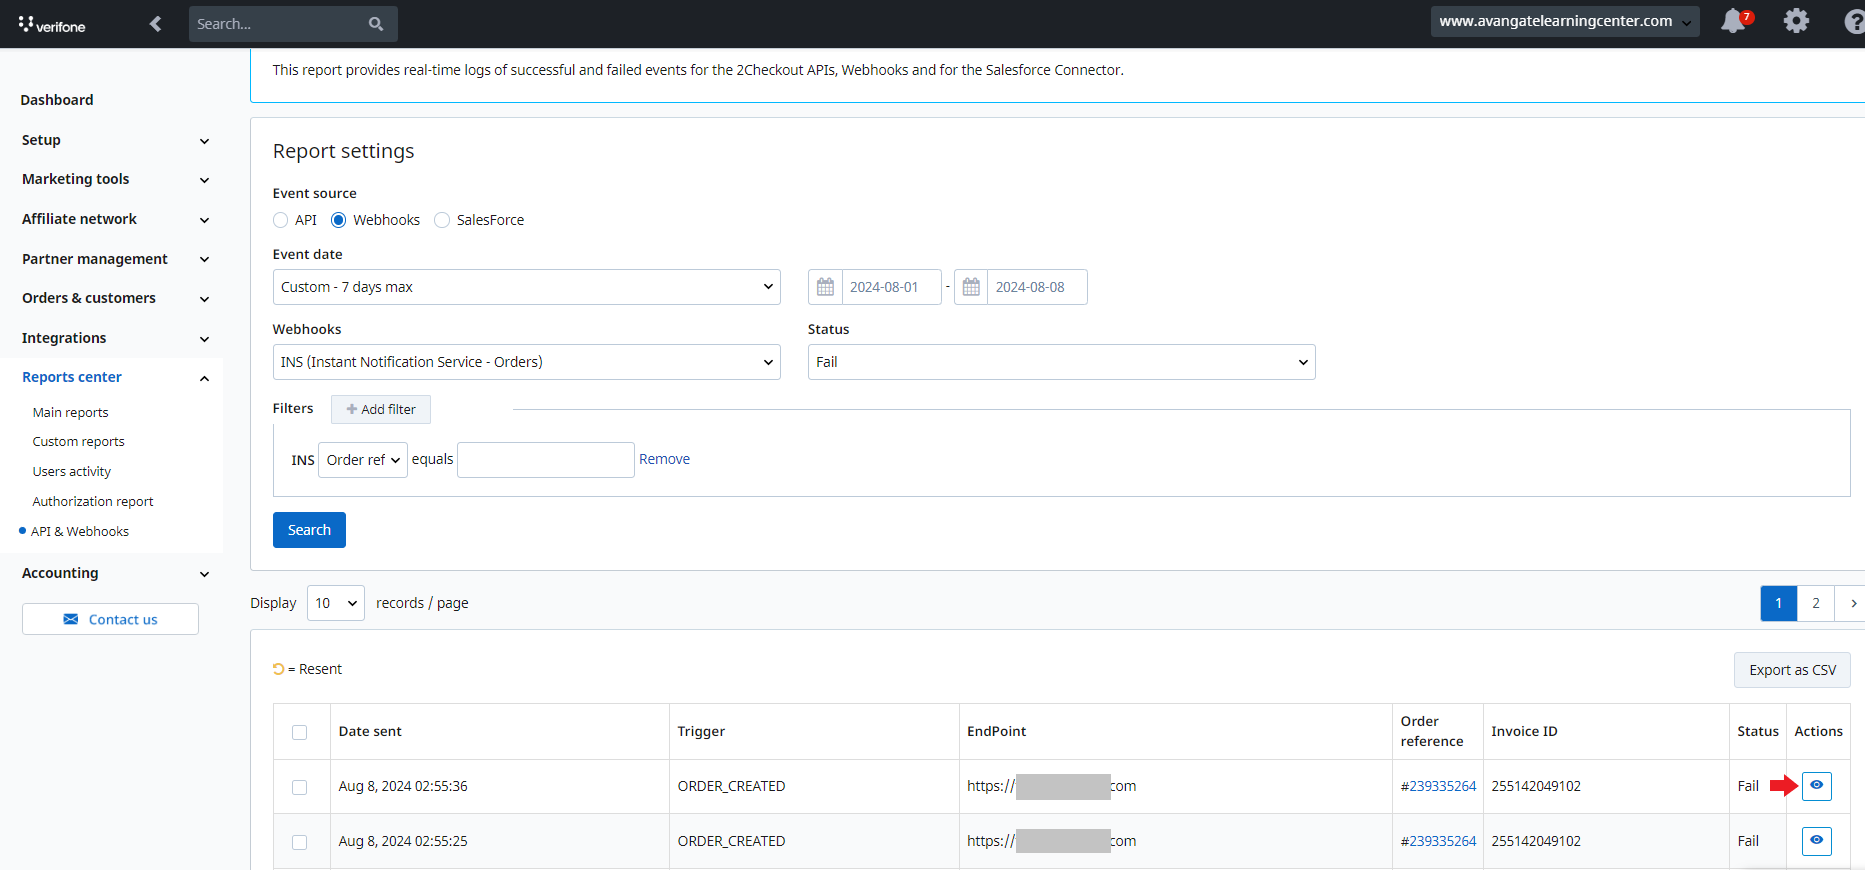
Navigate to Dashboard > Reports center > API & Webhooks.
-
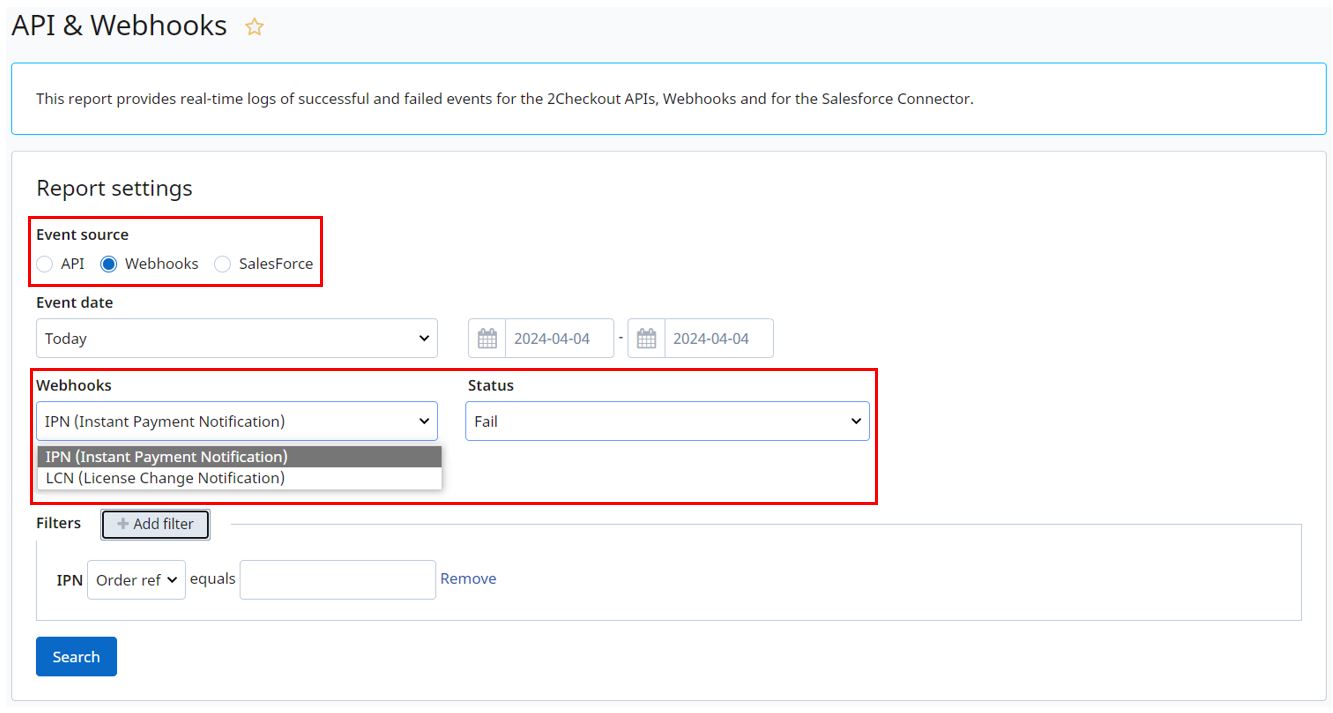
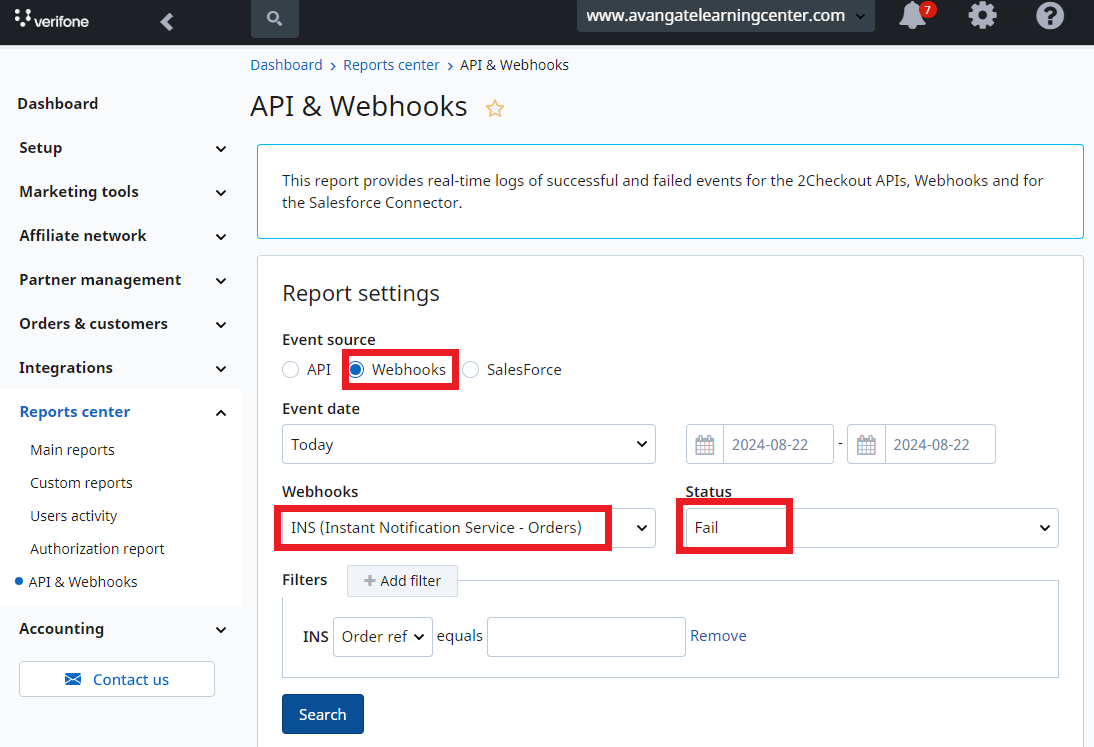
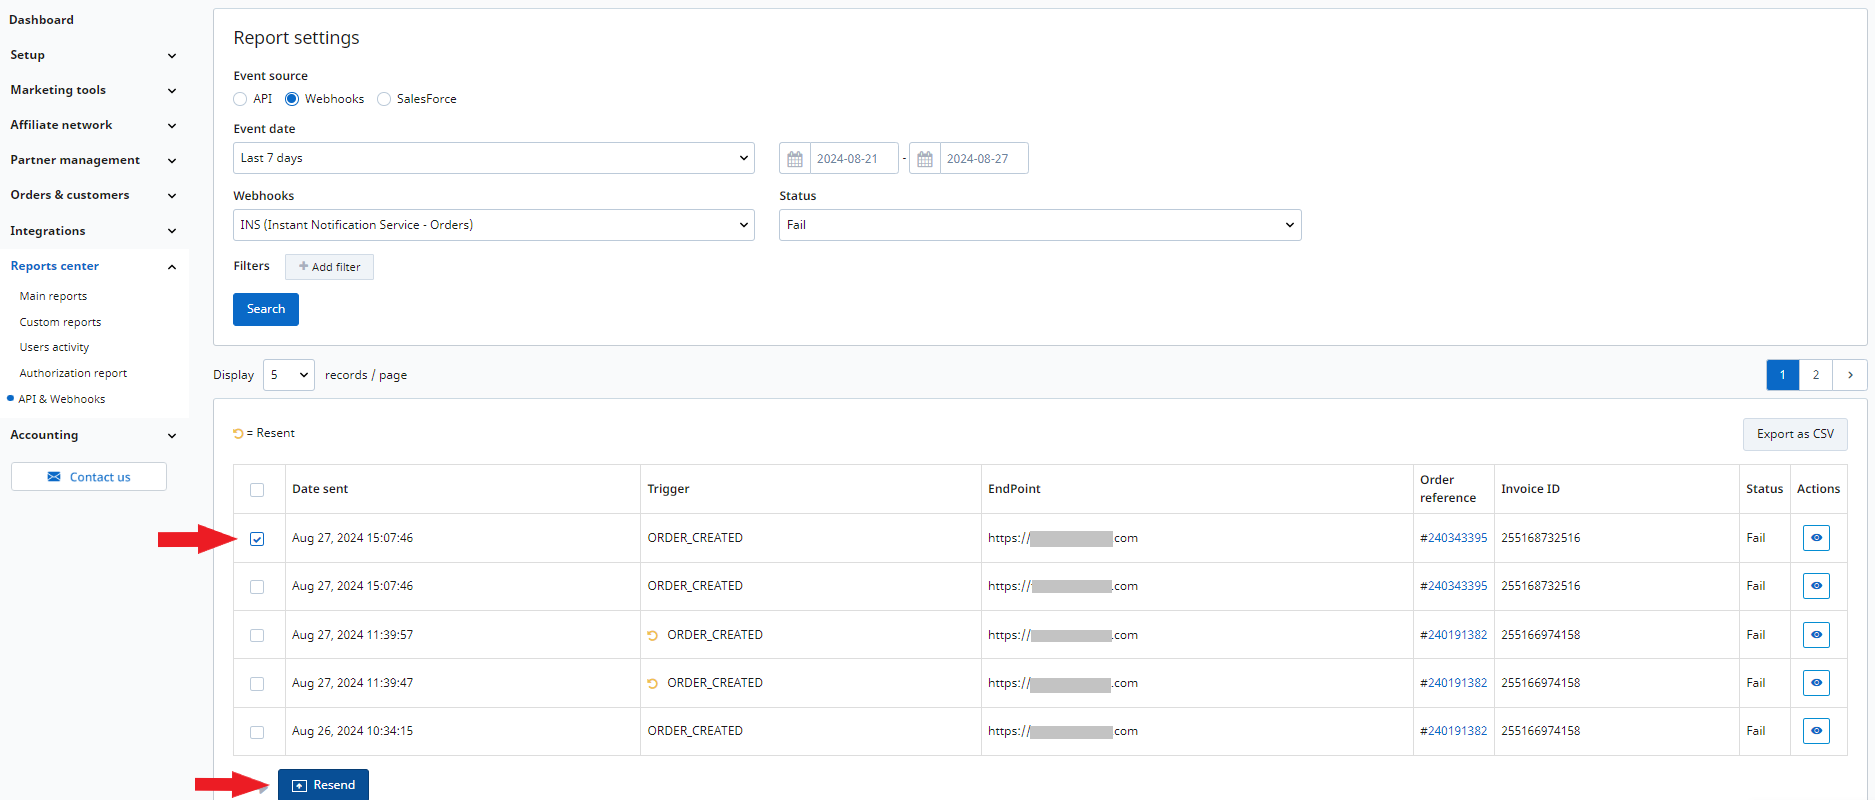
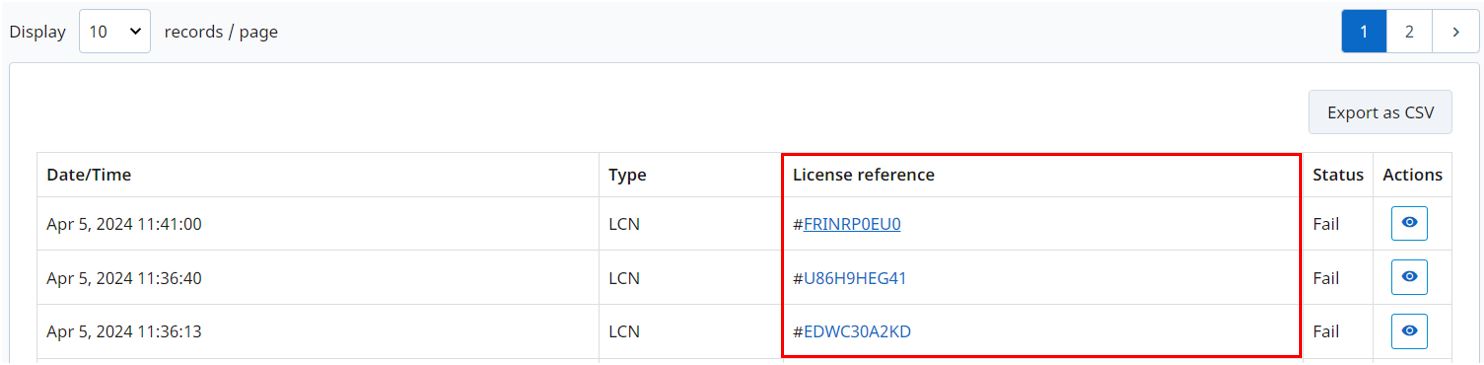
Select Webhooks as Event source, IPN (Instant Payment Notification), LNC (License Change Notification), or INS (Instant Notification Service) as Webhooks and Fail as Status. You can also filter your search by INS/IPN/LCN Order reference. Press on Search.
-
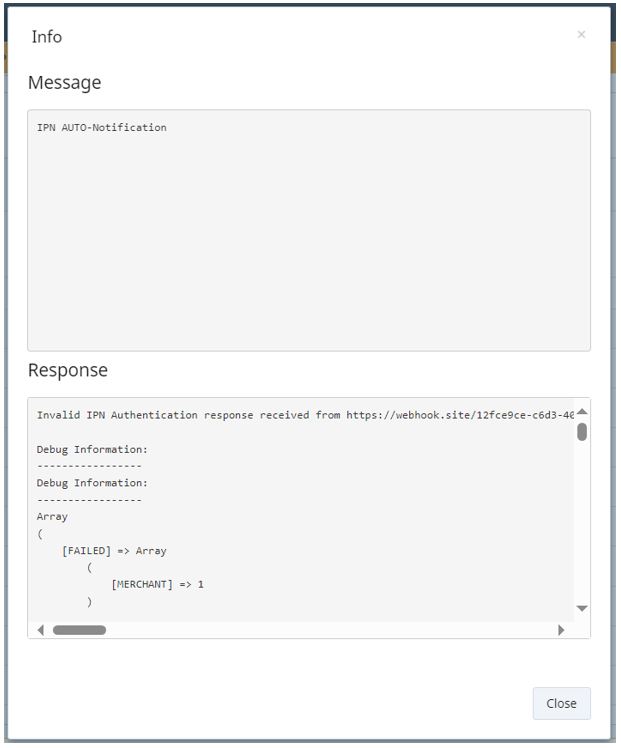
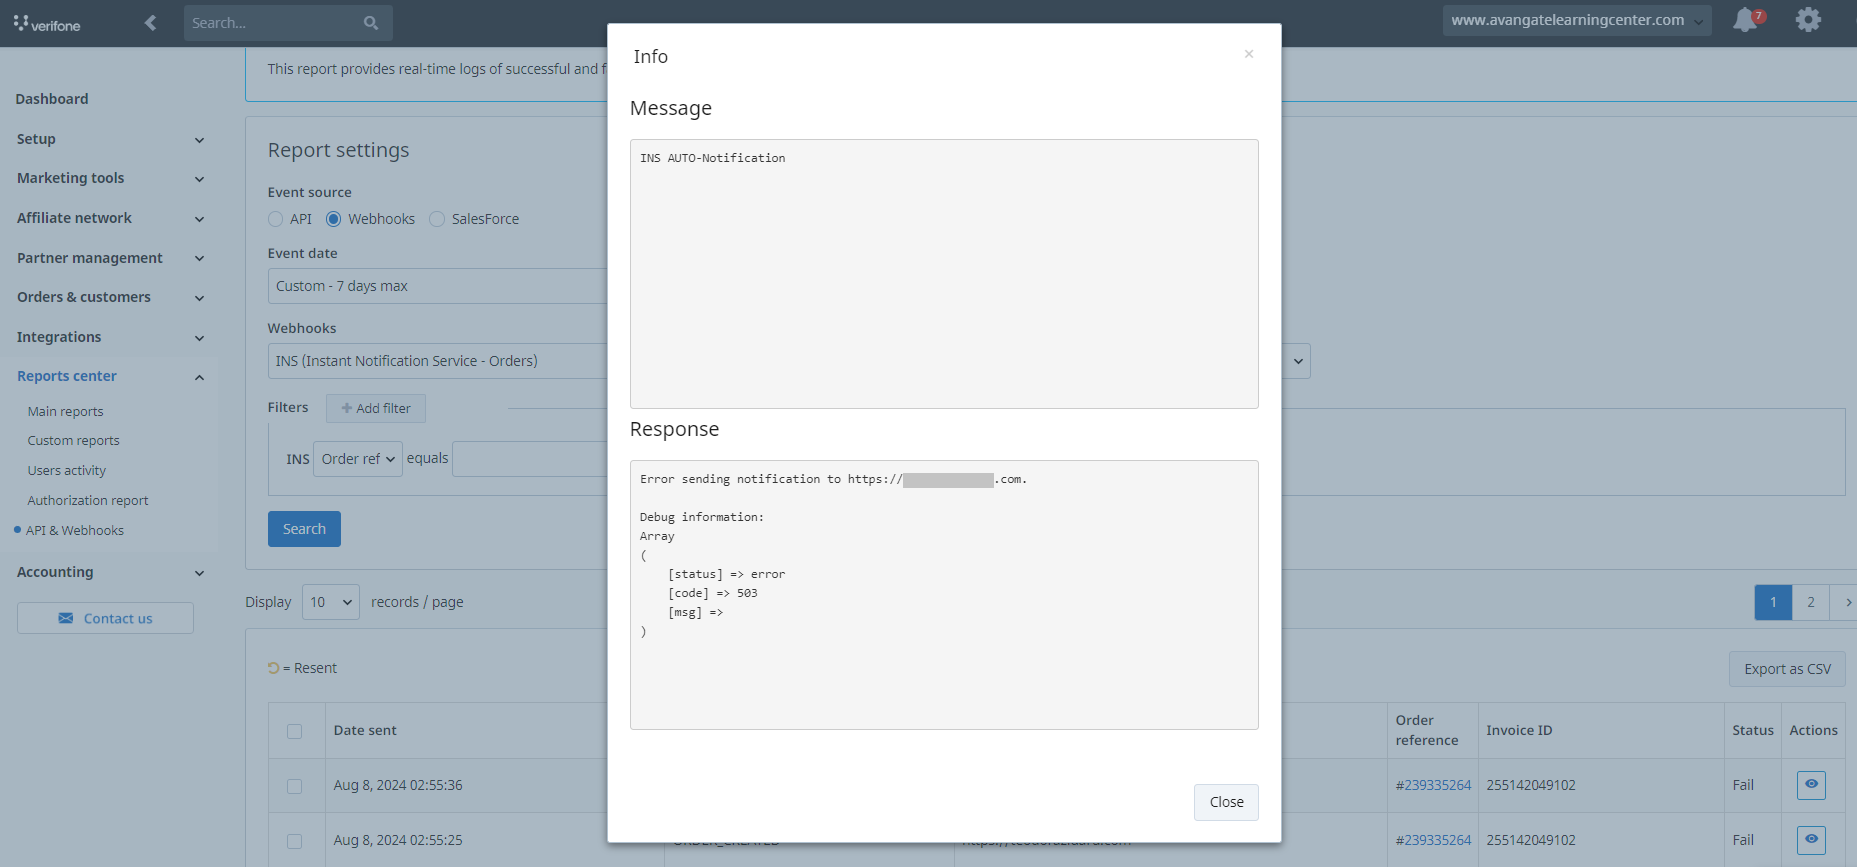
The failed INS(s)/IPN(s)/LCN(s) will be displayed. Select the Action icon to see more information.
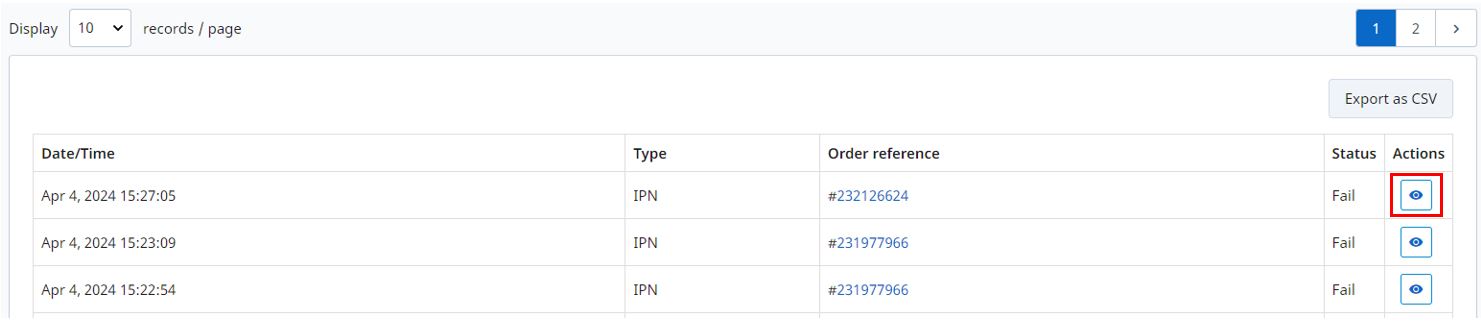
-
The retry mechanism is only for the failed INS/IPN/LCN. You can see which one failed via the report and request/response details of each webhook.
- Additionally, on the order level, you can click on Resend IPN and on the subscription level, you can click on Resend LCN feature in debug mode, to be able to see how your setup behaves:
Resend INS
-
Select the failed webhook and click on Resend.
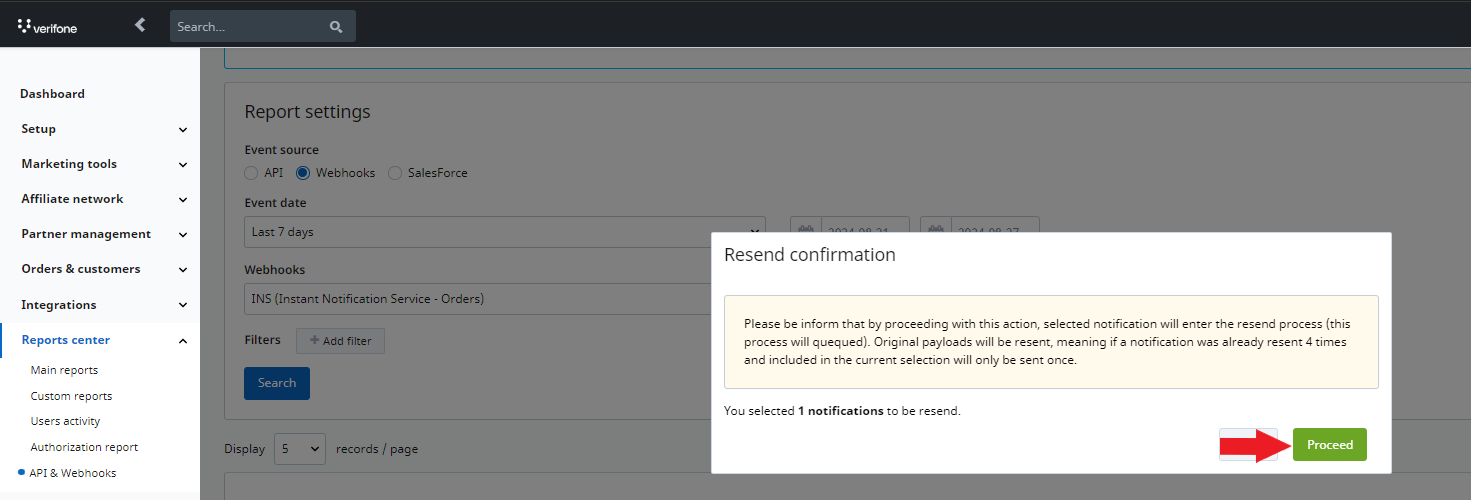
- Click on Proceed for the INS webhook to be resent.
Resend IPN
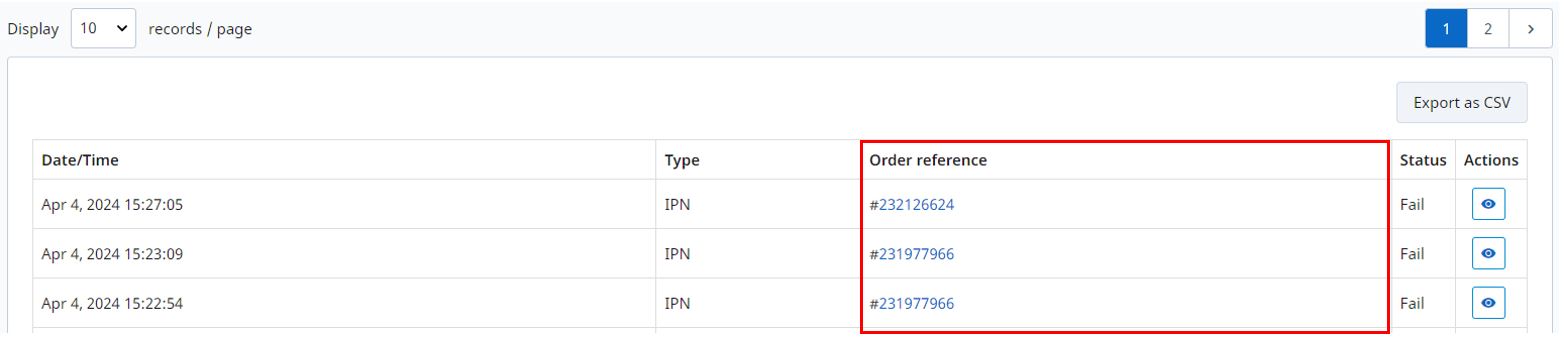
- Click on the order number, from the Order reference list.
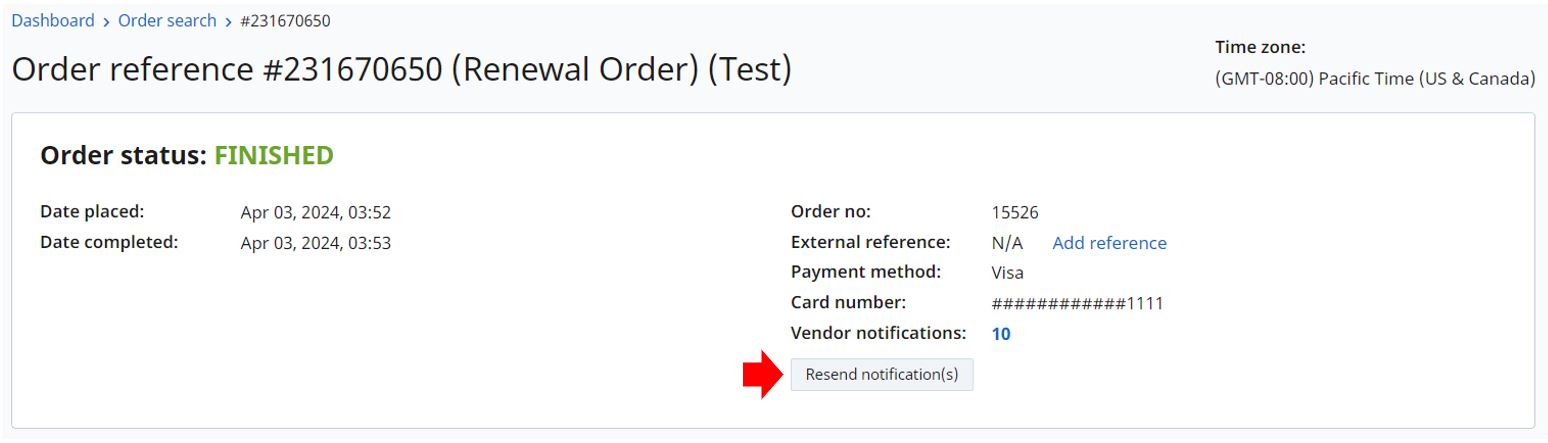
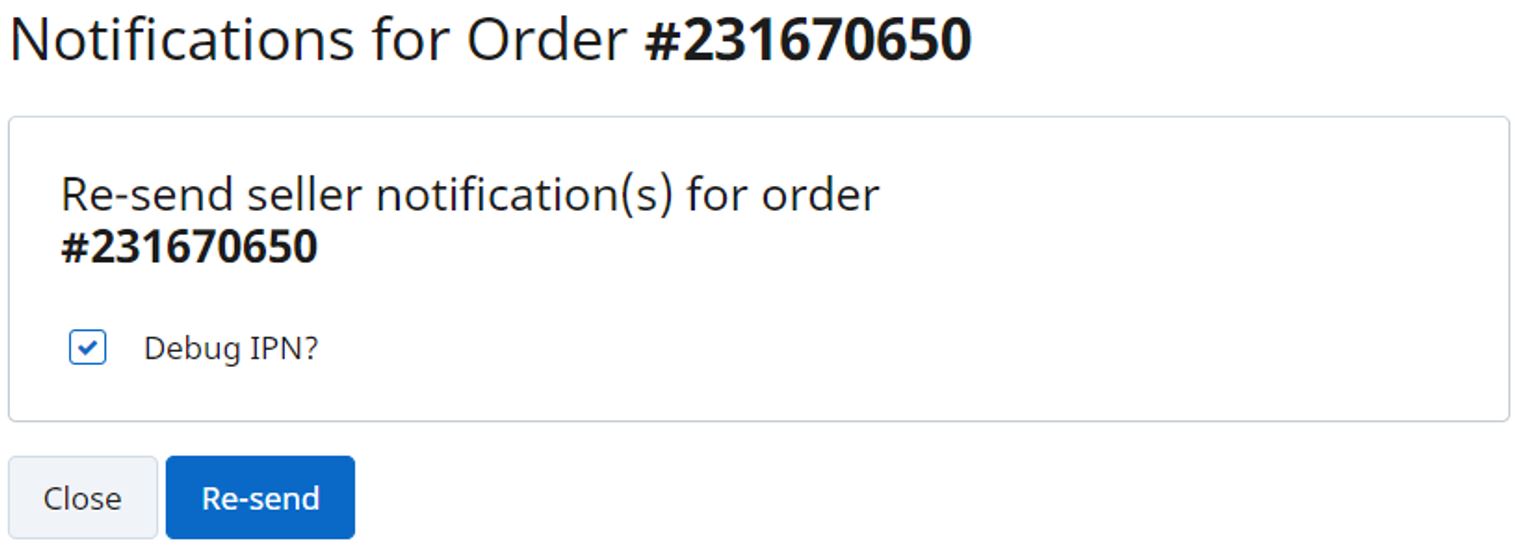
- Select Resend notification(s).
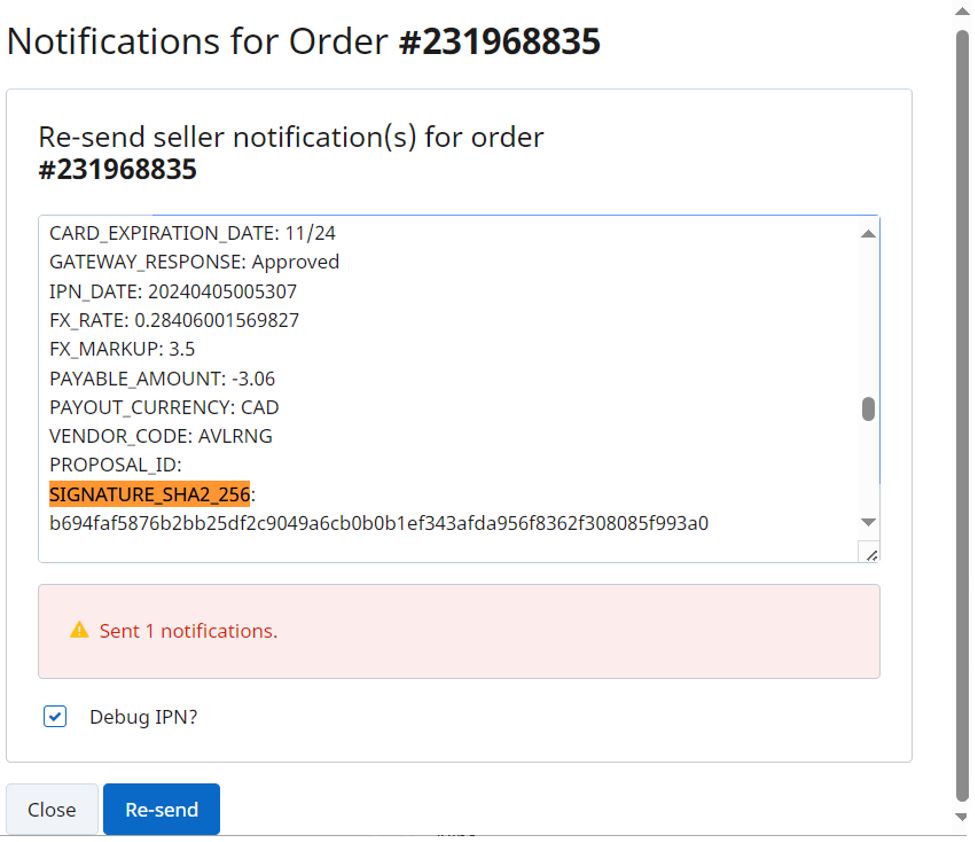
- Mark the Debug IPN? checkbox and click on Re-send.
- On the debugger you can see why the IPN failed and what hash signature was used.
-
Resend LCN
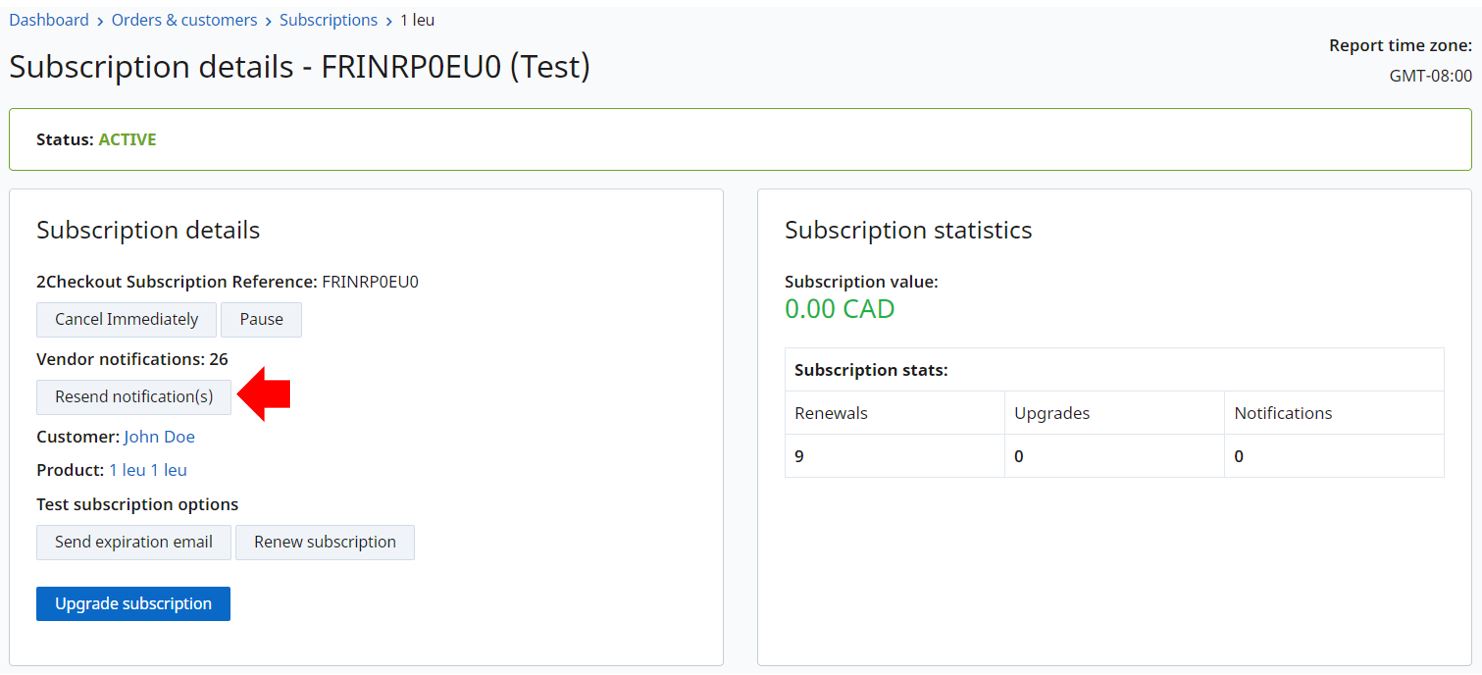
- Click on the license number, from the License reference list.
- Select Resend notification(s).
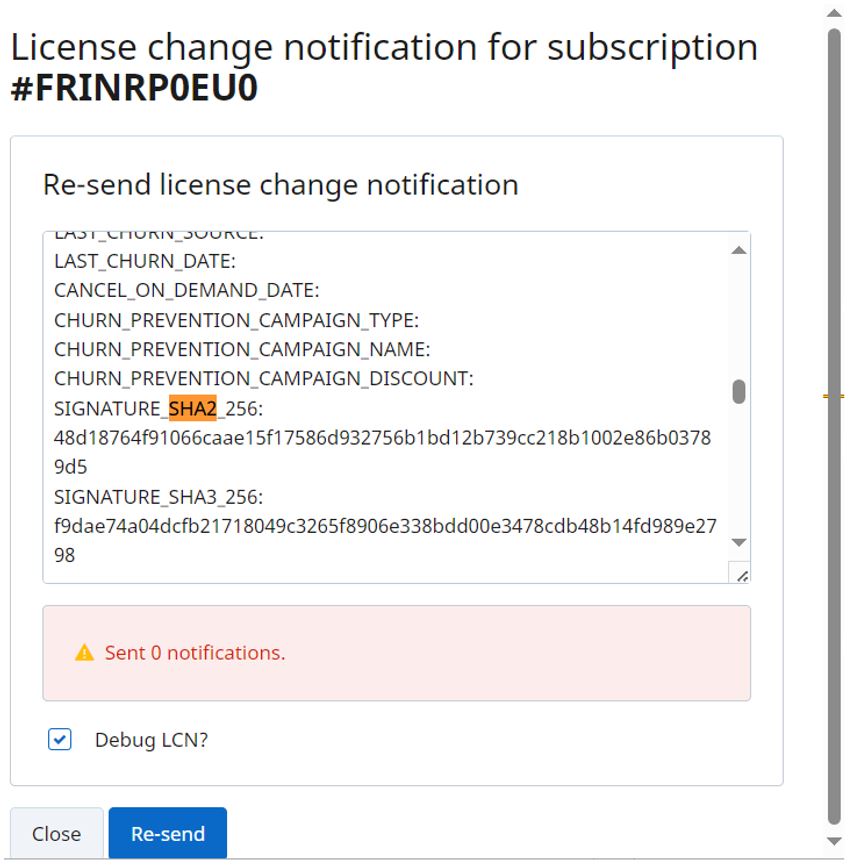
- Mark the Debug LCN? checkbox and click on Re-send.
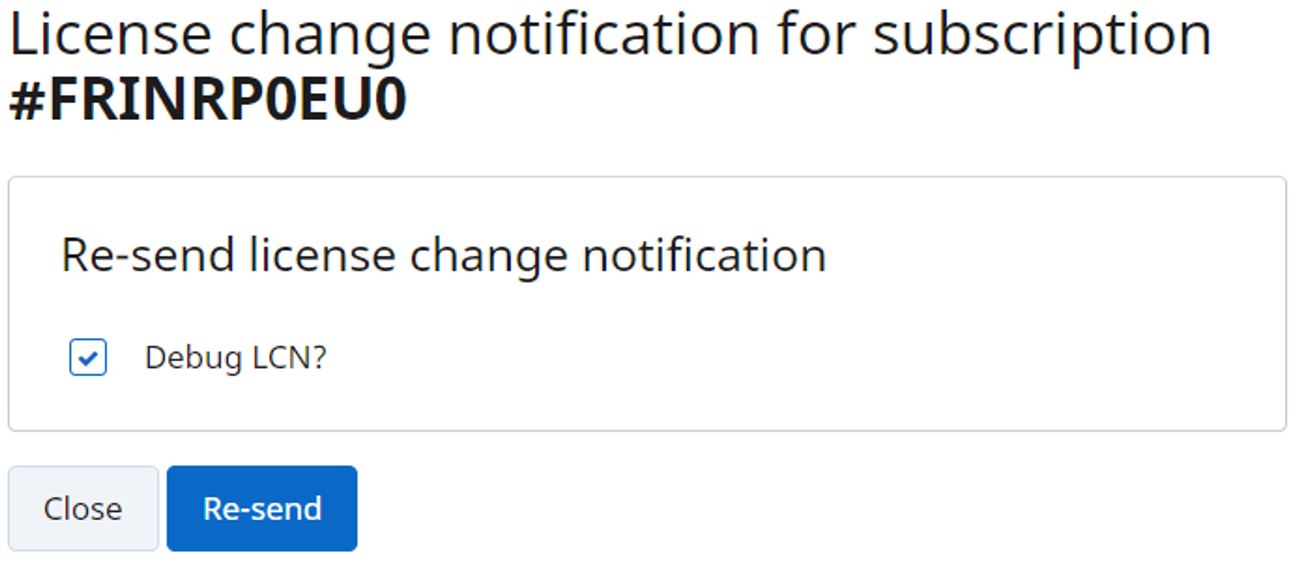
- On the debugger you can see why the LCN failed and what hash signature was used.
- Click on the license number, from the License reference list.