Mandatory 2Checkout information in custom shopper emails
As a Merchant of Record (MoR), 2Checkout is legally responsible for complying with the scheme, acquirer, as well as local/regional consumer protection regulations, when it comes to communication distributed to shoppers through emails triggered by our platform.
| Item | Content can be customized | Requirement | |
|---|---|---|---|
| Email sender address | Yes | The email sender address can be personalized with the vendor’s name, while keeping the 2Checkout domain. This will make it easy for the shopper to recognize where the email is coming from and ensure that if they reply, a ticket will be submitted to the 2Checkout Support team. |
e.g., vendor@2checkout.com |
| Do not use subdomains | e.g., vendor@subdomain.2checkout.com | ||
| Email sender name/alias | Yes | The sender must be 2Checkout or include the 2Checkout name | e.g., [Vendor_name]/2Checkout |
| Header | No | Display the 2Checkout logo | The vendor can add their logo, but not remove the 2Checkout logo. From a UX perspective, it is recommended that the two logos be displayed at the same height. |
| Email copy (text) | Yes | Clearly state the reason for sending the email | |
| Clear CTA button | e.g., Complete your order, Retry payment, Renew subscription | ||
| Link to myAccount for transactional emails, such as payment receipt emails, automatic renewal reminders | The shopper should be able to find an easy path to request a refund or cancel auto-renewal for an order they have placed or manage their subscription (in terms of its recurring status). | ||
| Support section | No | Section title | 'Need help with your order?' (recommended by Shopper Support team) |
| 2Checkout contact support information and disclaimer | ‘If you have any questions or need assistance for topics related to order processing and returns, please contact our support team at support@2checkout.com.’ | ||
| Footer | No | 2Checkout logo | |
| 2Checkout MOR disclaimer | ‘Your order is securely processed by our Merchant of Record and reseller, 2Checkout.’ | ||
| 2Checkout's name and address | Verifone Payments BV dba 2Checkout Mail address: P.O. Box 11334, 1001 GH Amsterdam Singel 250, Amsterdam, Netherlands +31 88 0000008 Avangate Inc dba 2Checkout Mail address: 1170 Great Oaks Way no. 210, 30022 Alpharetta, Georgia, USA Note: Depending on the processing route, 2Checkout can also act using the Avangate INC entity. For the platform default emails, the entity can be displayed dynamically from the back end. For emails customized by vendors without support from 2Checkout Professional Services, we recommend referencing both entities. |
||
| Terms & Conditions link | https://www.2co.com/terms.html | ||
| Privacy Policy link | https://www.2co.com/privacy.html | ||
| Unsubscribe link for lead management and manual renewal reminders | Emails that are part of the service delivery (e.g., order confirmation emails, payment receipt emails, electronic delivery emails, shopper invoices, automatic renewal reminders, etc.) should not include the option to unsubscribe. | ||
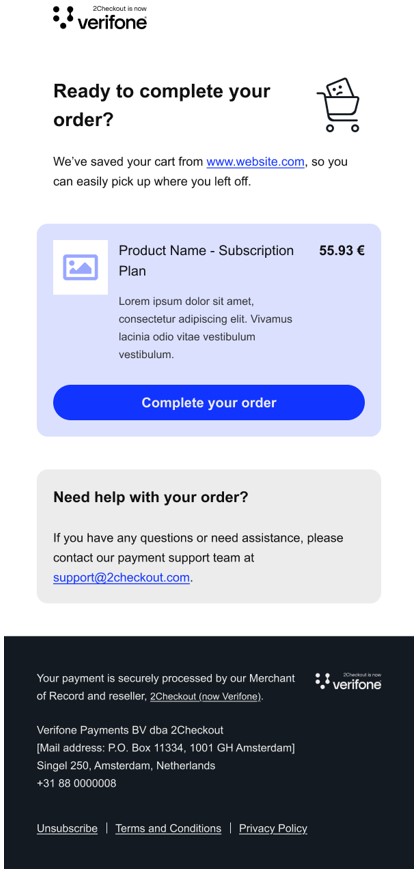
Example of a compliant follow-up email: