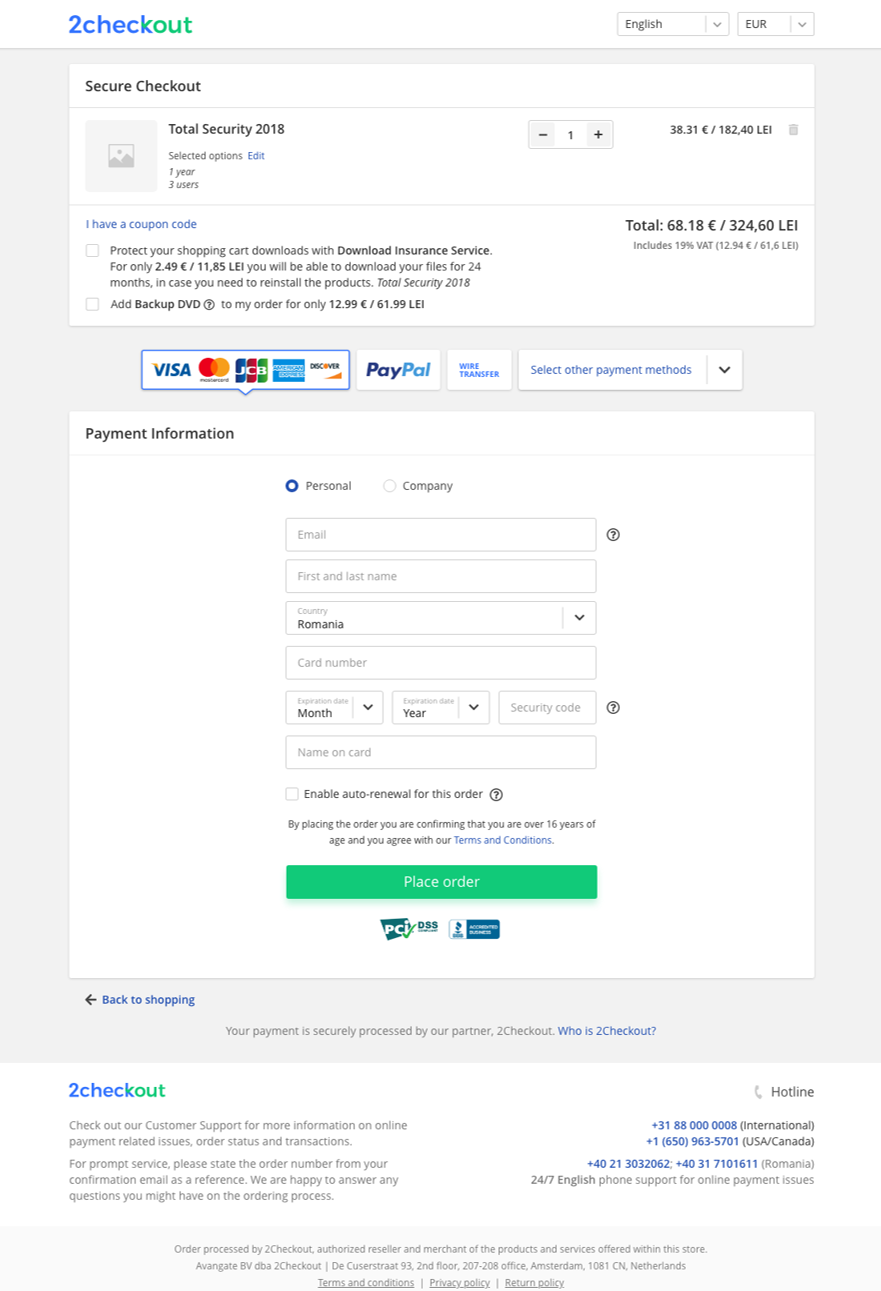
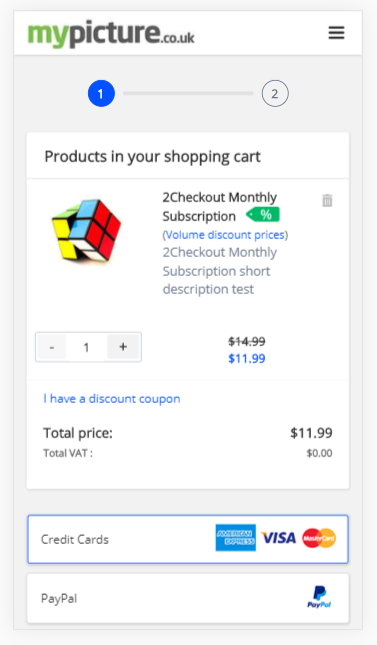
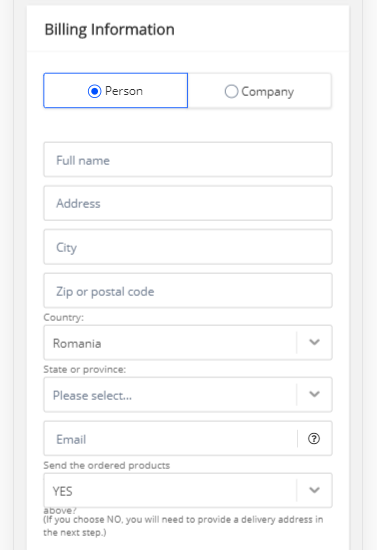
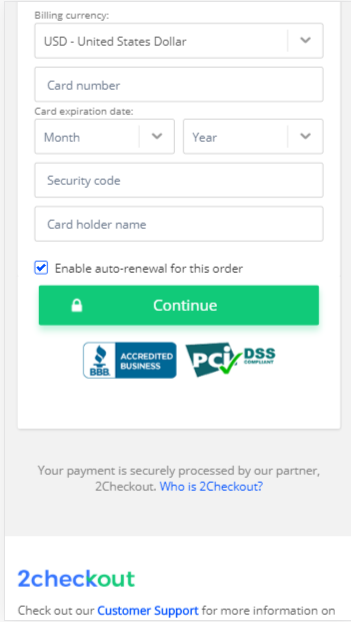
Payment flow with Apple Pay

Overview

The following payment method is specific to Apple devices.

Availability

Available for all 2Checkout merchants (2Sell, 2Subscribe, 2Monetize & 4Enterprise) using all or any of our ordering engines (hosted shopping cart, ConvertPlus, and InLine).

For more information on availability, see the main documentation page for Apple Pay here.

Requirements

Shoppers can use any device that supports Apple Pay and is located in one of the selected list of countries.

For more information on requirements, see the main documentation page for Apple Pay here.

Activation

For activation, you need to have Apple Pay enabled on your 2Checkout account. Contact the Merchant Support team in order to enable this. After 2Checkout sets up our domain, we will provide you with a domain verification file.

Host your domain verification file at the following path on our server: https://[DOMAIN_NAME]/.well-known/apple-developer-merchantid-domain-association.

Setting up Apple Pay

To set up Apple Pay, you need to build the frontend component and to initialize the session using the startApplePaySession method providing the “validationUrl” to the payload. Once the token is received from the frontend component, it has to be sent to the decryptApplePayData endpoint in the 2Checkout API. This will return a data response from Apple Pay that needs to be used in the placeOrder call.

Frontend component

In order to set up an Apple Pay session in the shopper’s browser, the following steps are needed:

  1. Include the Apple Pay library.

    <script src=https://applepay.cdn-apple.com/jsapi/v1/apple-pay-sdk.js></script>
  2. Add the Apple Pay button.

    <div class="apple-pay-button apple-pay-button-black" onclick="onApplePayButtonClicked()"></div>
    <style>
        .apple-pay-button {
            display: inline-block;
            -webkit-appearance: -apple-pay-button;
            -apple-pay-button-type: buy; /* Use any supported button type. */
        }
        .apple-pay-button-black {
            -apple-pay-button-style: black;
        }
        .apple-pay-button-white {
            -apple-pay-button-style: white;
        }
        .apple-pay-button-white-with-line {
            -apple-pay-button-style: white-outline;
        }
    </style>
    
  3. Set up the Apple Pay function and create a session instance.

    function onApplePayButtonClicked() { 
        // Ensure browser supports Apple Pay
        if (!ApplePaySession) {
            return;
        }
    
        // Define ApplePayPaymentRequest
       /* Define the country code and currency being sent to the library, as well as 
       the list of supported networks and the descriptor and amount of the transaction.*/
        const request = {
            "countryCode": "US",
            "currencyCode": "USD",
            "merchantCapabilities": [
                "supports3DS"
            ],
            "supportedNetworks": [
                "visa",
                "masterCard",
                "amex",
                "discover"
            ],
            "total": {
                "label": "Example Transaction",
                "type": "final",
                "amount": "0.01"
            }
        };
    
        // Create ApplePaySession
        const session = new ApplePaySession(3, request);
    
        session.onvalidatemerchant = async event => {
            // Call your own server to request a new merchant session (call 2checkout API /rest/6.0/payments/startapplepaysession)
            fetch("/startApplePay.php")
                .then(res => res.json()) // Parse response as JSON.
                .then(merchantSession => {
                    response = JSON.parse(merchantSession.ApplePaySessionData.response);
                    session.completeMerchantValidation(response);
                })
                .catch(err => {
                  console.error("Error fetching merchant session", err);
                });
        };
    
        session.onpaymentmethodselected = event => {
            // Define ApplePayPaymentMethodUpdate based on the selected payment method.
            // No updates or errors are needed, pass an empty object.
            const update = {
                newTotal: {
                    label: "Demo (Card is not charged)",
                    type: "final",
                    amount: "0.01"
                }
            }
            session.completePaymentMethodSelection(update);
        };
    
        session.onshippingmethodselected = event => {
            // Define ApplePayShippingMethodUpdate based on the selected shipping method.
            // No updates or errors are needed, pass an empty object. 
            const update = {
                newTotal: {
                    label: "Demo (Card is not charged)",
                    type: "final",
                    amount: "0.01"
                }
            }
            session.completeShippingMethodSelection(update);
        };
    
        session.onshippingcontactselected = event => {
            // Define ApplePayShippingContactUpdate based on the selected shipping contact.
            const update = {
                newTotal: {
                    label: "Demo (Card is not charged)",
                    type: "final",
                    amount: "0.01"
                }
            }
            session.completeShippingContactSelection(update);
        };
    
        session.onpaymentauthorized = event => {
            // Call your own server to request the Apply Pay token decryption and pass the decoded token to the place order call (call 2checkout APIs /rest/6.0/payments/decryptapplepaydata and /rest/6.0/orders/)
            // Define ApplePayPaymentAuthorizationResult based on the place order response
            payload = {
                token: event.payment.token,
            };
            fetch("/finishApplePay.php", {
                method: "POST",
                headers: {"Content-Type": "application/json"},
                body: JSON.stringify(payload),
            }).then((res) => res.json())
                .then((res) => {
                    if (res.Status.includes('AUTHRECEIVED', 'COMPLETE')) {
                      session.completePayment(session.STATUS_SUCCESS);
                    }
                    console.log("INFO - RECEIVED ECOM RESPONSE: ", res.Status);
                    })
                    .catch((err) => console.log(err));
        };
    
        session.oncancel = event => {
            // Payment cancelled by WebKit
        };
        session.begin();
    }
    

Backend component

  1. Initiate an Apple Pay session.

    Create an endpoint on your server to call to initiate an Apple Pay session. In order for a valid Apple Pay session to be created, an API call to the 2Checkout API needs to be sent, with the validationURL set to the ApplePay payment service.

    Protocol

    Endpoint

    REST POST https://api.2checkout.com/rest/6.0/payments/startapplepaysession
    JSON-RPC startApplePaySession
    SOAP startApplePaySession

    startApplePaySession payload

    {
       "validationURL":"https://apple-pay-gateway.apple.com/paymentservices/startSession"
    }
  2. Decrypt the Apple Pay token.

    Once the token is received from the frontend component, it has to be sent to the decryptApplePayData endpoint in the 2Checkout API. This will return a data response from Apple Pay that needs to be used in the placeOrder call.

    Protocol

    Endpoint

    REST POST api.2checkout.com/rest/6.0/payments/decryptapplepaydata
    JSON-RPC decryptApplePayData
    SOAP decryptApplePayData

    decryptApplePayData payload

    BODY: (ApplePayData property value should be the event.payment.token from the onpaymentauthorized event)

    {
       "ApplePayData":"543a07601ed9f8b8ee226e9630a24e2a91da8fdb08e6786fa02bf628f395bb91"
    }
  3. Place the order.

    Once the Apple Pay data is received from 2Checkout, this needs to be used in the Payment Method object of the Payment Details object in the API call to place an order.

    Protocol

    Endpoint

    REST POST https://api.2checkout.com/rest/6.0/orders
    JSON-RPC placeOrder
    SOAP placeOrder
    {
       "Items":[
          {
             "Code":"5DCB30C6B0",
             "Quantity":1
          }
       ],
       "BillingDetails":{
          "Email":"example@email.com",
          "FirstName":"Customer First Name",
          "LastName":"Customer Last Name",
          "CountryCode":"US",
          "State":"California",
          "City":"San Francisco",
          "Address1":"Example Street",
          "Zip":"90210"
       },
       "PaymentDetails":{
          "Type":"APPLE_PAY",
          "Currency":"USD",
          "CustomerIP":"10.10.10.10",
          "PaymentMethod":{
             "ApplePayToken":"ApplePayDataToken"
          }
       },
       "Language":"en",
       "Country":"US",
       "CustomerIP":"10.10.10.10",
       "Source":"Website",
       "ExternalCustomerReference":"externalCustomerId",
       "Currency":"USD",
       "MachineId":"123456789"
    }

Visa compliance trial email

Overview

2Checkout automatically sends out the Visa compliance trial email to shoppers with confirmation and details on their trial – information regarding trial period duration, trial expiration, following billing date, following billing amount, and a link to myAccount for the shopper to be able to cancel the following automatic charge.

Availability

All 2Checkout accounts.

Workflow

2Checkout sends the Visa compliance trial email if you offer free or promotional trial subscriptions, to prevent charge disputes and ensure compliance with the card networks’ requirements. Additional details can be found in the official Visa published requirements.

Visa compliance trial email content

When a customer enrolls for a free or promotional period trial, the following information must be included in the email:

  • Trial period duration
  • Trial expiration
  • Following billing date
  • Following billing amount
  • A link to myAccount for the shopper to be able to cancel the following automatic charge

Sample compliance trial email notification

visa compliance trial email

Is this the only email my shoppers receive after placing an order?

2Checkout can send the electronic delivery email either standalone or combined with the payment receipt notification (in one single email).

Depending on your account's setup, for each order containing at least one product configured with 2Checkout delivery your shoppers can receive:

  • Default: One email containing both the payment receipt and the electronic delivery messages
  • Two email notifications: The payment receipt and the electronic delivery messages, separately
  • Three email notifications: An order confirmation email, plus the payment receipt and the electronic delivery messages, separately

Contact 2Checkout to change your default configuration if you find another setup better suited for your customers.

Preview and test email

To preview and test the subscription email notification template, follow these steps:

  1. Log in to your 2Checkout Merchant Control Panel.
  2. Navigate to Marketing tools -> Email editor
  3. Scroll down to the Shopper emails section and click on Order
  4. Access the Visa compliance subscription email under the Order section. You can access this email only if your account uses the default shopper emails communication setup that blends together the electronic delivery and the payment emails.

Visa subscription email notification

Overview

2Checkout automatically sends out the Visa compliance subscription email to shoppers with confirmation and details on their subscription – information regarding billing cycle duration, next billing amount, next billing date, and a link to myAccount for the shopper to be able to cancel the following automatic charge.

Availability

All 2Checkout accounts.

Workflow

2Checkout sends the Visa compliance subscription email if the shopper has a recurring subscription-based product, to prevent charge disputes and ensure compliance with the card networks’ requirements. Additional details can be found in the official Visa published requirements.

Subscription Email Notification Content

When a shopper enrolls for a recurring subscription-based product, the following information must be included in the email notification:

  • Billing cycle duration
  • Next billing amount
  • Next billing date
  • A link to myAccount for the shopper to be able to cancel the following automatic charge

Sample subscription email notification

subscription email notification

Is this the only email my shoppers receive after placing an order?

2Checkout can send the electronic delivery email either standalone or combined with the payment receipt notification (in one single email).

Depending on your account's setup, for each order containing at least one product configured with 2Checkout delivery your shoppers can receive:

  • Default: One email containing both the payment receipt and the electronic delivery messages
  • Two email notifications: The payment receipt and the electronic delivery messages, separately
  • Three email notifications: An order confirmation email, plus the payment receipt and the electronic delivery messages, separately

Contact 2Checkout to change your default configuration if you find another setup better suited for your customers.

Preview and test email

To preview and test the subscription email notification template, follow these steps:

  1. Log in to your 2Checkout Merchant Control Panel.
  2. Navigate to Marketing tools -> Email editor
  3. Scroll down to the Shopper emails section and click on Order
  4. Access the Visa compliance subscription email under the Order section. You can access this email only if your account uses the default shopper emails communication setup that blends together the electronic delivery and the payment emails.

PayPal Service Provider for 2Checkout

Overview

PayPal Service Provider is a new self-service PayPal solution offered to merchants signed on our PSP model, allowing for multiple payment options to be available under the same high-conversion shopping carts.

Availability

Merchants eligible for the PayPal Service Provider need to meet the following criteria:

  • Business Model: Payment Service Provider (PSP)
  • Merchant country:  Austria, Belgium, Bulgaria, Croatia, Republic of Cyprus, Czech Republic, Denmark, Estonia, Finland, France, Germany, Greece, Hungary, Ireland, Italy, Latvia, Lithuania, Luxembourg, Malta, Netherlands, Poland, Portugal, Romania, Slovakia, Slovenia, Spain, and Sweden.

Prerequisites

Merchants need to have or create a valid PayPal business account.

If you don't have a PayPal account, follow this Sign up. If you already have an account, simply Log in

Workflow

To be able to accept payments via PayPal in your 2Checkout account, you first need to generate the API credentials from your verified PayPal account dashboard. In order to do this, perform the following steps.

PayPal Settings

  1. Log in to your PayPal account.
  2. Navigate to Account Settings > Account access
  3. On the Account access page, click on Update next to API access.

PayPal Service Provider for 2Checkout 9

4. On the next page, scroll down to NVP/SOAP API integration and click on Manage API credentials. 

PayPal Service Provider for 2Checkout 4

5. PayPal will then generate API Credentials that you can use in your 2Checkout account.


To complete setting up PayPal in your 2Checkout account, you will need to collect and use the following credential information: 

  • API Username 
  • API Password 
  • Signature 

PayPal Service Provider for 2Checkout 5

2Checkout Settings

1. Once you have identified your PayPal credentials, log in to your 2Checkout Merchant Control Panel account.

2. Navigate to Setup > Ordering options and click on the Payment methods tab.

PayPal Service Provider for 2Checkout 6

3. On the Payment methods page, click on the Settings cogwheel next to the PayPal payment option.

PayPal Service Provider for 2Checkout 1

4. On the PayPal payment settings page paste the credentials you copied previously from the PayPal admin.

  • API Password
  • API Signature
  • API Username

PayPal Service Provider for 2Checkout 8

5. Click Save. You can now accept payments via PayPal in your 2Checkout account. 

Reference Transactions

 
If you are selling subscription-based products or services or you are looking to improve the shopping experience for returning customers using 2Checkout, make sure that reference transactions are enabled for your PayPal business account.
 
Payments through reference (the reference of the billing agreement) are not available by default in PayPal business accounts. To activate this feature, you need to contact PayPal and request the enablement of reference transactions.
 
   Please note that it is up to PayPal to validate if certain requirements are met or not, before it enables support for reference transactions for your account.
 

How to collect churn reasons

Overview

Any effort to understand how churn occurs starts with a simple questions: where is churn coming from and why? Here are some ways to collect data for voluntary churn, which will later be made available in the churn reports that are currently under construction. 

Collect churn reasons via the Merchant Control Panel 

When canceling a subscription or stopping the automatic billing via the subscription page in the Merchant Control Panel, you are presented with the option to select one or multiple churn reasons.  

If you choose to cancel the subscription immediately, a confirmation pop-up is displayed, along with the possibility of selecting the cancellation reason: 

how to collect churn reasons 1

Providing the reason for cancellation is not mandatory, however if you want to be able to track churn metrics in the future, this could help you get more comprehensive reporting data.

If you stop the automatic billing, you can either choose to disable it right away or after a number of renewals. However, you can only specify the cancellation reason if you end automatic billing effective immediately.

how to collect churn reasons 2

Churn reasons

There are different churn reasons available depending on whether the subscription is disabled or the automatic billing is stopped:

Churn reason Cancel subscription Stop automatic billing
Not satisfied with the product/service Yes Yes
Don’t need the product/service anymore Yes Yes
Covid-19 Yes Yes
Price is too high Yes Yes
Not satisfied with customer support Yes Yes
Accidentally enabled auto-renewal No Yes
Prefer to manually renew my subscription No Yes
Already renewed my subscription No Yes
Don’t need the product/service anymore Yes Yes
Want to pause my subscription No Yes
Others - please specify Yes Yes

Collect churn reasons via 2Checkout MyAccount

Shoppers can specify the reason they wish to stop the automatic billing if they do it via their 2Checkout MyAccount platform. This applies to both subscriptions that have an active churn prevention campaign and to those that do not, with some workflow differences.

All shoppers that click on the “Stop automatic subscription renewal” link (and there is no churn prevention campaign attached to the subscription) get a confirmation pop-up where they can specify the reason for this change.

how to collect churn reasons 3

how to collect churn reasons 4

If a churn prevention campaign is already attached to the subscription, then the “Stop automatic subscription renewal” option is no longer displayed as a churn reason as in the example above. Instead, the shopper is prompted with the configured churn prevention campaign steps.

Next steps

We are currently working on a new churn report that will make this type of data available in a seamless way and will help you understand why customers leave a product/service.

Return Process

Approved URL

After the successful completion of a sale, 2Checkout.com can return the buyer and sale parameters to a script or page on your site. Specifying an approved URL at the account level will direct all buyers to the same URL after a successful checkout. This URL can be entered on the Site Management page by clicking the Account tab followed by the Site Management sub-category.

site management

You may also choose to pass the approved URL on the fly by using the x_receipt_link_url parameter.  This parameter has a few very specific behaviors that should be paid attention so that it can be used effectively.

x_receipt_link_url=http://www.yoursite.com/return
  • This parameter will over-ride any approved URL set within your account.
  • If your return method is set to Given links back to my Site — This parameter will control where the Click Here to Finalize your Order button takes the buyer after the successful sale.
  • If your return method is set to Direct Return or Header Redirect, this parameter will control where the buyer gets directed to automatically after the successful sale.
  • The value passed must match the domain registered to the account.

Validation

The MD5 hash is provided to help you verify the authenticity of the passback to your approved URL. The hash is computed using the secret word on the Site Management page and is returned using the key parameter. To validate against the hash, you need to make a string that contains the information described below and pass it in as the value to your scripting languages MD5 function. The MD5 hash is created the same way for a production 2Checkout account and a Sandbox 2Checkout account.

 UPPERCASE(MD5_ENCRYPTED(Secret Word + Seller ID + order_number + Sale Total)) 

The secret word is set by yourself on the Site Managment page. The vendor number is your numerical vendor/seller ID number. The order number is the order number for the sale. The total is the numerical value for the total amount of the sale.Each of our community supported libraries provides a binding to validate the hash on a notification message.

Demo Sales

Please note that the MD5 hash that we return on demo sales is intentionally broken as we use a “1” for the order number when we compute the hash instead of the actual value being returned through the `order_number` parameter. You will need to account for this on your end if you are testing with demo sales by computing the compare hash like below:

UPPERCASE(MD5_ENCRYPTED(Secret Word + Seller ID + 1 + Sale Total))


Example

Below is an example PHP script that validates the hash.

<?php
$hashSecretWord = 'tango'; //2Checkout Secret Word
$hashSid = 1303908; //2Checkout account number
$hashTotal = '1.00'; //Sale total to validate against
$hashOrder = $_REQUEST['order_number']; //2Checkout Order Number
$StringToHash = strtoupper(md5($hashSecretWord . $hashSid . $hashOrder . $hashTotal));

if ($StringToHash != $_REQUEST['key']) {
	$result = 'Fail - Hash Mismatch'; 
	} else { 
	$result = 'Success - Hash Matched';
}

echo $result;

Return Method

2Checkout provides three methods in which the buyer and sale parameters can be returned to your approved URL. You may send the buyer to our order processed page which will display a Click Here to Finalize your Order button to redirect the buyer, you may bypass the order processed page using a header redirect or you can immediately display your approved URL to the buyer while they remain on our server. Your return method can be selected on the Site Management page.

Given links back to my Website

With the Return Method set to Given links back to my website, the buyer will be taken to our Order Processed page after completing a successful purchase. This page will feature a Click Here to Finalize your Order button. When clicked the buyer and collected sale parameters will be directed to the provided approved URL by POST.

Direct Return

With the Return Method set to Direct Return, sale parameters will be posted automatically to the approved URL while fetched by our server and displayed to the buyer. When using this Direct Return function the URL will be masked to the buyer, appearing to still be on the 2Checkout.com domain. This method can be used with redirects as long as each page outputs content more than 255 characters to the browser. If Direct Return encounters a page that redirects without outputting content the process will fail and the buyer will be sent to our standard Order Processed page. This occurs usually with a header redirect, specifically content less then 255 characters. This is a common issue as many developers will set their approved URL to a script that processes the return sales parameters then silently forwards the buyer to another page. This is usually a thank you or download page for intangible products. The best solution is to handle all post-order processing on the page set as your approved URL, including the thank you message. If no redirects are used, meaning the URL is masked by our servers, then relative links will not point to the correct location. This can be corrected with the use of absolute paths on the approved URL page or by simply using a base tag in the head of the document to provide a reference for the relative paths.

Header Redirect

With the Return Method set to Header Redirect the buyer will be immediately returned to your approved URL. Using this method, the sale parameters will be returned along with the buyer using the GET method.

Additional Information

If you are returning the buyer to a script on your end it is important to note that parameter information will typically be returned by POST. Parameters however will be returned by GET if the Header Redirect method is used.

   You must also have a script set up as the return URL if you wish to receive the pass back information. If your return URL ends in any of the following extensions, then pass back will NOT occur, but the buyer will still be returned there : .htm, .html, .com, .zip, .pdf, .rar, .doc
   If you do not specify an approved URL at the account level, product level, or with the x_receipt_link_url parameter the buyer will remain on the 2Checkout Order Processed page upon completion of the order.


Inline Checkout

Overview

Inline Checkout is our iframe checkout option which displays a secure payment form as an overlay on your checkout page. It is designed to function when the buyer’s billing/shipping address has been collected and the cart total has been finalized. This makes it ideal for use with shopping cart applications or your own custom checkout process.

Note: This feature is available to all 2Checkout merchants by default - there are no additional fees to use Inline Checkout.

Integration

To place a sale using Inline Checkout, your checkout form must utilize our Hosted Checkout parameter set. This parameter set allows you to dynamically pass in recurring, non-recurring, shipping, tax, and coupon line items.

Your form must also pass in the buyer’s name, email, and full billing address.The buyer’s shipping address is also required if the sale is tangible, or if a shipping lineitem is passed in.

Required parameters for intangible sales

Required parameters for tangible sales

Example Checkout Form - Intangible Product

<form action='https://www.2checkout.com/checkout/purchase' method='post'>
<input type='hidden' name='sid' value='1303908' />
<input type='hidden' name='mode' value='2CO' />
<input type='hidden' name='li_0_type' value='product' />
<input type='hidden' name='li_0_name' value='invoice123' />
<input type='hidden' name='li_0_price' value='25.99' />
<input type='hidden' name='card_holder_name' value='Checkout Shopper' />
<input type='hidden' name='street_address' value='123 Test Address' />
<input type='hidden' name='street_address2' value='Suite 200' />
<input type='hidden' name='city' value='Columbus' />
<input type='hidden' name='state' value='OH' />
<input type='hidden' name='zip' value='43228' />
<input type='hidden' name='country' value='USA' />
<input type='hidden' name='email' value='example@2co.com' />
<input type='hidden' name='phone' value='614-921-2450' />
<input name='submit' type='submit' value='Checkout' />
</form>

Since our example form above is passing all of the required information for an intangible sale, integrating with Inline Checkout is as easy as including our small JavaScript library at the bottom of the page where your checkout form is located:

<script src="https://www.2checkout.com/static/checkout/javascript/direct.min.js"></script>

The Inline Checkout JavaScript library will add an iframe to the DOM and hook into any existing form that uses our checkout routine. When the buyer submits the form, our Inline Checkout page will overlay your current checkout page.

Example Checkout Form - Tangible Product

<form action='https://www.2checkout.com/checkout/purchase' method='post'>
<input type='hidden' name='sid' value='1303908' />
<input type='hidden' name='mode' value='2CO' />
<input type='hidden' name='li_0_type' value='product' />
<input type='hidden' name='li_0_name' value='invoice123' />
<input type='hidden' name='li_0_price' value='25.99' />
<input type='hidden' name='li_0_tangible' value='Y' />
<input type='hidden' name='li_1_type' value='shipping' />
<input type='hidden' name='li_1_name' value='Express Shipping' />
<input type='hidden' name='li_1_price' value='13.99' />
<input type='hidden' name='card_holder_name' value='Checkout Shopper' />
<input type='hidden' name='street_address' value='123 Test Address' />
<input type='hidden' name='street_address2' value='Suite 200' />
<input type='hidden' name='city' value='Columbus' />
<input type='hidden' name='state' value='OH' />
<input type='hidden' name='zip' value='43228' />
<input type='hidden' name='country' value='USA' />
<input type='hidden' name='ship_name' value='Checkout Shopper' />
<input type='hidden' name='ship_street_address' value='123 Test Address' />
<input type='hidden' name='ship_street_address2' value='Suite 200' />
<input type='hidden' name='ship_city' value='Columbus' />
<input type='hidden' name='ship_state' value='OH' />
<input type='hidden' name='ship_zip' value='43228' />
<input type='hidden' name='ship_country' value='USA' />
<input type='hidden' name='email' value='example@2co.com' />
<input type='hidden' name='phone' value='614-921-2450' />
<input name='submit' type='submit' value='Checkout' />
</form>

Since our example form above is passing all of the required information for a tangible sale, integrating with Inline Checkout is as easy as including our small JavaScript library at the bottom of the page where your checkout form is located:

<script src="https://www.2checkout.com/static/checkout/javascript/direct.min.js"></script>

Inline Checkout-Card Details


The buyer can easily complete the checkout process or if they need to return to the cart, they can simply click the close button (X) to dismiss the overlay and complete the checkout when they are ready.

Inline Checkout-Payment Confirmation

Return Process

Inline Checkout uses the same return processes as standard checkout. If you have an existing integration with standard checkout, you do not need to modify your return setting.

Event Callbacks

You may specify a callback to be invoked on certain events that happen in the checkout process:

Events:

  • checkout_loaded - Invoked when the inline form is visible to the buyer.
  • checkout_closed - Invoked when the inline form is closed by the buyer.

The event_type will be passed to the callback that is subscribed.

Example:

  var myCallback = function(data) {
        console.log(JSON.stringify(data));
        // Example callback data
        // {"event_type":"checkout_loaded"}
        // {"event_type":"checkout_closed"}
    };
     (function() {
         inline_2Checkout.subscribe('checkout_loaded', myCallback);
         inline_2Checkout.subscribe('checkout_closed', myCallback);
     }());

Errors/Debugging

Please Note: Inline Checkout focuses solely on securely and efficiently collecting the buyer’s payment information. The buyer’s name, email and billing address must be passed in from your payment form. If a required parameter is missing, we will break out of the iframe and redirect the buyer to standard checkout to fill in the missing data.

Are you being directed to the standard checkout routine while implementing the Inline Checkout feature? Please refer to the following suggestions that may resolve the issue:

  • Clear your browser’s cache and cookies, close all open instances of your browser, then recommence testing.
  • Review your page to ensure that the mandatory JavaScript code has been properly implemented.
  • Ensure that you are using the Hosted Checkout parameter set to pass in sale details.


Check to make sure all required billing information is being passed in for intangible sales.

Parameter Description
sid Your 2Checkout account number.
mode Defines the parameter set. Should always be passed as ‘2CO’.
li_#_type The type of line item that is being passed in. (Always Lower Case, ‘product’, ‘shipping’, ‘tax’ or ‘coupon’, defaults to ‘product’)
li_#_name Name of the item passed in with the corresponding li_#_type. (128 characters max, cannot use ‘<' or '>’, defaults to capitalized version of ‘type’.)
li_#_quantity Quantity of the item passed in with the corresponding li_#_type. (0-999, defaults to 1 if not passed in.)
li_#_price Price of the line item. Format: 0.00-99999999.99, defaults to 0 if a value isn’t passed in, no negatives (use positive values for coupons), leading 0 & decimal are optional. Important note: If the li_#_price parameter isn’t used to pass in line item pricing, the pricing for the corresponding item will default to 0.00.
card_holder_name Card holder’s name (128 characters max). The card holder’s name can also be populated using the first_name, middle_initial, and last_name parameters. IMPORTANT: If you use these three parameters, the data will be combined into and returned as card_holder_name to your Approved URL script.
street_address Card holder’s street address(64 characters max)
street_address2 The second line for the street address, typically suburb or apartment number information (64 characters max)
city Card holder’s city (64 characters max)
state Card holder’s state (64 characters max)
zip Card holder’s zip (16 characters max)
country Card holder’s country (64 characters max)
email Card holder’s email (64 characters max)
phone Card holder’s phone (16 characters max)


Check to make sure all required billing and shipping information is being passed in for tangible sales:

Parameter Description
sid Your 2Checkout account number.
mode Defines the parameter set. Should always be passed as ‘2CO’.
li_#_type The type of line item that is being passed in. (Always Lower Case, ‘product’, ‘shipping’, ‘tax’ or ‘coupon’, defaults to ‘product’)
li_#_name Name of the item passed in with the corresponding li_#_type. (128 characters max, cannot use ‘<' or '>’, defaults to capitalized version of ‘type’.)
li_#_quantity Quantity of the item passed in with the corresponding li_#_type. (0-999, defaults to 1 if not passed in.)
li_#_price Price of the line item. Format: 0.00-99999999.99, defaults to 0 if a value isn’t passed in, no negatives (use positive values for coupons), leading 0 & decimal are optional. Important note: If the li_#_price parameter isn’t used to pass in line item pricing, the pricing for the corresponding item will default to 0.00.
li_#_tangible Specifies if the corresponding li_#_type is a tangible or intangible. ( Must be Upper Case, ‘Y’ or ‘N’, if li_#_type is ‘shipping’ forced to ‘Y’.)
card_holder_name Card holder’s name (128 characters max). The card holder’s name can also be populated using the first_name, middle_initial, and last_name parameters. IMPORTANT: If you use these three parameters, the data will be combined into and returned as card_holder_name to your Approved URL script.
street_address Card holder’s street address(64 characters max)
street_address2 The second line for the street address, typically suburb or apartment number information (64 characters max)
city Card holder’s city (64 characters max)
state Card holder’s state (64 characters max)
zip Card holder’s zip (16 characters max)
country Card holder’s country (64 characters max)
email Card holder’s email (64 characters max)
phone Card holder’s phone (16 characters max)
ship_name Recipient Name
ship_street_address Recipient Address 1
ship_street_address2 Recipient Address 2
ship_city Recipient City
ship_state Recipient State
ship_zip Recipient Zip
ship_country Recipient Country

Hosted checkout parameters

Overview

These parameters can be used to dynamically pass in tangible/intangible and recurring/non-recurring products, product options, shipping, taxes, and coupons as items without having to create the products in the admin area.

Checkout URL

https://www.2checkout.com/checkout/purchase

Required Parameters

Parameter Description
sid Your 2Checkout account number.
mode Defines the parameter set. Should always be passed as ‘2CO’.
li_#_type The type of line item that is being passed in. (Always Lower Case, ‘product’, ‘shipping’, ‘tax’ or ‘coupon’, defaults to ‘product’)
li_#_name Name of the item passed in with the corresponding li_#_type. (128 characters max, cannot use ‘<' or '>’, defaults to capitalized version of ‘type’.)
li_#_quantity Quantity of the item passed in with the corresponding li_#_type. (0-999, defaults to 1 if not passed in.)
li_#_price Price of the line item. Format: 0.00-99999999.99, defaults to 0 if a value isn’t passed in, no negatives (use positive values for coupons), leading 0 & decimal are optional. Important note: If the li_#_price parameter isn’t used to pass in line item pricing, the pricing for the corresponding item will default to 0.00.
li_#_tangible Specifies if the corresponding li_#_type is a tangible or intangible. ( Must be Upper Case, ‘Y’ or ‘N’, if li_#_type is ‘shipping’ forced to ‘Y’.)

You can use these parameters to pass in multiple products as well. To do so you will need to append a digit to each parameter. For example, li_0_type, li_0_quantity, li_0_name, li_0_price, li_0_product_id, li_0_description, li_0_tangible will describe the first product, then to describe the second product you would increment so the parameters will read li_1_type, li_1_quantity, and so on. Please Note: With this parameter set # may be represented by 0-999 and aren’t required to be consecutive.

Additional Parameters

Parameter Description
li_#_product_id Id that you use to identify the product. 64 characters max, cannot use ‘<' or '>’.
li_#_description Description you use for the product. 255 characters max, cannot use ‘<' or '>’.
li_#_recurrence Sets billing frequency. Ex. ‘1 Week’ to bill order once a week. (Can use # Week, # Month, or # Year)
li_#_duration Sets how long to continue billing. Ex. ‘1 Year’, to continue billing based on li_#_recurrence for 1 year. (Forever or # Week, # Month, # Year)
li_#_startup_fee Any start up fees for the product or service. Can be negative to provide discounted first installment pricing, but cannot equal or surpass the product price.
li_#_option_#_name Name of product option. Ex. Size (64 characters max – cannot include ‘<' or '>’)
li_#_option_#_value Option selected. Ex. Small (64 characters max, cannot include ‘<' or '>’)
li_#_option_#_surcharge Option price in seller currency. (0.00 for no cost options)
demo Y to enable demo mode. Do not pass for live sales. Can also be controlled within the account.
currency_code AFN, ALL, DZD, ARS, AUD, AZN, BSD, BDT, BBD, BZD, BMD, BOB, BWP, BRL, GBP, BND, BGN, CAD, CNY, COP, CRC, CZK, DKK, DOP, XCD, EGP, EUR, FJD, GTQ, HKD, HNL, HUF, INR, IDR, ILS, JMD, JPY, KZT, KES, LAK, MMK, LBP, LRD, MOP, MYR, MVR, MRO, MUR, MXN, MAD, NPR, TWD, NZD, NIO, NOK, PKR, PGK, PEN, PHP, PLN, QAR, RON, RUB, WST, SAR, SCR, SGD, SBD, ZAR, KRW, LKR, SEK, CHF, SYP, THB, TOP, TTD, TRY, UAH, AED, USD, VUV, VND, XOF, YER. Use to specify the currency for the sale.
lang Chinese – zh, Danish – da, Dutch – nl, French – fr, German – gr, Greek – el, Italian – it, Japanese – jp, Norwegian – no, Portuguese – pt, Slovenian – sl, Spanish
merchant_order_id Specify your order number with this parameter. It will also be included in the confirmation emails to yourself and the customer. (50 characters max)
purchase_step Sets the purchase step that the buyer will land on when being directed to the checkout page. Possible values are ‘review-cart’, ‘shipping-information’, ‘shipping-method’, ‘billing-information’ and ‘payment-method’. Please Note: To skip a purchase step, all required fields must be pre-populated with the parameters that are passed in with the sale. If a required field is not pre-populated, the buyer will revert back to the step that needs to be completed.
x_receipt_link_url Used to specify an approved URL on-the-fly, but is limited to the same domain that is used for your 2Checkout account, otherwise it will fail. This parameter will over-ride any URL set on the Site Management page. (no limit)
coupon Specify a 2Checkout created coupon code. If applicable, the coupon will be automatically applied to the sale.

To pre-populate the billing information page you may pass in:

Parameter Description
card_holder_name Card holder’s name (128 characters max). The card holder’s name can also be populated using the first_name, middle_initial, and last_name parameters. IMPORTANT: If you use these three parameters, the data will be combined into and returned as card_holder_name to your Approved URL script.
street_address Card holder’s street address(64 characters max)
street_address2 The second line for the street address, typically suburb or apartment number information (64 characters max). Required if “country” value is: CHN, JPN, RUS - Optional for all other “country” values.
city Card holder’s city (64 characters max)
state Card holder’s state (64 characters max). Required if “country” value is ARG, AUS, BGR, CAN, CHN, CYP, EGY, FRA, IND, IDN, ITA, JPN, MYS, MEX, NLD, PAN, PHL, POL, ROU, RUS, SRB, SGP, ZAF, ESP, SWE, THA, TUR, GBR, USA - Optional for all other “country” values.
zip Card holder’s zip code/post code. Required if “country” value is ARG, AUS, BGR, CAN, CHN, CYP, EGY, FRA, IND, IDN, ITA, JPN, MYS, MEX, NLD, PAN, PHL, POL, ROU, RUS, SRB, SGP, ZAF, ESP, SWE, THA, TUR, GBR, USA - Optional for all other “country” values. (16 characters max)
country Card holder’s country (64 characters max)
email Card holder’s email (64 characters max)
phone Card holder’s phone (16 characters max)
phone_extension Card holder’s phone extension (9 characters max)

To pre-populate the shipping information page you may pass in:

Parameter Description
ship_name Recipient Name
ship_street_address Recipient Address 1
ship_street_address2 Recipient Address 2. Required if “ship_country” value is: CHN, JPN, RUS - Optional for all other “ship_country” values.
ship_city Recipient City
ship_state Recipient State. Required if “ship_country” value is ARG, AUS, BGR, CAN, CHN, CYP, EGY, FRA, IND, IDN, ITA, JPN, MYS, MEX, NLD, PAN, PHL, POL, ROU, RUS, SRB, SGP, ZAF, ESP, SWE, THA, TUR, GBR, USA - Optional for all other “ship_country” values.
ship_zip Recipient Zip Code/Post Code. Required if “ship_country” value is ARG, AUS, BGR, CAN, CHN, CYP, EGY, FRA, IND, IDN, ITA, JPN, MYS, MEX, NLD, PAN, PHL, POL, ROU, RUS, SRB, SGP, ZAF, ESP, SWE, THA, TUR, GBR, USA - Optional for all other “ship_country” values.
ship_country Recipient Country

The billing information page will also be populated with the information from the shipping page if the shipping information is collected on that sale and the billing information is not passed in.

Custom Parameters

You may pass in any additional parameters that you may need and they will be returned to you at the end of the sale. The only restrictions on custom parameters are that they can not share the name of ANY parameter that our system uses, even from the other sets. Please note that you WILL need a return script set up on the Site Management page to receive any of these parameters back as they are not included in the confirmation emails.

Parameters Returned

You will receive back all of the parameters that were passed in as well as the following parameters:

Parameter Description
order_number 2Checkout order number
invoice_id 2Checkout invoice id
credit_card_processed Y if successful (Approved).
total the total amount of the purchase
key the MD5 hash used to verify that the sale came from one of our servers

Important: You can not mix parameter sets. This will cause problems during payment or may prevent the payment pages from working at all.

Standard checkout

Overview

Our Standard Checkout option provides a complete checkout solution that can handle every part of the buyer’s checkout process on a single page. You can tailor the whole checkout process to your needs by passing in billing/shipping information, currency, language, and checkout steps.

Integration

Standard Checkout can be utilized by passing the required hosted checkout parameters to our checkout URL as shown in the examples below.

Multiple Lineitem Example

This sale includes 1 product with a quantity of 2, a coupon deduction, and both shipping and tax surcharges. The form also passes in all the billing and shipping information.

<form action='https://www.2checkout.com/checkout/purchase' method='post'>
<input type='hidden' name='sid' value='1303908' >
<input type='hidden' name='mode' value='2CO' >
<input type='hidden' name='li_0_type' value='product' >
<input type='hidden' name='li_0_name' value='Example Product Name' >
<input type='hidden' name='li_0_product_id' value='Example Product ID' >
<input type='hidden' name='li_0__description' value='Example Product Description' >
<input type='hidden' name='li_0_price' value='10.00' >
<input type='hidden' name='li_0_quantity' value='2' >
<input type='hidden' name='li_0_tangible' value='Y' >
<input type='hidden' name='li_1_type' value='shipping' >
<input type='hidden' name='li_1_name' value='Example Shipping Method' >
<input type='hidden' name='li_1_price' value='1.50' >
<input type='hidden' name='li_2_type' value='coupon' >
<input type='hidden' name='li_2_name' value='Example Coupon' >
<input type='hidden' name='li_2_price' value='1.00' >
<input type='hidden' name='li_3_type' value='tax' >
<input type='hidden' name='li_3_name' value='Example Tax' >
<input type='hidden' name='li_3_price' value='0.50' >
<input type='hidden' name='card_holder_name' value='Checkout Shopper' >
<input type='hidden' name='street_address' value='123 Test St >
<input type='hidden' name='street_address2' value='Suite 200' >
<input type='hidden' name='city' value='Columbus' >
<input type='hidden' name='state' value='OH' >
<input type='hidden' name='zip' value='43228' >
<input type='hidden' name='country' value='USA' >
<input type='hidden' name='email' value='example@2co.com' >
<input type='hidden' name='phone' value='614-921-2450' >
<input type='hidden' name='phone_extension' value='197' >
<input type='hidden' name='ship_name' value='Gift Receiver' >
<input type='hidden' name='ship_street_address' value='1234 Address Road' >
<input type='hidden' name='ship_street_address2' value='Apartment 123' >
<input type='hidden' name='ship_city' value='Columbus' >
<input type='hidden' name='ship_state' value='OH' >
<input type='hidden' name='ship_zip' value='43235' >
<input type='hidden' name='ship_country' value='USA' >
<input name='submit' type='submit' value='Checkout' >
</form>

Skipping Checkout Steps

You can use the ‘purchase_step’ parameter to set the purchase step that the buyer will land on when being directed to the checkout page. Possible values are ‘review-cart’, ‘shipping-information’, ‘shipping-method’, ‘billing-information’, and ‘payment-method’. Please Note: To skip a purchase step, all required fields must be pre-populated with the parameters that are passed in with the sale. If a required field is not pre-populated, the buyer will revert back to the step that needs to be completed.

Example form, Skipping Checkout Steps

<form action='https://www.2checkout.com/checkout/purchase' method='post'>
<input type='hidden' name='sid' value='1303908' >
<input type='hidden' name='mode' value='2CO' >
<input type='hidden' name='li_0_type' value='product' >
<input type='hidden' name='li_0_name' value='Example Product Name' >
<input type='hidden' name='li_0_product_id' value='Example Product ID' >
<input type='hidden' name='li_0__description' value='Example Product Description' >
<input type='hidden' name='li_0_price' value='10.00' >
<input type='hidden' name='li_0_quantity' value='2' >
<input type='hidden' name='li_0_tangible' value='N' >
<input type='hidden' name='card_holder_name' value='Checkout Shopper' >
<input type='hidden' name='street_address' value='123 Test St' >
<input type='hidden' name='street_address2' value='Suite 200' >
<input type='hidden' name='city' value='Columbus' >
<input type='hidden' name='state' value='OH' >
<input type='hidden' name='zip' value='43228' >
<input type='hidden' name='country' value='USA' >
<input type='hidden' name='email' value='example@2co.com' >
<input type='hidden' name='phone' value='614-921-2450' >
<input type='hidden' name='phone_extension' value='197' >
<input type='hidden' name='purchase_step' value='payment-method' >
<input name='submit' type='submit' value='Checkout' >
</form>

Return Process

Standard Checkout and Inline Checkout share the same return processes.

Need help?

Do you have a question? If you didn’t find the answer you are looking for in our documentation, you can contact our Support teams for more information. If you have a technical issue or question, please contact us. We are happy to help.

Not yet a Verifone customer?

We’ll help you choose the right payment solution for your business, wherever you want to sell, in-person or online. Our team of experts will happily discuss your needs.

Verifone logo