Integrate Magento 2
Overview
Magento is an open-source PHP-based eCommerce platform that offers merchants a high degree of flexibility and control over the user experience, catalog, content, and functionality of their online store. You can integrate your Magento 2 web store with 2Checkout by following the steps in this guide.
The new Magento connector will enable merchants to process orders with ConvertPlus, InLine Cart, and 2Pay.js.
Availability
Magento 2 integration is available only for 2Checkout accounts that handle their own tax and invoice management (2Sell and 2Subscribe accounts).
Merchants using the Magento connector built on the legacy 2Chechout hosted cart will be able to upgrade to the new Magento connector as well.
Magento Settings
Follow these steps to integrate Magento 2 connector:
- Download the 2Checkout Payment module from Github and click on the Releases tab to find the latest release.
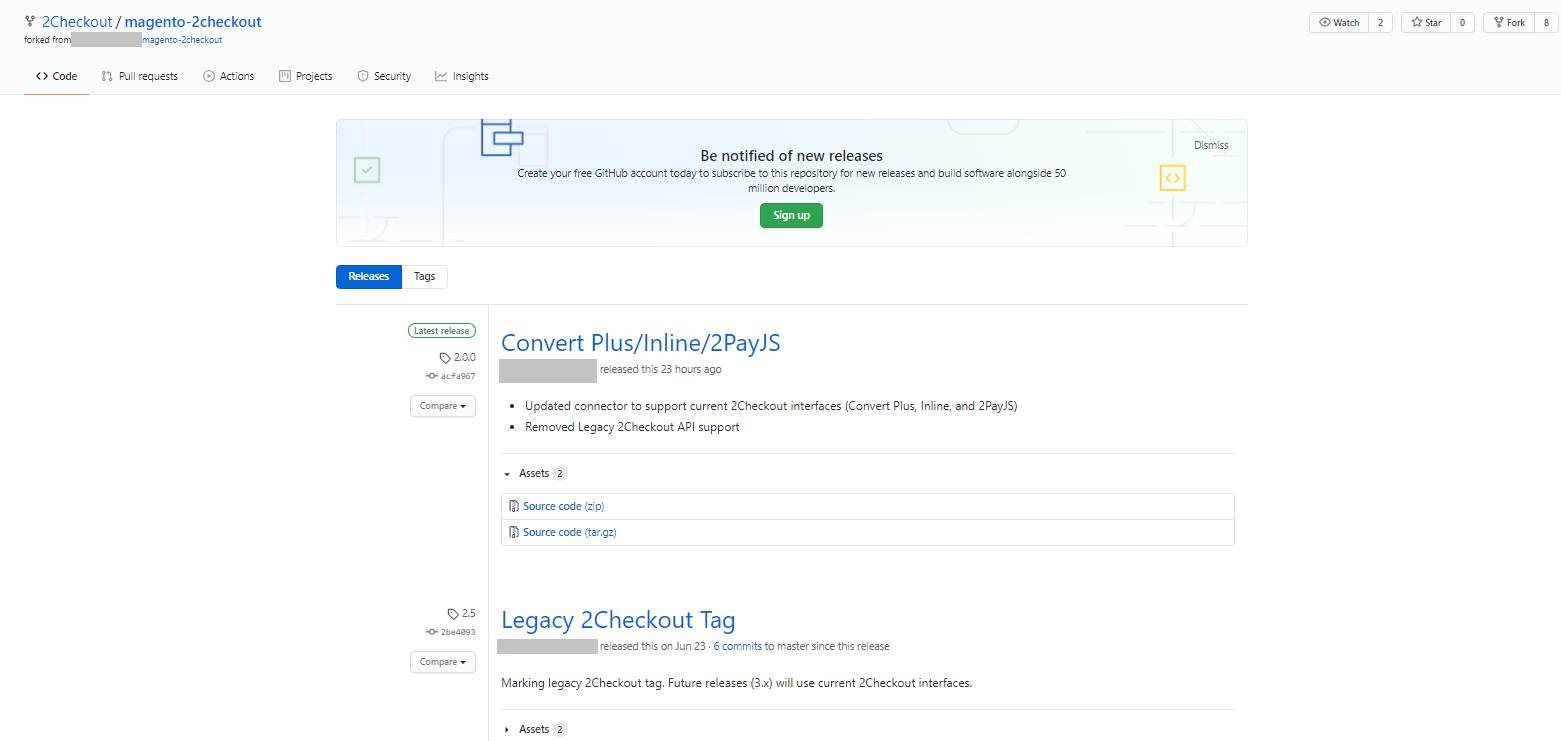
- You can also download the connector directly from the Master branch, as it always reflects the latest release.
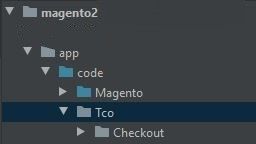
- Upload the files to your server, to your instance of Magento 2. Each file must be uploaded to the correct directory.
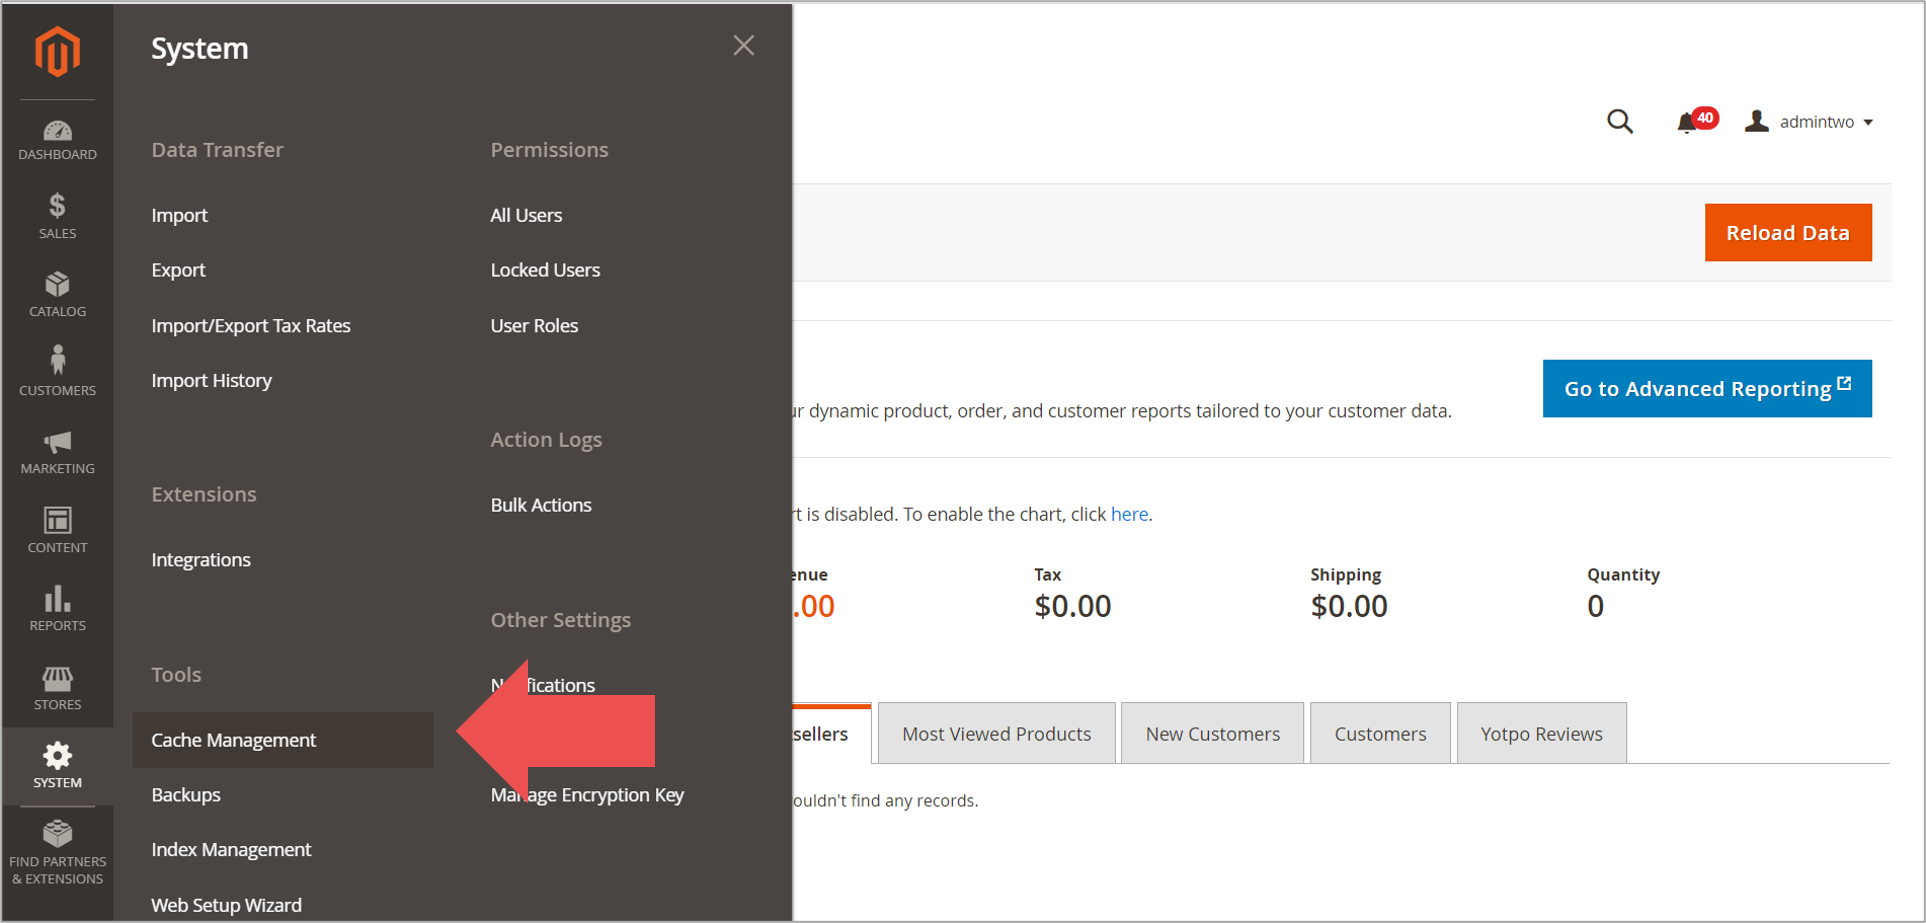
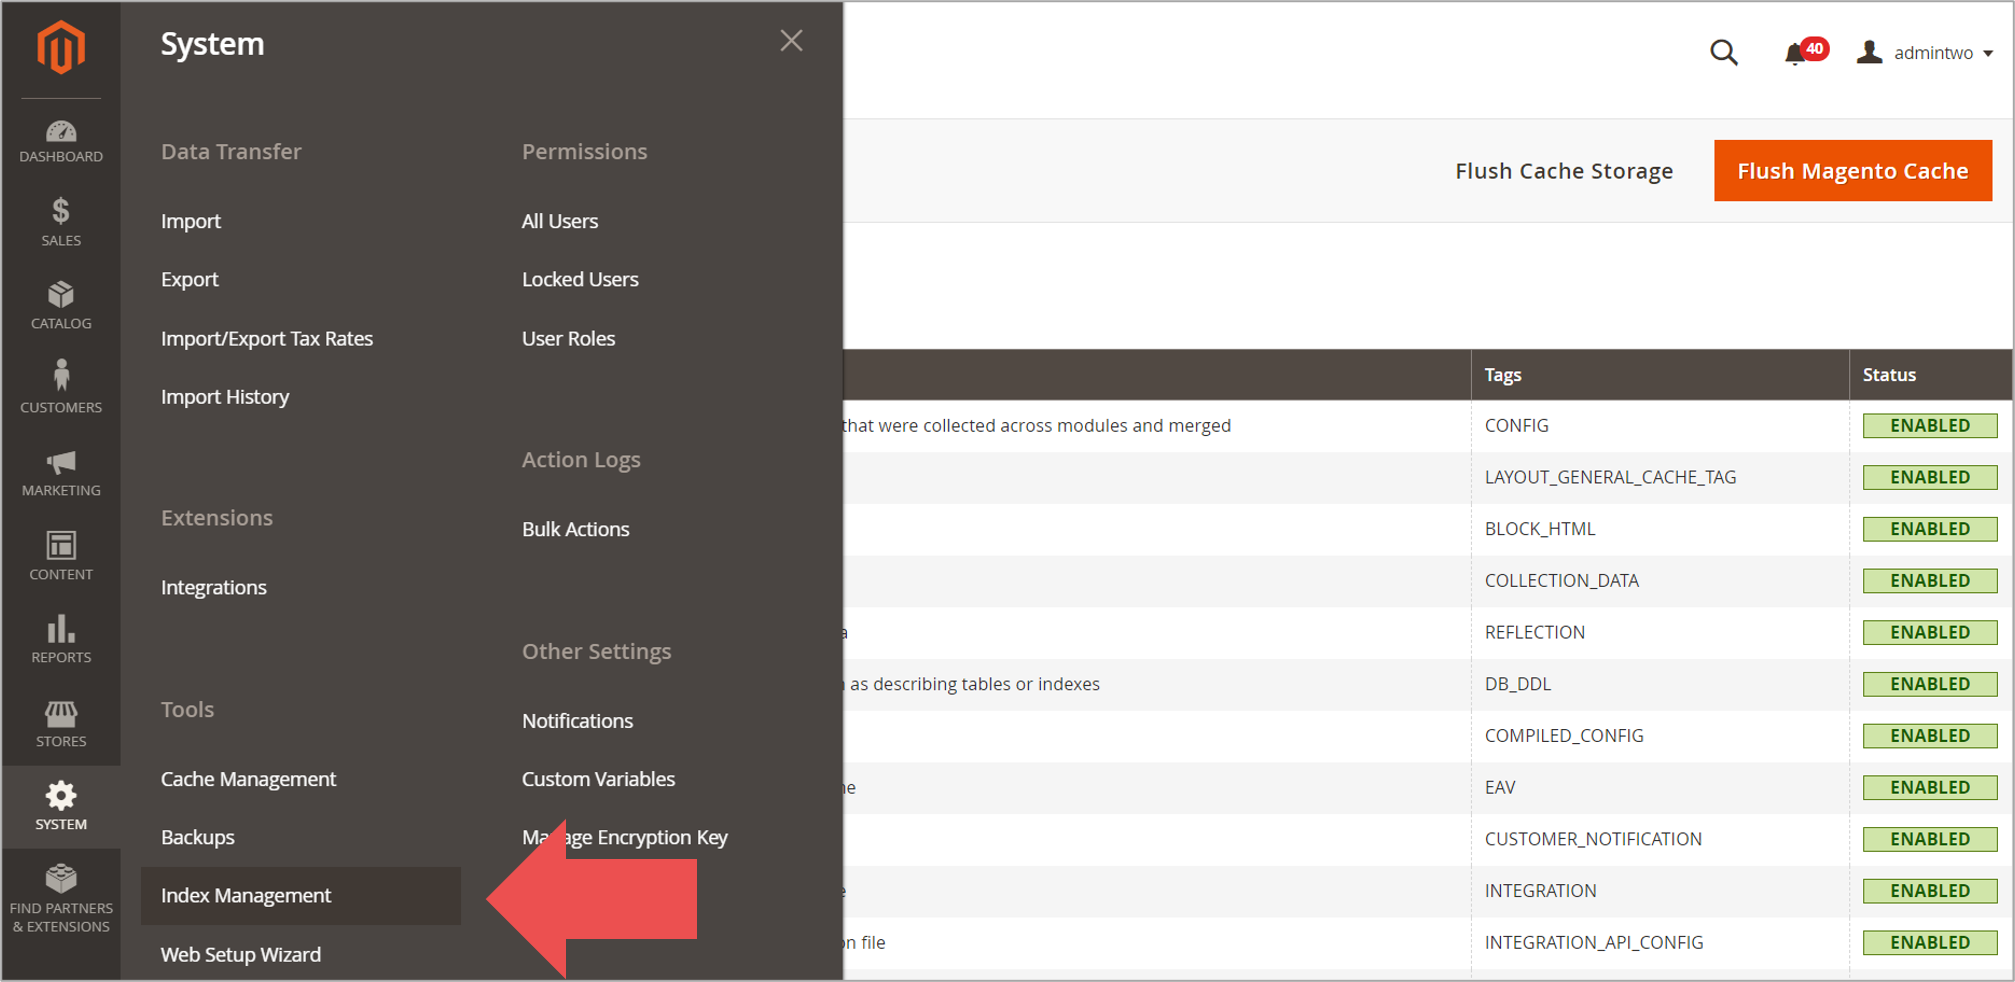
- Sign in to your Magento 2 administration panel and navigate to System → Cache management.
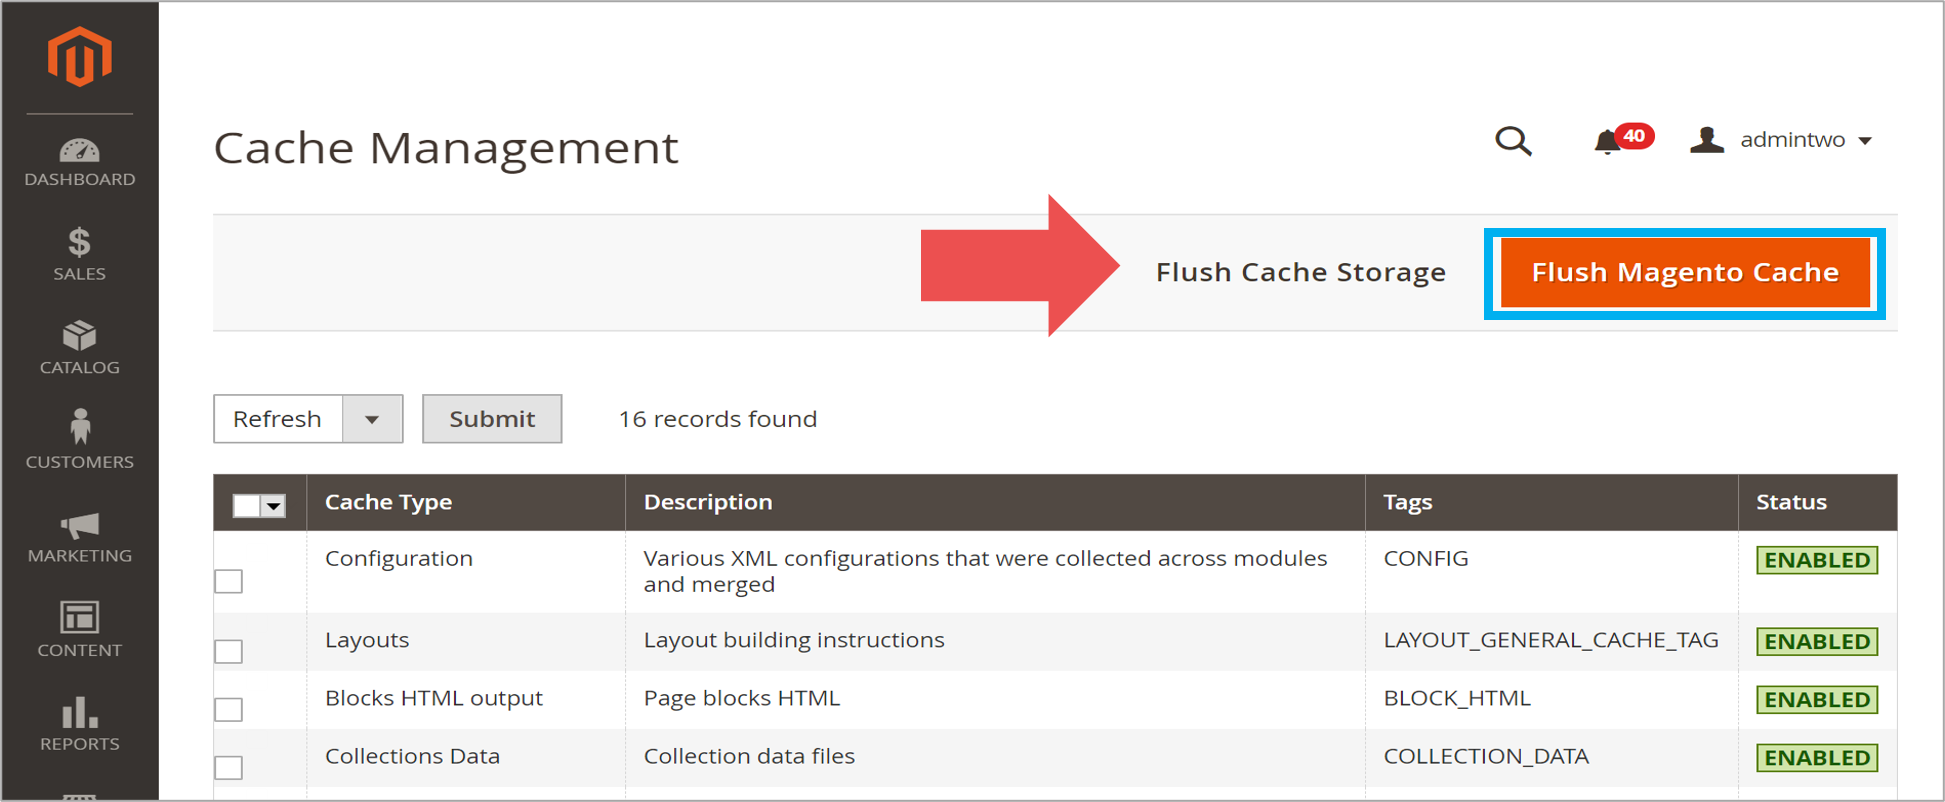
- On the Cache management page, click on the Flush Magento Cache button.
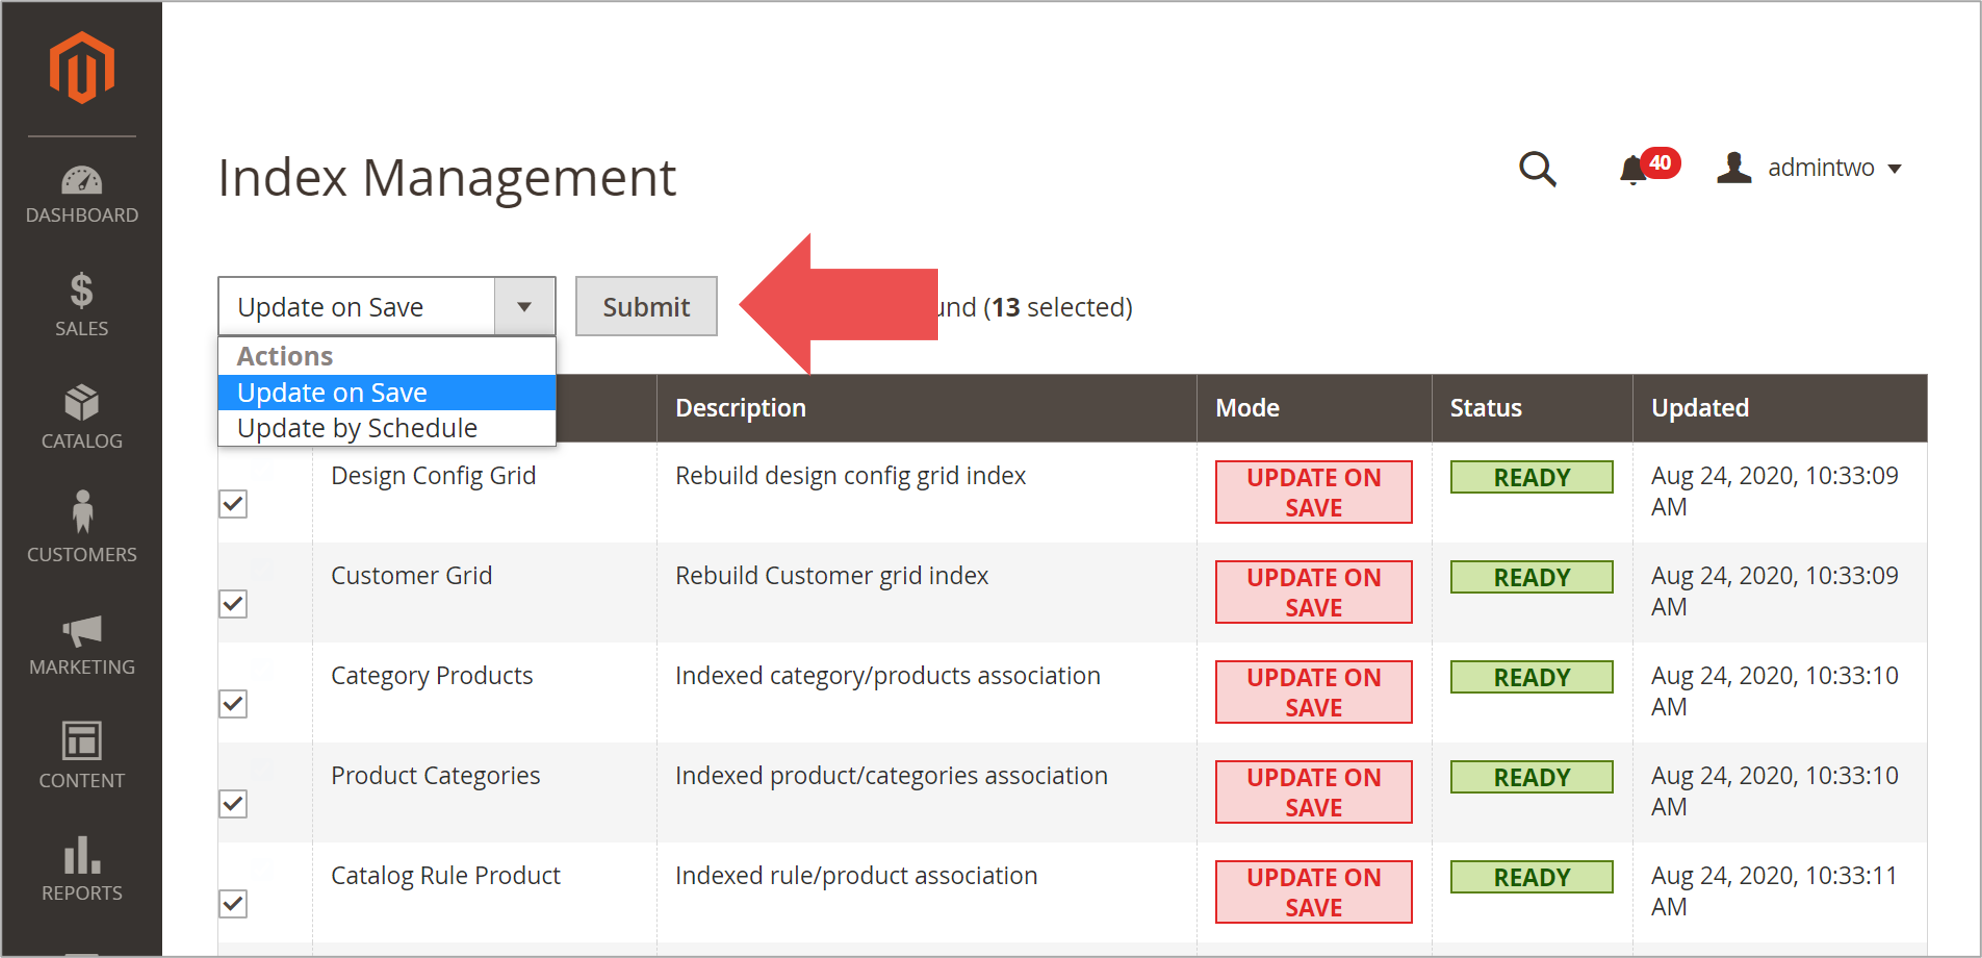
- Go back to the System tab and select Index Management.
- On the Index Management page, select the Update on save option and click on the Submit button to re-index all templates.
- In the Magento admin panel, go to Stores → Configuration.
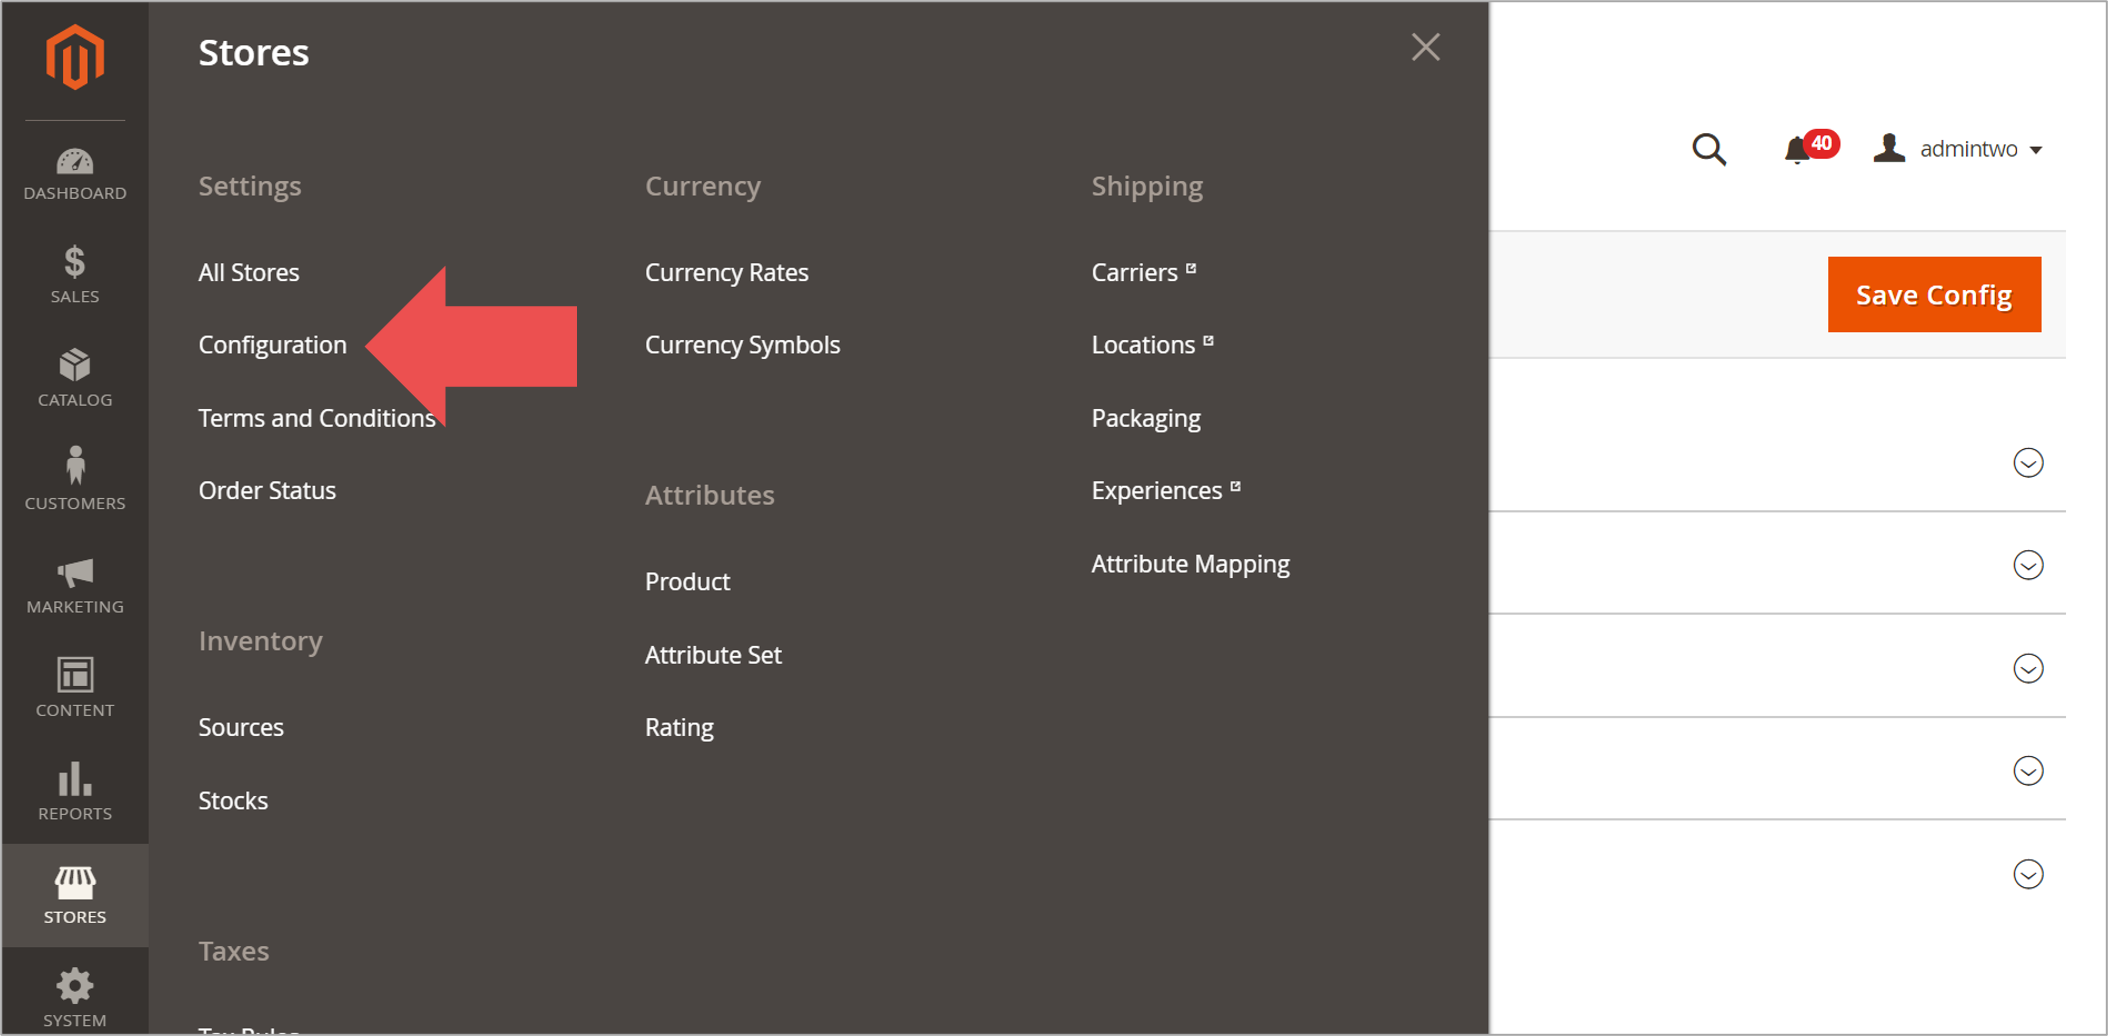
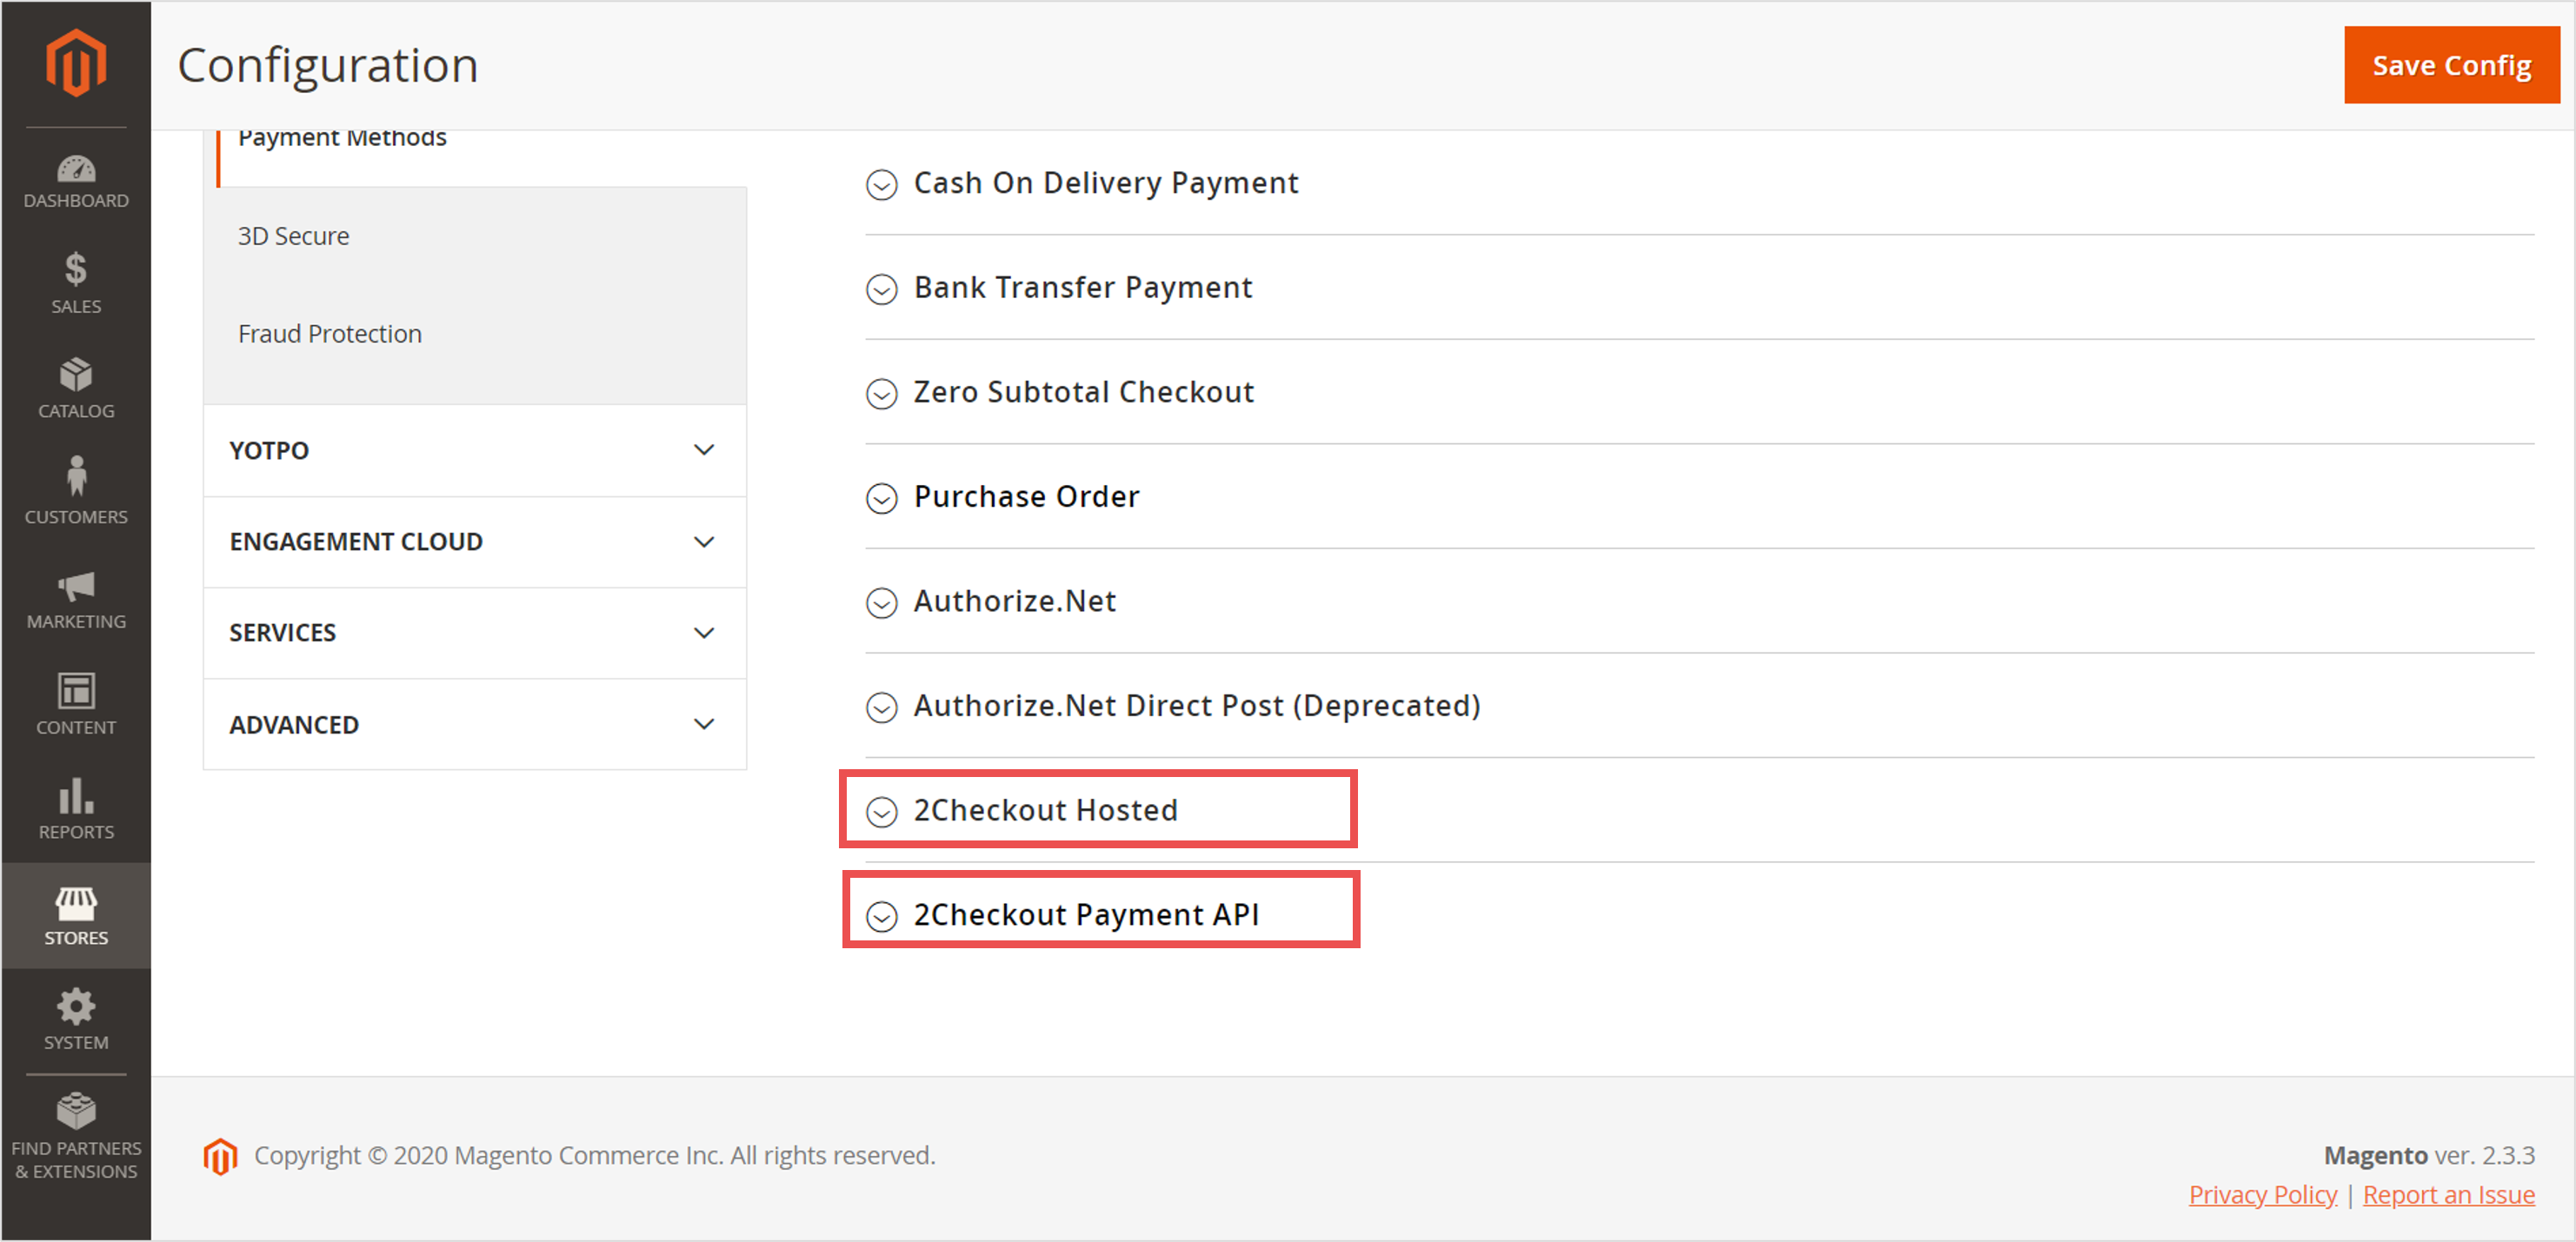
- Under Configuration, click on the Sales tab and scroll down to Payment methods.
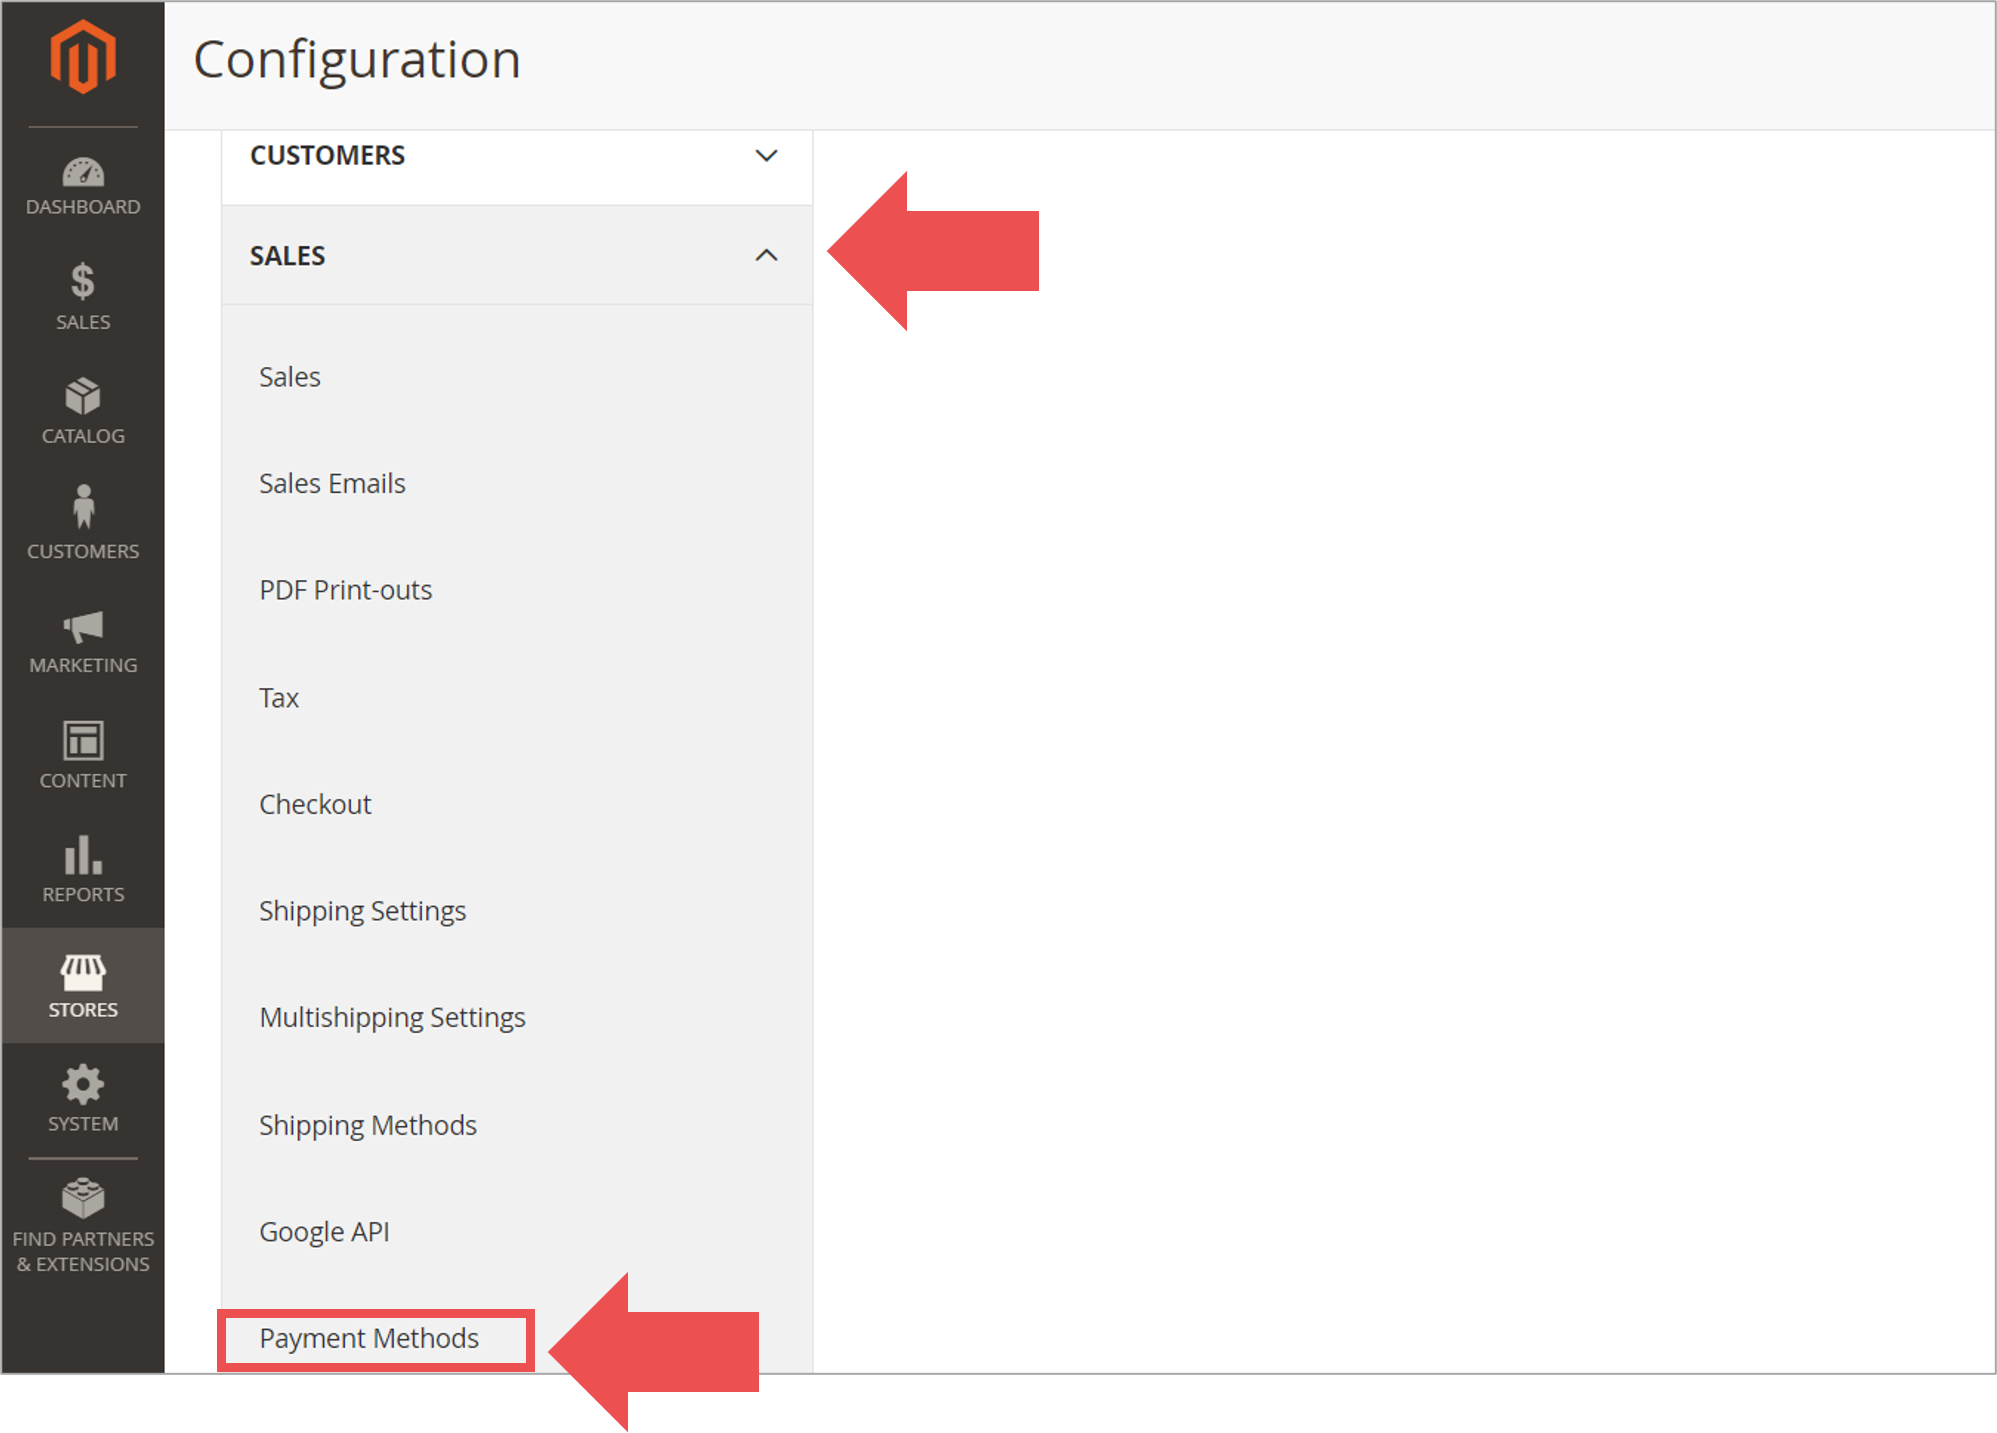
-
Under Payment methods, you will see 2checkout Hosted and 2checkout Payment API.
- Select 2Checkout hosted to use the ConvertPlus or InLine shopping carts.
- Select 2Checkout Payment API to use 2Pay.js.
-
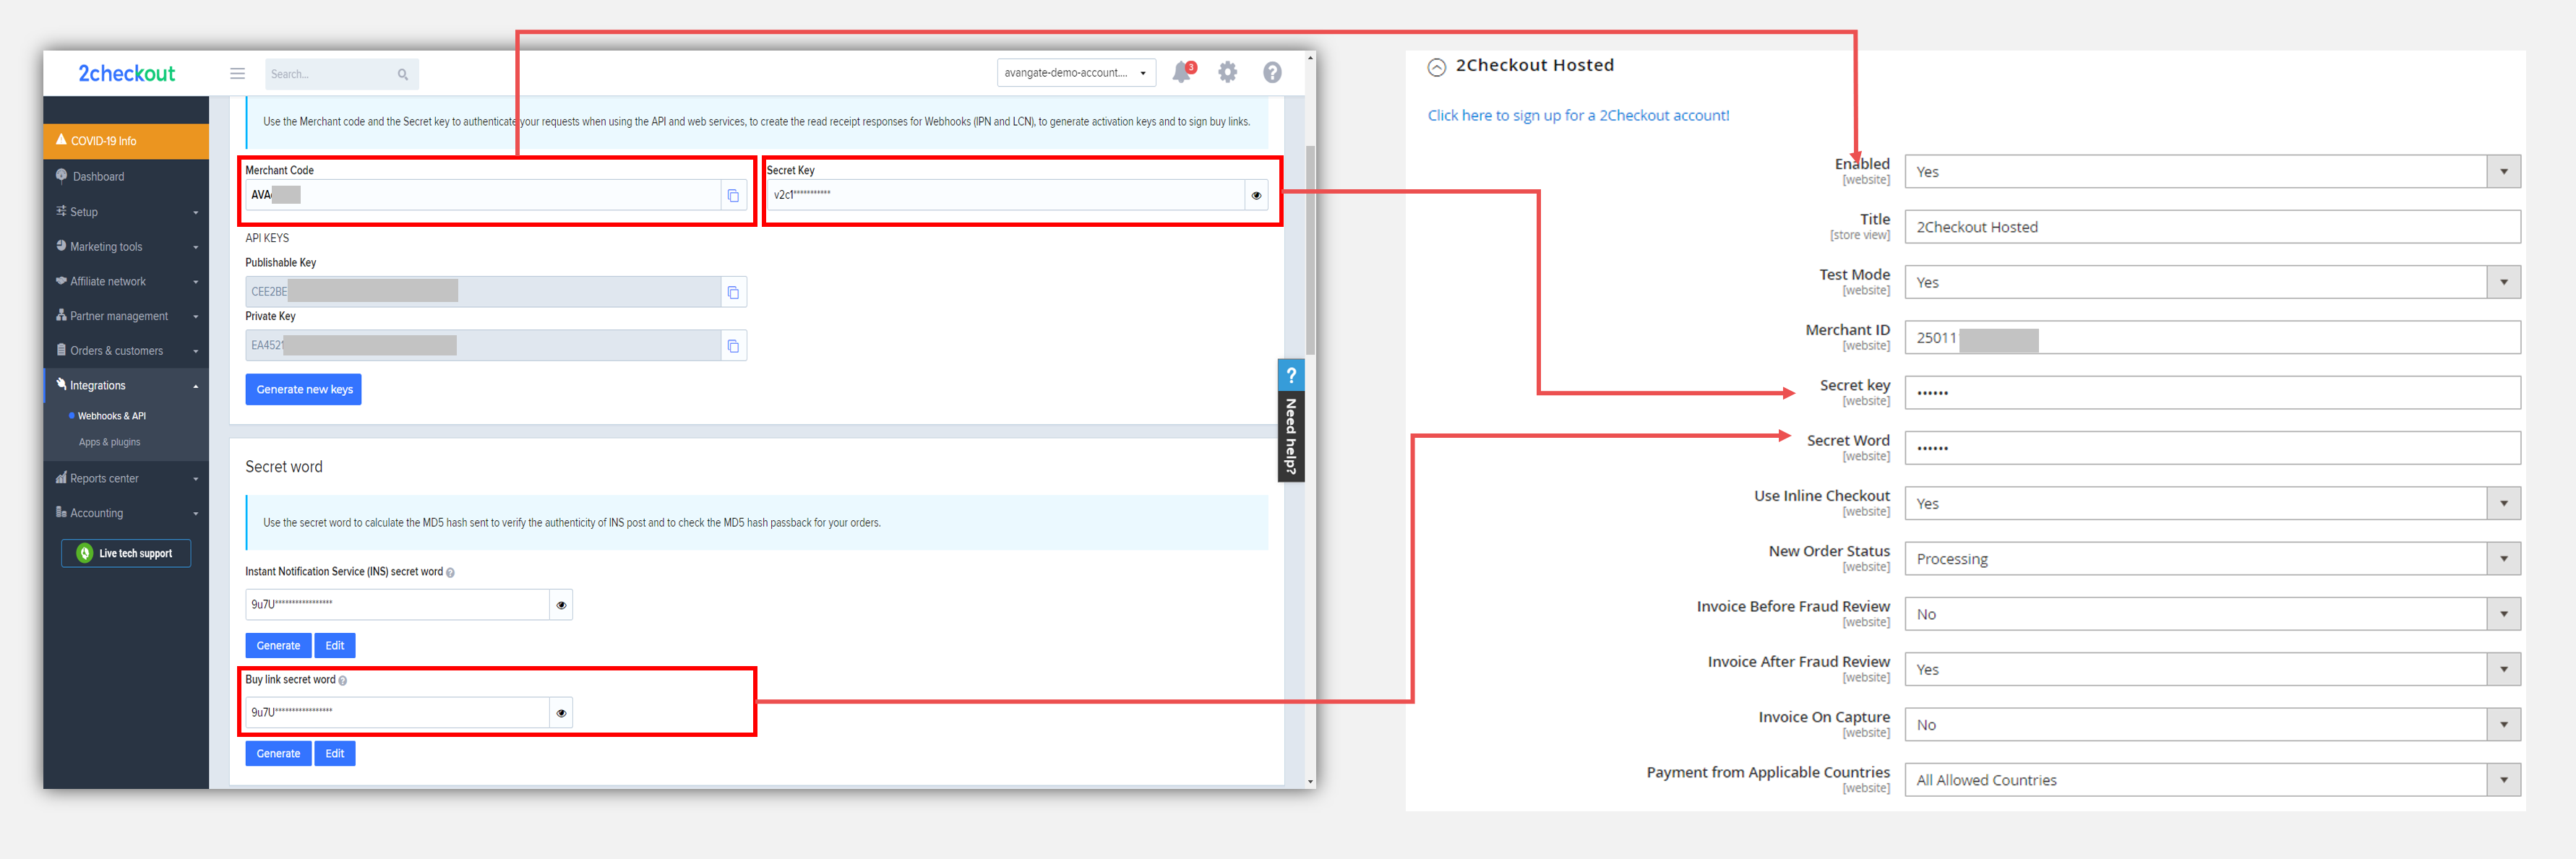
After selecting your payment methods configuration, input your:
- Merchant Code in the field 2Checkout Merchant Id
- Buy-Link Secret Word in the field Buy link secret word
- Secret Key in the field Secret key
from the 2Checkout Merchant Control Panel.
- Select your settings for the 2Checkout hosted option and click on Save Config to save your settings. For the Use Inline Checkout field select No, if you want to use ConvertPlus as your default shopping cart.
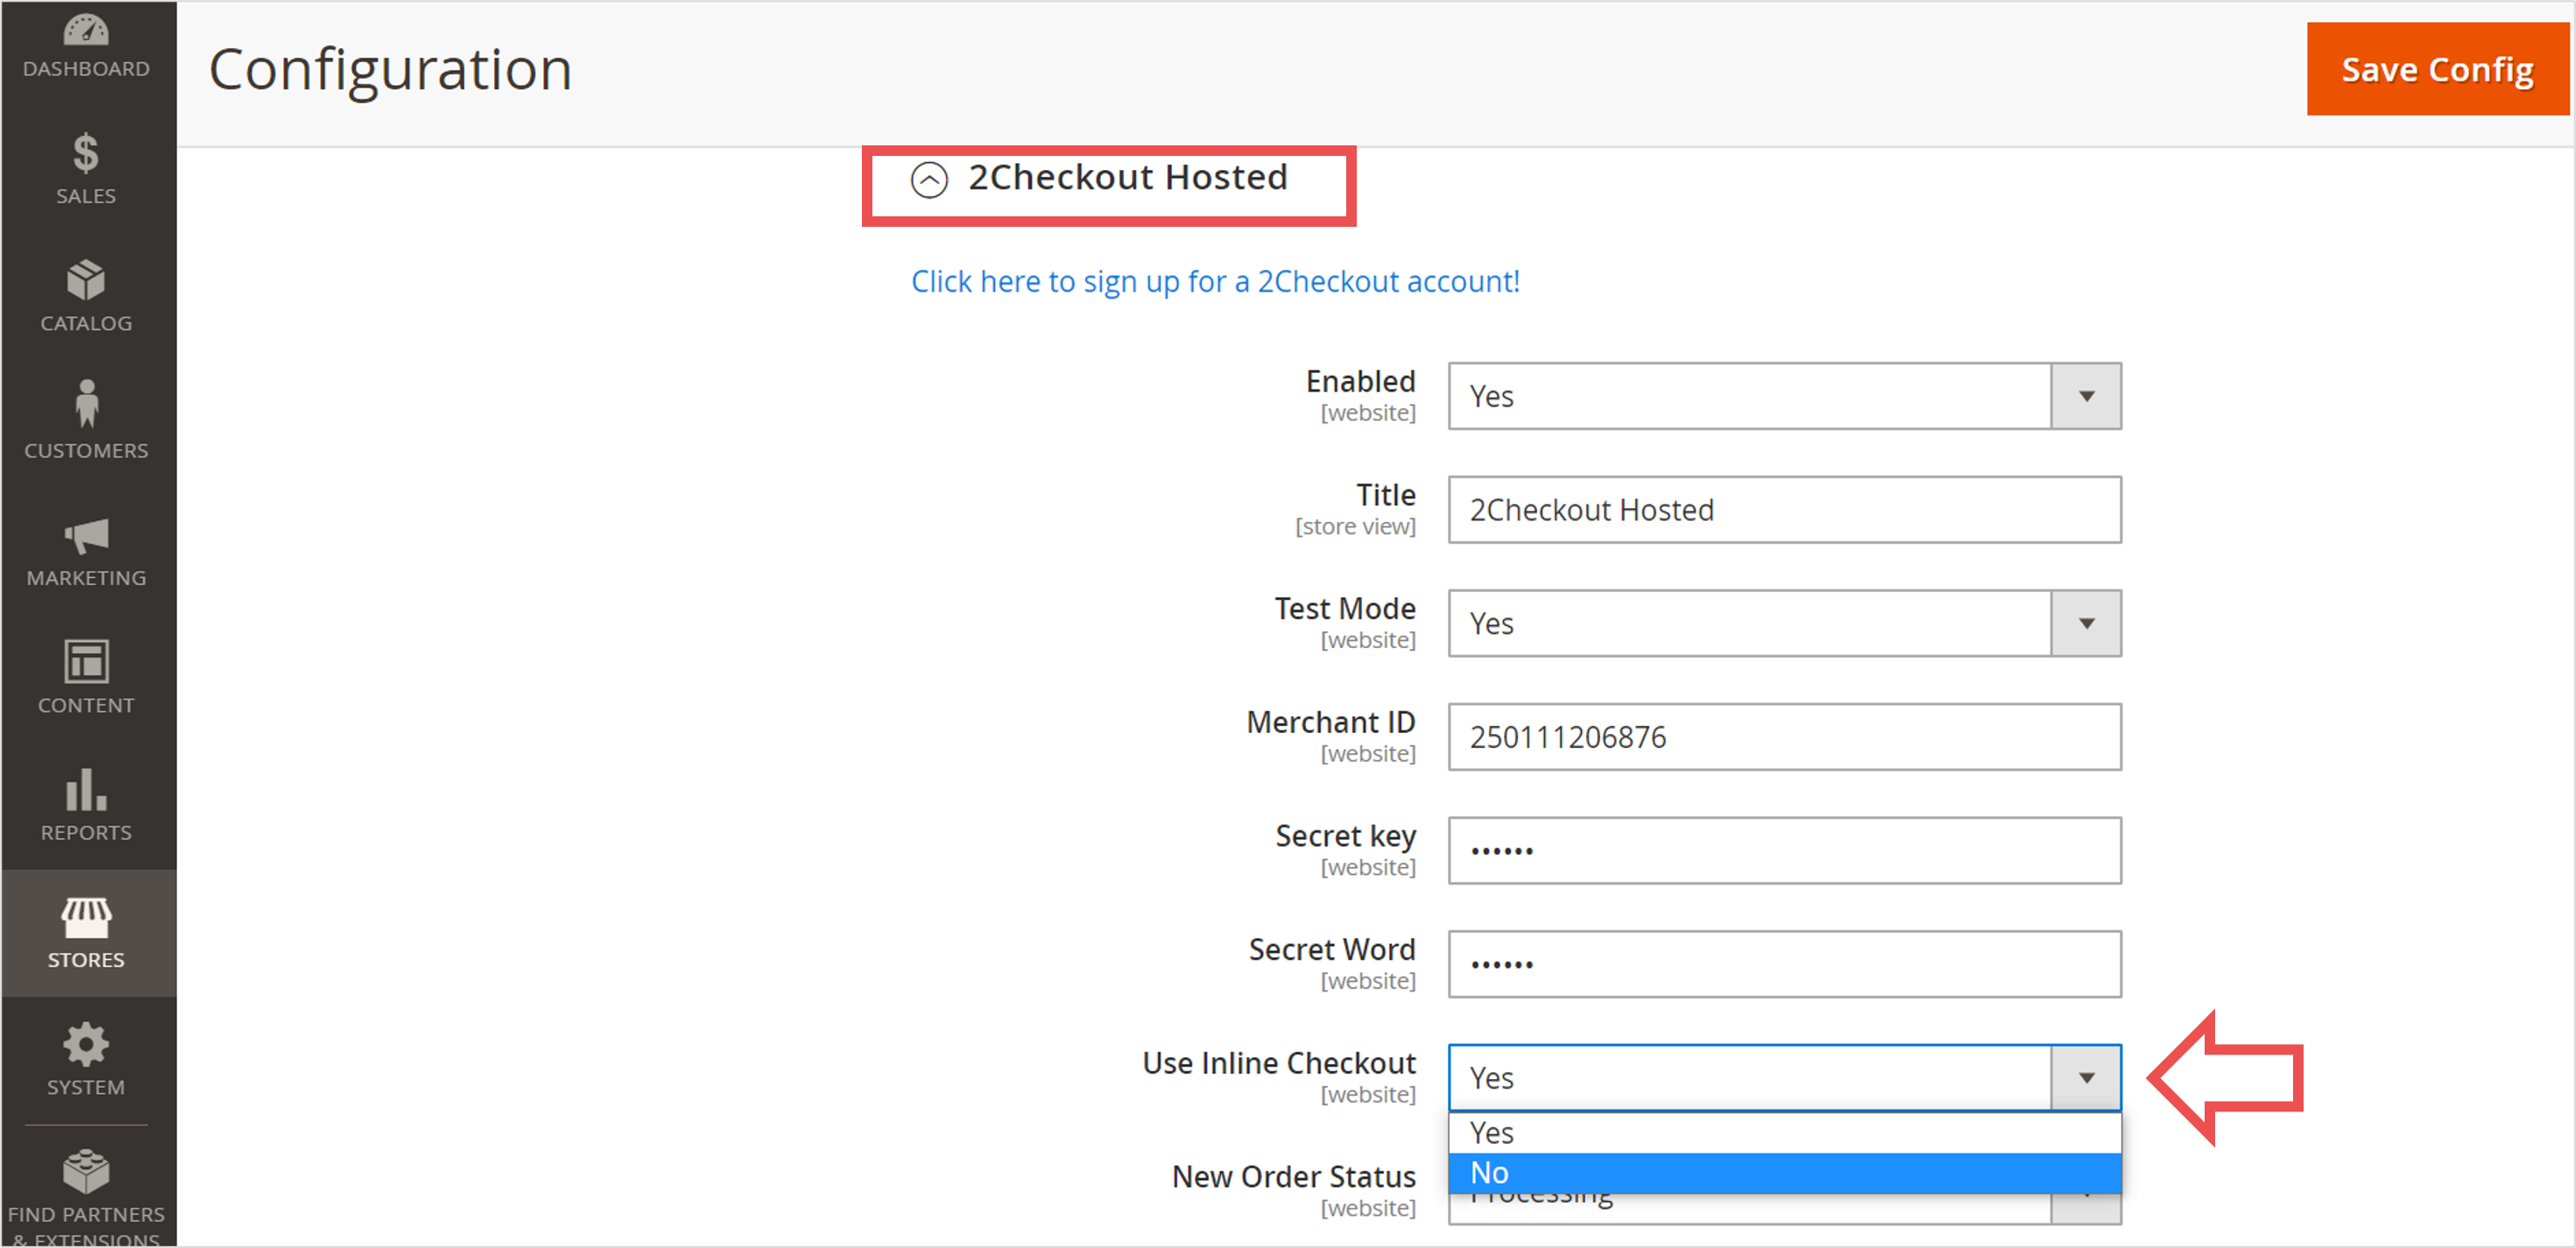
-
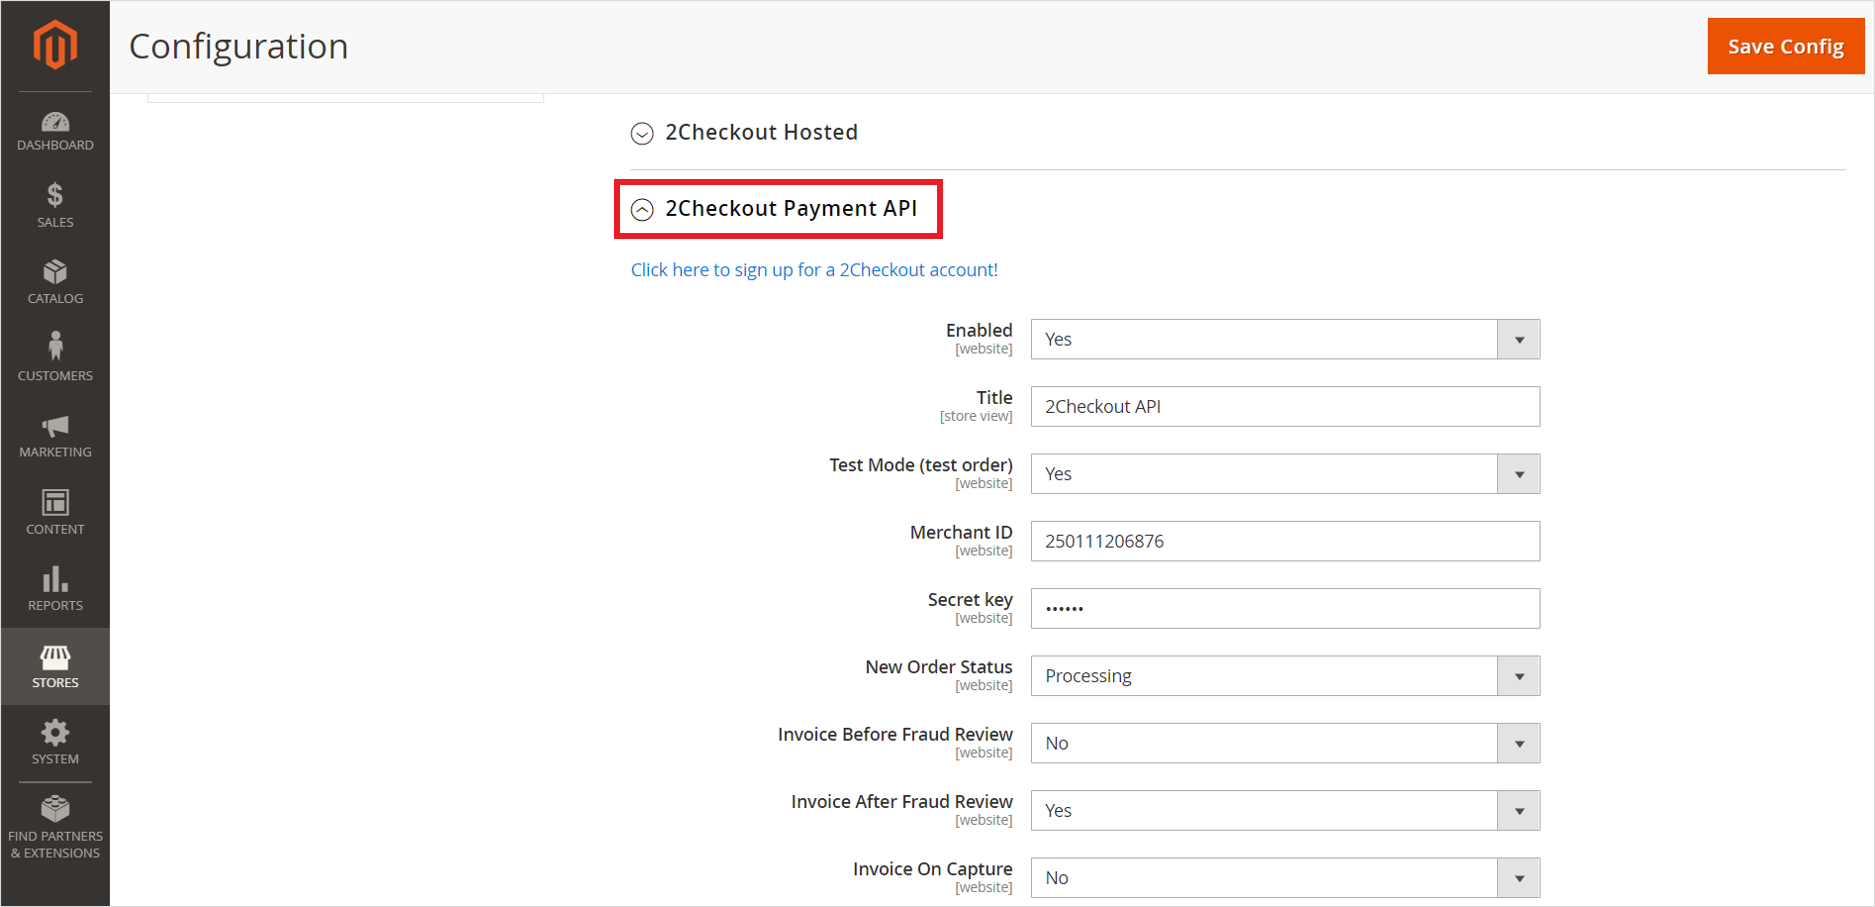
Select your settings for the 2Checkout Payment API option and click on Save Config to save your settings.
The Test Mode dropdown enables or disables the demo mode. If it’s set to Yes, then any placed order is for demonstration purposes only and has no impact on the store.- The Merchant ID field is your Merchant Code which can be found in your 2Checkout Merchant Control Panel, under Integrations → Webhooks & API.
- The Secret key field is your Secret Key which can also be found in your 2Checkout Merchant Control Panel, under Integrations → Webhooks & API.
- The Secret Word field is the Buy-Link Secret Word which can be found in your 2Checkout Merchant Control Panel, under Integrations → Webhooks & API.
- The Use Inline Checkout dropdown determines if the InLine mode or the ConvertPlus mode is used. Setting the Use InLine Checkout option to No enables the ConvertPlus mode.
- The New Order Status sets the default status of the order when it’s created. We do recommend that you leave it as Processing. Unless you have a very good reason to set it to any other status.
- The Invoice Before Fraud Review dropdown issues an invoice before 2Checkout does a fraud review on the order.
- The Invoice After Fraud Review dropdown issues an invoice after 2Checkout does a fraud review.

We recommend you to have the “Invoice Before Fraud Review” option set to “No” and the “Invoice After Fraud Review” option set to “Yes”. Unless you have a good reason to issue the invoice before the fraud review. - The Invoice On Capture field issues an invoice on capturing a transaction.
Both “2checkout Hosted” and “2checkout Payment API” options must be configured. Usually, they have the same settings, but variations are possible.
2Checkout Settings
- Sign in to your 2Checkout Merchant Control Panel account.
- Navigate to Dashboard → Integrations → Webhooks & API section.
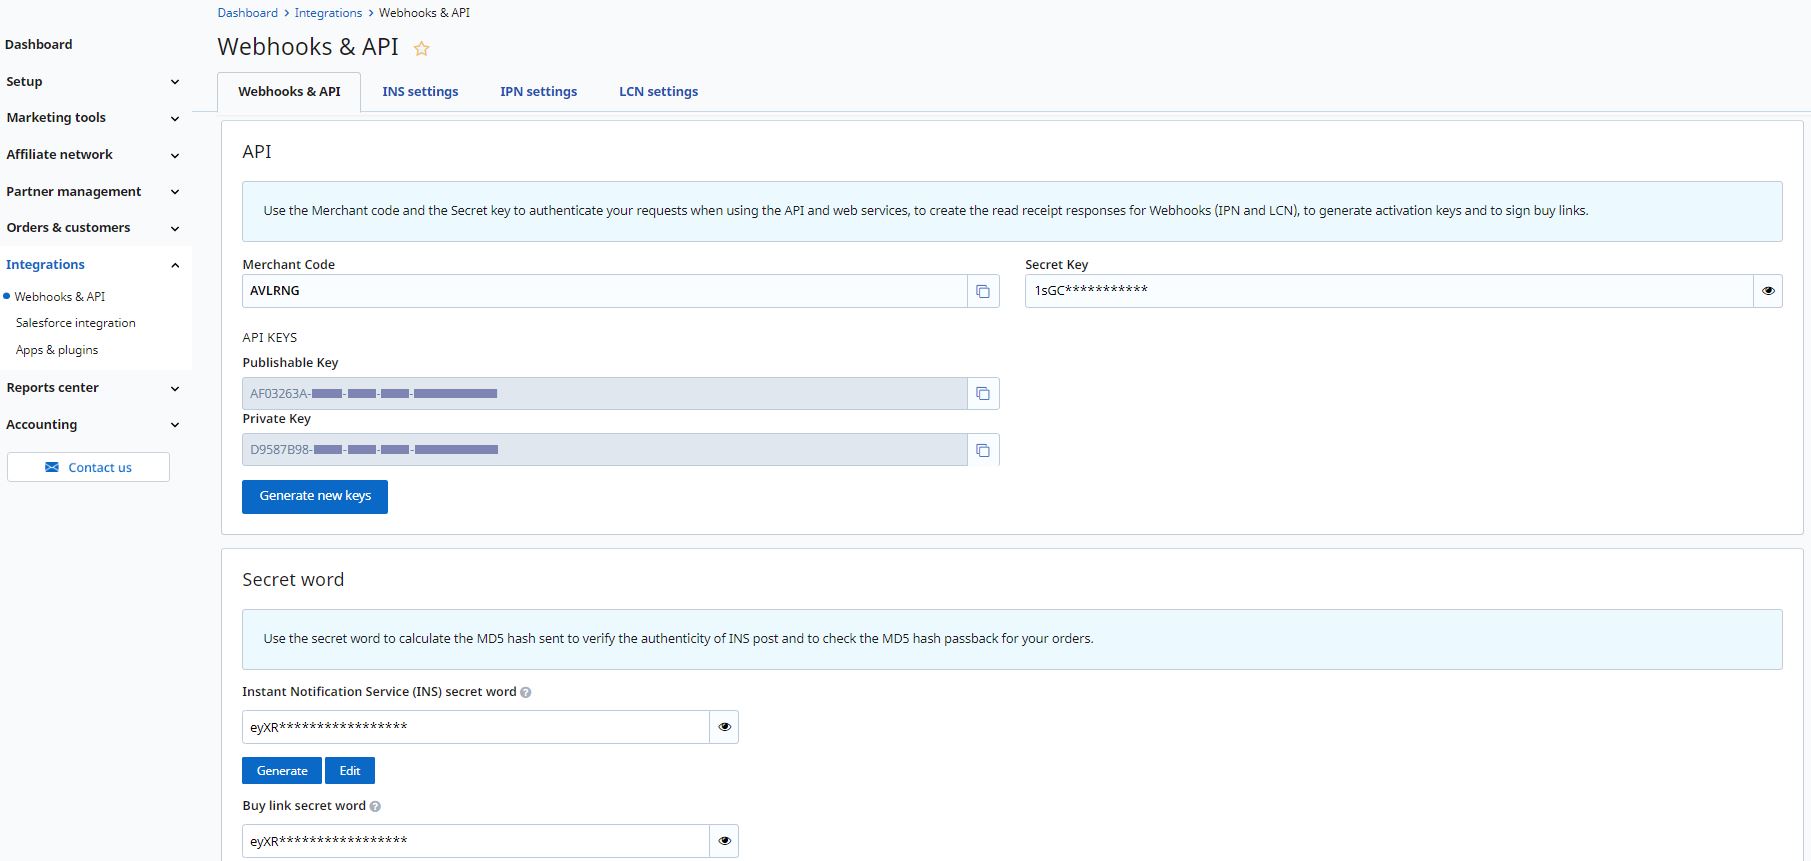
- Locate the Merchant Code, Secret key, and the Buy-link Secret Word to be used in the Magento 2 administration panel.
- Under Integrations, click on the IPN Settings tab.
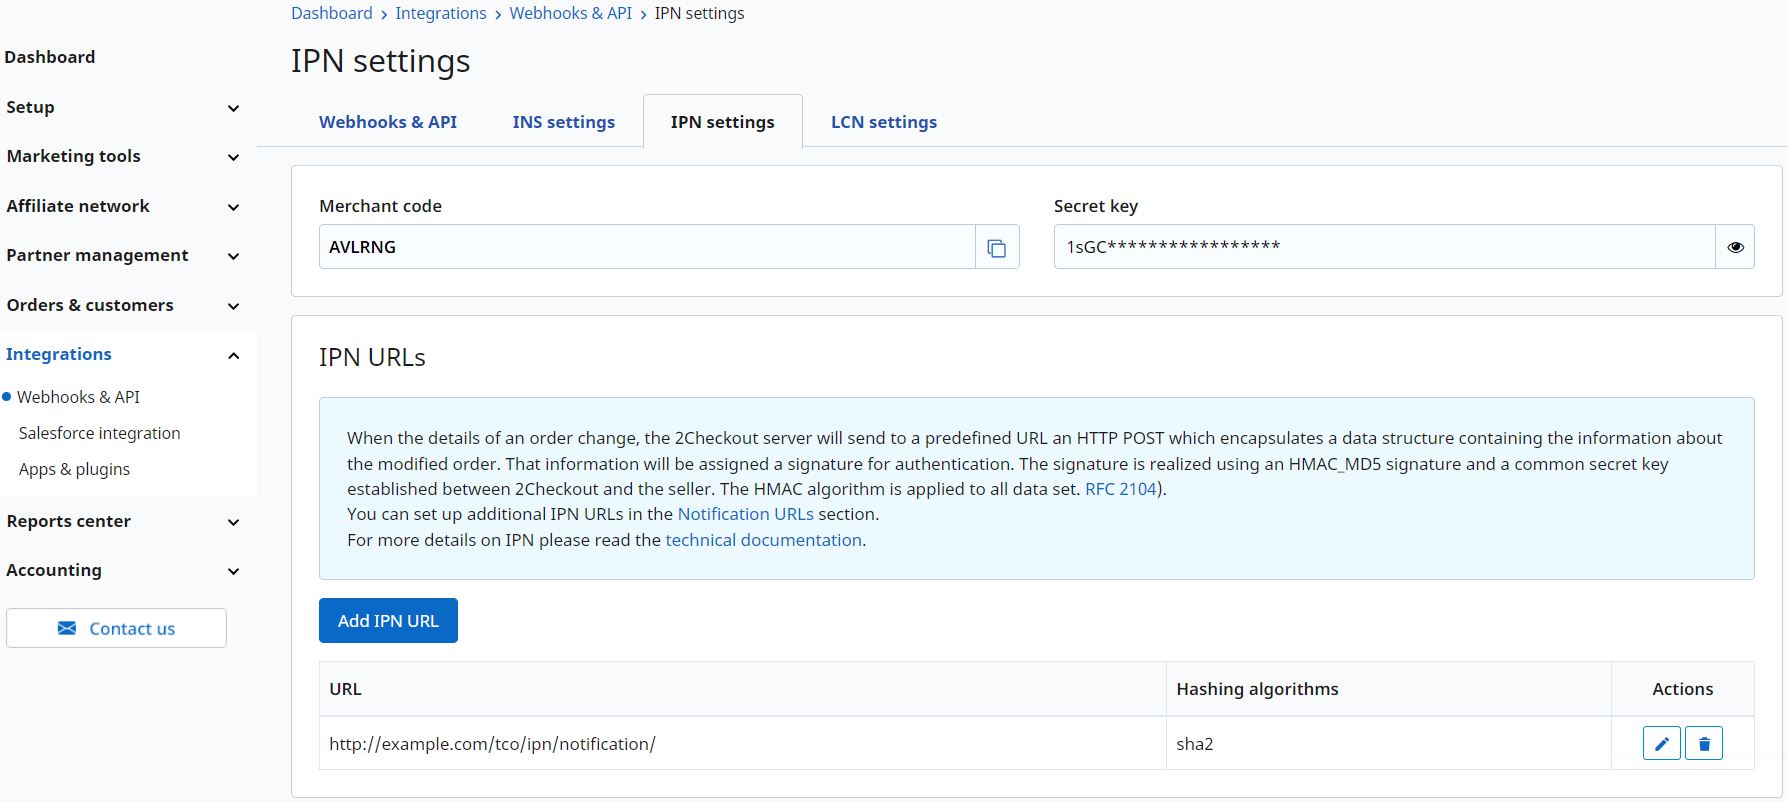
- Set the IPN URL which should be: https://your-site-name.com/tco/ipn/notifications/ and select the SHA 2 / SHA 3 hash.
Example of IPN URL: http://example.com/tco/ipn/notification/. - Enable all Response tags and the Triggers in the IPN section. Those who are not required will simply not be used.
About Magento
Magento is a feature-rich, open-source, enterprise-class eCommerce solution that offers merchants a high degree of flexibility and control over the user experience, catalog, content, and functionality of their online store. In August 2011, Magento was acquired by eBay Inc. In May 2018 it was announced that Magento would be acquired by Adobe for $1.68bn with a view to integrating it into Adobe Experience Cloud, its Enterprise CMS platform. The transaction is expected to complete between June and August of 2018, Q3 of Adobe's fiscal year.
Launched in 2007, the Magento platform now serves tens of thousands of merchants worldwide and is supported by a global community of solution partners and third-party developers. Magento Go is a hosted, software-as-a-service solution that provides small and growing merchants with the eCommerce tools they need to succeed online. Based in Los Angeles, Magento, Inc. is a fast-paced, entrepreneurial organization dedicated to the mission of enabling the eCommerce ecosystem.