Integrate WooCommerce
Overview
WooCommerce is a plugin that integrates easily with any website built on WordPress. The plugin helps merchants turn their websites into fully functional WordPress eCommerce platforms with just a few clicks.
WooCommerce offers online retailers a suite of services, including payments, marketing, shipping, and customer engagement tools to simplify the process of running an eStore for small and enterprise merchants.
Related links
Want to process payments through the 2Checkout platform and integrate with us within minutes? Choose from a list of +100 connectors and leverage our capabilities to simplify the way you handle payments.
Availability
WooCommerce integration is available only for 2Checkout accounts that handle their own tax and invoice management (2Sell and 2Subscribe accounts).
WooCommerce Settings
Regardless of whether you are already using the WooCommerce connector or you want to start integrating with 2Checkout to receive payments, you need to follow the steps below:
Current module version is not compatible with WooCommerce 8.5.1 (WooCommerce Blocks). A new compatible version will soon be released.
-
Download the 2Checkout payment module from GitHub by clicking on the Code button and then on Download ZIP.
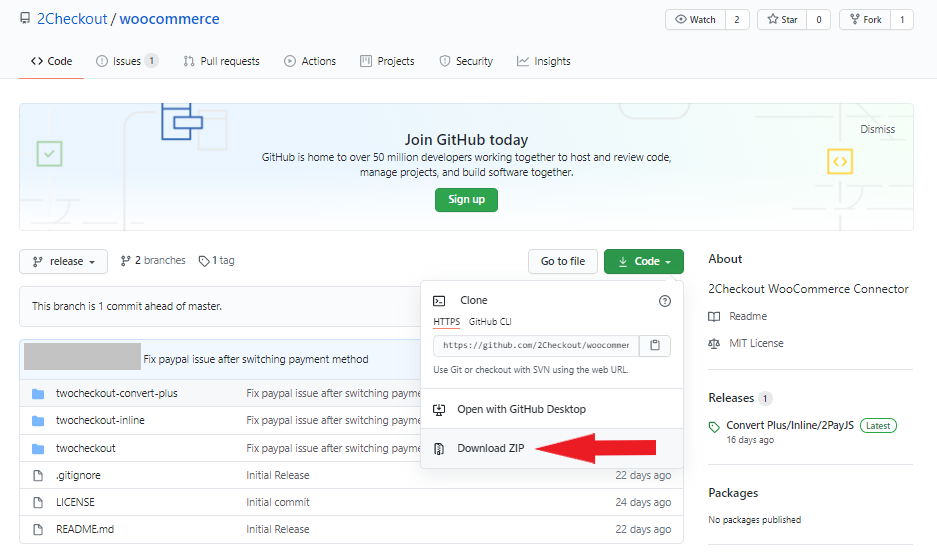
- After downloading the .zip archive, open it and extract the folders twocheckout-convert-plus, twocheckout-inline, and twocheckout. Archive these folders separately as a .zip file.
-
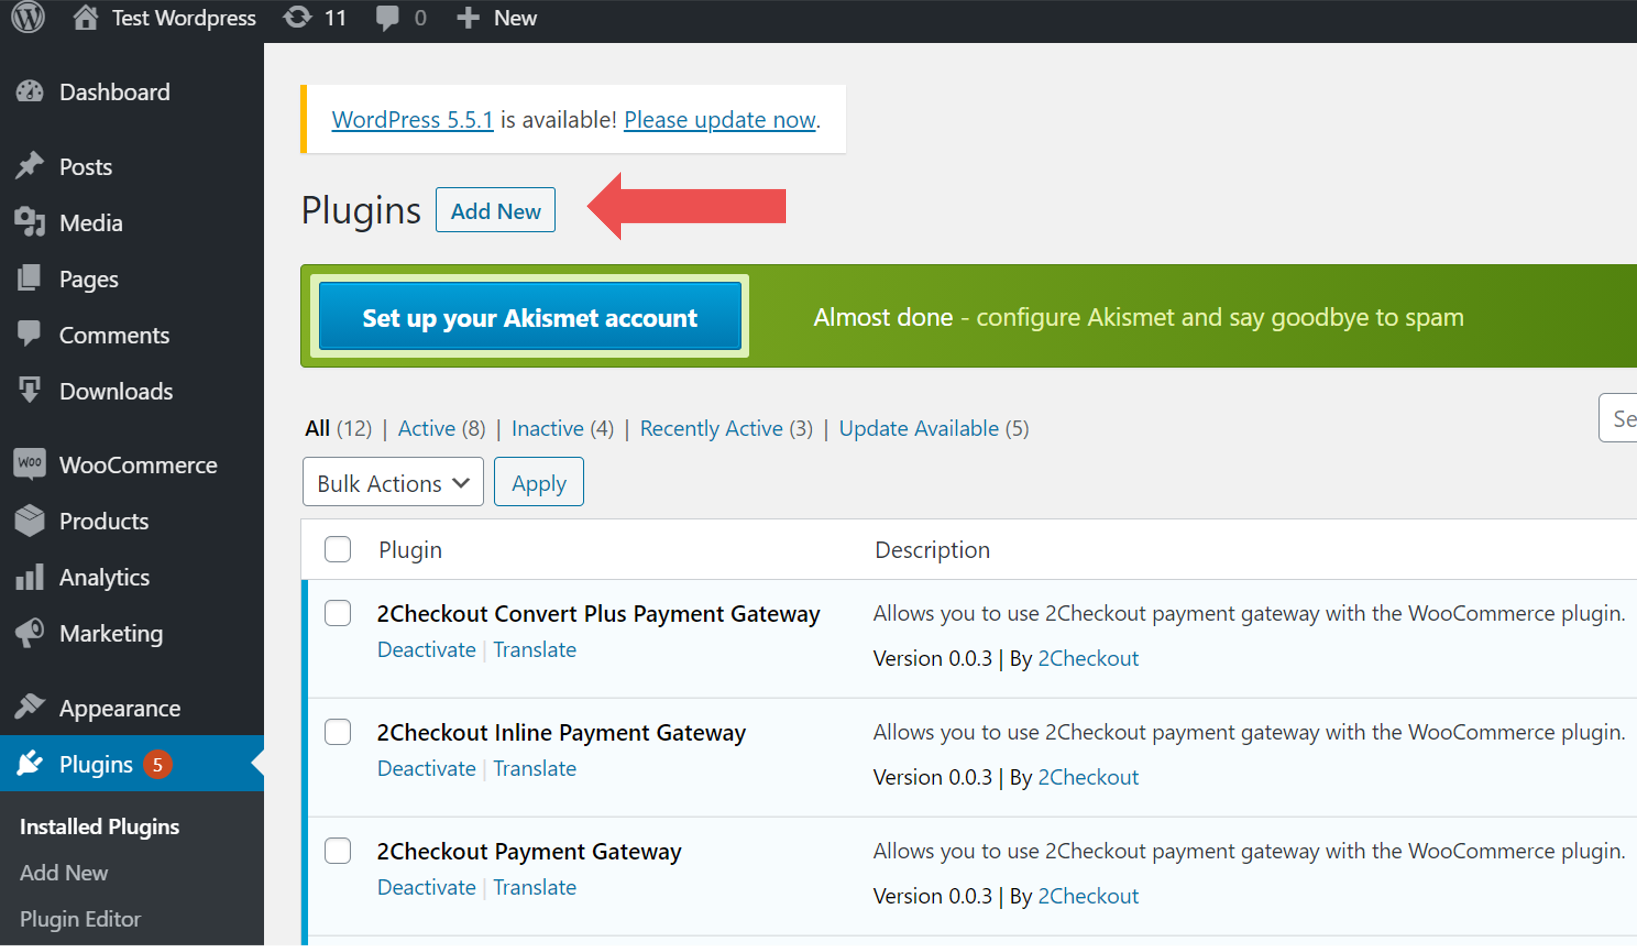
Log in to your WordPress admin, navigate to Plugins, and click on Add new.
-
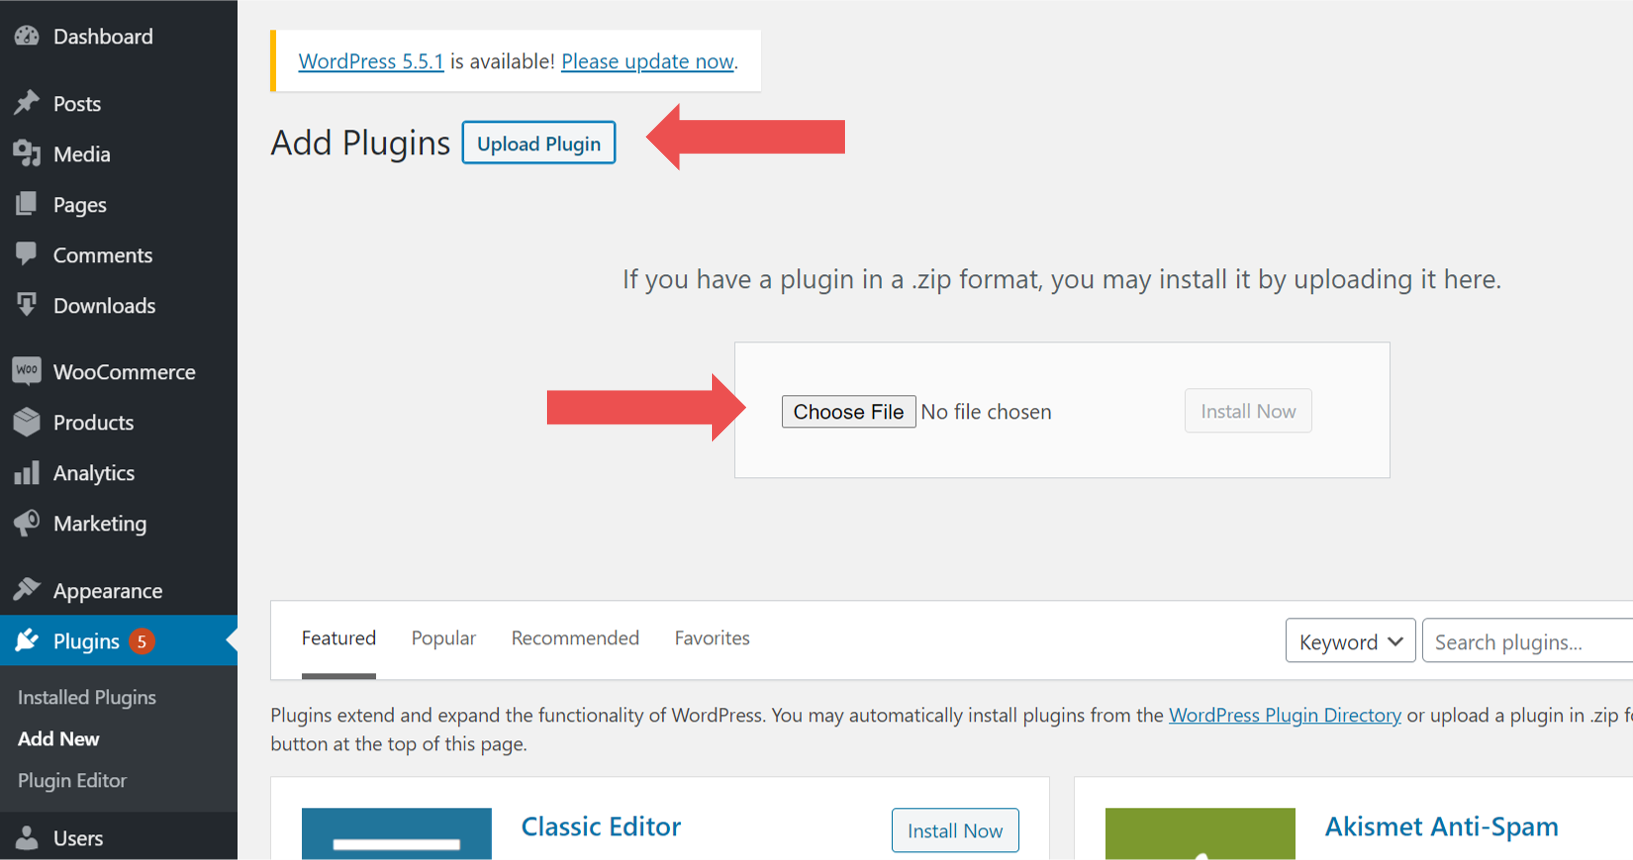
On the Add plugins page, click on Upload plugin, then on Choose File and on Install Now.
-
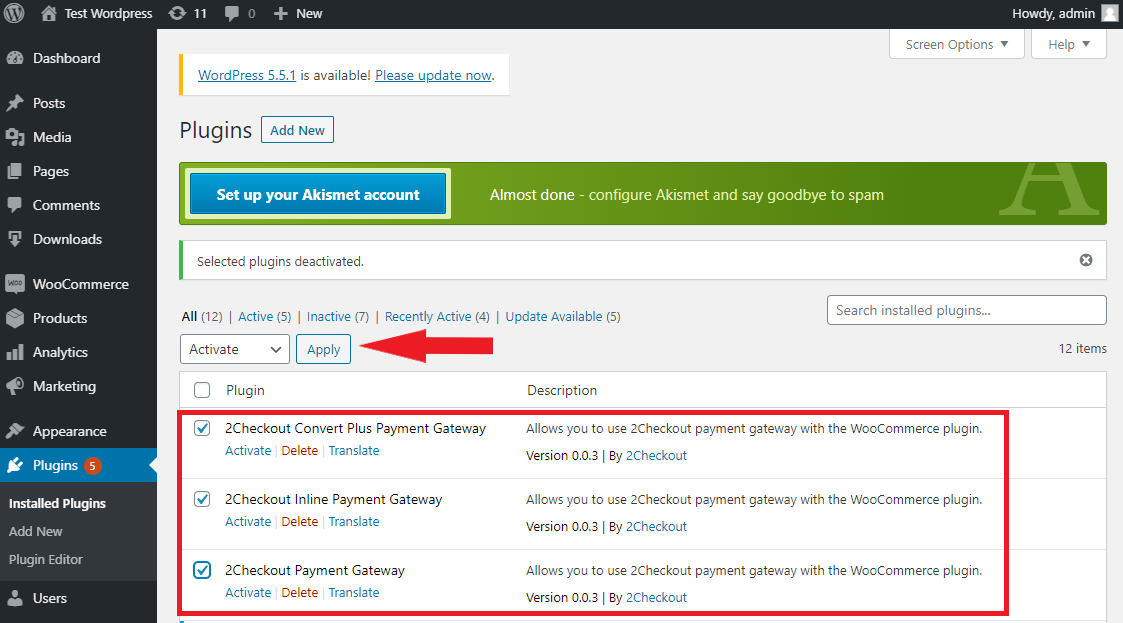
On the Plugins page, activate the modules for ConvertPlus, InLine cart, and 2Pay.js by checking the boxes and clicking on the Apply button.
-
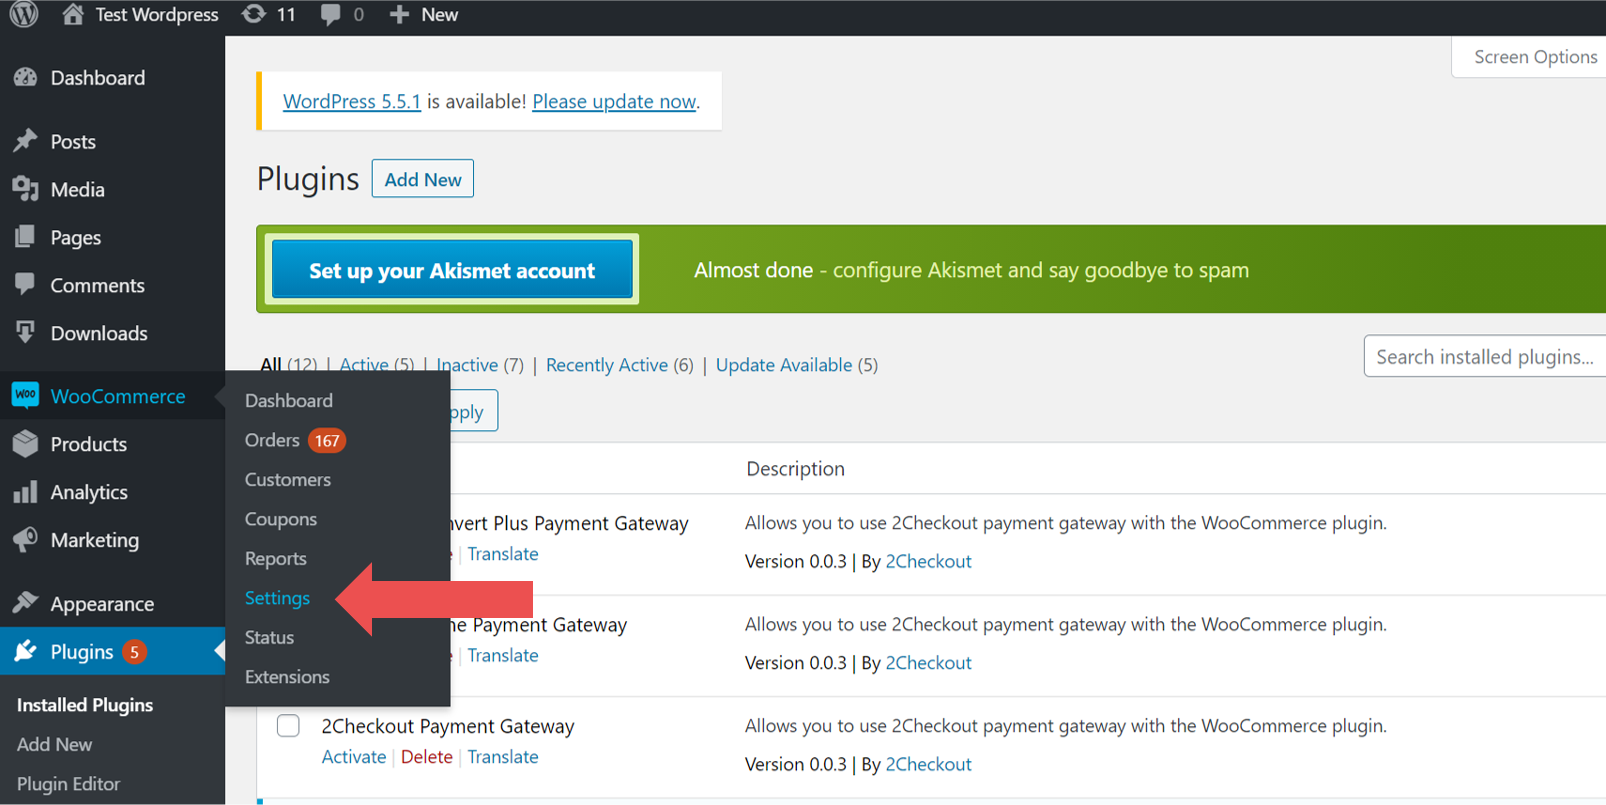
Go back to Dashboard, scroll down to WooCommerce, and click on Settings.
-
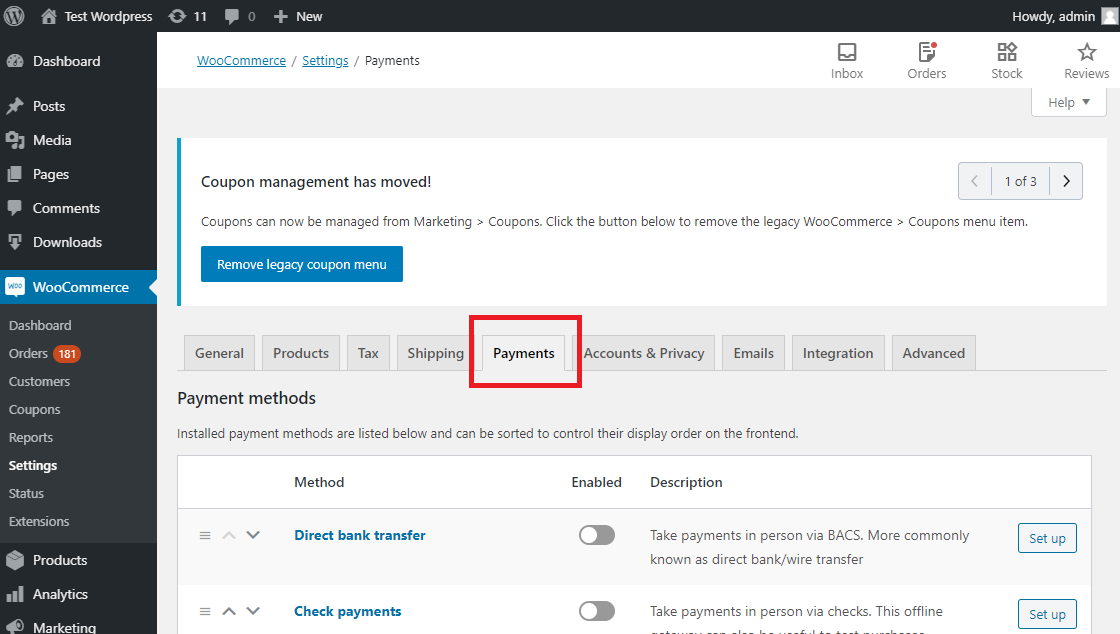
Under WooCommerce - Settings, click on the Payments tab.
-
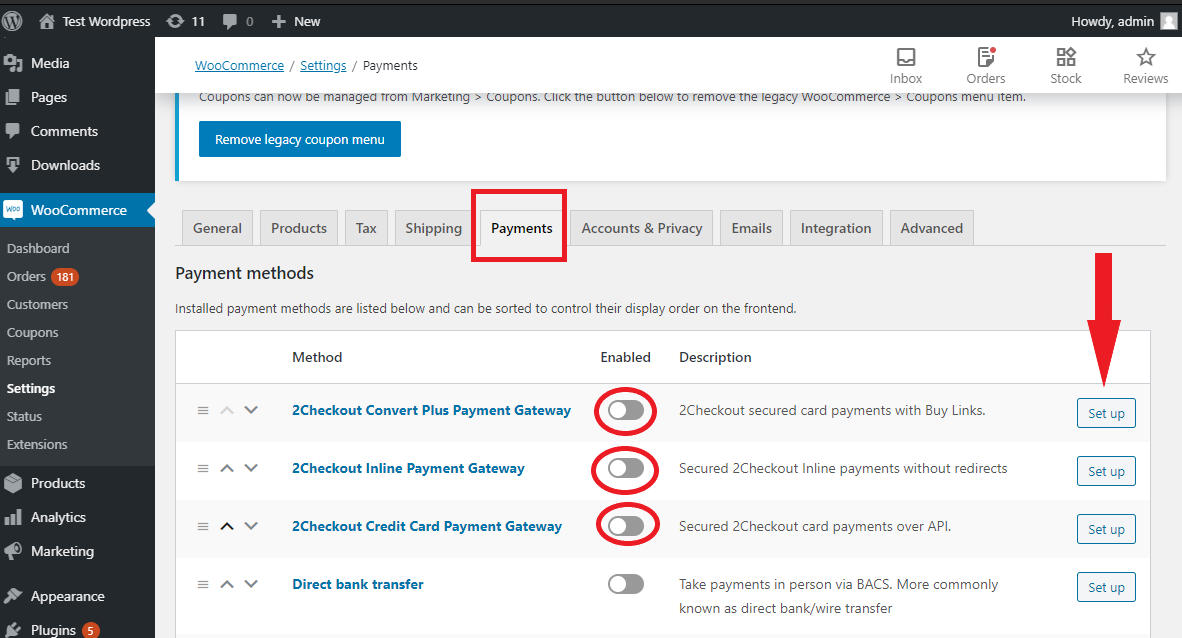
Enable all three modules and then click on Set up to configure each module.
-
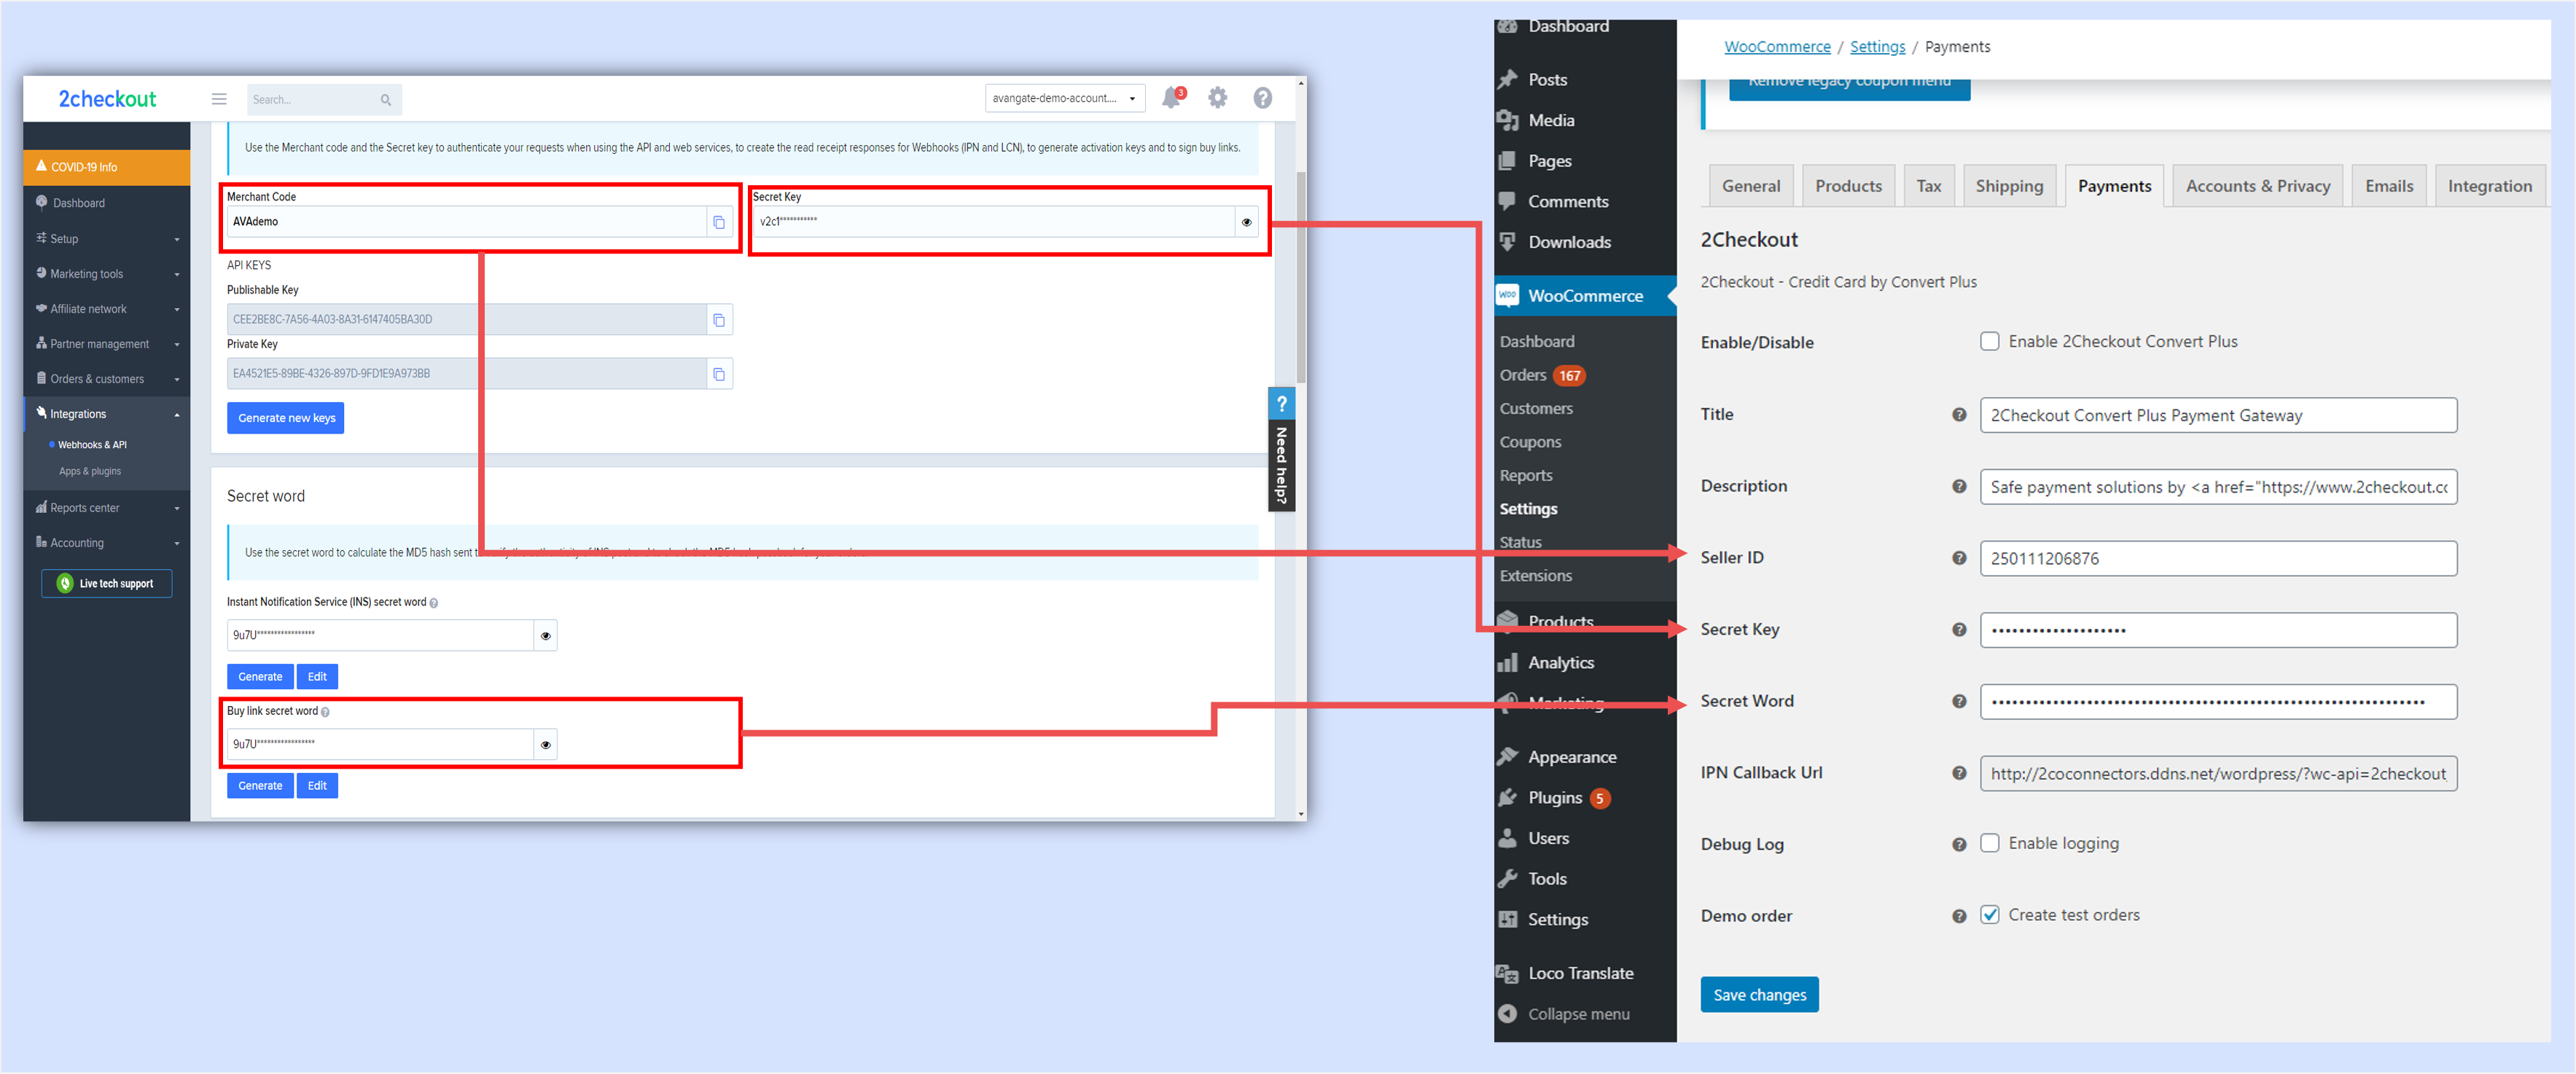
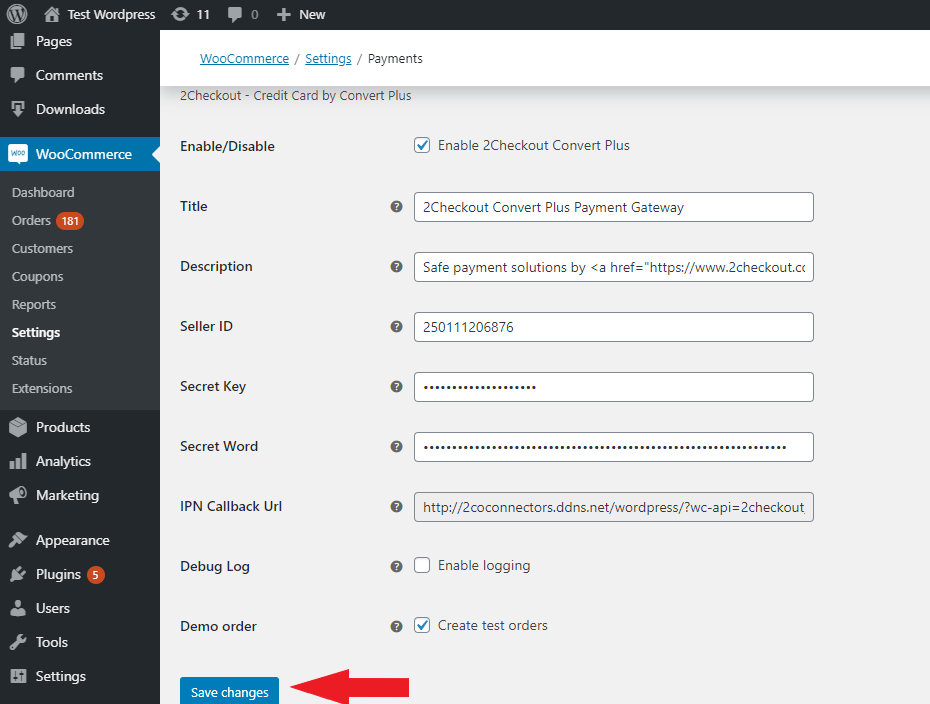
Configure each module by filling in all the fields:
- Input a Title and Description for the module. These fields control how your users will see the module during checkout.
- Input the Seller ID. Your Seller ID is the Merchant Code from the 2Checkout Merchant Control Panel. To copy this code from 2Checkout and paste it in the WooCommerce platform:
- Log in to your 2Checkout Merchant Control Panel and navigate to Integrations → Webhooks & APIs. Copy the Merchant Code from the API section and paste it into the Seller ID field in WooCommerce.
- Input the Secret Key. To copy the Secret Key from 2Checkout and paste it in the WooCommerce platform:
- Log in to your 2Checkout Merchant Control Panel and navigate to Integrations → Webhooks & APIs. Copy the Secret Key from the API section and paste it into the Secret Key field in WooCommerce.
- Input the Secret Word. Your Secret Word is the Buy-Link Secret Word from the 2Checkout Merchant Control Panel. To copy this code from 2Checkout and paste it in the WooCommerce platform:
- Log in to your 2Checkout Merchant Control Panel and navigate to Integrations → Webhooks & APIs. Go to the Secret Word section, edit the INS Secret Word to match the Buy-Link Secret Word, then copy the code and paste it into the Secret Word field in WooCommerce.
- Fill in the IPN URL.
- Check the Debug Log option if you want to log 2Checkout events.
- Check the Demo order option if you want to be able to place test orders.
-
Click on Save changes.
-
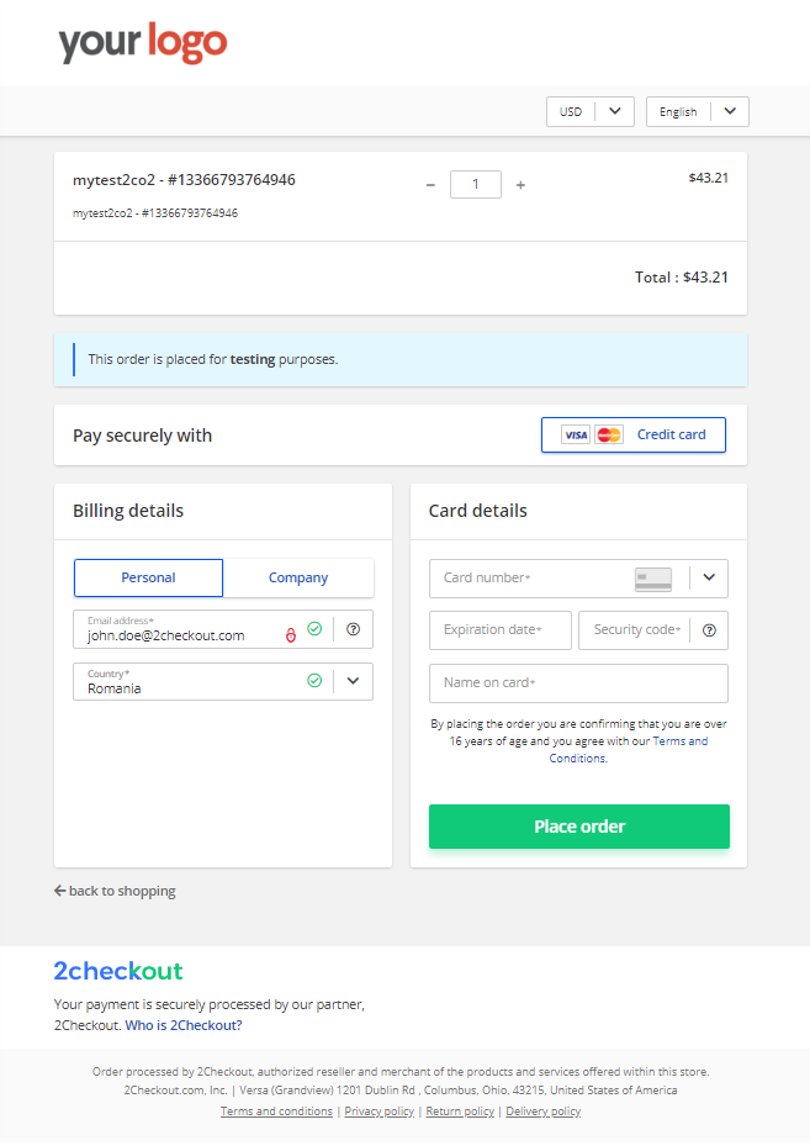
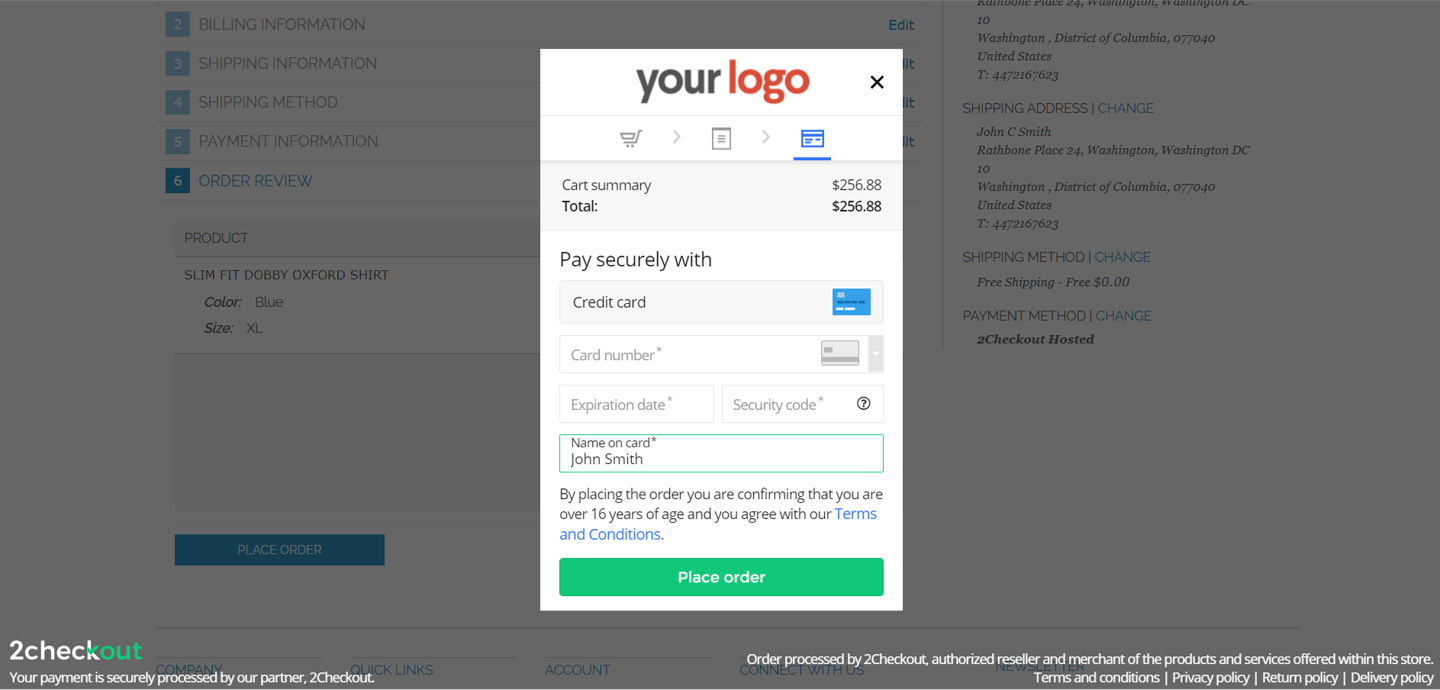
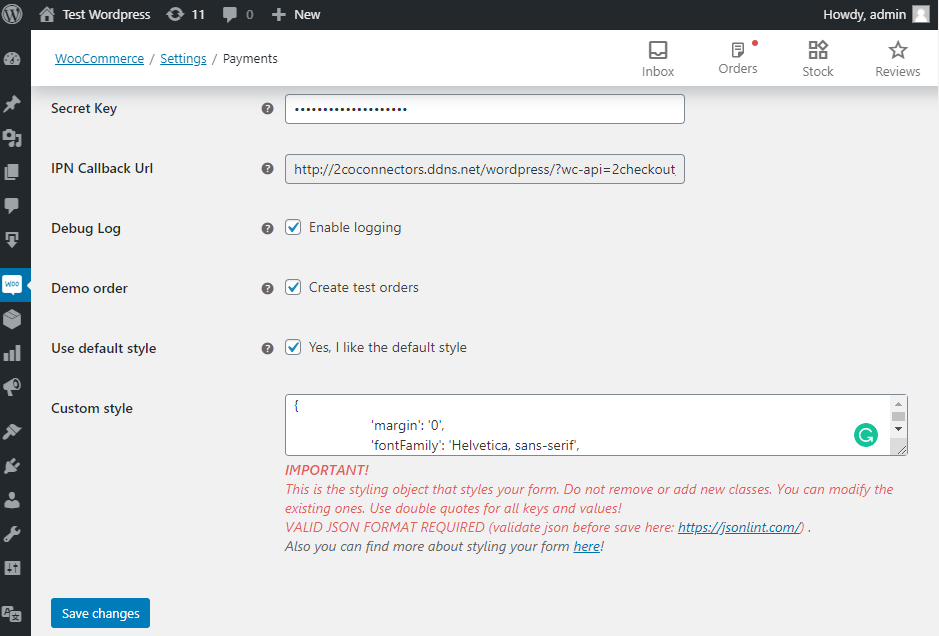
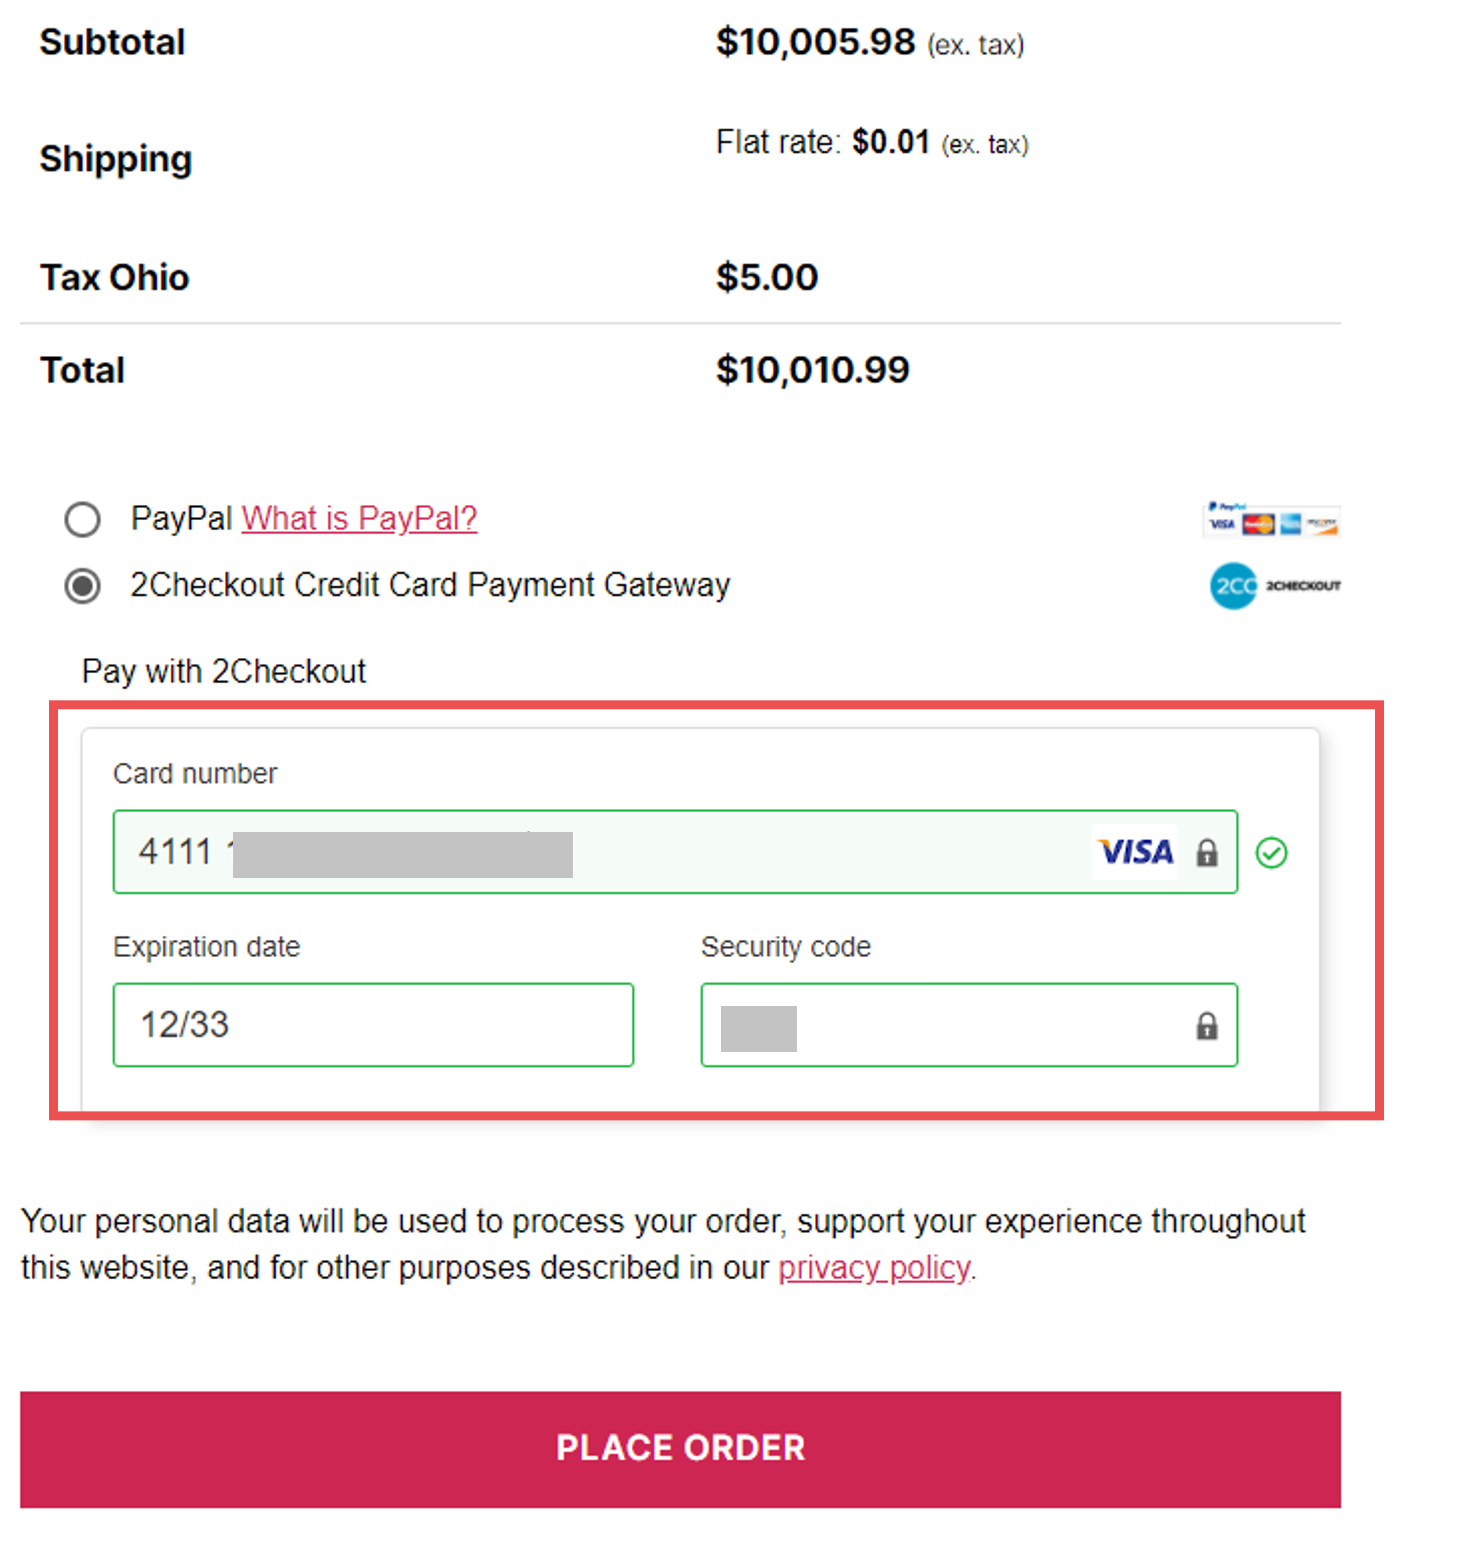
Test your integration by placing an order. If your setup is correct,
- the ConvertPlus flow will look as below
- the InLine checkout flow will look like this
- the 2Pay.js flow will be displayed as shown below. You can customize the form by using the Custom style option.
2Checkout Settings
- Sign in to your 2Checkout account.
- Navigate to Dashboard → Integrations → Webhooks & API section.
- Follow these steps to activate Redirect URL:
- In the Redirect URL section, check Enable return after sale
- For Redirect URL section, set the Approved URL to your WooCommerce URL
- For the Return method, select Header Redirect
- Click Update to save your settings.
-
Make sure to enable the IPN webhook notification in your Merchant Control Panel.
- Log in to the 2Checkout Merchant Control Panel and navigate to Integrations → Webhooks & API
- Scroll down to the Notifications section and enable the IPN webhook
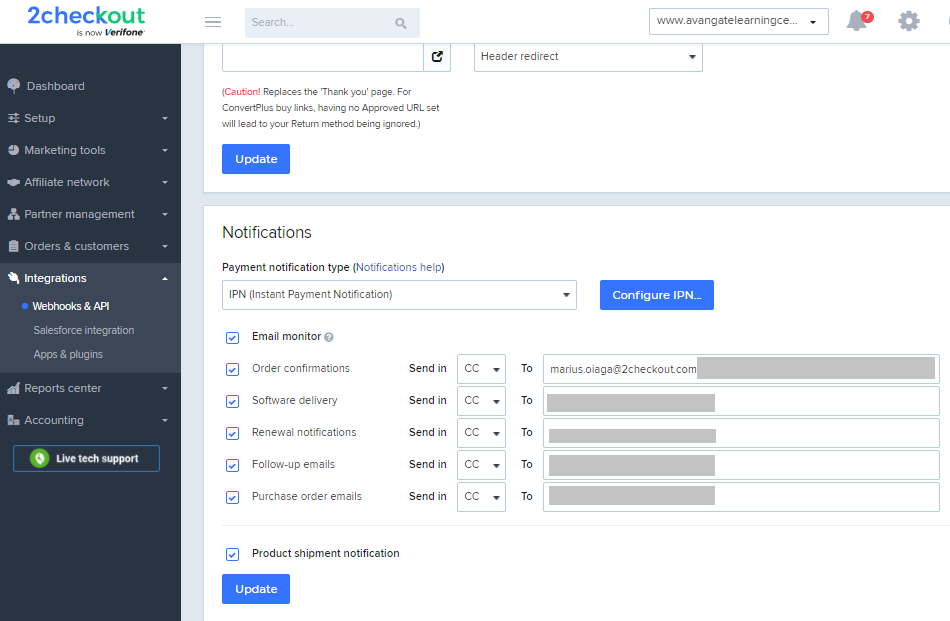
- For the Payment notification type field, select IPN or Email Text & IPN, and then click on the Configure IPN button.
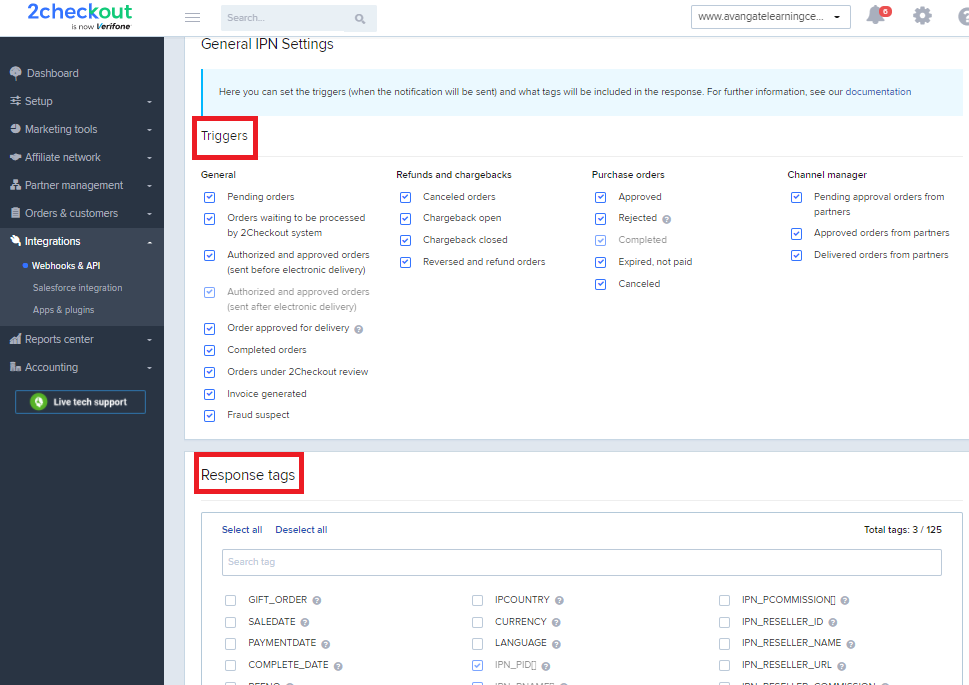
- On the IPN settings page, click on the Add IPN URL button, input the IPN URL available on the configuration page in WooCommerce, and select the SHA-2/SHA-3 hash.
- Enable all triggers and response tags
About WooCommerce
WooCommerce is the most popular WordPress eCommerce plugin. And it’s available for free. Packed full of features, perfectly integrated into your self-hosted WordPress website. For more information, visit: woothemes.com/woocommerce.
FAQ
- Does the new connector use webhooks?
Yes, it uses IPN, so make sure you enable it from your Merchant Control Panel. - Do order statuses get updated on the WooCommerce side if any change occurs after placing an order?
Yes, both order and fraud statuses are synchronized, as well as refunds. - Can I place refunds?
Yes. You can place refunds from the WooCommerce portal. - Can I use this connector with a 2Monetize account?
No, the connector is built to cover only the 2Sell and 2Subscribe accounts.
