Integrate Zen Cart
Overview
Integrate Zen Cart to be able to process payments through the 2Checkout platform in over 200 countries and more than 100 currencies.
Zen Cart provides a complete package of solutions to different aspects of online business (features like billing, product display, multi-language options, different currencies, etc.).
Availability
Before you are able to start accepting payments, you need to request and finalize the activation of your live account by completing a form, and provide information that will help us verify the business and identity of the individuals involved in your business.
Zen Cart integration is available only for 2Checkout accounts that handle their own tax and invoice management (2Sell and 2Subscribe).
Zen Cart Settings
Perform the below set of instructions in your Zen Cart account to integrate it with 2Checkout.
- Download the 2Checkout payment module from GitHub.
- Upload the files to your server under your store’s directory.
- Log in to your Zen Cart admin panel.
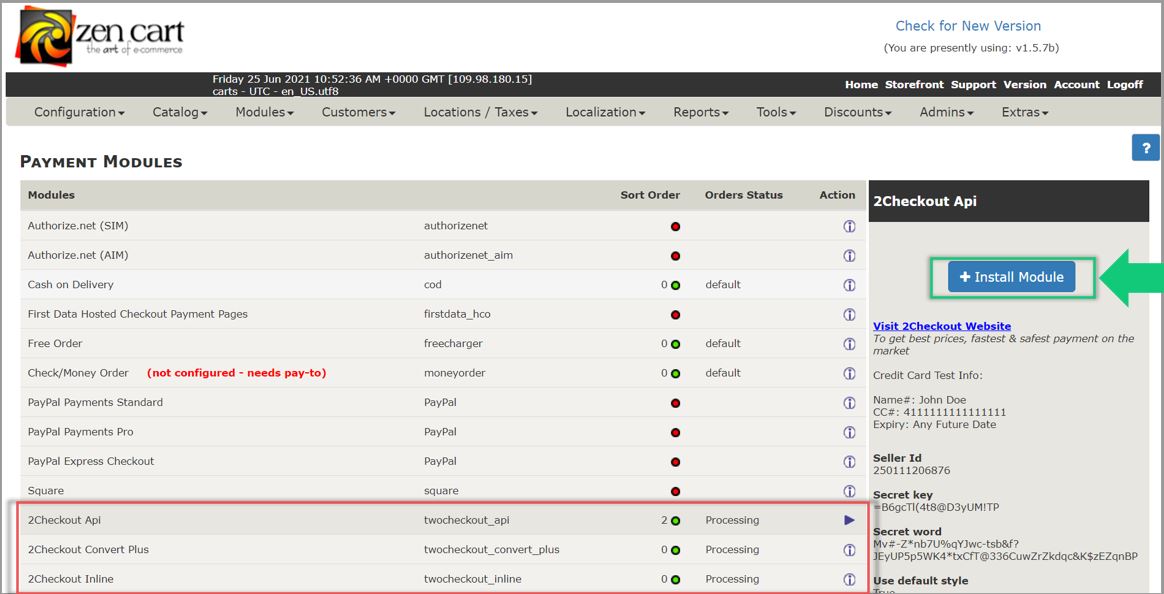
- Navigate to Modules and click on Payment.

- On the Payment Modules page, select 2Checkout API, 2Checkout Convert Plus, or 2Checkout InLine and click on Install Module, as shown below.
-
Enter your 2Checkout information:
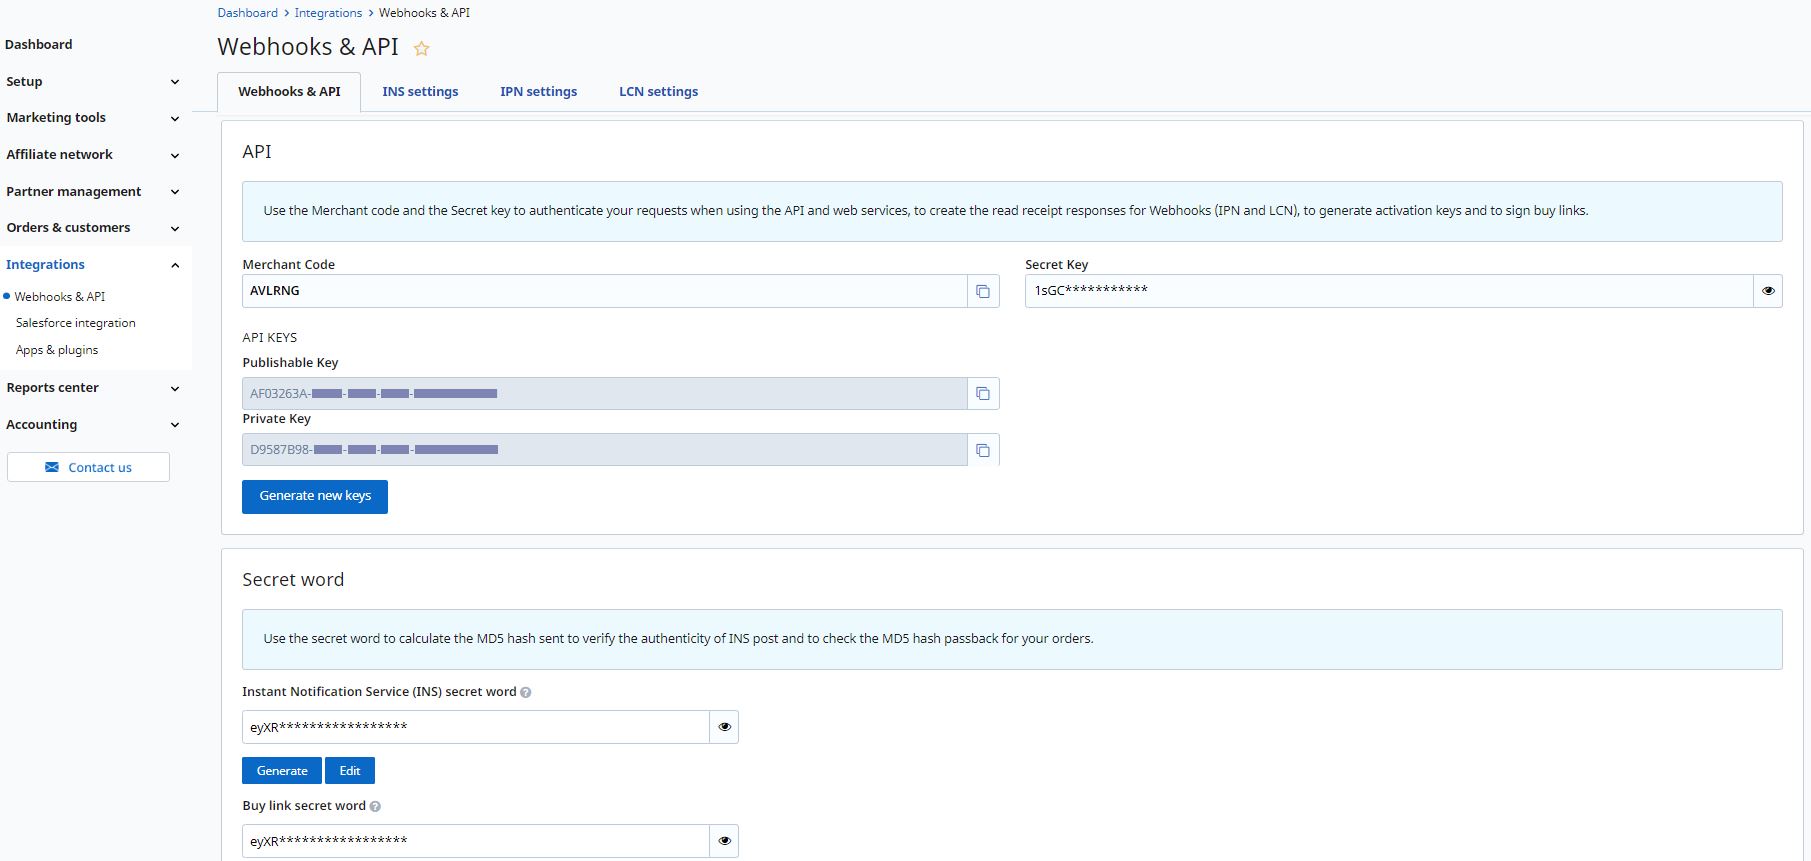
- your Seller ID. The Seller ID is your 2Checkout Merchant Code, and you can find it in the 2Checkout Merchant Control Panel, under Integration → Webhooks and API.
- your Secret Key. You can find it in the 2Checkout Merchant Control Panel, under Integration → Webhooks and API
- your Secret Word. The Secret Word is your 2Checkout Buy-Link Secret Word and you can find it in the 2Checkout Merchant Control Panel, under Integration → Webhooks and API.
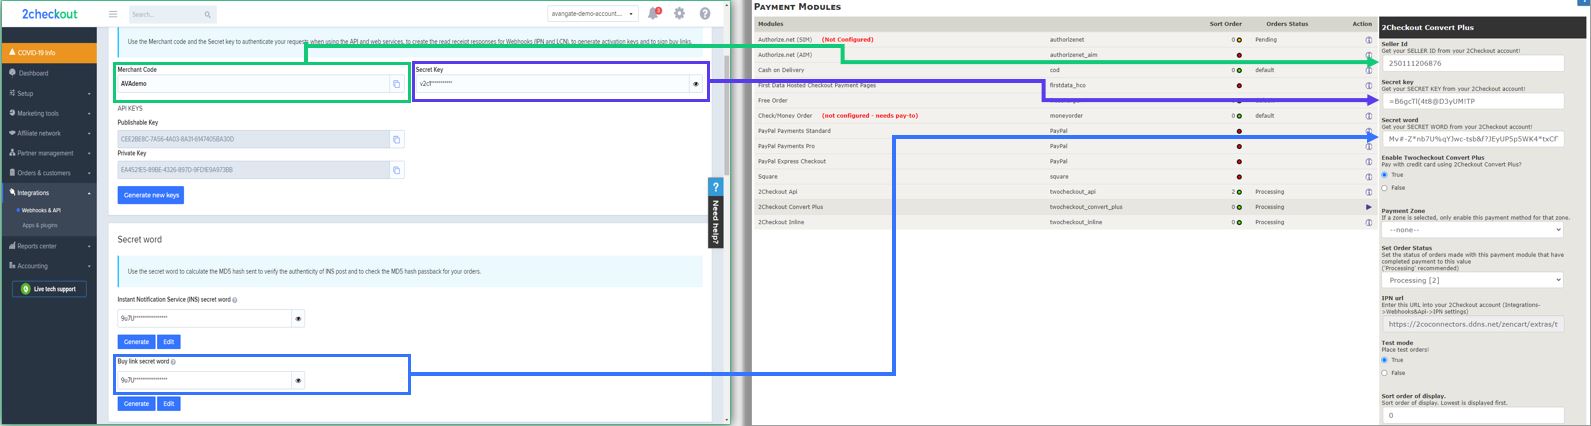
- Under Test Mode select No for live sales or Yes for test sales.
- Click Save Changes.
2Checkout Settings
- Log in to your 2Checkout Merchant Control Panel account.
- Navigate to Integrations → Webhooks & API section.
- Enable the IPN webhook notification.
- Go to Integrations → Webhooks & API
- Scroll down to the Notifications section and
- Enable the IPN webhook
- For the Payment notification type field, select IPN or Email Text & IPN, and then click on the Configure IPN button.
- On the IPN settings page, click on the Add IPN URL button, input the IPN URL available on the configuration page in Zen Cart and select the SHA 2 / SHA 3 hash.
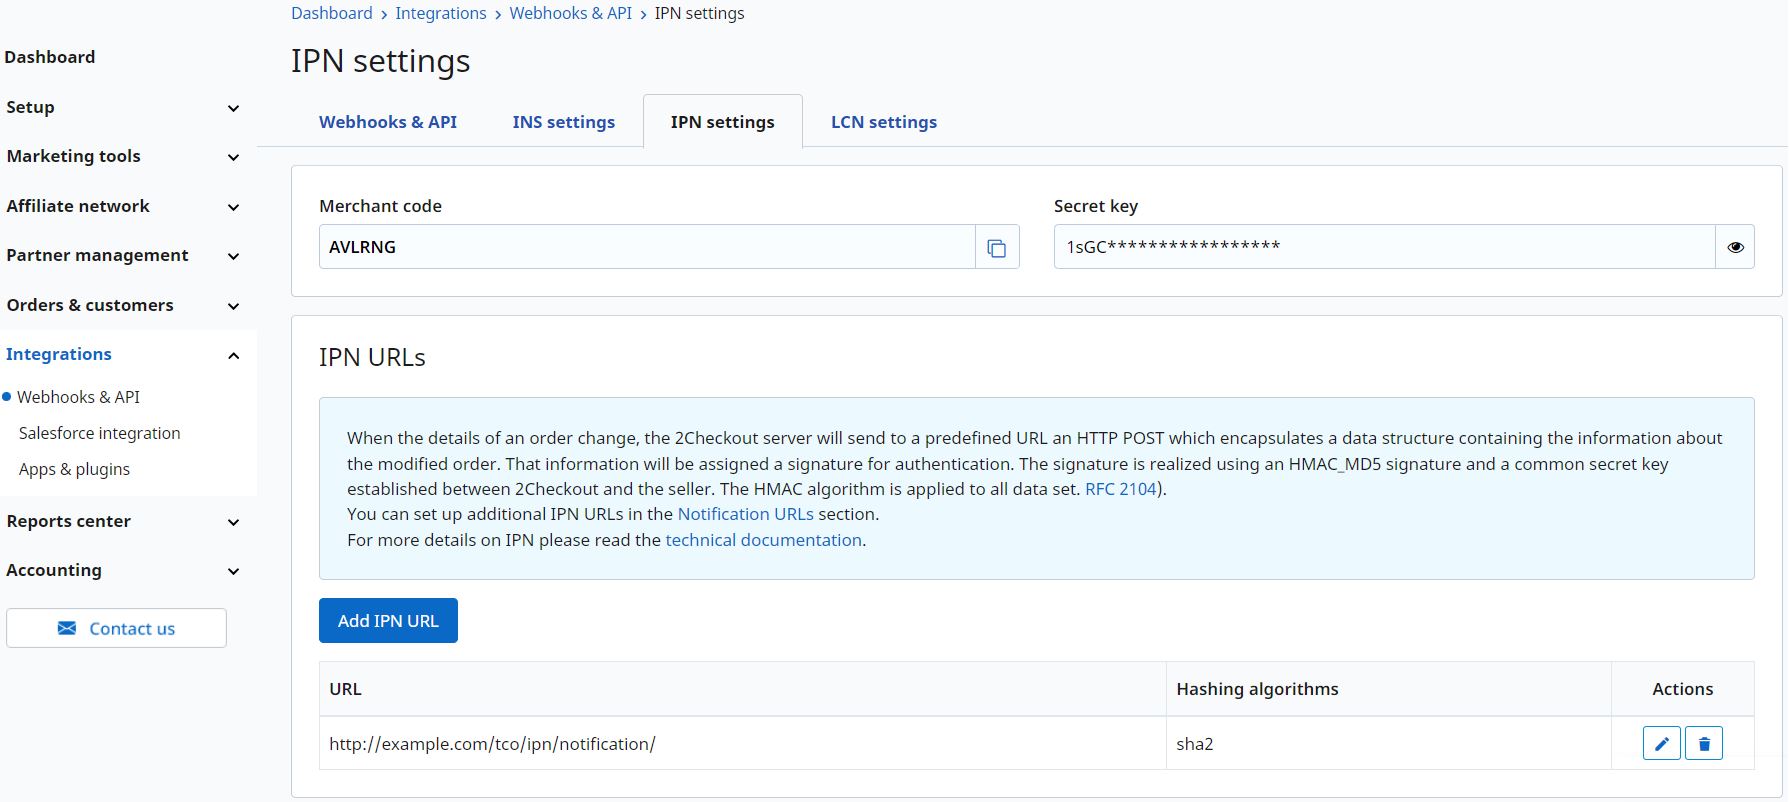
- Enable all triggers and response tags.
About Zen Cart
Zen Cart is an eCommerce and online store management software. It is PHP-based, using a MySQL database and HTML components, and supports both physical and digital products as well as services.
Zen Cart truly is the art of e-commerce: free, user-friendly, open-source shopping cart software. The eCommerce website design program is developed by a group of like-minded shop owners, programmers, designers, and consultants that think eCommerce web design could be and should be, done differently.