Integrate third-party connectors
Overview
You can easily integrate with 2Checkout through different third-party store creators. You can find a list of all the major connectors in our Knowledge Center. However, if you are looking to integrate with 2Checkout through a particular connector that is not listed in our Knowledge Center, see the steps below:
2Checkout Settings:
After logging into your 2Checkout account, navigate to the Integrations → Webhooks & API section in the Control Panel, and you will find all the necessary tools to connect your third-party store creators to your 2checkout account. From this centralized integrations' section you will be able to:
- Set up INS
- Have access to your Merchant code
- Add Return URL with header redirect or link in Thank you page
- Generate an INS secret word
- Generate private API keys, or use any API information required for your authentication
Integration Tools
Merchant code
Throughout the 2Checkout connectors' documentation, you may find the Merchant code also referred to as Seller ID, Account ID, Merchant ID, 2checkout ID, 2checkout account code. You can find your Merchant code in your Control Panel dashboard, in the Integrations section, under Webhooks and APIs.
Return URL
Throughout the 2Checkout connectors' documentation, you may find the Return URL referred to as Return link, Approved URL, Thank you link, Given links back to my website. You can find the Return URL in your Control Panel dashboard, in the Integrations section, under Webhooks and APIs.
Secret Word/Secret Key
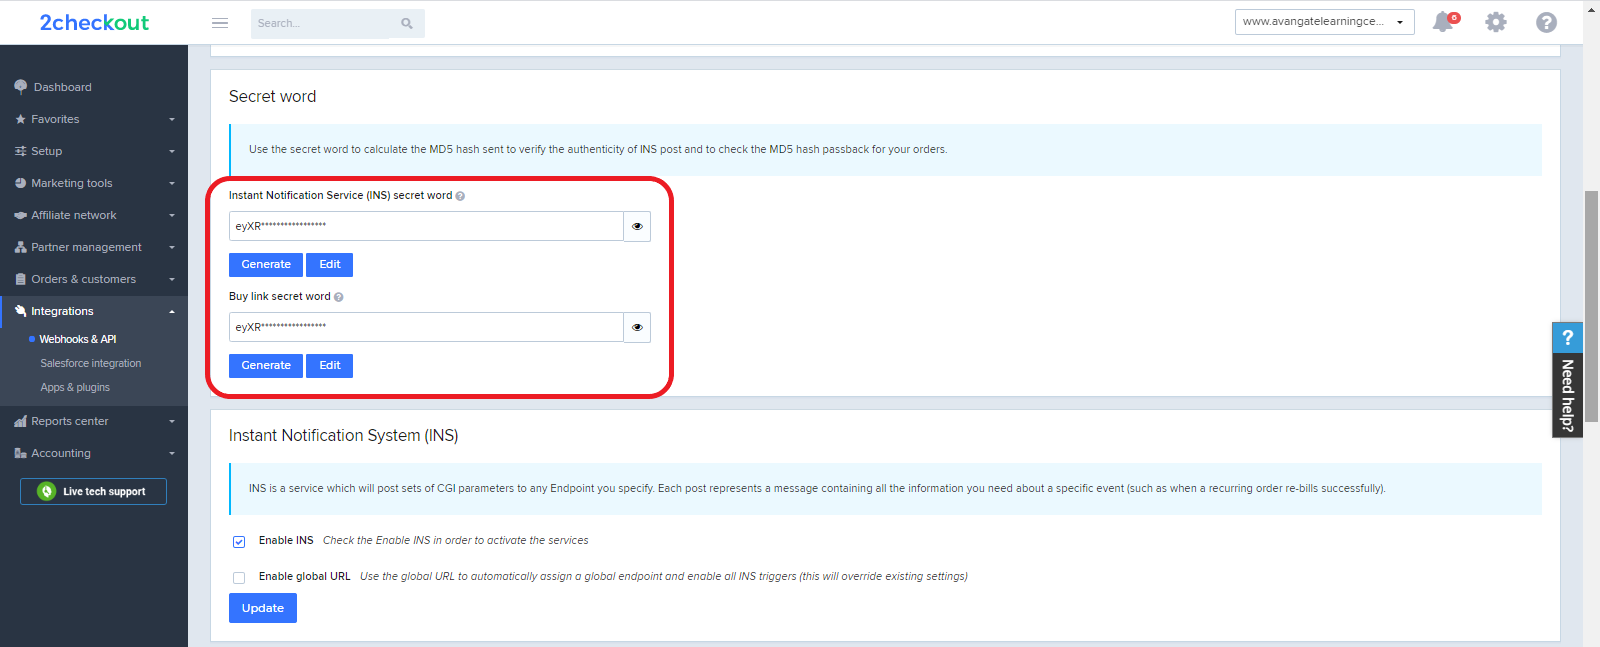
You can find the 2Checkout Secret Word functionality under the INS secret word tab in your Control Panel dashboard, in the Integrations section, under Webhooks and APIs. Your INS secret word should be the same as the buy-link secret word (can be found under Dashboard → Integrations → Webhooks & API, scroll down to the Secret Word area, as shown in the image below). Edit your INS secret word and buy-link secret word to match each other, then copy and paste them into your third-party connector's admin.
2Checkout API Access
To connect to the 2Checkout API, use the API private keys located in your Control Panel dashboard, in the Integrations section, under Webhooks and APIs.
Set up your Instant Notification Service (INS)/Global URL
To set up your Global URL, follow the steps below:
- Log into your 2Checkout account
- Navigate to Dashboard → Integrations → Webhooks & API section
- Check the Enable INS and the Enable global URL checkboxes
- Paste the link from your third-party store creator in the field below the “Enable global URL”
- Click Update to save your settings
If any changes are made to your domain (to a custom domain/other), e-mail us the new URL at supportplus@2checkout.com in order to update your 2Checkout account, and thus avoid a communication mismatch. Currently, when you are using a third-party cart and want to have multiple URLs, you need to create new accounts for each new URL.
Digital Sales Tax
Overview
The Digital Sales Tax (DST) or Equalization Levy (EQL) was introduced in April 2020 for foreign eCommerce sellers of goods and services to level the playing field with local businesses that pay taxes in India. With the latest change to India’s tax law, foreign eCommerce companies will need to segregate the inventory of resident and non-resident sellers on their platforms to make it clear where the levy applies.
DST Impact on 2Checkout Merchants
The introduction of the Digital Sales Tax (DST) means that all merchants on the Reseller model (outside and from India, Kenya, and Vietnam), selling to Indian/Kenyan/Vietnamese customers, must pay an extra 2% (India), 3% (Kenya) and 5% (Vietnam) per transaction when selling digital goods. Thus, 2Checkout adds an extra layer of compliance for the Indian, Kenyan, and Vietnamese eCommerce markets.
The addition of the new tax will ensure that the merchants on the Reseller model don’t have to worry about the DST that must be paid to the local fiscal entities by all eCommerce businesses.
DST Geographical Coverage
Currently, DST is applied to the following countries:
| Country | DST Rate | Starting from | End date |
|---|---|---|---|
| India | 2% | April 2020 | August 1st, 2024 |
| Kenya | 3% | February 9th, 2022 | |
| Vietnam | 5% | November 10th, 2022 | |
| Tanzania | 2% | September 6th, 2023 | |
| Uganda | 5% | August 16th, 2024 |
DST Applicability
The Digital Sales Tax in India applies to:
- Companies with annual revenues in India of over 2M Rupee (USD $27,000)
- Online sales of goods and services to Indians.
- All products that are sold on the Reseller model, as the legislation does not provide for specific product categories
- Partner orders, based on the delivery country of the partner (not the end-user)
- Tax will be retained from merchants
DST does not apply to affiliates, as the merchant will retain the entire amount.
DST Reporting
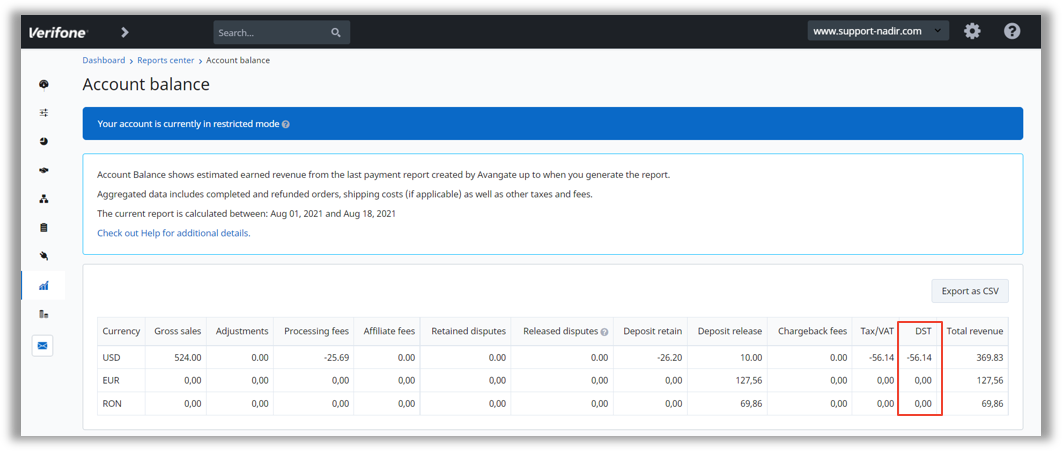
DST is included in all merchant reports, as displayed in the images below:
DST Displayed in the Account Balance on your Dashboard
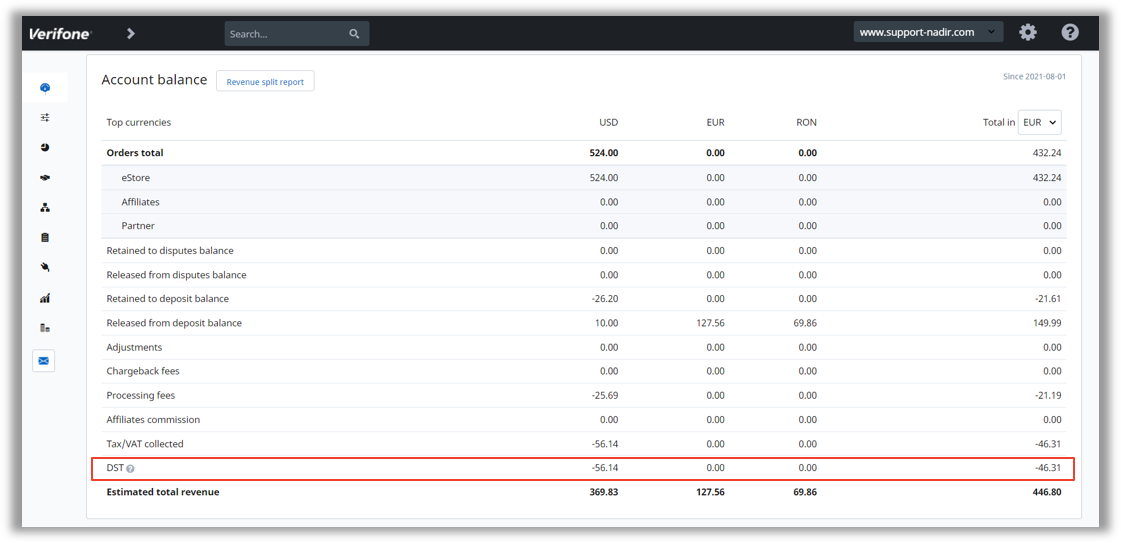
Reports center → Main Reports → Financial reports → Account Balance
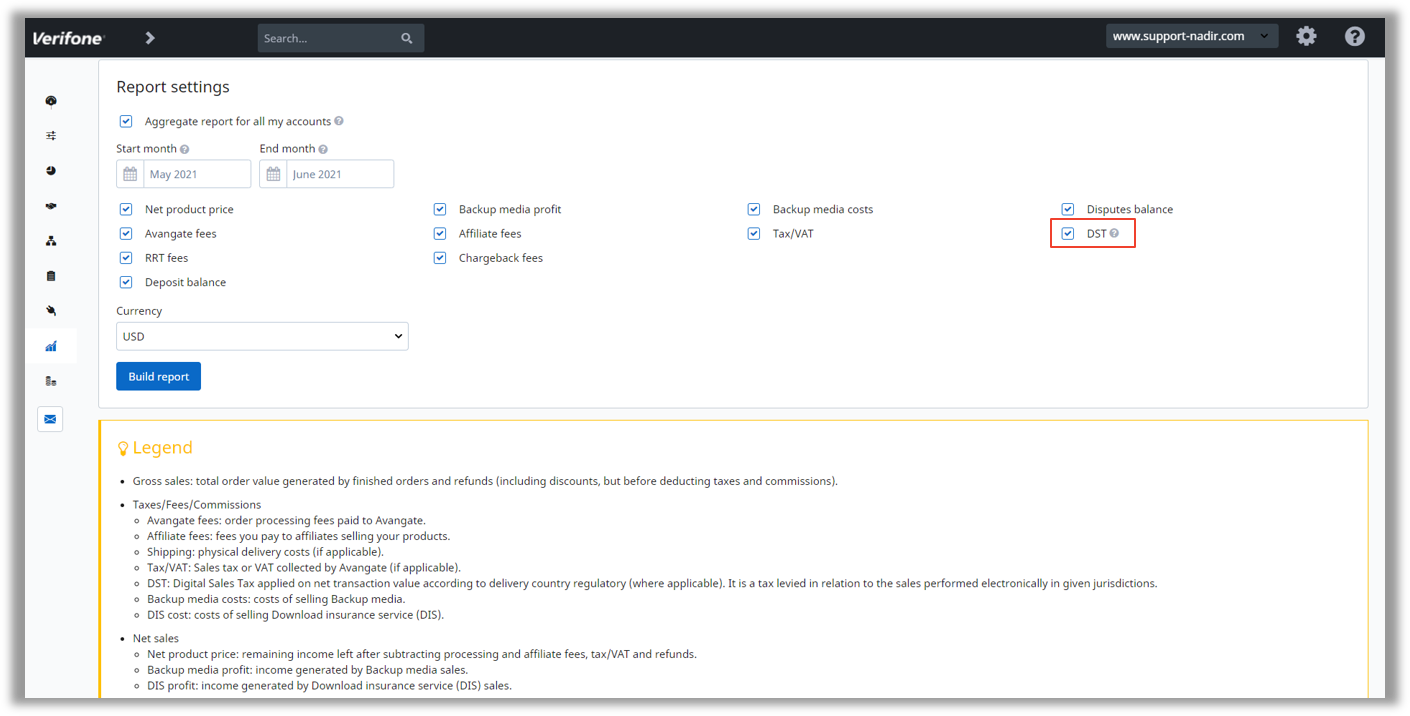
Monthly Revenue Split in the Merchant Control Panel
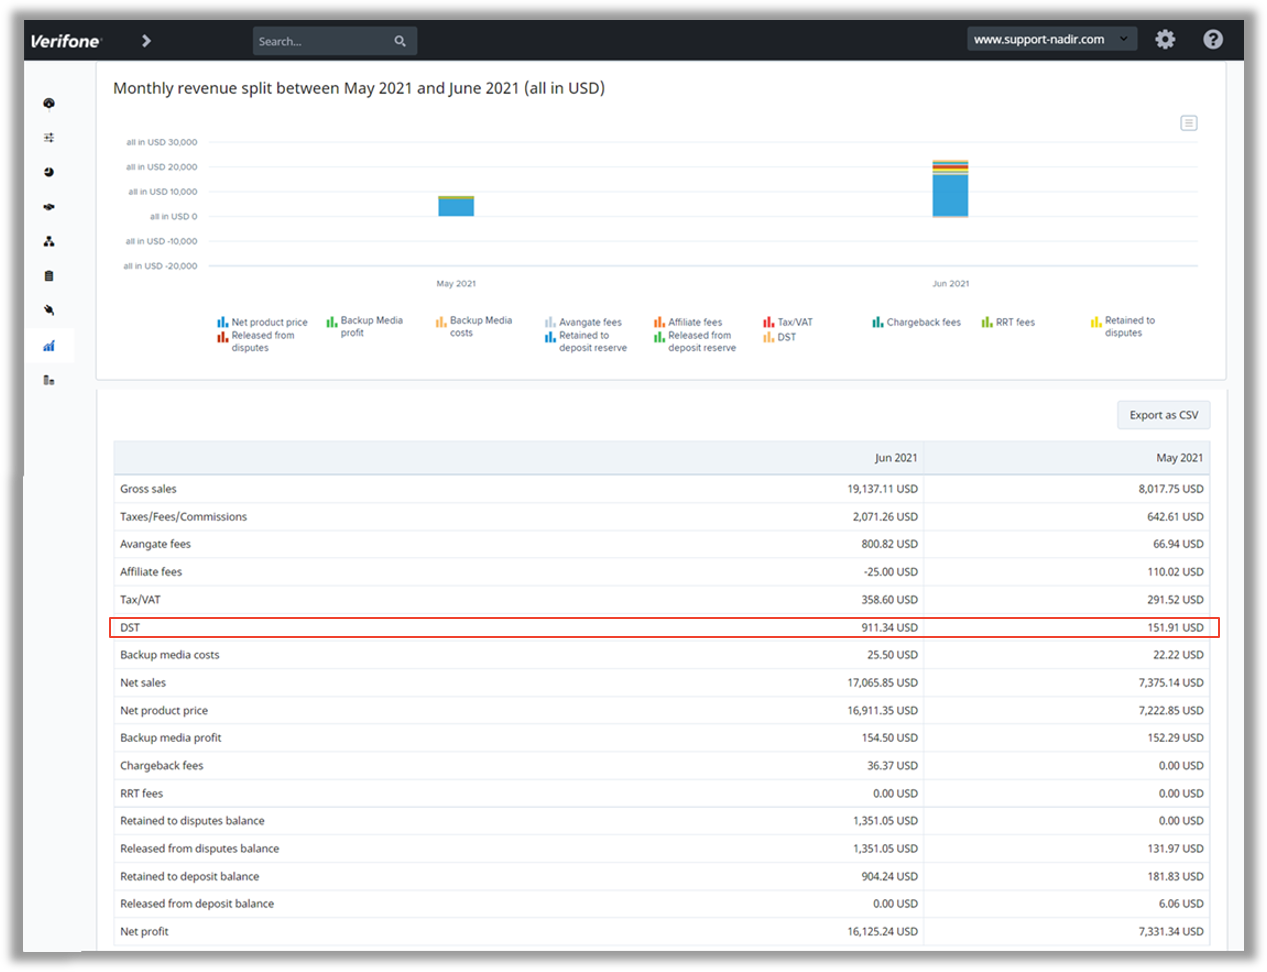
Merchant Control Panel - Main Reports
Merchant Sales Report – CSV/XLS Format
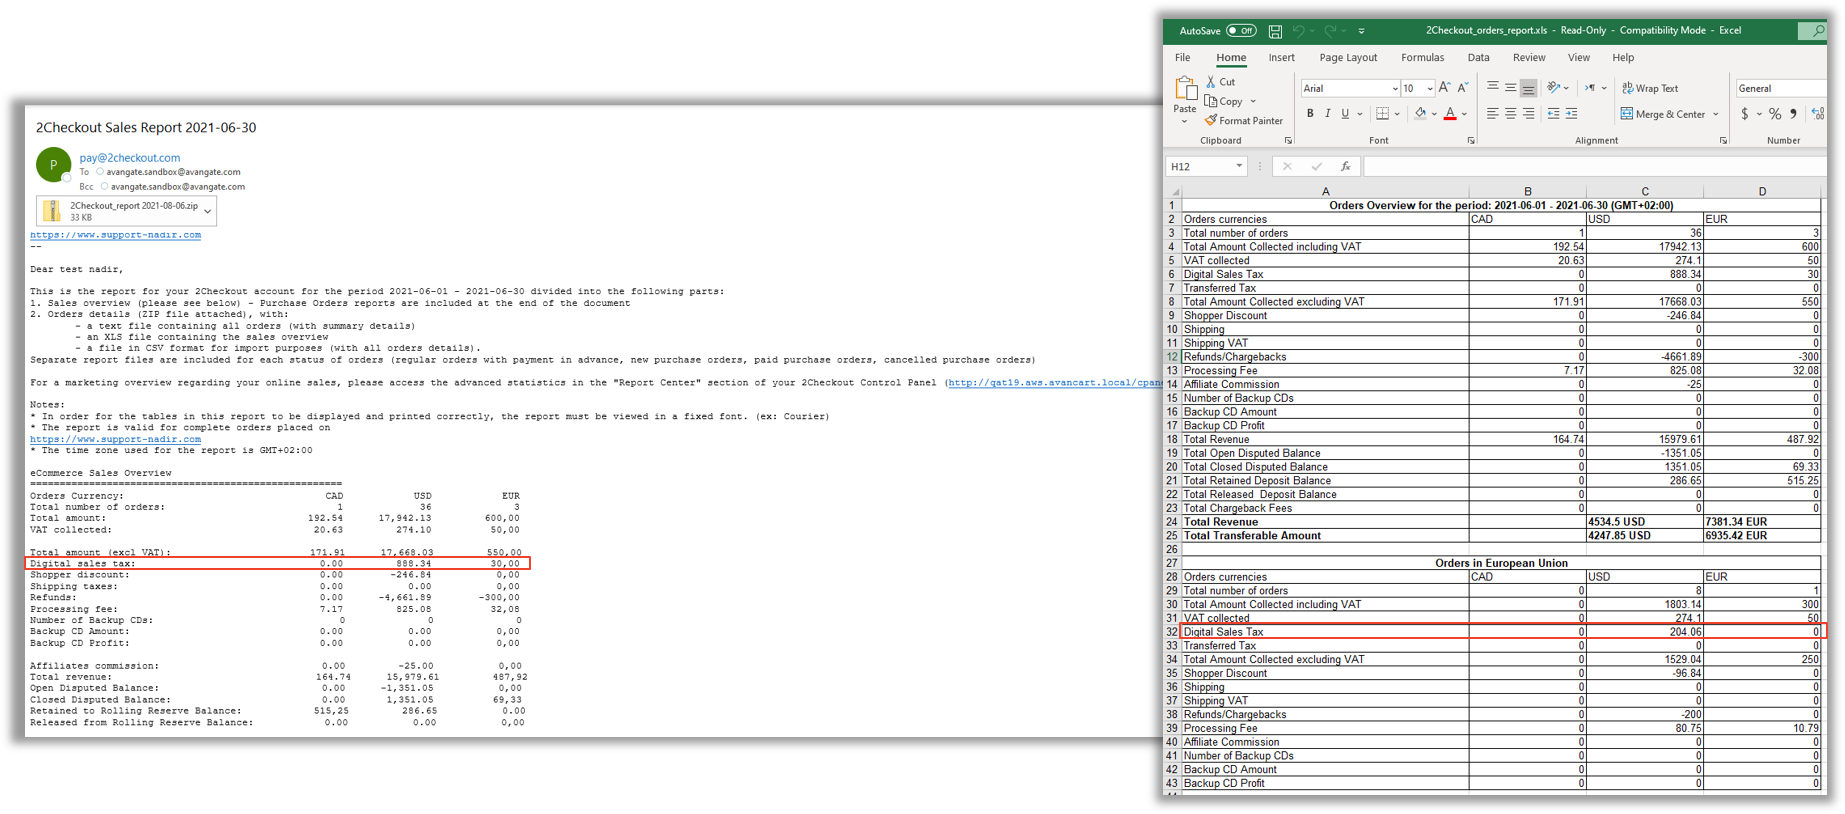
Merchant Invoice
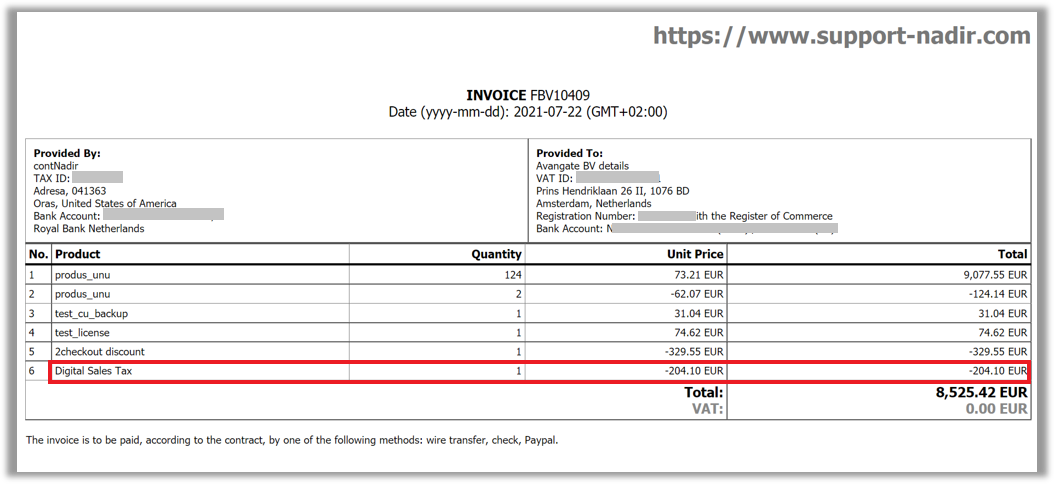
DST Calculation
- The tax is calculated as follows: GTV - VAT
- Rolling reserve computation will not be affected by this tax
- In case of refunds, the DST should be returned to the merchant for the amounts already retained
- The current tax rate is 2% (India) and 1,5% (Kenya) but may be changed in the future and might be different in other countries
FAQs
What happens when the tax % is changing?
The new tax % will be applied to the next order placed. For refunds, the tax % will be the one from the order.
Country availability?
DST only applies in India, Kenya, Vietnam, Tanzania, and Uganda.
Are Indian merchants on the Reseller model charged?
Yes. The reason is that this tax applies to foreign eCommerce sellers of goods and services, in our case this applies to Avangate BV.
If a partner with the delivery country in India is not selling to end-users from India, is the DST returned to the partner?
No. The partner acts as the end-user, so 2Checkout takes into account only the partner delivery country.
Is delivery country change possible for complete orders?
No. This is not possible to avoid issues with tax compliance.
Channel Manager email templates
Overview
The 2Checkout system sends both merchants and shoppers a variety of emails triggered by different actions they perform in the platform. Below is a list of currently available email templates sent via the Channel Manager.
Channel Manager Email Templates
Sent to Merchants
New partnership request
Informs the merchant that they have received a new partnership request that needs their review.
Email body:
Please be informed that you have received a new partnership request that needs your review.
Partner Company Name:
Partner Country:
Contact Email:
Website:
To see more information regarding the partnership request and accept the application, please log in to your 2Checkout Control Panel and visit Partnership Management – Partners section:
Order placed by partner
It notifies the merchant that an order has just been placed by a partner.
Email body:
Please be informed that a new order was placed by [PARTNER_COMMERCIAL_NAME].
Order Details
Partner Commercial Name:
Order Reference:
Order Total Amount:
Order Status:
To approve this order please log in to your 2Checkout Control Panel:
To see more information regarding this order, please log in to your 2Checkout Control Panel:

Best regards,
The 2Checkout Partner Team
Vendor partner threshold notification
Email sent by the system to the merchant to inform them about the list of partners that can be switched to a new partnership program based on reaching a threshold.
Email body:
Hello,

This is an automated notification sent out for [ACCOUNT_NAME].
Since our last notification, the following partners have reached the thresholds you set and now qualify for a new partnership program.
The following partners have reached the thresholds you set and now qualify for a new partnership program.
Please find below the corresponding information:
Partner code:
Partner company name:
Partnership program the partner qualifies for:
Total amount of complete orders:
Total number of complete orders:

Thank you,
2Checkout Team
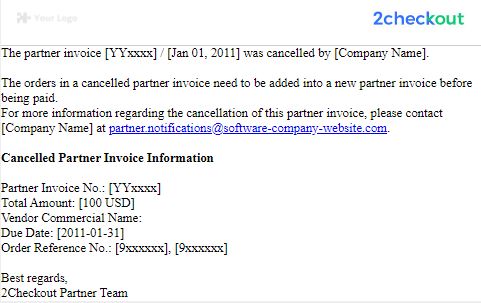
Cancel Invoice
Email notification informing partners about the cancelation of the proforma invoice.
Email content:
The partner invoice [ProformaNumber] / [DateFormated] was cancelled by [COMPANY_NAME].

The orders in a cancelled partner invoice need to be added into a new partner invoice before being paid.
For more information regarding the cancellation of this partner invoice, please contact [COMPANY_NAME] at ....

Cancelled Partner Invoice Information

Partner Invoice No.:
Total Amount:
Partner Commercial Name:
Vendor Commercial Name:
Due Date:
Order Reference No.:
Sent to Partners
Confirm Address To Old Email
Email address change notification sent by the Partner Control Panel.
Email body:
Dear ....,

You are receiving this message because we recently recorded a request to change the login email address for the [PAYMENT_PARTNER] Partner Control Panel you are using in relationship with [MerchantCommercialName].

Old email address:
New email address:

To continue with the new login address, just ignore this message.

If you want to cancel this request and restore the login with the old email address, please follow the link below:

[RESTORE_EMAIL_ADDRESS_URL]

To avoid truncated link errors, paste the entire link above into your web browser.

The link will expire in 30 days.
Direct Renewal
An email informing partners that the Direct Renewal program was enabled for their account by the merchant.
Email body:
Dear [PARTNER_NAME],

The [PAYMENT_PARTNER] Direct Renewal program has been enabled for your account by [VENDOR_NAME].

Log into the Partner Control Panel and activate Direct Renewal now to start benefiting from:
* Automated subscription renewals for your customers;
* Protected profit margins for renewals;
* Streamlined renewal management.

Take advantage of this program to receive margins for the subscriptions your customers renew directly through [PAYMENT_PARTNER] or [VENDOR_NAME] website. The margins you’ll receive are based on the Direct Renewal margins detailed below:
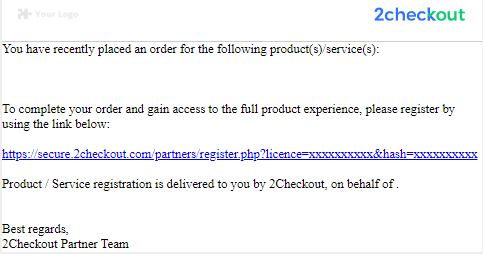
End-User Registration
Email sent to end-users, asking them to register their Avangate licenses.
Email body:
You have recently placed an order for the following product(s)/service(s):
To complete your order and gain access to the full product experience, please register by using the link below:
Product / Service registration is delivered to you by [PAYMENT_PARTNER], on behalf of [Merchant.CommercialName].
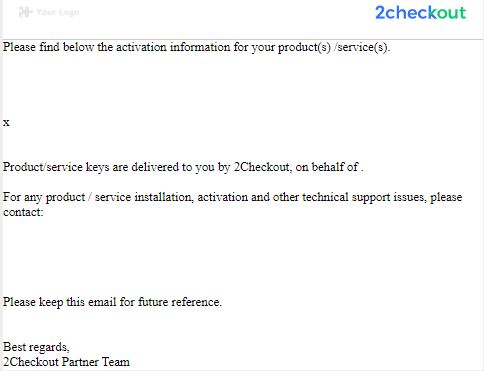
Keys to End-user
Email sent to end-users listing activation keys.
Email body:
Please find below the activation information for your product(s) /service(s).
Activation key:
Attachment file:
The customer reference corresponding to this transaction is: [product.CUSTOMER_REFERENCE]
Product/service keys are delivered to you by [PAYMENT_PARTNER], on behalf of [Merchant.CommercialName].
For any product / service installation, activation and other technical support issues, please contact:
Please keep this email for future reference.
Best regards,
Keys to Partner
Email notification sent by the platform providing partners with activation information for the purchases product/service.
Email body:
Please find below the activation information for the product(s) /service(s) purchased through order #[REFNO]
Activation key:
Attachment file:
The customer reference corresponding to this transaction is:
Product/service keys are delivered to you by [PAYMENT_PARTNER], on behalf of [Merchant.CommercialName].
For any product / service or commercial related questions, please contact:
Please keep this email for future reference.
New Invoice
Email sent by the 2Checkout Financial department to inform partners that a new invoice was issued for their account by the merchant.
Email body:
A new partner invoice was issued for your account by [CompanyName].
To view your partner invoice, please log in to your control panel:
Partner Invoice Information
Partner Invoice No.:
Total Amount:
Due Date:
Order Reference No.:
New Partner Contact Notification
Email notification informing partners that a new Partner Control Panel account was created for them, upon request from the merchant.
Email body:
Dear Partner,

We are happy to inform you that a new Partner Control Panel account (powered by [PAYMENT_PARTNER]) has been created for you, upon request from [Merchant.CommercialName].
You can use your new account to place orders and manage the relationship with [Merchant.CommercialName].
To place orders and manage the relationship with [Merchant.CommercialName], you need to use the new Partner Control Panel account (powered by [PAYMENT_PARTNER]) that was created for you.
Please use the details below to log in to your new Partner Control Panel account:
Login email: [PartnerContact.Email]
Password: To setup your password, access the following link:
Login URL:
Order Cancel to Partner
Email notification informing the partner that their order was canceled by the merchant.
Email body:
Please note that your order [REFNO] was cancelled by [VENDOR_COMMERCIAL_NAME].
Order Details:
Order Date:
Order Total Amount:
Product(s)/Service(s) in order:
To see more information regarding this order, please log in to your Partner Control Panel:
Order Edit to Partner
Email sent by the platform informing partners that their order was edited by the merchant.
Email body:
Please be informed that your order [REFNO] was edited by merchant.

Order Details:
Comment:
New Order Total Amount:
Order Date:
Product(s)/Service(s) in order:
To see more information regarding this order, please log in to your Partner Control Panel:
Partners Order Placed by Merchant
Notification sent to partners about a new order that was added to their account by the merchant.
Email body:
Please be informed that a new order has been added for your account by [VENDOR_COMMERCIAL_NAME].
Order Details
Order Reference No.:
Order Total Amount:
Order Status:
To see more information regarding this order, please log in to your Partner Control Panel:
Partners Renewal License
This is a renewal notification for partners.
Email body:
Please find attached the report regarding the subscriptions that are about to expire or have already expired.
To add a renewal order, just log in to your Partner Control Panel and choose to renew the subscriptions.
For more information, please contact [VENDOR_NAME] at [VENDOR_EMAIL].
Partner Confirmation Notification to Partner
Email sent to partner after approval/decline of their partnership application from the Merchant Control Panel.
Email body:
Dear ...,
Your partnership application with [Merchant.CommercialName] has been approved.
Please use the details below to log in to your Control Panel.
To setup your password, access the following link:
Login URL:
Login email: [PartnerContact.Email]

Or...

We regret to inform you that [Merchant.CommercialName] has declined your partnership application. For more information on this topic, please contact [Merchant.PartnersAutomaticEmail].
Partner Signup Notification to Partner
Email sent to the partner after submitting their partner registration form.
Email body:
Dear ...,

Thank you for your interest in becoming a partner with [Merchant.CommercialName]!
Your application has been submitted for approval to [Merchant.CommercialName].
Once your request has been approved, you will receive an automated email with details about your account information.
If you have any questions, please do not hesitate to contact [Merchant.CommercialName] by email.
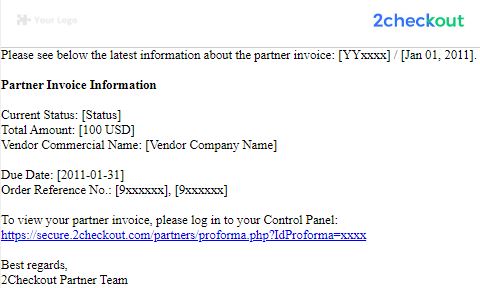
Proforma Notification
Proforma Invoice status information sent by the 2Checkout Financial department when the Notify partner button is clicked.
Email body:
Please see below the latest information about the partner invoice:
Partner Invoice Information
Current Status:
Total Amount:
Partner Commercial Name:
Vendor Commercial Name:
Due Date:
Order Reference No.:
To view your partner invoice, please log in to your Control Panel:
Recover Pass
Notification sent by the platform upon password recovery request.
Email body:
Dear [PAYMENT_PARTNER] customer,

You are receiving this message because you have requested to recover the login password to the [PAYMENT_PARTNER] Control Panel.
In order to reset your password, please access the following link:
This link will expire in 24 hours.
If you have not requested the recovery of your password, please ignore this message.
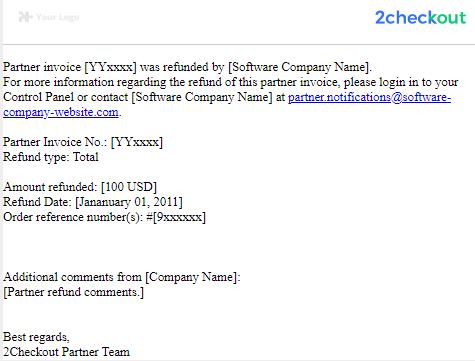
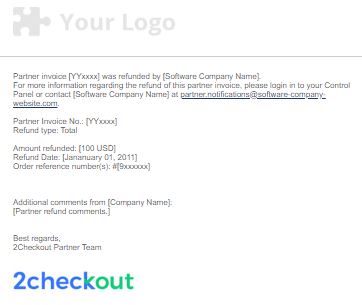
Refund Process Status
Email sent to partner by 2Checkout Financial department with details about the refund process.
Email body:
A refund request has been sent by [REFUND_PARTNER_NAME] with the following details:
Partner invoice [REFUND_PROFORMA_NUMBER] was refunded by [REFUND_VENDOR_NAME].
For more information regarding the refund of this partner invoice, please login in to your Control Panel or contact [REFUND_VENDOR_NAME] at [REFUND_VENDOR_EMAIL].
Partner Invoice No.:
Refund type: Total
Amount requested:
Partner Commercial Name:
Refund request date:
Amount refunded:
Refund Date:
Order reference number(s):
In order to view full details of this refund request, please login to your Vendor control panel.
1. Go to [VENDOR_LOGIN] and log in using your email address and password.
2. From Orders & Customers - Refunds, you can manage, approve, and reject refund requests.
Additional comments from your partner:
Additional comments from [COMPANY_NAME]:
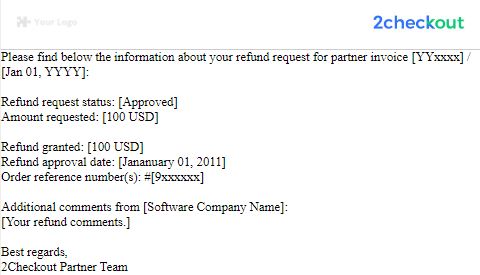
Refund Status
Email sent to the partner by the 2Checkout Financial department with the status of the requested refund.
Email body:
Please find below the information about your refund request for partner invoice [REFUND_PROFORMA_NUMBER] / [REFUND_PROFORMA_DATE]:
Refund request status:
Amount requested:
Refund granted:
Refund approval date
Refund denied on:
Order reference number(s):
Additional comments from [COMPANY_NAME]:
Reset Partner Contact Password
Notification sent to the partner by the platform upon password reset request.
Email body:
Dear partner,
Your Partner Control Panel password has been reset. Please use the link below to set up your new password:
This link will expire in 24 hours.
The new password must meet the following criteria:
- Must have at least 8 characters
- Must have at least 3 out of the following 4 character groups: lower case letters, upper case letters, numbers, special characters (ex: !,@,#,$)
- Must be different from the last password
Users Renewal License
Renewal notification sent to end-users (when direct renewal is active).
Email body:
Dear ...,

Please note that your [PRODUCT_NAME] has expired or is about to expire on [LICENSE_EXPIRATION_DATE].
In order to continue using [PRODUCT_NAME] after this date you need to renew your subscription.
For more details, please contact:
[PARTNER_NAME]
[PARTNER_WEBSITE]
[PARTNER_EMAIL]
[PARTNER_PHONE_NUMBER]
Partners User-Activated Email
Email sent by the platform to let partners know that their user account is active and they need to set a password.
Email body:
Dear ...,

Your partner user account is now active. Click the following URL to set a secure password.
The link expires in ... hours.

Best regards,
Partner Team
Partner Grace Period Approach
The email informs partners that payment is due in 3 days for the partner invoice. It's sent by 2Checkout's Financial department.
Email body:
According to your Partnership Details and to avoid incurring any late penalties, Partner Invoice [% $PROFORMA.Details.ProformaNumber%] is to be paid in [% $dueIn %] days.
To view this partner invoice, please log in to your Partner control panel:
Partner Invoice Information
Partner Invoice Reference:
Total Amount:
Vendor Commercial Name:
Order Reference:
Password About to Expire Partners
It notifies partners that their password is about to expire.
Email body:
Dear ...,

Your partner user account password expires in ... day(s), on ....
Once it expires, you won’t be able to access your account.
To avoid access issues, please update your password before it expires by accessing the folowing URL:
Should you have any questions related to your account, don’t hesitate to contact us.
Send expiration notification for usage-based subscriptions
Sent by 2Checkout Support to notify partners that subscription usage data needs to be uploaded before expiration.
Email body:
FOR:
[%$REPORT.CompanyName%]
[%$REPORT.ContactPerson%]
[%$REPORT.Street%]
[%$REPORT.City%]
--
Dear [%$REPORT.ContactPerson%],
Please upload usage data for the subscriptions listed below ahead of their respective expiration deadline. 2Checkout will renew usage-based subscriptions and charge your customers after you provide the data on the metered resources consumed.
[% $REPORT.LICENSES %]
Usage can be uploaded via the Control Panel or transmitted through the 2Checkout API, ensuring that customers are charged and subscriptions renewed when due.
Thank you for choosing 2Checkout solutions.
[%$REPORT.BusinessCompany%]
[%$REPORT.BusinessStreet%]
[%$REPORT.BusinessZip%], [%$REPORT.BusinessCity%], [%$REPORT.BusinessCountry%]
http://www.avangate.com
----
This message is confidential. It may also be privileged or otherwise protected by work product immunity or other legal rules. If you have received it by mistake please let us know by reply and then delete it from your system; you should not copy the message or disclose its contents to anyone.
Refund for Partner Invoice
It notifies the partner about their invoice refund.
Email body:
API and webhooks log monitor
Overview
We have improved the way vendors use our APIs and webhooks and added an easy way to monitor historical records of events. By using the API & webhooks log monitor you can get detailed reports on API methods, webhook and SalesForce Connector events. The report logs both:
- Successful events
- Failures
These reports will prove to be very useful when you need to troubleshoot certain issues that you encounter while using our API, webhooks or SalesForce Connector. They can help you identify different problems so you can find a solution as soon as possible.
How do I enable the API & webhooks log monitor?
- Go to Account Settings
- Click Manage user access
- Select View roles and click the Edit button for the role that you want to enable the API & webhooks log monitor for.
- Under the Orders & Reports roles section, check the API Logs checkbox and click Save role at the bottom of the page.
You will now see the API & webhooks log monitor in the Reports menu.
API logs
Follow the steps below to see the reports on the API activity.
- Go to the Reports center menu and click API & Webhooks.
- Choose the type of report.
- Select API from the Event source section. Customize the report details according to your needs, including:
- The time interval for which you need to generate the report.
- A certain API method.
- Successful or failed events (or both).
- Choose the desired event status from the Status dropdown box and click Search once you're done configuring the report settings.
Select the Failed status to generate a report with the failed events if you need to troubleshoot specific situations or errors that have occurred while using the API.
The report shows you the date and time of the events, their duration, the IP address they were generated from, the request type and the API method that was called. You can export the report as a CSV file by clicking the Export as CSV button at the upper right side of the table. The report displays a maximum of 500 sessions starting with the most recent one detected in the selected time interval.
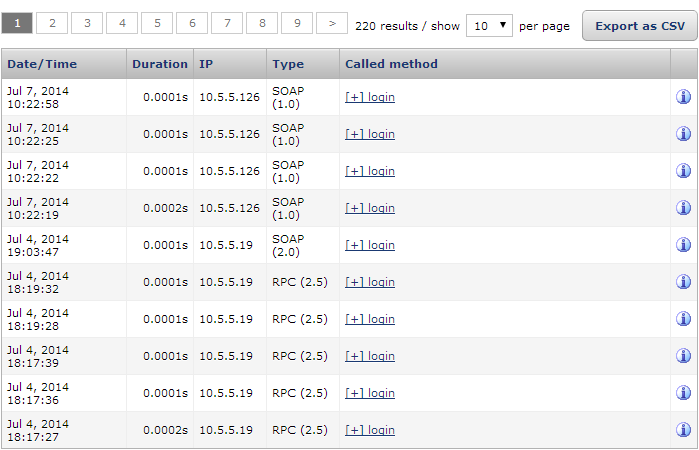
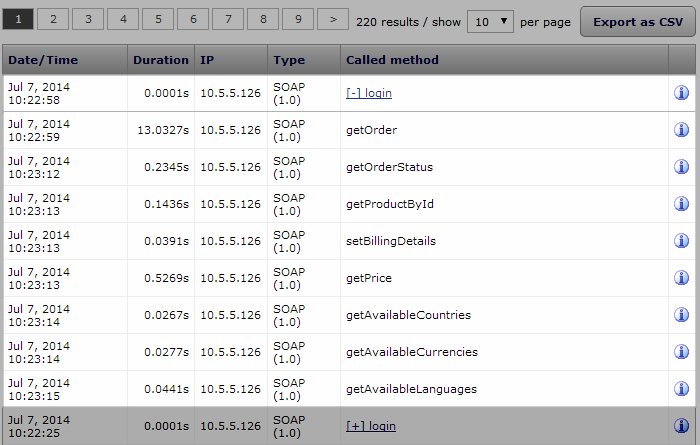
By clicking the called method name you can see the cronological order of the methods called during that session.
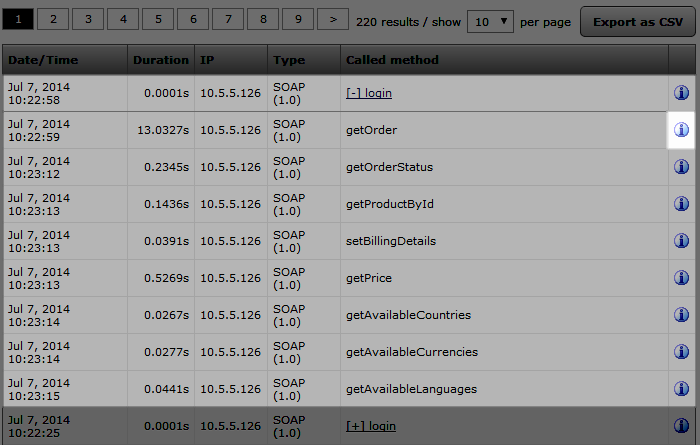
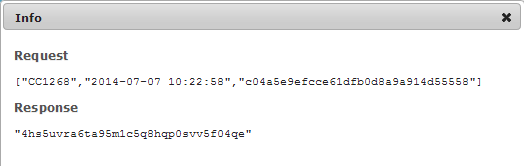
If you want specific information about each event, you can click the Info button at the right side of each row.
You can see an example of an Info box for an event below.
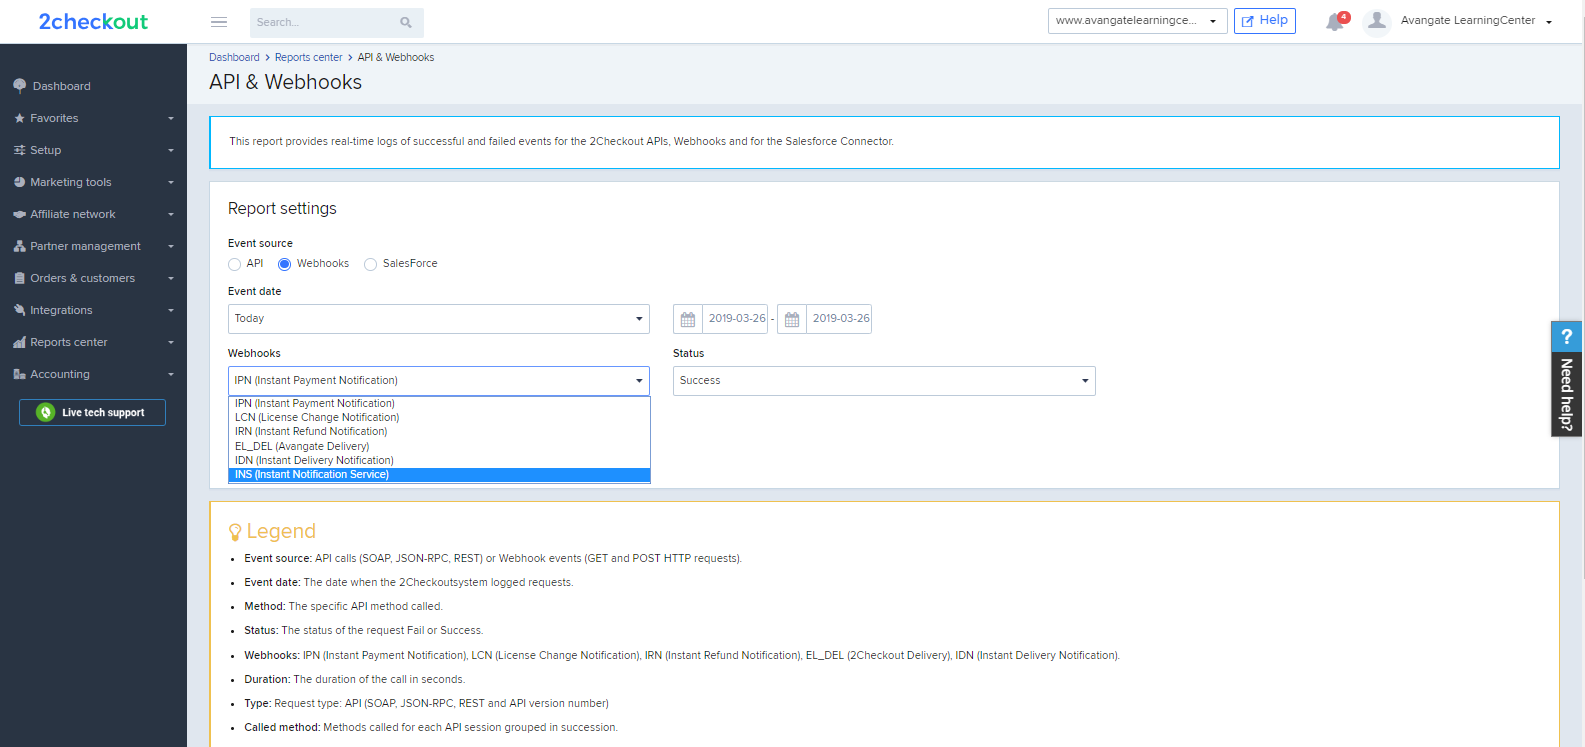
Webhooks logs
Follow the steps below to see the reports on the webhooks activity. The webhooks you can generate reports on are:
- Instant Payment Notification (IPN)
- License Change Notification (LCN)
- Instant Refund Notification (IRN)
- 2Checkout Delivery (EL_DEL)
- Instant Delivery Notification (IDN)
- Instant Notification Service (INS)
- In your cPanel Dashboard, navigate to Reports center → API & Webhooks.
- Select Webhooks from the Event source section, as shown in the image below. Customize the report details according to your needs. Select the time interval for which you need to generate the report, the web hook that you want to generate the report for and the status of the web hook. You can choose to display successful events, failed events or both.
Select the Failed status to generate a report with the failed events if you need to troubleshoot specific situations or errors that have occurred while using the webhooks.
After you click Search you can see the detailed report displayed in a table. The report shows you the date and time of the webhooks, their type, the message they have generated and their status.
You can also export the report in CSV format by clicking the Export as CSV button. The report displays a maximum of 500 sessions starting with the most recent one detected in the selected time interval.
- If you want to generate reports for a specific webhook, click the Add filter button and the additional information required.
For IPN/IRN/EL_DEL/IDN, you can add as filter the order reference number generated by 2Checkout. In the case of LCN, you can filter the results by using the license code or the dispatch reason (change in license that determined the LCN to be sent).
If you want specific information about a webhook event, you can click the Info button at the right side of each row.
SalesForce Connector logs
Follow the steps below to see the reports on the SalesForce Connector activity.
- Select SalesForce from the Event source section. Customize the report details according to your needs. Select the time interval for which you need to generate the report and the status of the Connector events. You can choose to display successful events, failed events or both.
- After you click Search you can see the detailed report displayed in a table. The report shows you the date and time of the connections, their type, the message they have generated and their status.
You can also export the report in CSV format by clicking the Export as CSV button. The report displays a maximum of 500 sessions starting with the most recent one detected in the selected time interval.
- If you want to generate reports for a specific subscription, click the Add filter button and enter the order or subscription reference that you are searching for.
Important: Select the Failed status to generate a report with the failed events if you need to troubleshoot specific situations or errors that have occurred while using the connector.
Select the report time zone
The data registered into 2Checkout's databases are registered with a timestamp that reflects the 2Checkout time zone (Romania's time zone). When you generate API and webhooks reports you have the option of generating them according to the time zone that your vendor account is configured on.
Select the desired time zone from the Report time zone drop-down menu.
Tax calculator for PSP
Overview
Merchants that use a PSP business model (2Sell, 2Subscribe packages) are required to handle their own taxes (both calculation and remittance to local authorities) according to the merchant's applicable fiscal laws. 2Checkout offers a tax calculator service for PSP merchants to help them collect taxes in order to be compliant at the transaction level with applicable fiscal laws.
Availability
The tax calculator is available for merchants that use the PSP business model (2Sell, 2Subscribe packages). For eligibility and activation Contact 2Checkout.
Assumption and Disclaimer
2Checkout assumes that the merchant's data is accurate, complete, reliable, error-free, and up-to-date.
The calculator’s purpose is to apply, calculate, and collect taxes on order level based on merchant tax info. This calculator and service are not meant as professional financial advice and we encourage you to seek professional advice for setting your tax compliance scheme properly.
2Checkout, its agents, officers, and employees make no representations, express or implied, as to the accuracy of the tax applicable at the order level and its applicability and suitability to the merchant's circumstances.
Workflow
- Merchants who want to activate this feature can send an email request to the 2Checkout Financial Operations department.
- Merchants need to submit a file with all applicable taxes they need to collect at the transaction level with the shopper.
- 2Checkout applies and calculates the taxes at the transaction level according to the information received from the merchant.
- The merchant is fully responsible for the tax info provided to 2Checkout. The tax information sent by the merchant needs to is accurate, complete, reliable, error-free, and up-to-date. Besides tax collection for the merchant's communicated tax data and payment of the collected taxes to the merchant, 2Checkout disclaims all warranties and responsibilities.
- Merchants receive the collected taxes from 2Checkout as per the payment arrangements agreed in the agreement.
- Merchants need to further declare and pay the taxes to the appropriate tax authorities according to applicable fiscal laws.
- 2Checkout will apply and collect the taxes per order (e.g. sales taxes or VAT value) and further remit the collected taxes in the payout/settlement with the merchant.
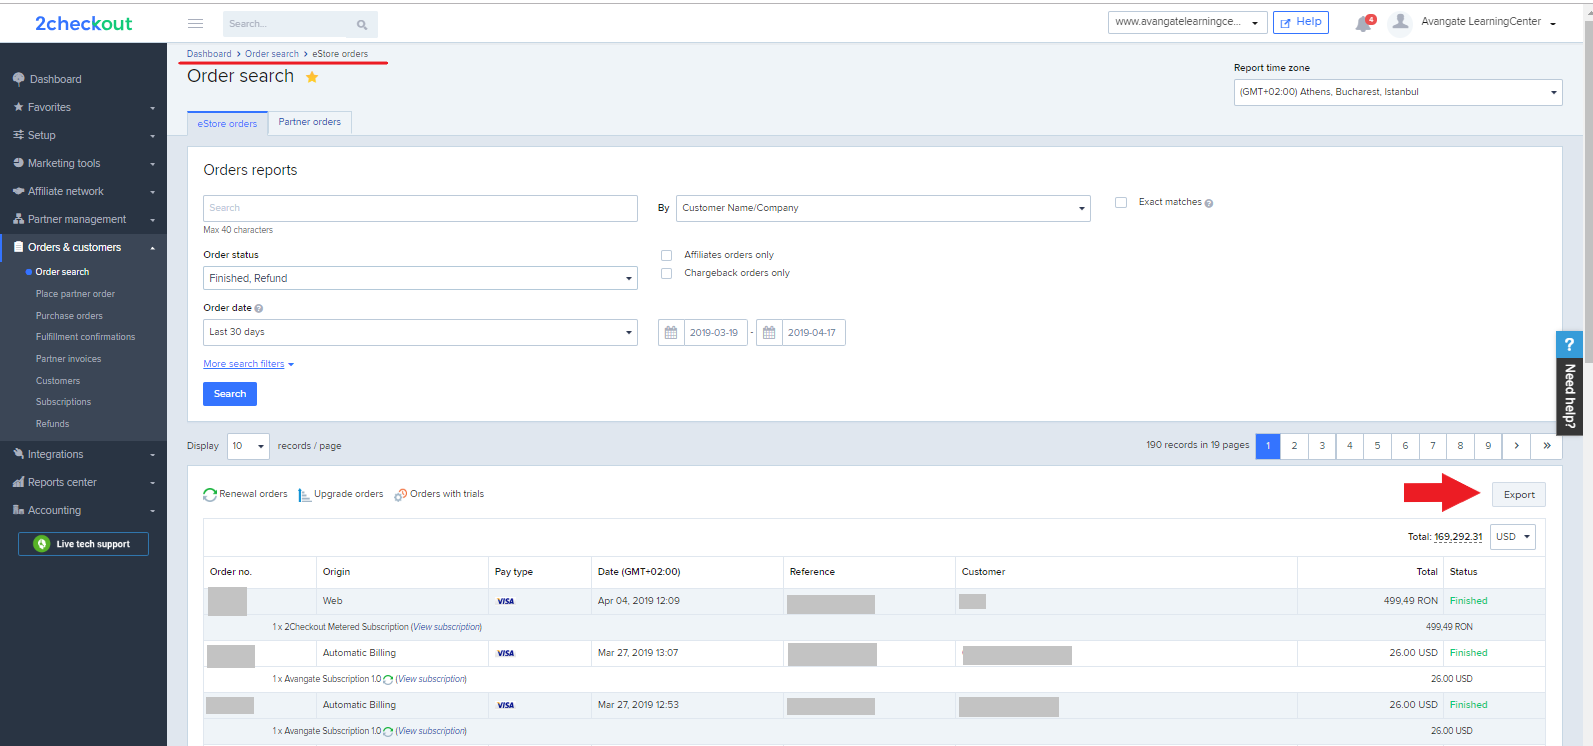
- Merchants can see detailed reporting on tax calculation through the Order Export functionality (available in the 2Checkout Merchant Control Panel, as shown in the image below), Account Balance section in the 2Checkout Merchant Control Panel, through APIs per order, Payout Report, and Netsuite.
The attributes that can be configured for the PSP tax calculator are based on the country and/or Zip Code and include:
- VAT instant validation (through VIES)
- Product type and additional items added to the order - impacting the tax computation (e.g. IOT product together with a gift)
- Mandatory information can be collected (e.g. CIF in Brazil, GST in India and Australia)
- GST, ABN, VAT (other than EU) are validated against our internal rules
Merchant flow
There are no special actions that merchants need to set on their side. The merchant navigates to the 2Checkout Merchant Control Panel, adds a new product and generates a new buy-link for the product using the Generate link option.
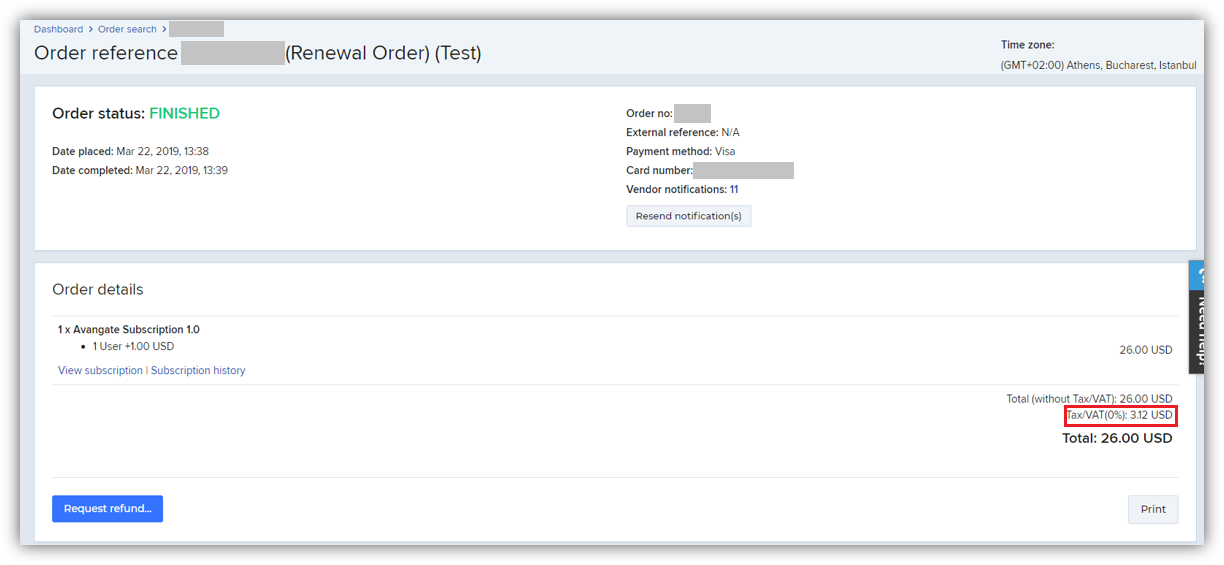
VAT/Sales tax display
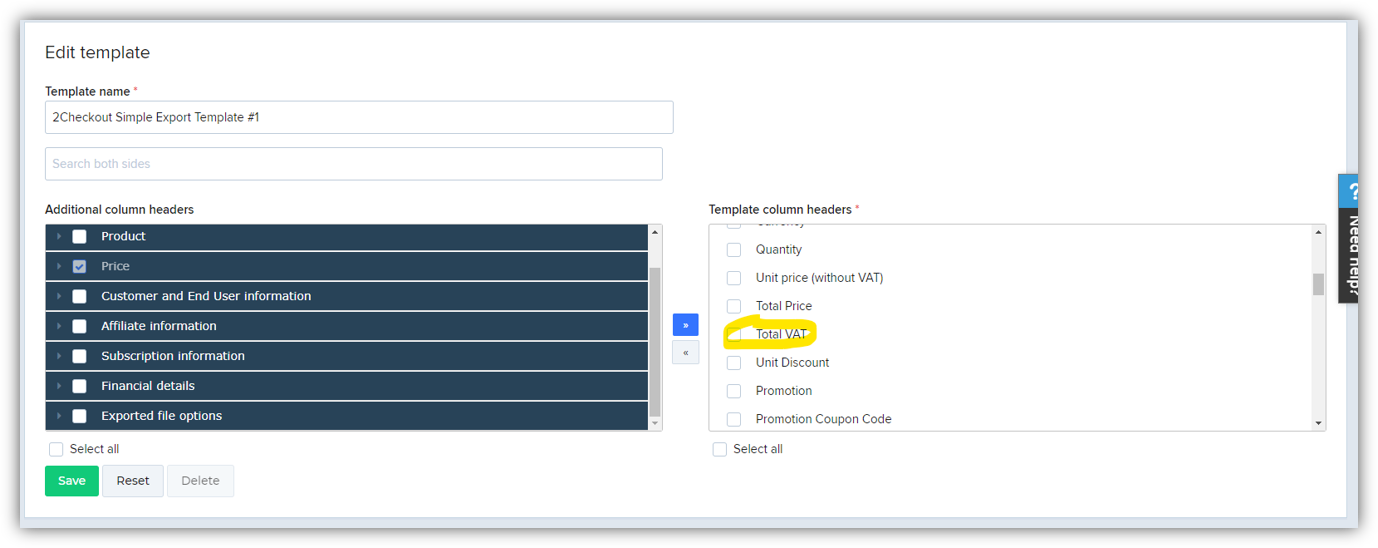
The collected taxes are displayed in any Control Panel report once 2Checkout starts collecting them and merchants will be able to see what taxes were collected on any order.
The option to display VAT/ Sales tax is also available on each report template.
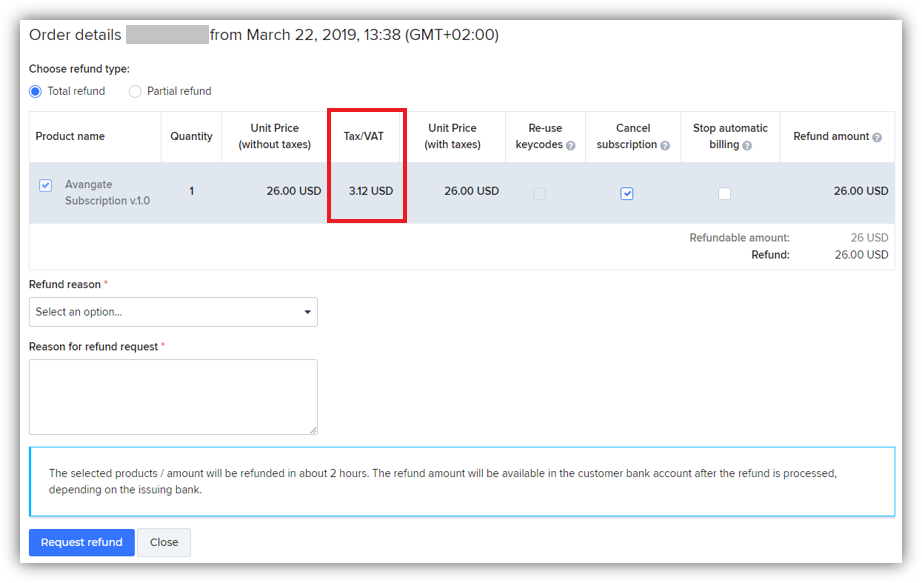
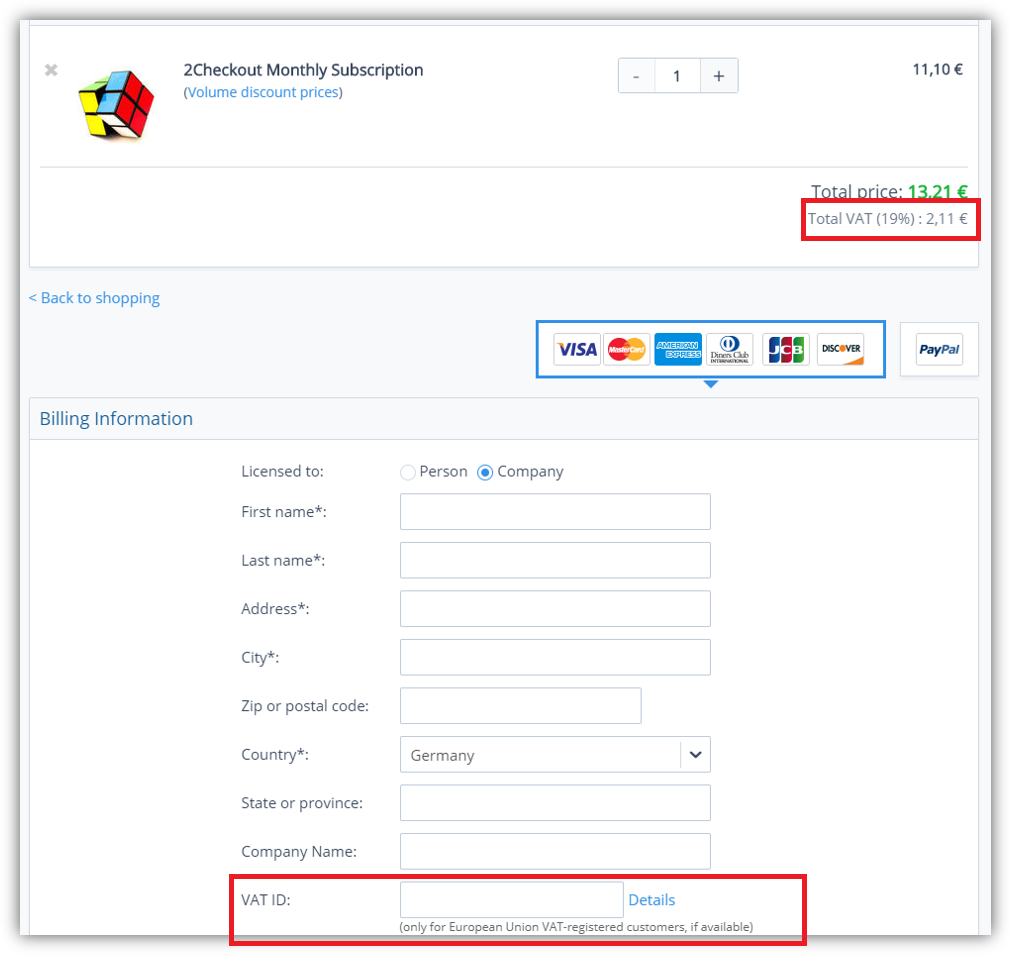
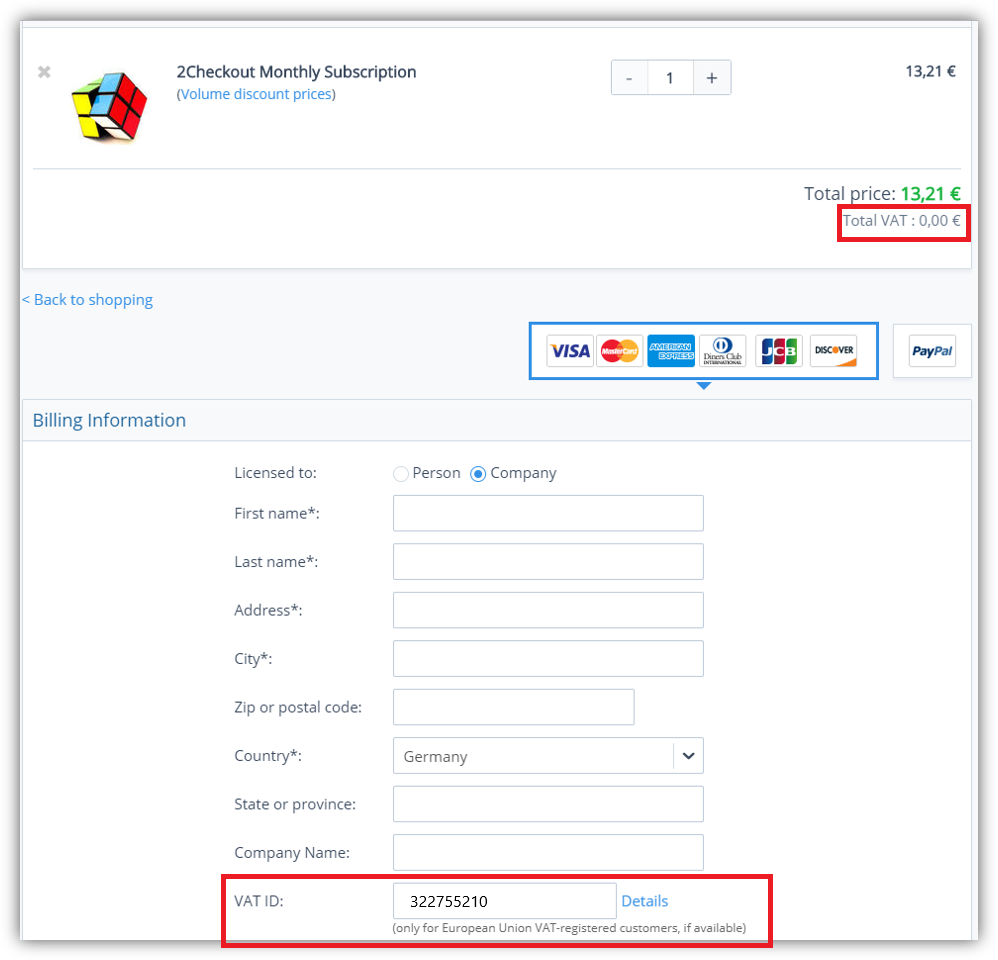
Shopper flow
Tax exemption will be applied only if tax cart validation rules are met. For example, if a German B2B shopper with a valid VAT ID places an order, in the checkout process the VAT will no longer be applied, as shown in the images below.