Integrate Drupal Commerce
Overview
Integrate Drupal Commerce to be able to process payments through the 2Checkout platform in over 200 countries and more than 100 currencies.
Drupal Commerce is revolutionary software integrating commerce, content, and community to create engaging Web experiences that bring e-retailers more traffic to drive more results. With Drupal Commerce, online retailers have a simple yet powerful platform and the flexibility to integrate a rich commerce experience anywhere within their environment.
Availability
Before you are able to start accepting payments, you need to request and finalize the activation of your live account by completing a form, and provide information that will help us verify the business and identity of the individuals involved in your business.
Drupal Commerce integration is available only for 2Checkout accounts that handle their own tax and invoice management (2Sell and 2Subscribe).
Drupal Commerce Settings
Perform the below set of instructions in your Drupal Commerce account to integrate it with 2Checkout.
- Download the new 2Checkout module from Github.
- Upload the files to your server under your store’s directory.
- Log in to your Drupal Commerce admin area.
- Navigate to Commerce → Configuration → Payment and click on Payment gateways.
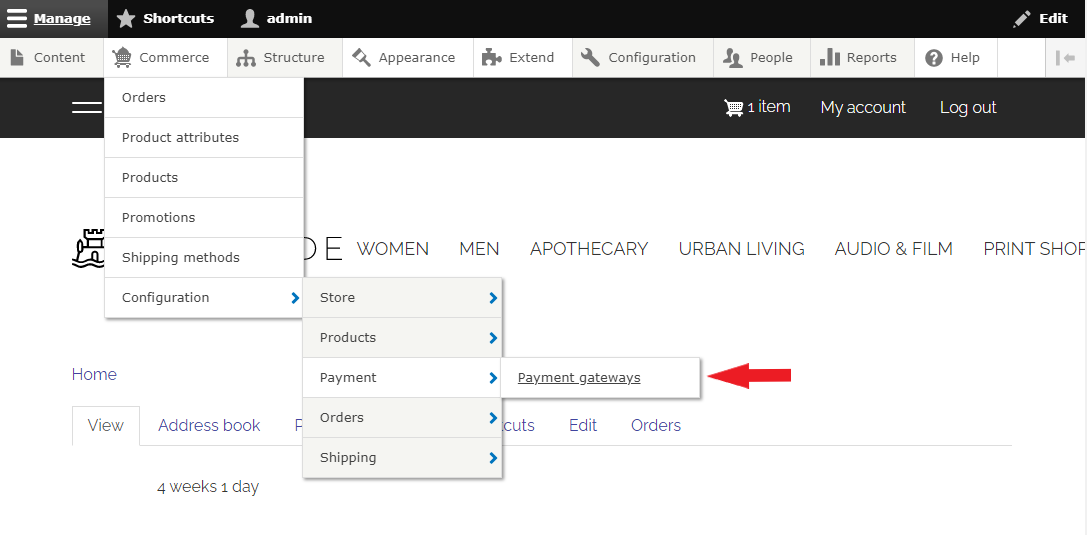
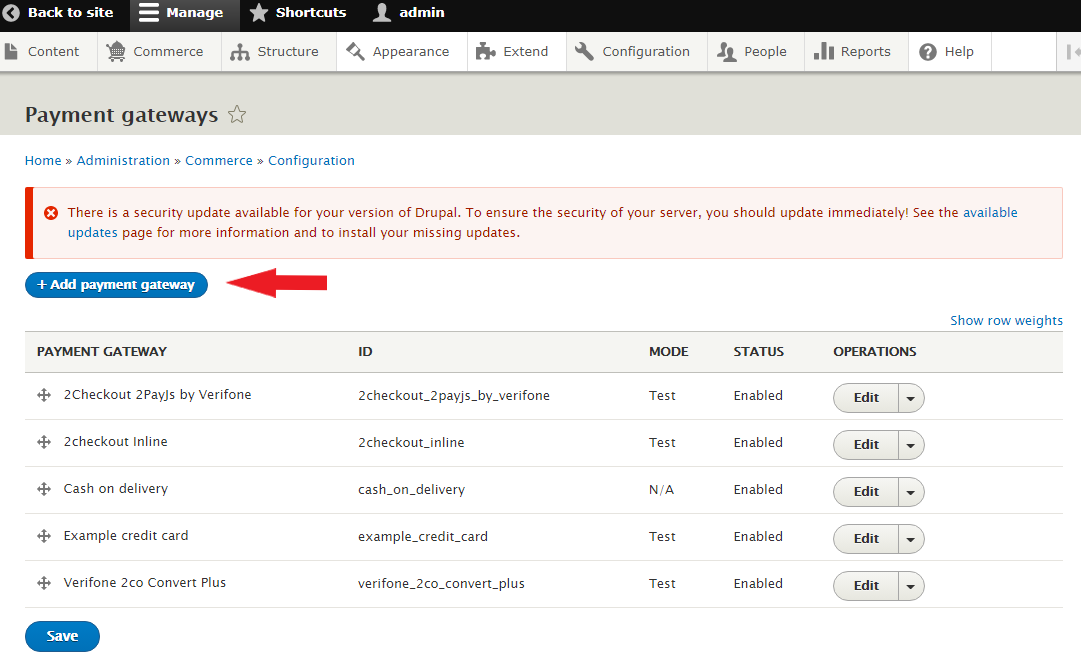
5. On the Payment gateways page, click on Add payment gateway.
6. On the Add payment gateway page, select 2Checkout ConvertPlus by Verifone/2Checkout InLine by Verifone/2Checkout 2Pay.js.
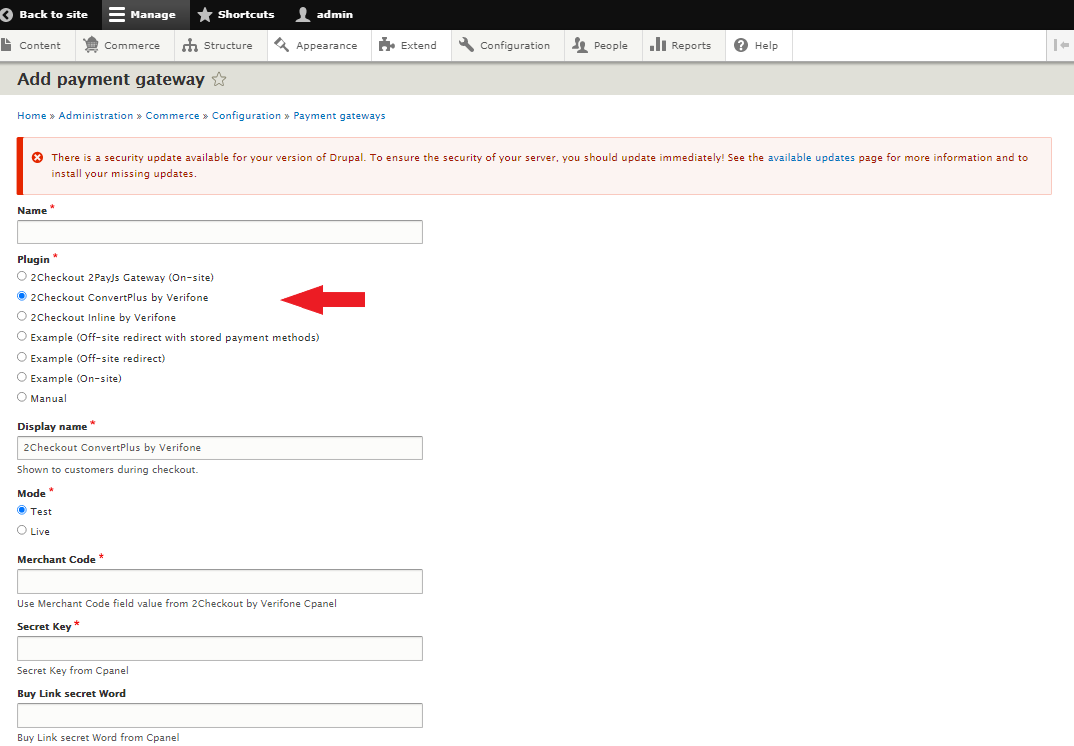
7. Fill in the rest of the fields on the page:
- Display name
- Mode (select Test to be able to place test orders)
- Merchant Code - This is the 2Checkout Merchant Code, and you can find it in the 2Checkout Merchant Control Panel, under Integration → Webhooks and API.
- Secret Key - (you can find it in the 2Checkout Merchant Control Panel, under Integration → Webhooks and API)
- Buy-Link secret Word (you can find it in the 2Checkout Merchant Control Panel, under Integration → Webhooks and API)
- Conditions
8. Select Enabled to activate the plugin.
9. Click Save.
About Drupal Commerce
Drupal Commerce is revolutionary software integrating commerce, content, and community to create engaging Web experiences that bring e-retailers more traffic to drive more results. With Drupal Commerce, online retailers have a simple yet powerful platform and the flexibility to integrate a rich commerce experience anywhere within their environment.
Drupal Commerce provides the structure you need to do eCommerce without any assumptions about how your business is done.