Implement Google Analytics 4 in ConvertPlus and InLine Checkout (with GTM)
Overview
You can implement Google Analytics 4 and Google Tag Manager tracking tools to help you track and monitor your ConvertPlus and InLine checkout orders in order to improve the shopping experience and increase the conversion rate.
Availability
Google Analytics 4 and Google Tag Manager can be set for all 2Checkout accounts.
Google Analytics 4 Settings
Implement Google Analytics 4
To implement Google Analytics 4 through Google Tag Manager (GTM) for your ConvertPlus and InLine Checkout, follow these steps:
- In your browser window, navigate to Tag manager → All accounts.
- Click on the Create Account button.

- Fill in all the required fields:
- Account Name
- Country
- Container name
- Target platform → Web
- Click on the Create button.
- Copy the Google Tag Manager Container ID. It will be used in the 2Checkout Control Panel for the Google Tag Manager set-up.

Creating the Google Tag in Google Tag Manager
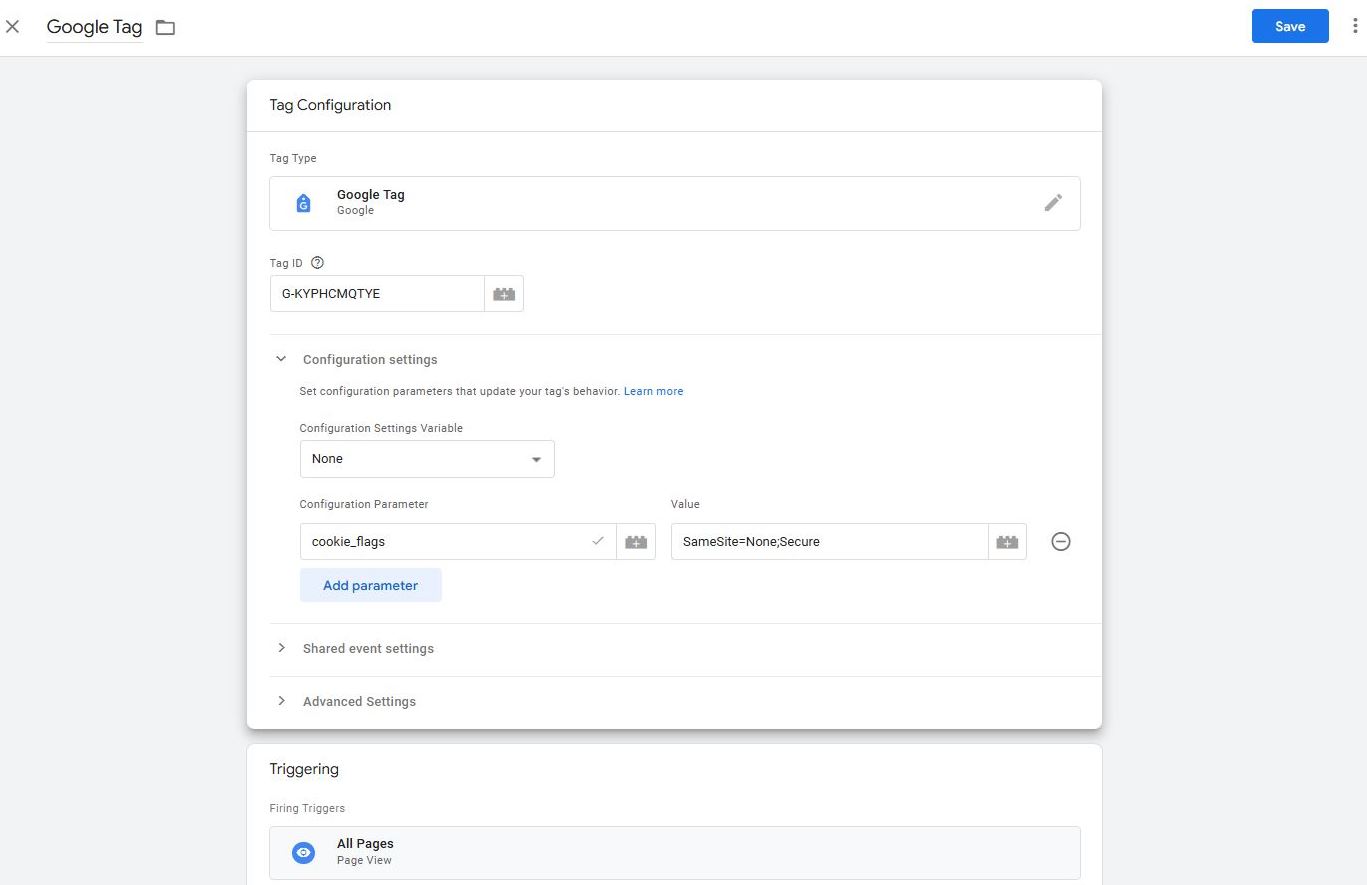
If you already have a Google Tag in your container that fires on all pages where the Google Tag Manager code is added, then you do not need to create a new Google Tag specifically for 2Checkout and can proceed directly to the next section. However, you need to make sure you add the cookie_flags configuration, described in step 3 below. This configuration is necessary, as the tracking script is placed in an iFrame for ConvertPlus and Inline carts.
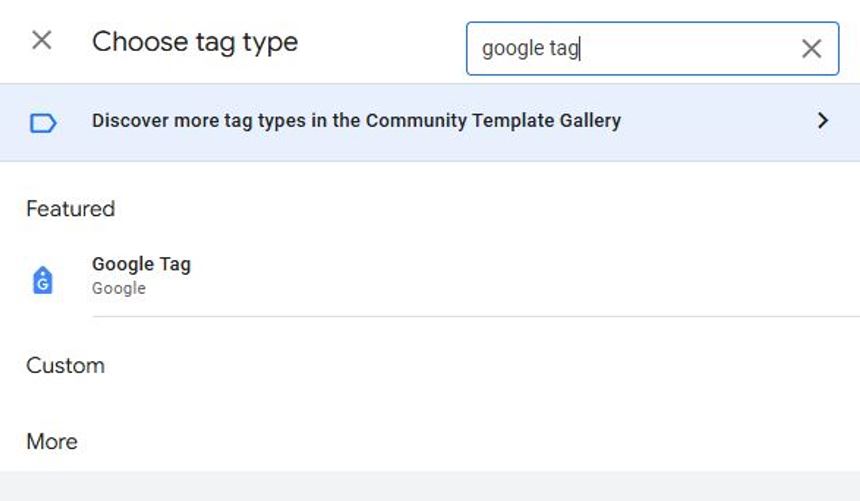
- Click to create a new tag in Google Tag Manager and select Google Tag from the list pre-defined tags.
-
In the Tag ID section in Google Tag Manager, enter the Measurement ID. You can find the ID in your Google Analytics 4 with the following steps:
- Navigate to Admin -> Data Streams.
- Click on your website property.
- Copy the measurement ID.

- In the Fields to set section select the following to add the cookie_flags configuration:
- For Field Name add cookie_flags
- For Value add SameSite=None;Secure
- In the Triggering section, select All Pages.
Sending ecommerce information to Google Analytics 4 from the 2checkout shopping cart
Configure a trigger in Google Tag Manager
In Google Tag Manager, click on the Triggers section and then click to add a new trigger.

Create a Custom Event trigger
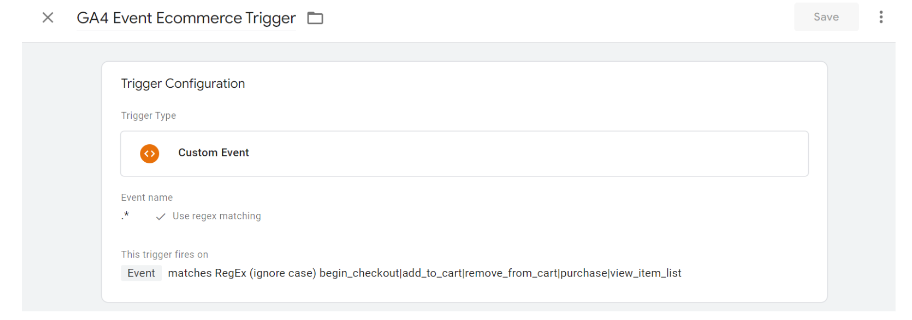
- Name your trigger GA4 Event Ecommerce Trigger.
- From the list provided, choose Custom event as Trigger Type.
- In the field Event name, type .* and check the box Use RegEx matching.
- For the This trigger fires on section, select Some custom events.
- As rule, fill in the boxes with Event matches RegEx (Ignore case) begin_checkout|add_to_cart|remove_from_cart|purchase|view_item_list. Those are events in the dataLayer on the format of the GA4 documentation for developers provided by Google.
- Click Save.
Configure the tag for GA4 for sending ecommerce data
- Click on New to create a new tag that you can call GA4 Event Ecommerce Tag.
- From the list provided by Google, select the option Google Analytics: GA4 event as Tag Type.
- For Measurement ID, add the measurement ID from the Google Analytics 4 property to which you want to send data. This is normally the same measurement ID that you have in your Google Tag. Once you add the measurement ID from your Google Tag, you will see the message Google Tag found in this container.
- For Event Name, select {{Event}}.
- Under More Settings -> Ecommerce, click on the Send Ecommerce data checkbox and select Data Layer from the Data Source drop-down list.
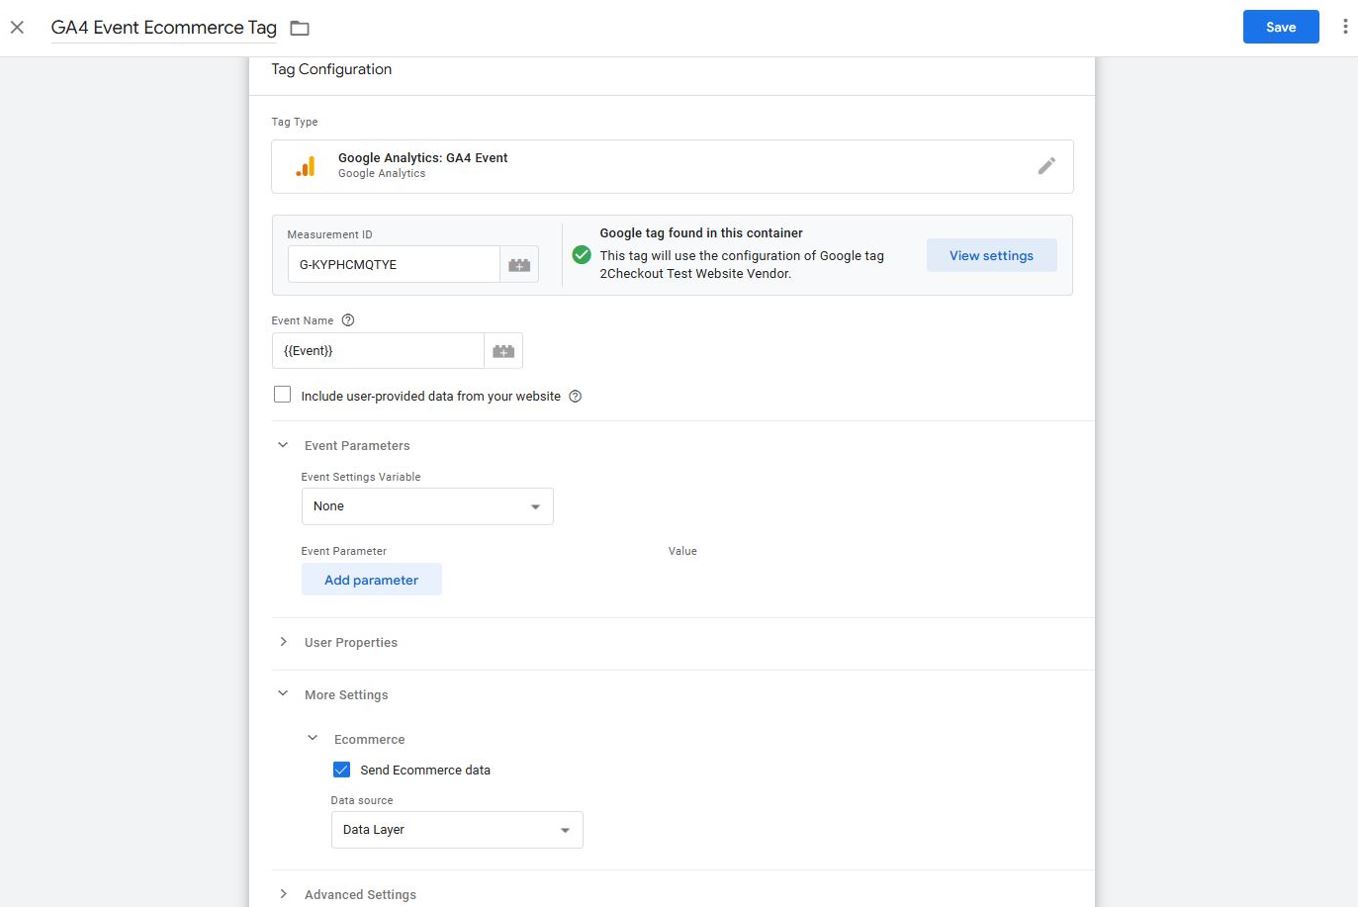
- Add as trigger for this tag the previously created trigger for GA4 Event Ecommerce Trigger.

Setup Cross-domain measurement in your Google Analytics 4 Admin page
Google Tag Manager code is placed in an iFrame with the domain tracking.avangate.net. In order for Google to recognize that a visitor is the same when entering your website and then entering the shopping cart, you need to setup cross-domain measurement in Google Analytics 4 Admin, according to information provided by Google.
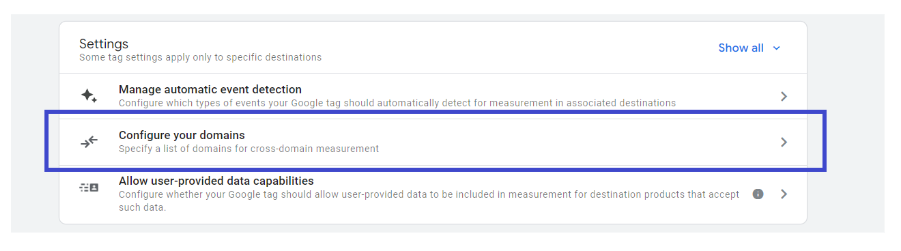
- In Admin, click on Data Streams, click on Web and then select your web data stream. In the web stream details, click Configure tag settings (at the bottom). In the Settings section, click Configure your domains.
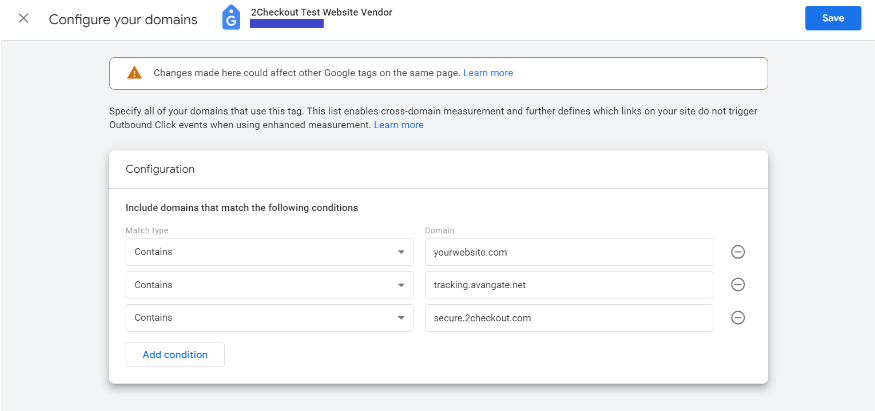
- Under Include domains that match ANY of the following conditions, choose match type Contains and under Domains, enter the identifier of your domain (ex. yourwebsite.com) and then click Add Condition to add the next domains – tracking.avangate.net and secure.2checkout.com.
Test your Google Analytics 4 Settings with GTM Debugger
To test if your Google Analytics settings are correct, follow the steps below:
- Download and install the Tag Assistant Companion browser extension found here.
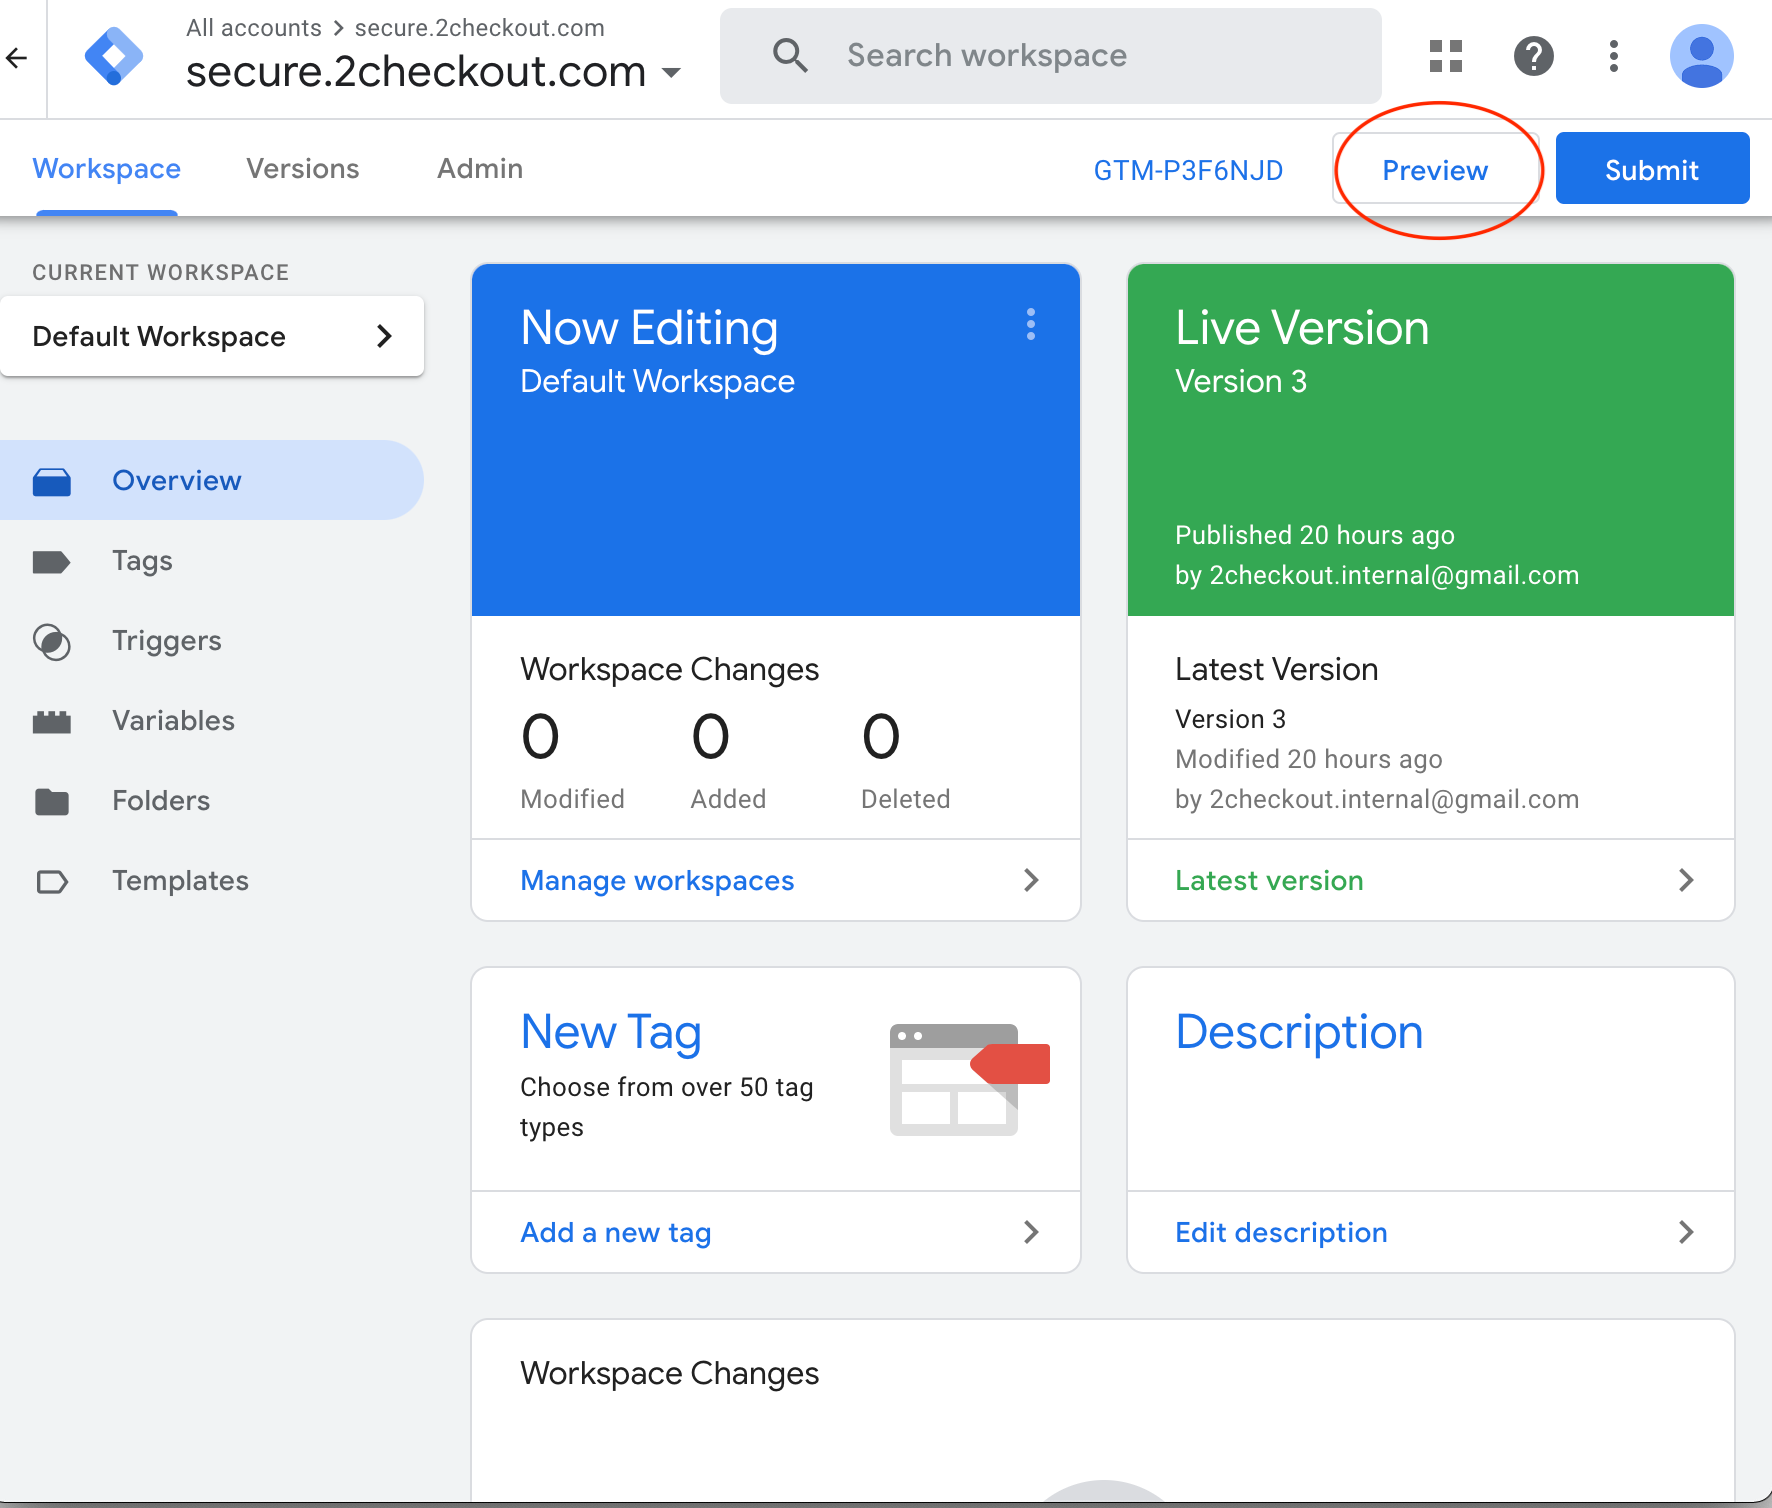
- Click on Preview.
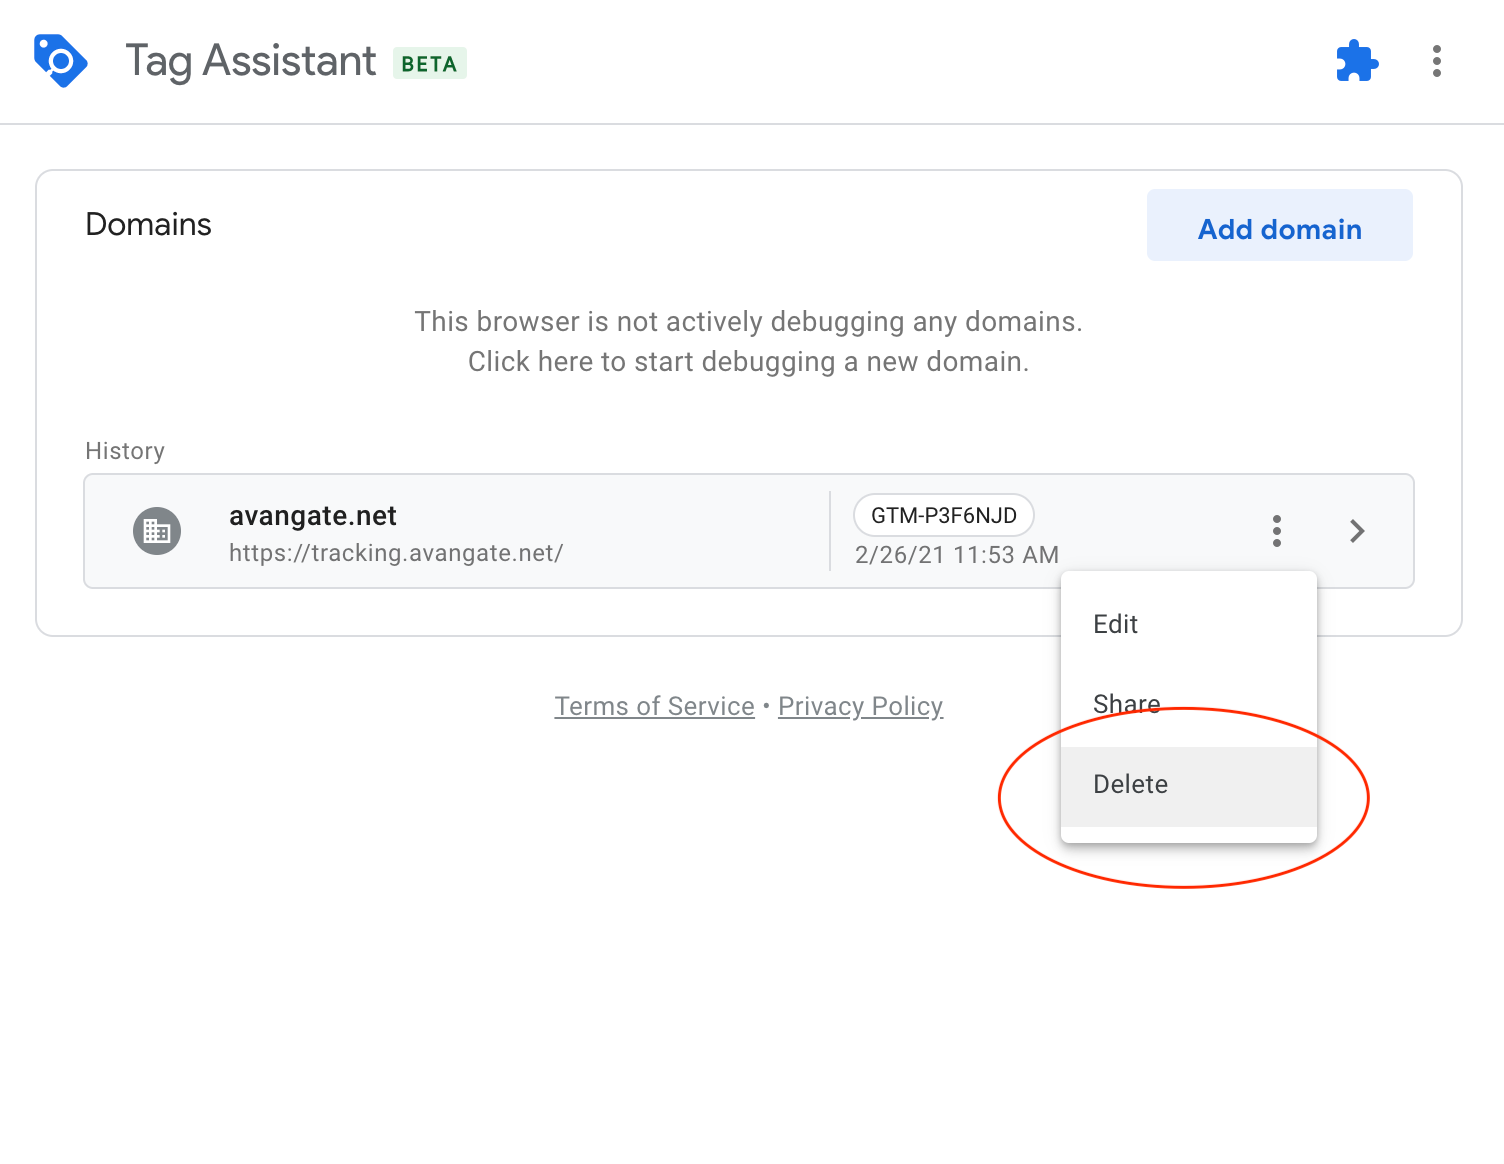
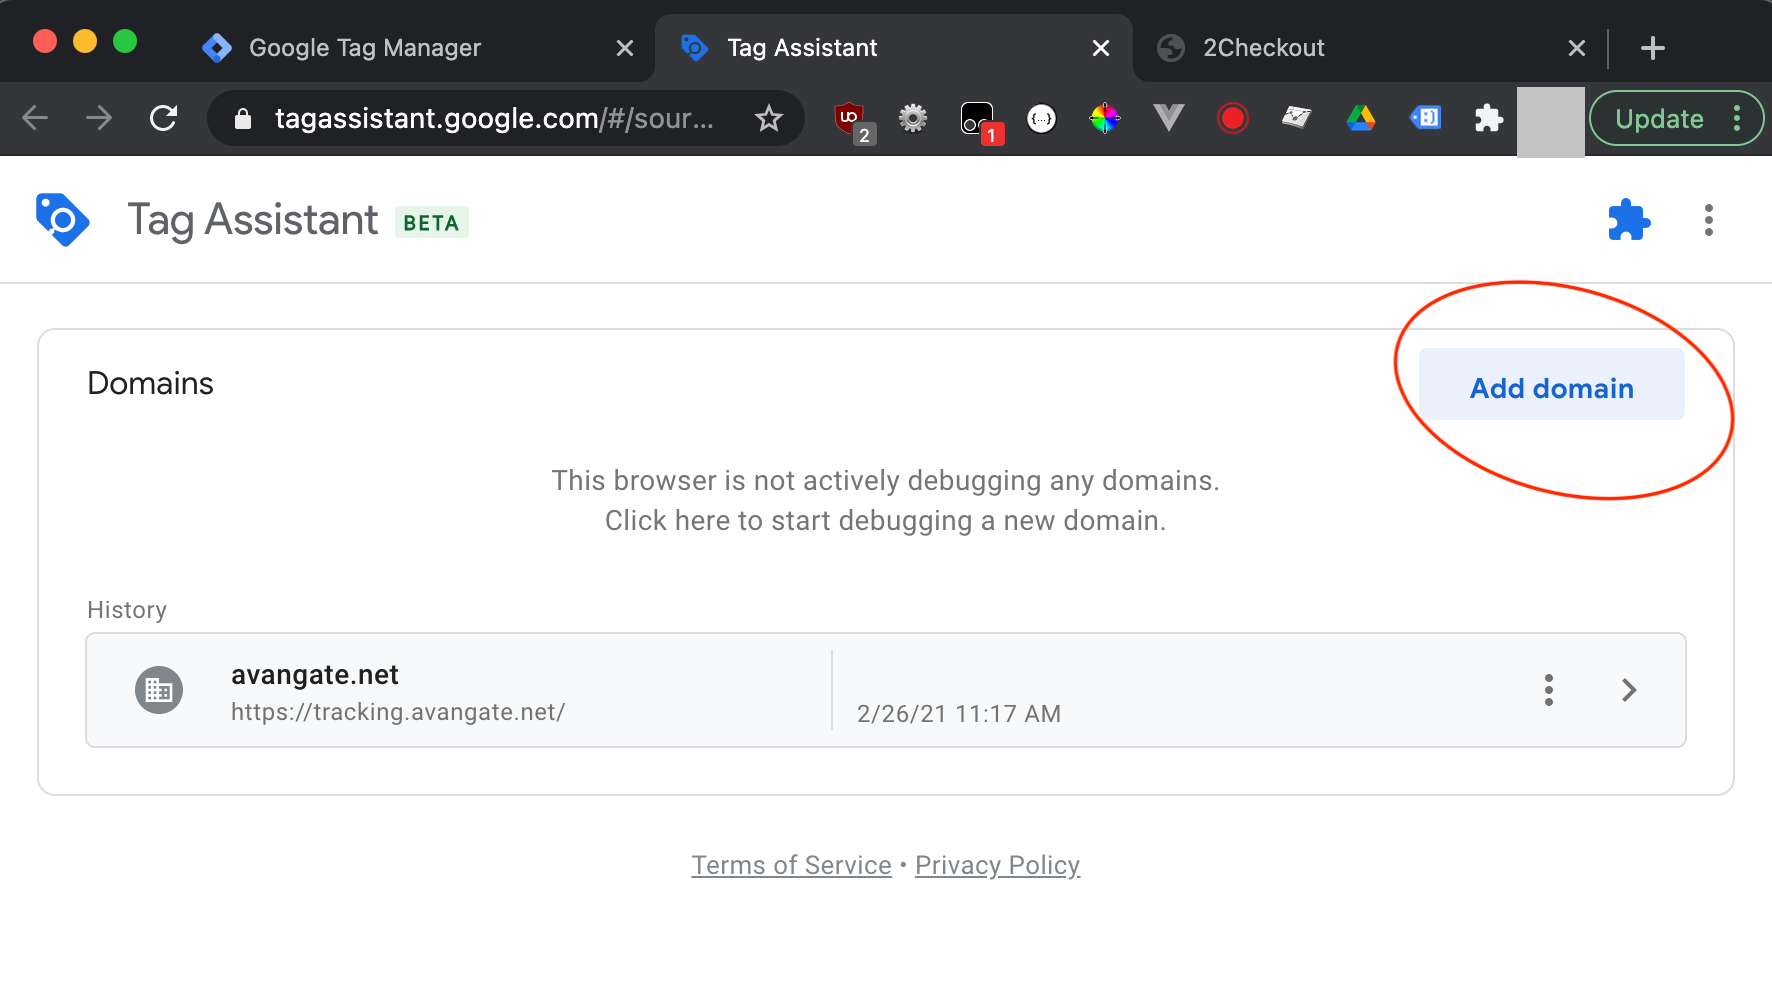
- Delete all existing domains.
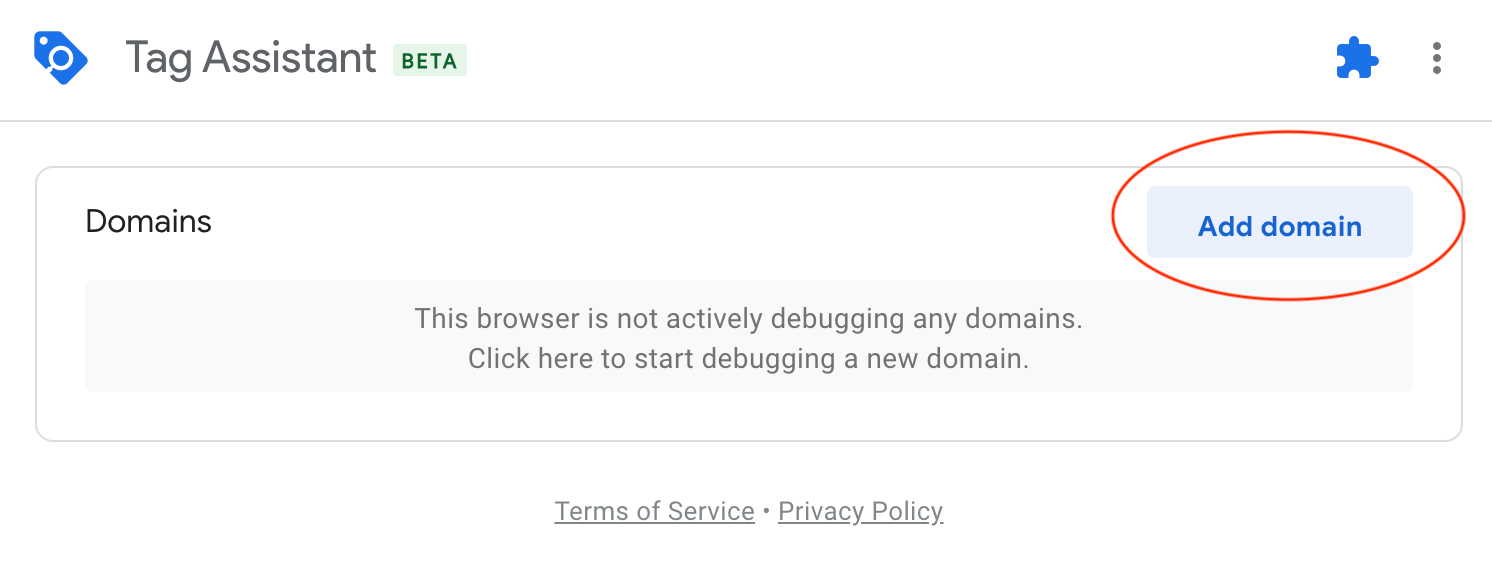
- Click on Add domain.
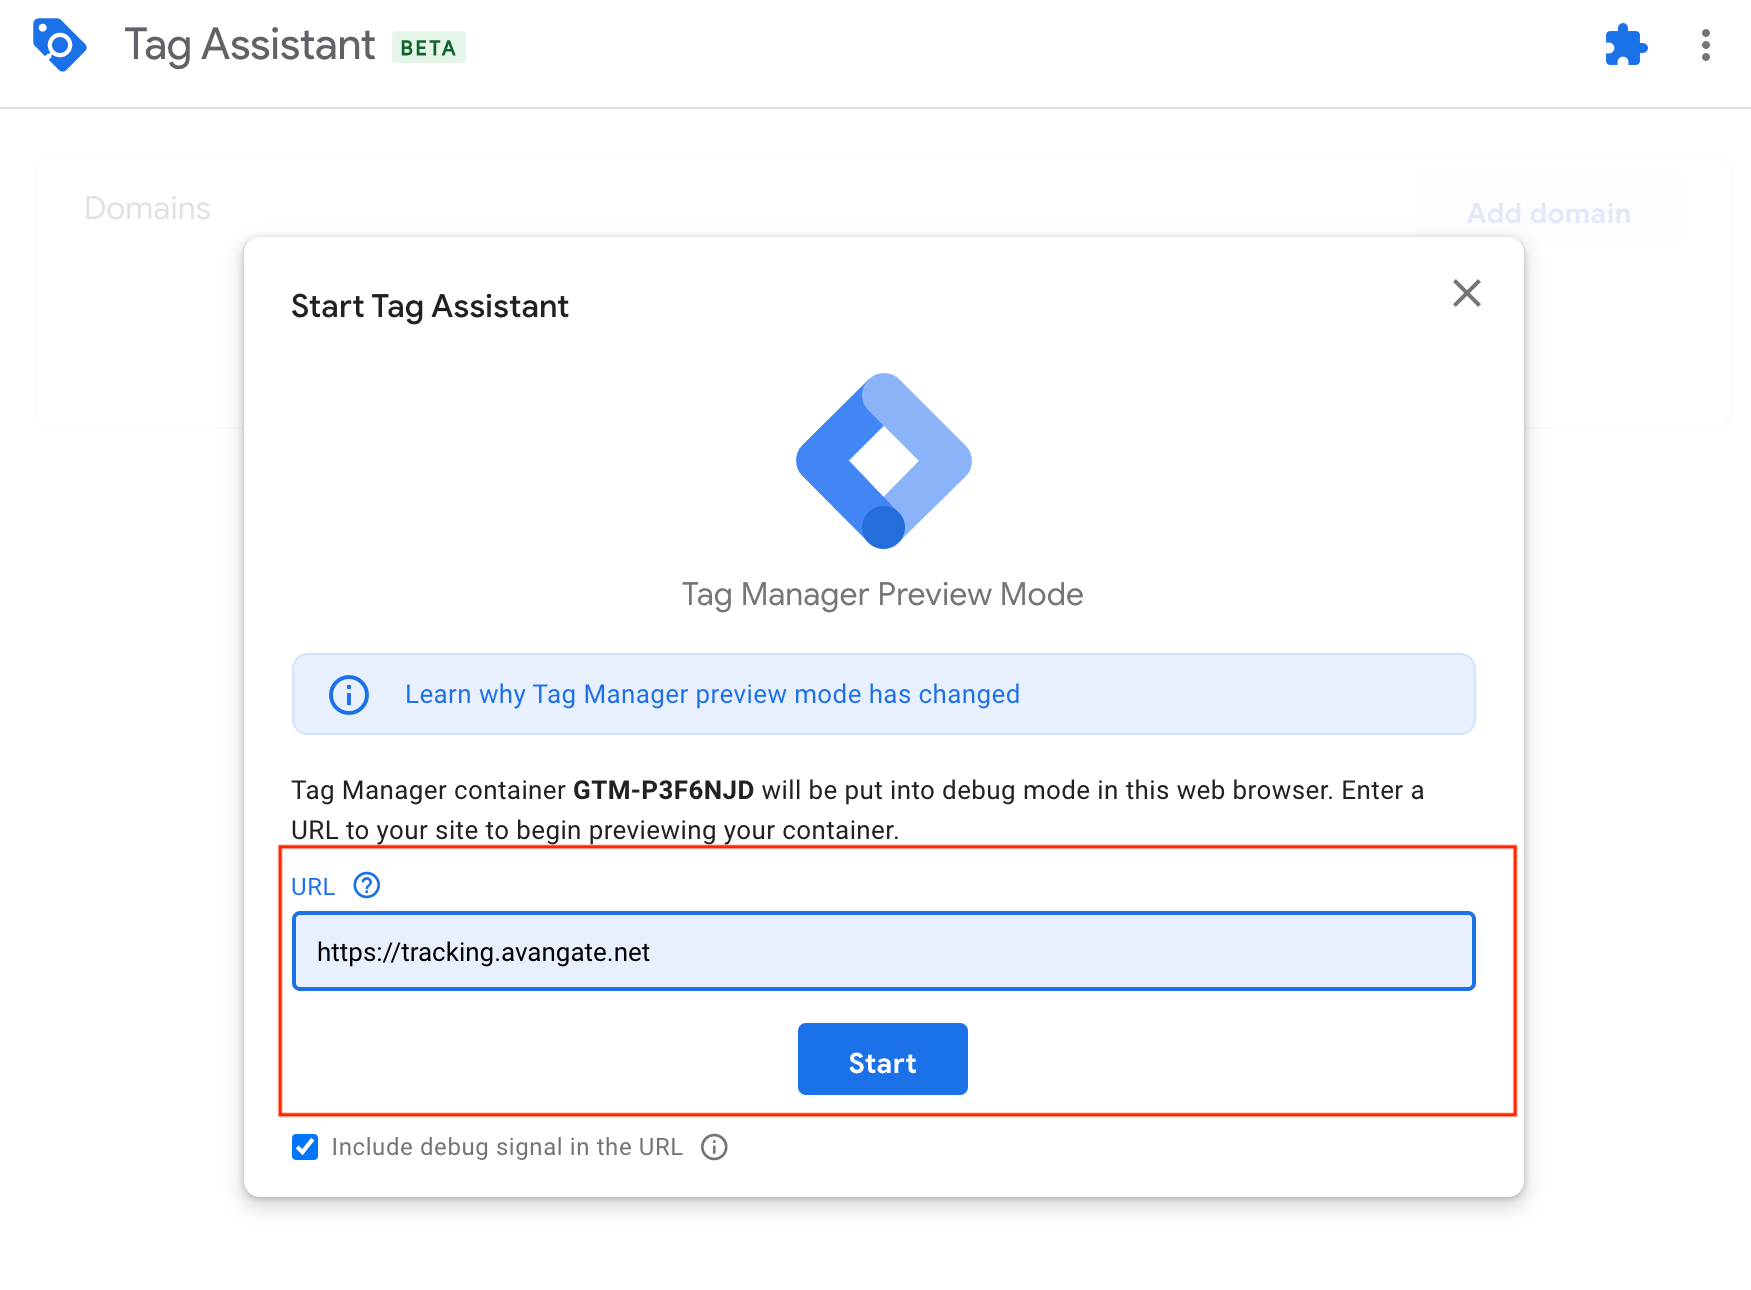
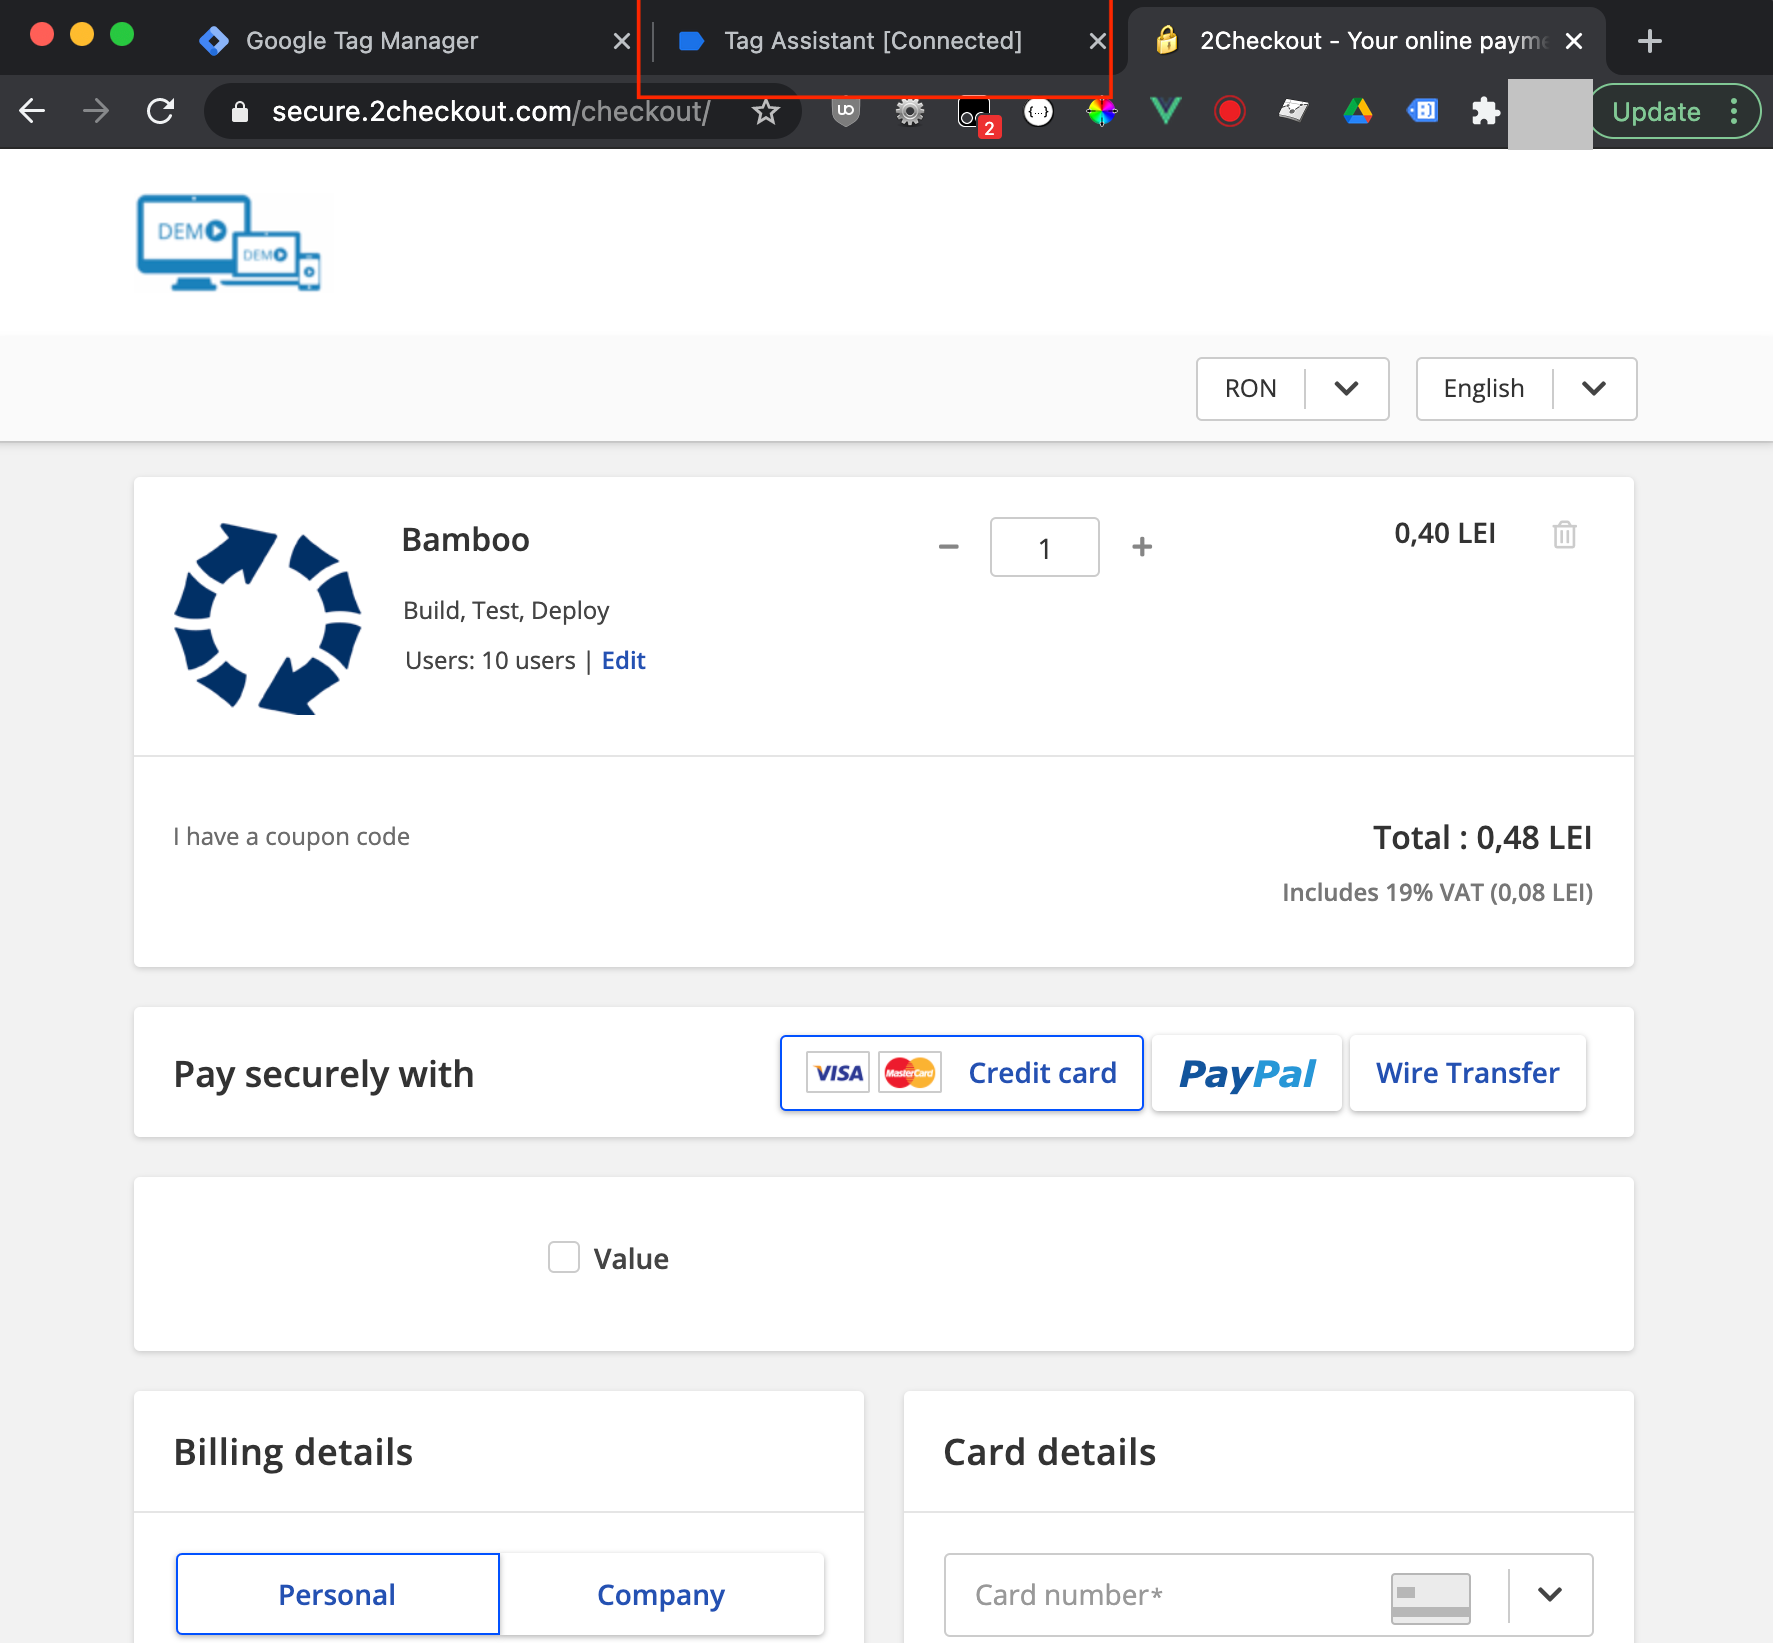
- Add https://tracking.avangate.net/ and click Start.
- Go back to the Google Tag Manager tab but DON’T close the tab with tracking.avangate.local.

- Click on X in the top-left corner.
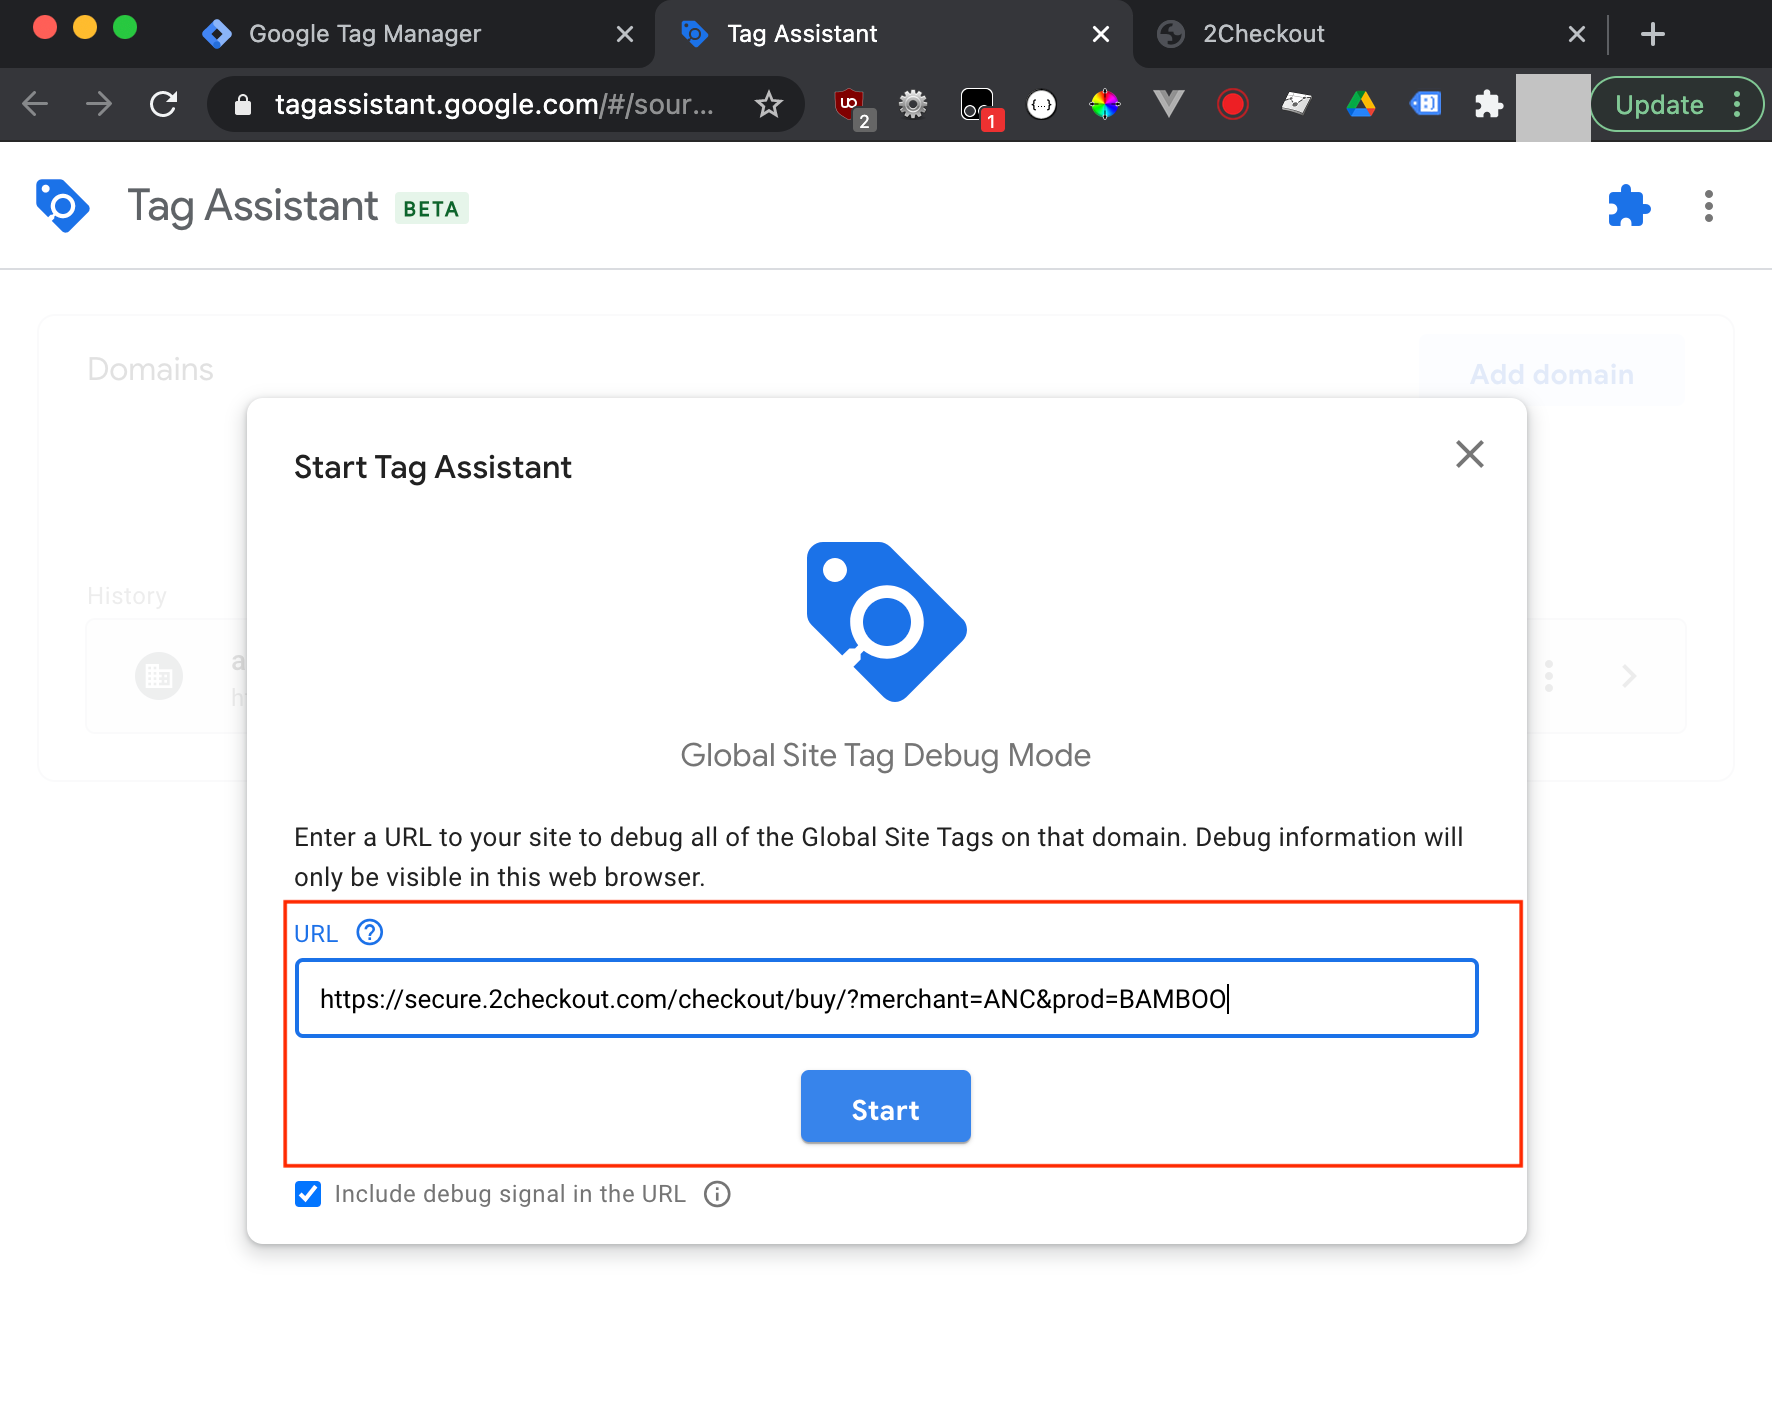
- In the Tag Assistant tab, click on Add domain.
- Enter the buy-link you want to debug and click Start.
- Go back to the Google Tag Manager debugger tab.
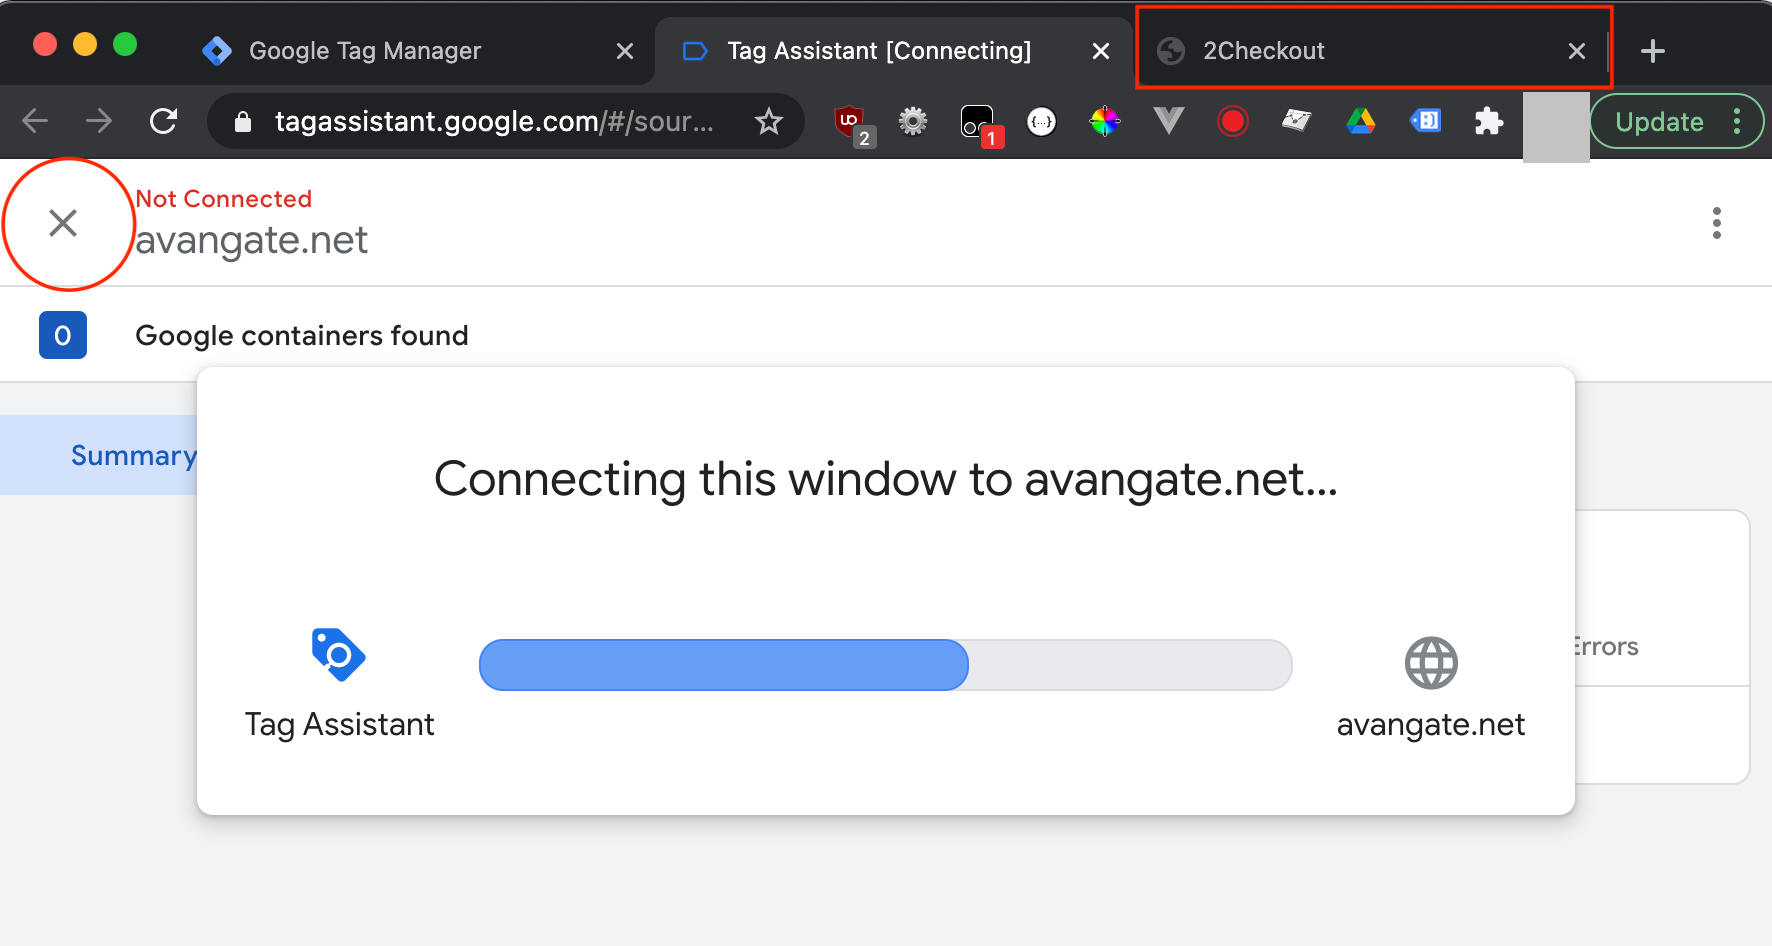
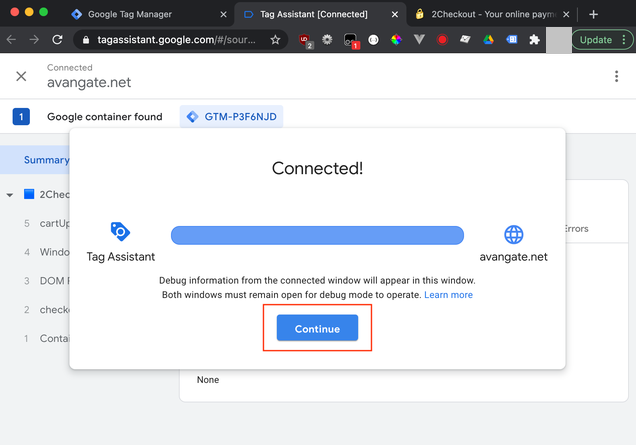
- Click on the Enable button behind the Connecting this window to avangate.net pop-up.
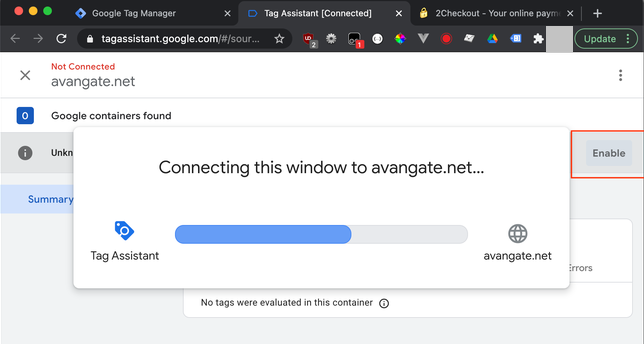
- Click on Continue.
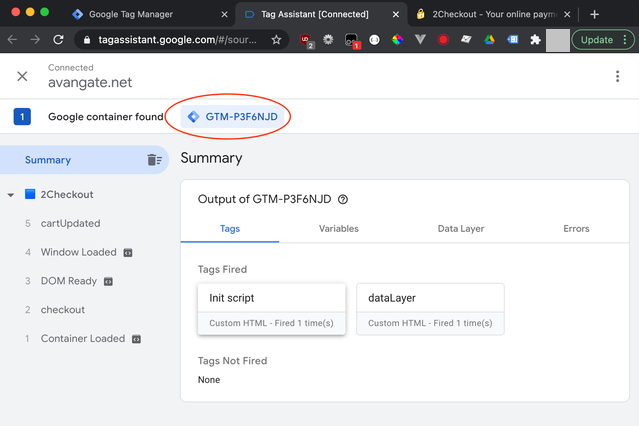
- You are now debugging tracking.avangate.net, but this domain receives tags from the shopping cart.
- Submit and publish your settings.

Checking a purchase in Google Analytics 4
Place an order on the 2checkout shopping cart, using the template which has your Google Tag Manager code.
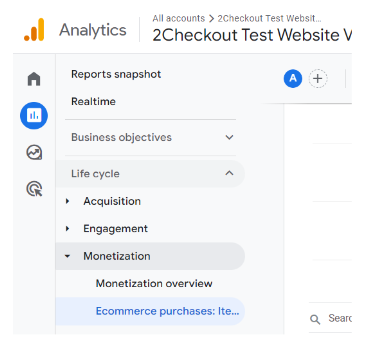
Log into your Google Analytics 4, go to Monetization -> Ecommerce purchases.
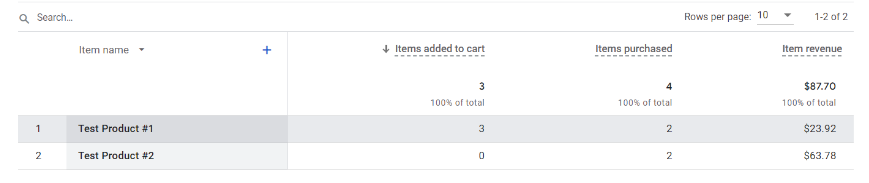
You will see the number of purchases for your products and the revenue from your purchases.
Control Panel Settings
The Analytics section in your Control Panel allows you to integrate Google Analytics 4 or/and Google Tag Manager(with GA 4) in the ConvertPlus or InLine ordering engines and thus track the behavior of your shoppers on the 2Checkout pages.
Follow these steps to complete your analytics integration:
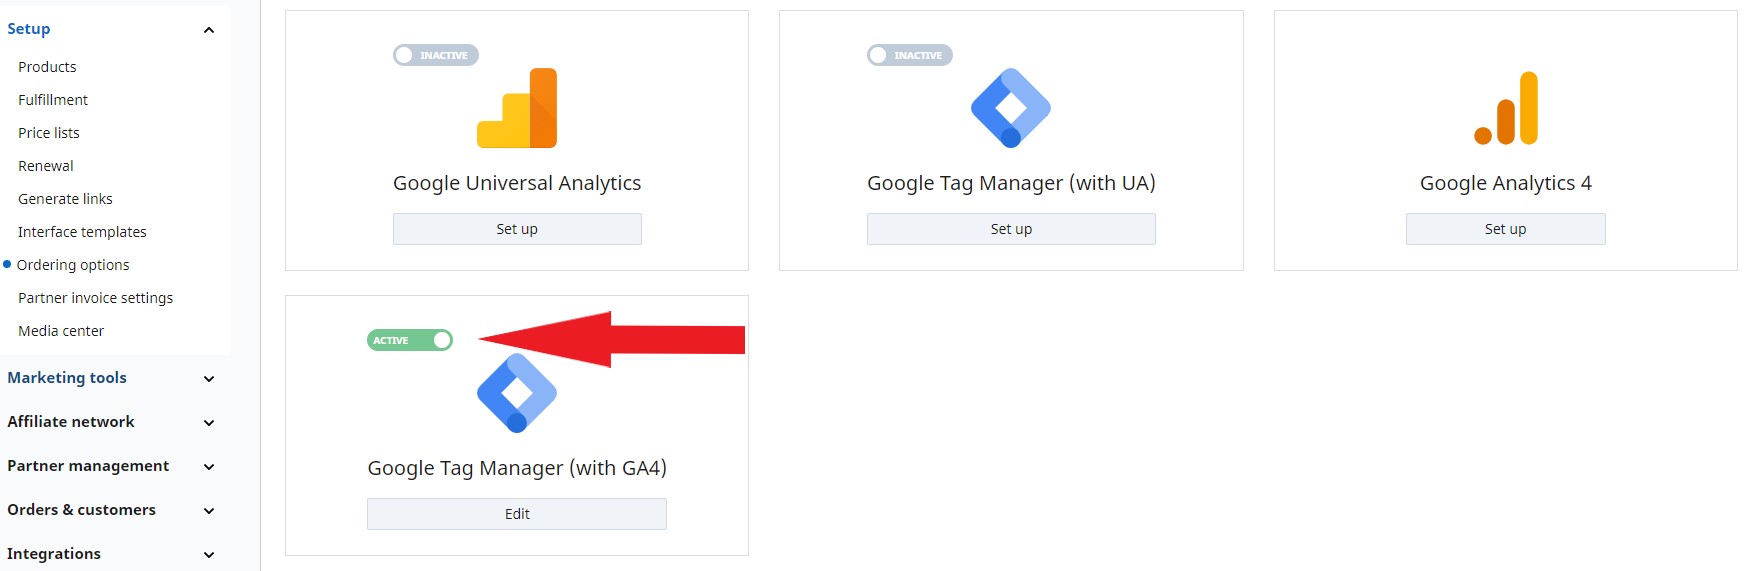
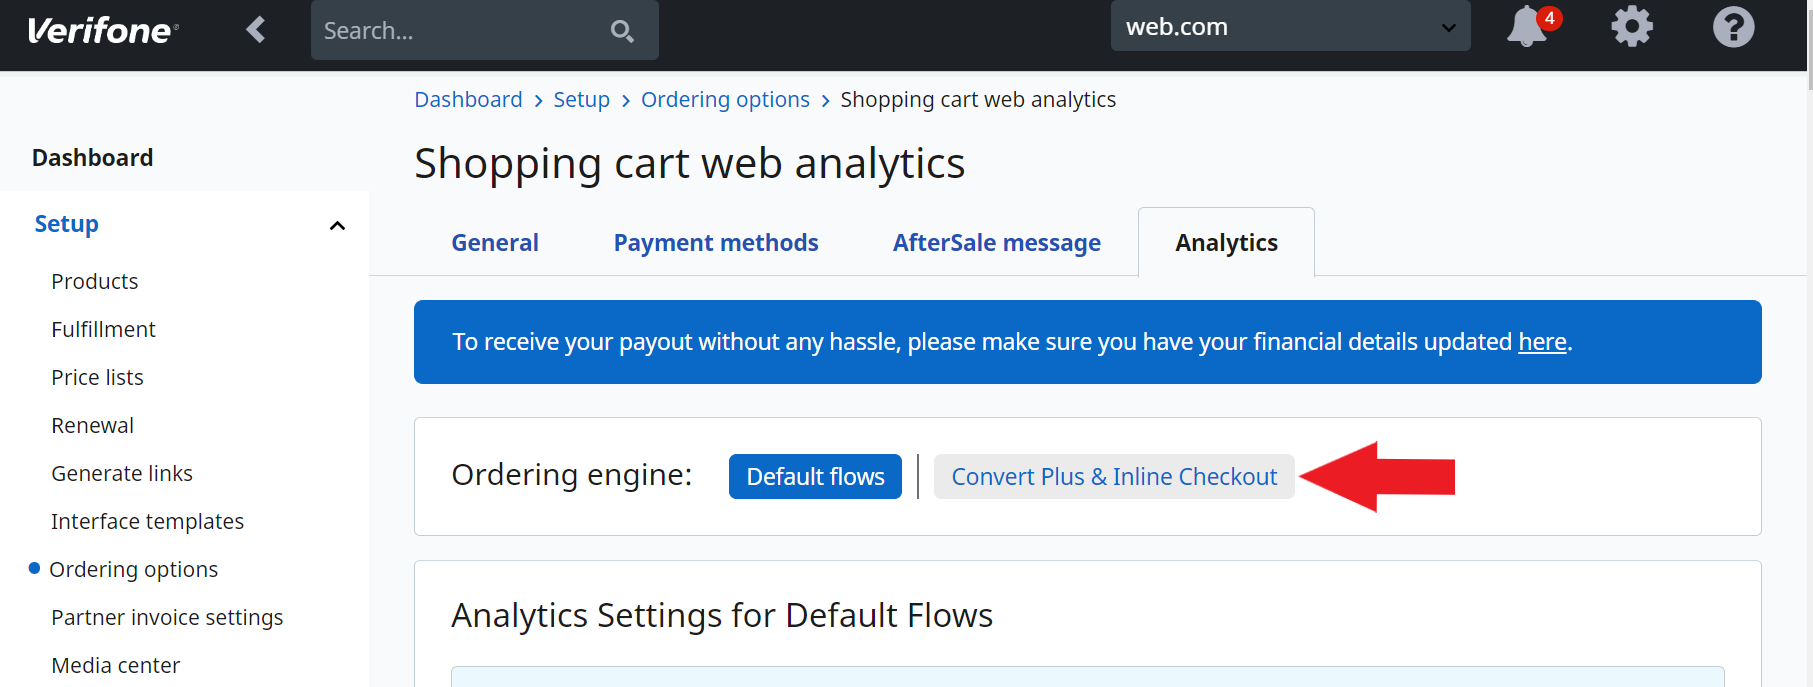
- Log into your Control Panel.
- Navigate to Setup → Ordering options.
- Click on the Analytics tab.
- Click on the ConvertPlus and InLine Checkout tab.
- In the Google Tag Manager(with GA 4) box, click on Set up and fill in the Google Tag Manager (with GA4) Container ID.
- Click Save.
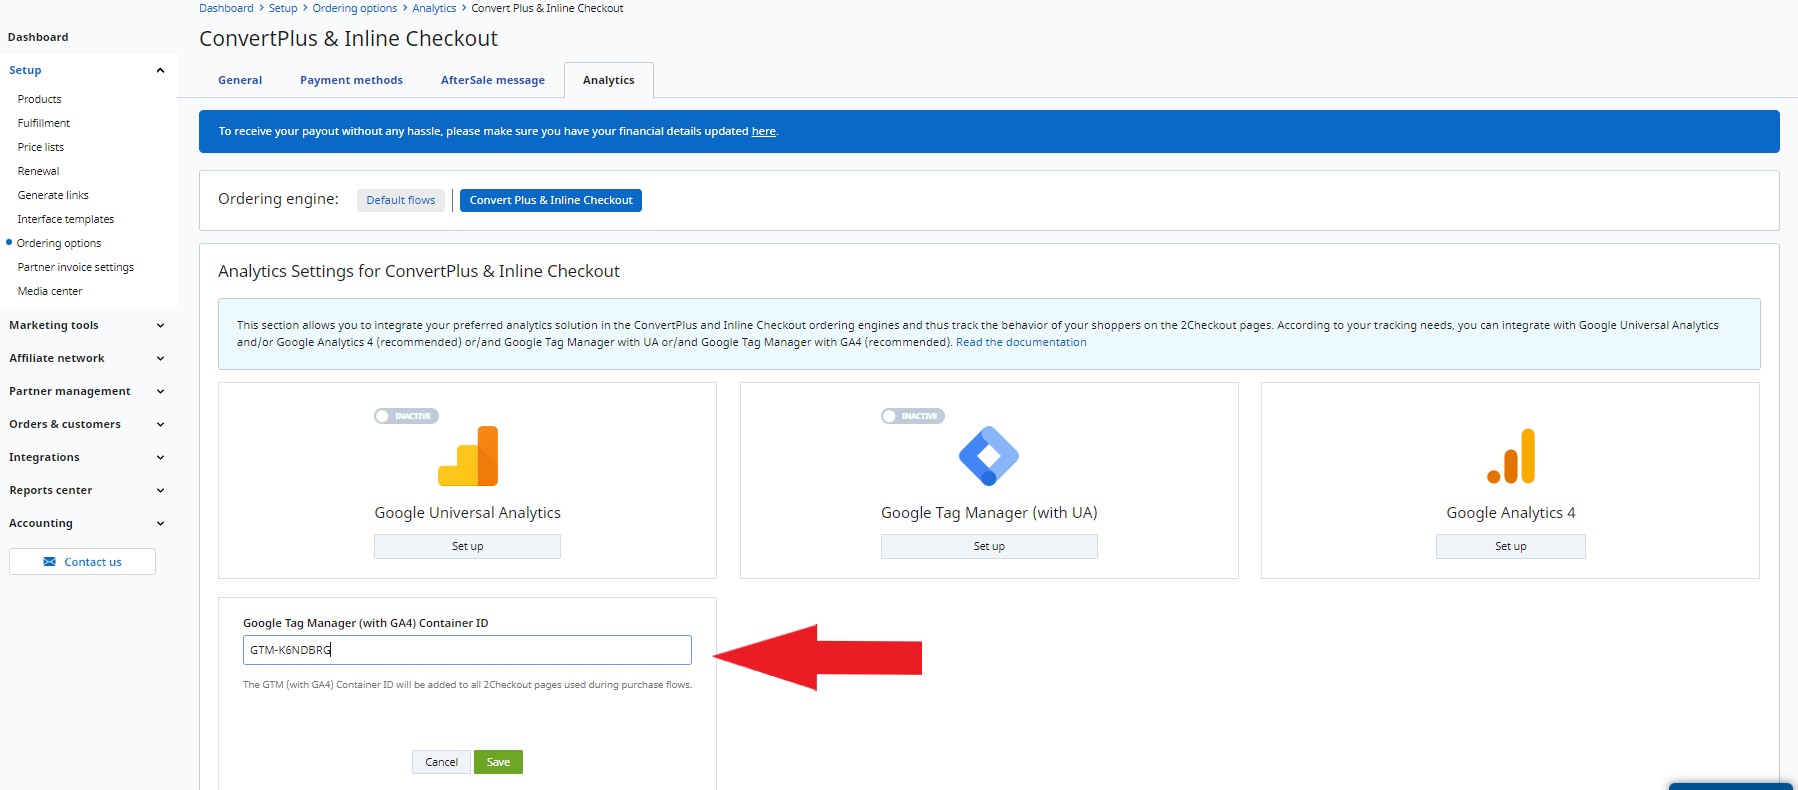
- Complete the integration by using the slider to activate Google Tag Manager. It is not recommended to activate both Google Analytics 4 and Google Tag Manager to send data to the same Google Analytics 4 property, otherwise, duplicate data will occur.