Report Scheduler
Overview
The Report Scheduler in Verifone Central enables you to set and generate an orders / transactions report at time intervals scheduled by you. You can set the time and frequency at which the report will be generated, you can apply filters to the orders / transactions included in the report and you can choose who has access to the reports.
Availability
The Report Scheduler can be activated on demand and is set by the Merchant Admin or Merchant Supervisor roles. For more information, contact your Verifone sales representative.
Generate a scheduled report
To schedule a report, follow the steps below or watch this video tutorial:
- Log in to your Verifone Central account.
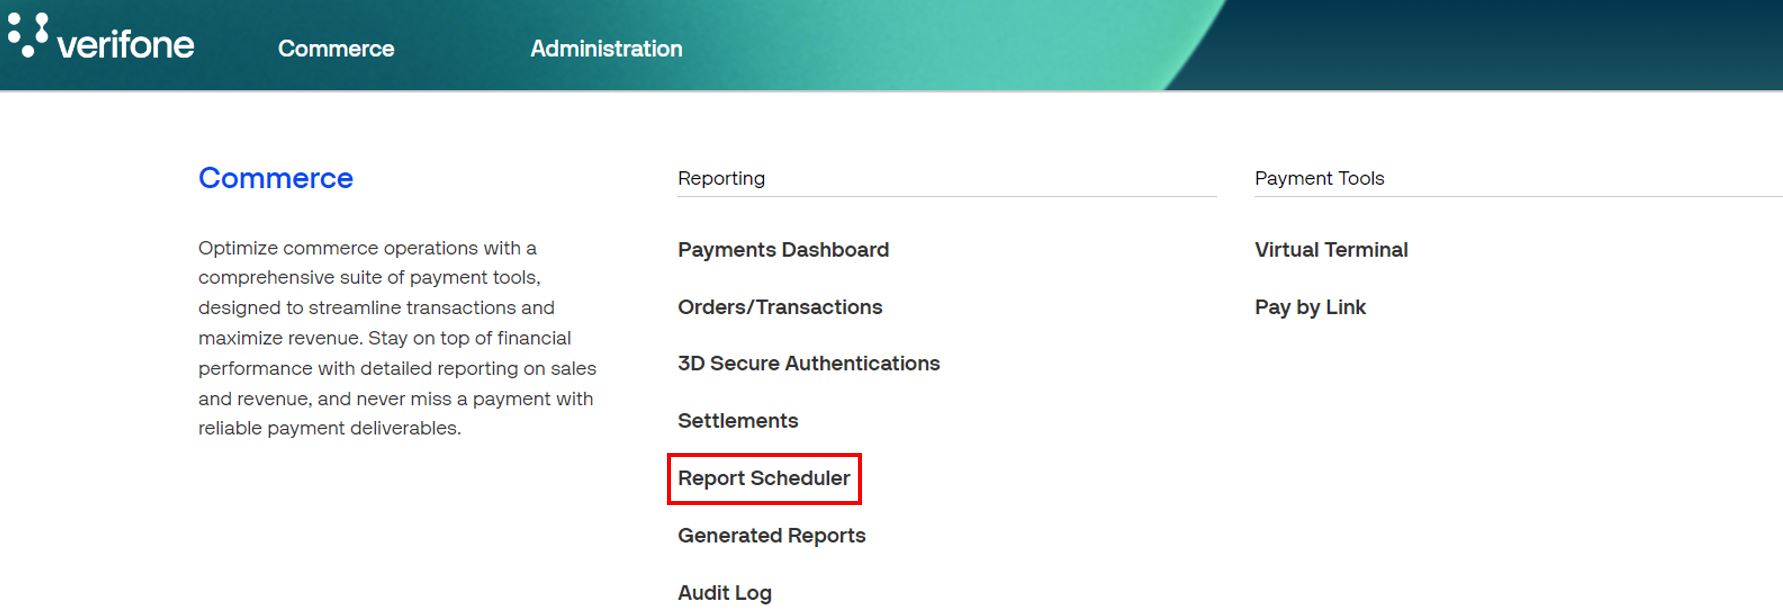
- Navigate to Commerce -> Reporting and select Report Scheduler.
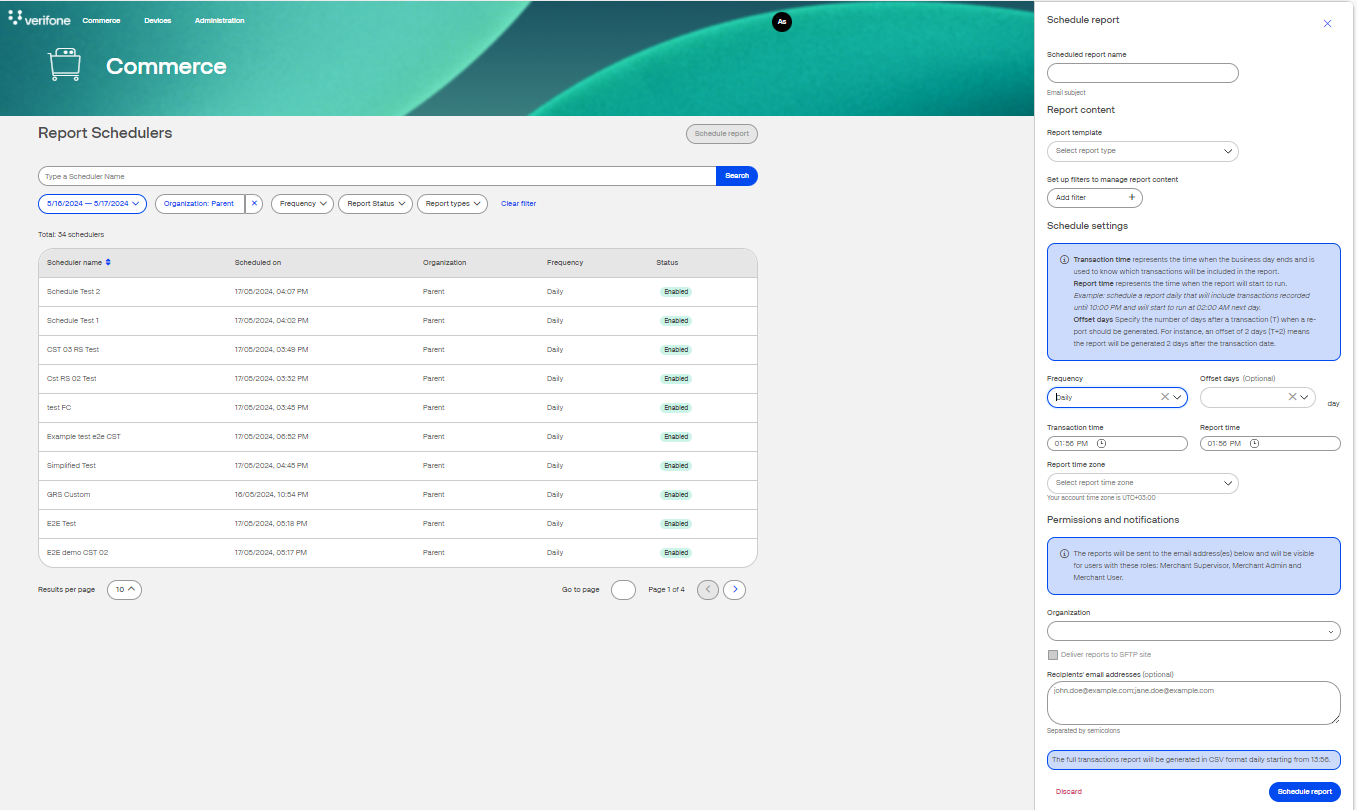
- In the next window, click on the Schedule report button.

- Alternatively, you can also select Orders / Transactions from Commerce -> Reporting and click on the Schedule button on the top right-hand side.
-
In the Schedule Report side panel on the right-hand side, complete the following fields to customize the type of report you want to generate:
Scheduled report name: Type in the title of the report you want to start.
Report Content:-
Report templates: Choose from the drop-down list between two templates: Transaction Reports-Full and Transaction Reports-Basic.
- Set up filters to manage report content: You can choose to filter the content of the report according to:
- Transaction date
- Channel
- Wallet
- Currency
- Product
- Transaction type
- Transaction state
- Processor
- Merchant ID
- Organizations
Schedule Settings:
- Frequency: Choose how often the report Is generated:
- Daily
- Weekly
- Monthly
- Offset Days: Offset days is a delay or gap between the transaction date (T) and the date in which the report is generated. It specifies how many days after the transaction date the report will be generated. Offset days values that can be selected are between 2 up to 7 days.
- It is only applicable to daily frequency scheduled reports.
- An offset of 2 days (T+2) means the report will be generated with a 2-day gap in the transaction export.
- Let's assume your transactions are getting settled 2 days after the transaction date. For example, you scheduled a report today on April 23, 2024, selecting an offset of "2" days. Starting from tomorrow (April 24, 2024), you will begin receiving the daily report with a 2-day offset. This means you will receive the latest status report export of transactions dated April 22, 2024, tomorrow.
- Transaction time: Set the time when the collection of transactions for the current report will end. New transactions after this time will not be included in the current report. The transaction time is the end of the range of the current report and the start of the next report.
- Report time: Set the time when the report will be generated.
- Report time zone: Set the regional time zone used to schedule the report.
Permissions and notifications:
- Organizations: Search for an organization, so you can enable its members to access the report.
- Recipient e-mail address: Add the e-mail addresses of those that will be notified that a report has been generated.
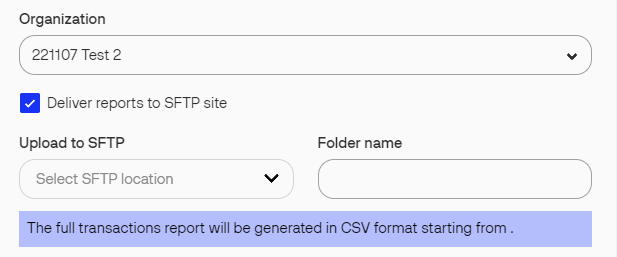
- Deliver reports to SFTP site (Only available if SFTP is enabled): Click on the checkbox if you want reports to be sent using the Secure File Transfer Protocol (SFTP). SFTP is a safe encrypted way of transferring files between two remote systems. This checkbox is only visible if the organization has the SFTP Delivery feature access enabled.
- Upload to SFTP (Only available if SFTP is enabled): Identifier for the SFTP site where the reports will be sent to.
- Folder (Only available if SFTP is enabled): Folder on the SFTP site where the reports will be sent to.
-
-
Once you set all the details of your report scheduler, click on Schedule report to set the scheduler.
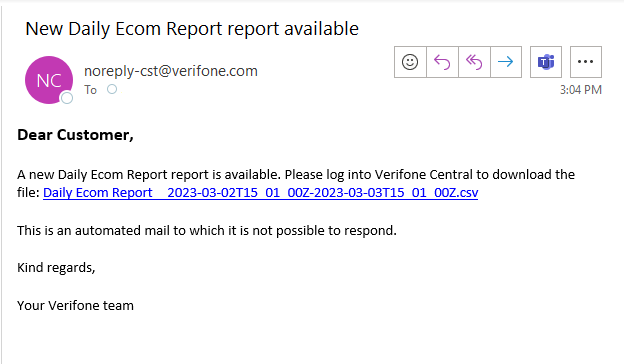
- When the report is generated, an e-mail is sent out to all the configured e-mail addresses. The e-mail contains a direct link to the report on Verifone Central. If you do not have permission to access that report, an error message will be displayed when you attempt to open the report link. You can download the report after logging-in as a user. Users can only download the reports for the organization they are assigned to and to their underlying sub-organizations as well. All reports are also available to download from the Generated reports page.
View a scheduled report
- Log in to your Verifone Central account.
- Navigate to Commerce -> Reporting and select Report Scheduler.
- In the new window you can see all the report schedulers generated for your organization. You can filter according to:
- Date range - to filter the results by the scheduling times, the first date being the start of the scheduling period and the second the end of the scheduling period.
- Organizations - the organizations that made the transactions aggregated in the report.
- Frequency - how often the report is generated.
- Report status - whether the report scheduler is currently Disabled or Enabled.
- Report types - the report template used to generate the report.
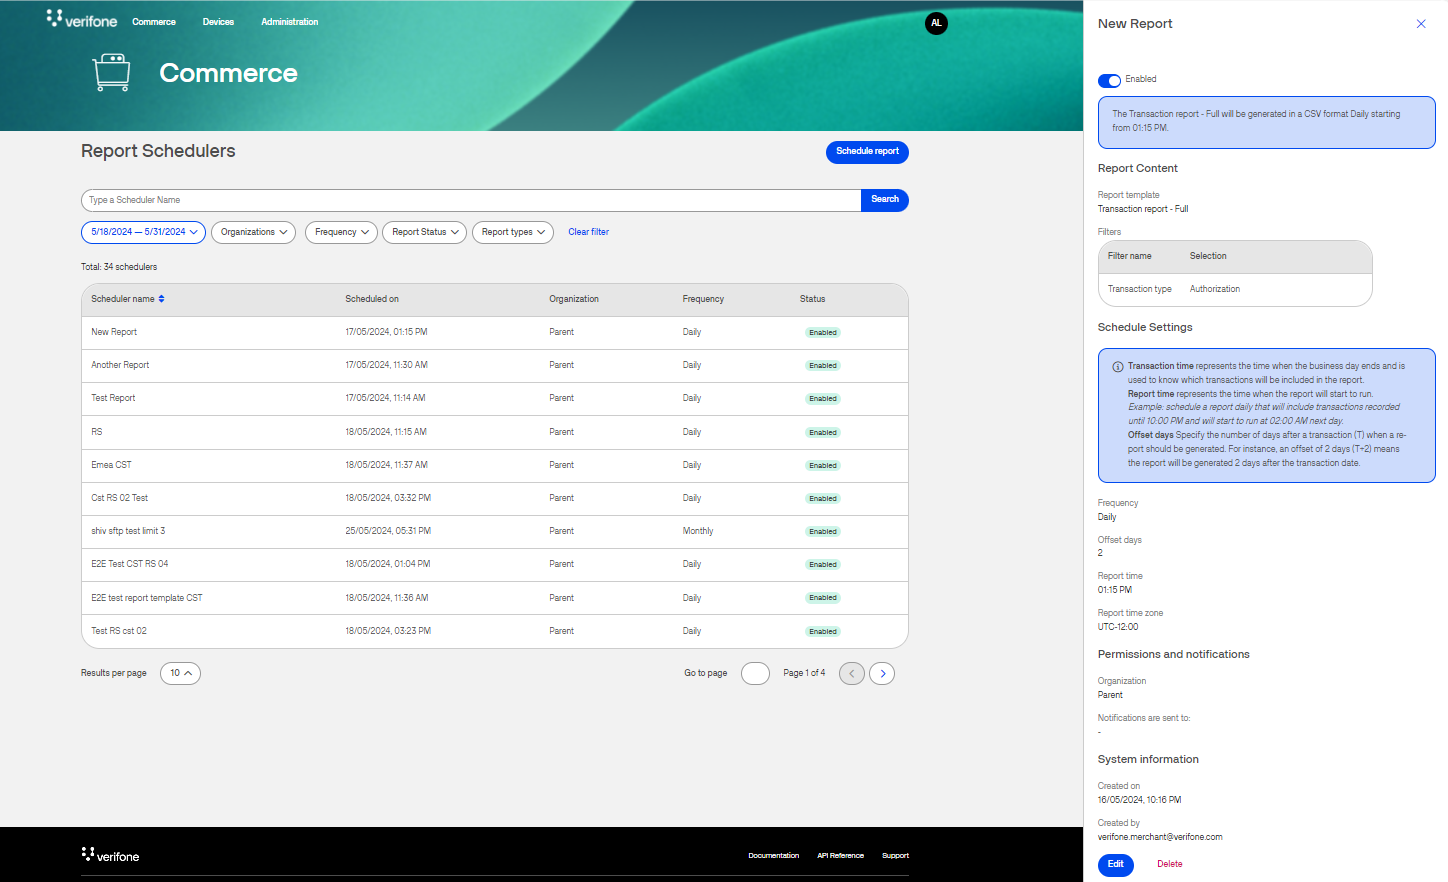
- To get more details on a report scheduler, after applying a filter, click on the scheduler you are interested in, and a side panel will appear on the left-hand side.
- At the bottom right-hand side of the side panel there is an Edit button. You can change all the sections except for the filters to manage report content. To change the filters, you must set up a new report scheduler.
- If you want to delete a report scheduler, click on the Delete button next to the Edit button.
- If you want to temporarily interrupt the scheduler, you can click on the slide button on top and set the scheduler from Enabled to Disabled. This way, you can enabled it again when it is convenient for you.