Customize a report template
Last updated: 26-Nov-2025
Overview
This feature enables you to customize the content by selecting the transaction details you need, and the access to the report within your organization. You can create new report templates for exporting the report to best suit your business needs.
Access
Your level of access determines if you can create and edit a new template.
✅ Access:
- Merchant Admin
🚫 No access:
- Every other user roles
Creating a report template
To create a new report template, follow these steps:
- Navigate to Commerce and select Orders / Transactions from the Reporting section.
- Select the needed view between orders and transactions, by clicking on the toggle button Orders / Transactions.
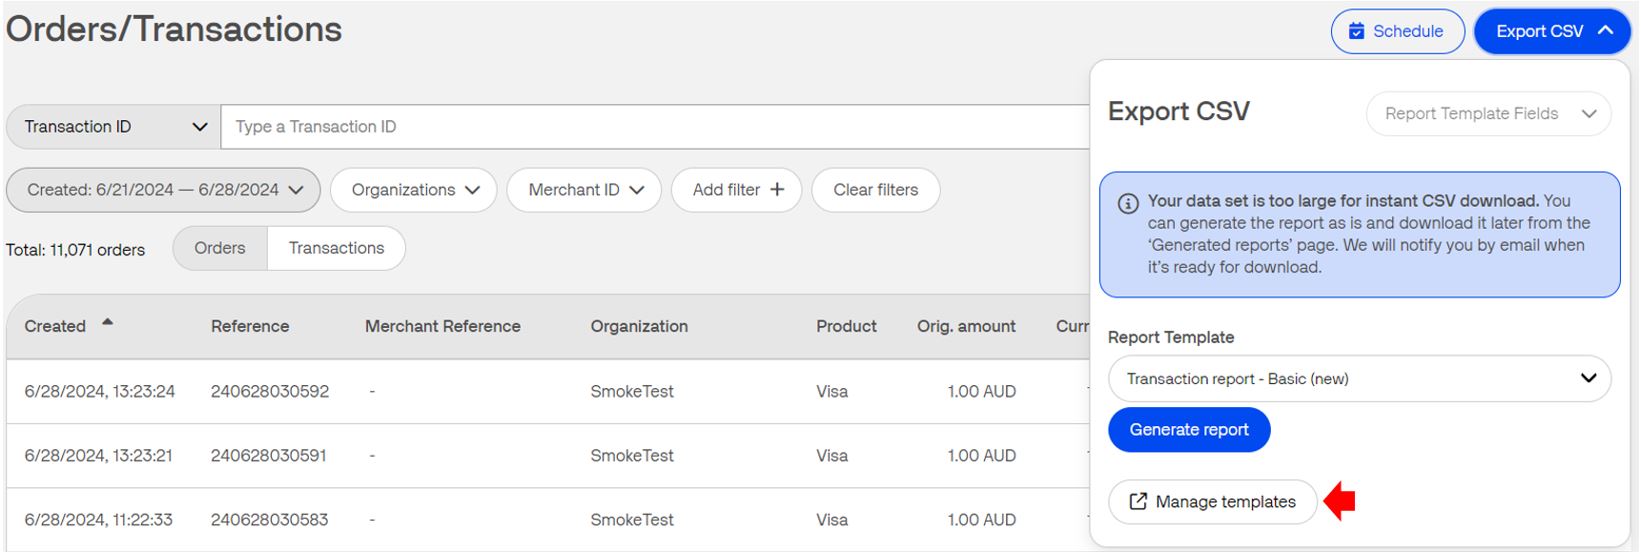
- After adding the filters for the details that you need included in the report, click on Export CSV.
-
In the Export CSV pop-up dialogue box, click on Manage templates.
-
In the Transactions report templates page, click on the Create template button on the right-hand side of the screen.

- In the Add template form fill in and select all needed details.
- In the Report Template Name field, type the name of the new report template.
- In the Organization field select your organization from the drop-down menu. You can allow users from your organization and attached sub-organizations to use the template by clicking on the Share to all sub-organizations checkbox.
- In the Report Content section you can either select all the available transaction fields by clicking on the Select all fields checkbox or you can select only the fields you need by clicking on their respective checkbox from the list of 100 different transaction fields. With every selected checkbox from the list the counter next to the Select all fields checkbox increases, informing of the number of details you have selected so far. For information on each field, see Reporting details.
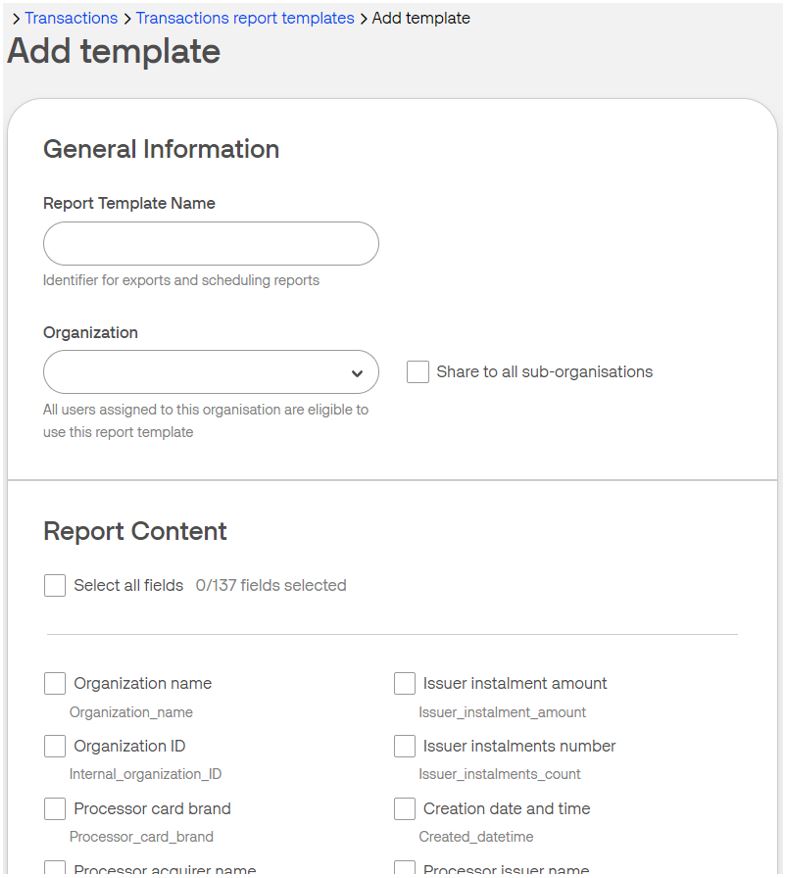
- Once you have chosen the details you need included in the report, click on Save template.
-
The new template will now be available to use from the Report template drop-down list in the Export CSV pop-up menu each time you need to export a report.
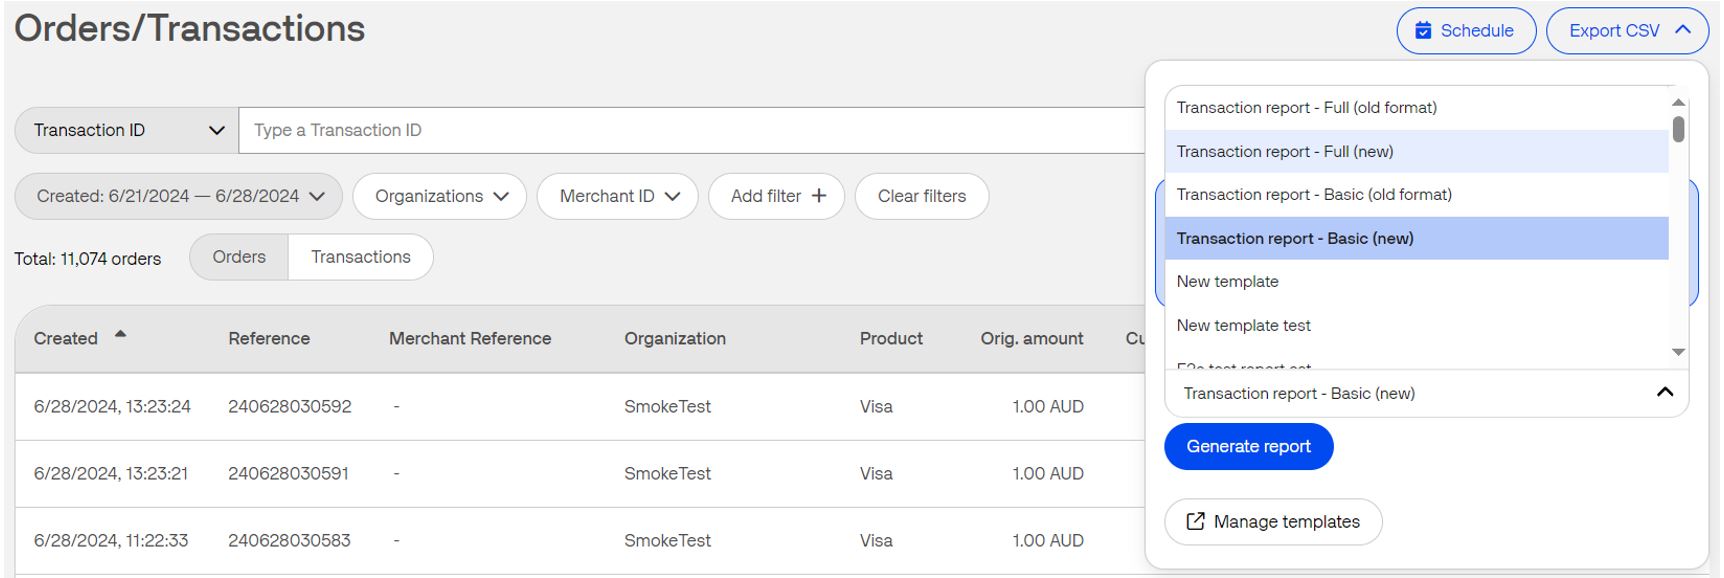
- You can also edit existing templates if you have a Merchant Admin role in your organization.