PayPal In-app
Useful links
Billing Agreement API
PayPal Initiate billing agreement
Merchant setup
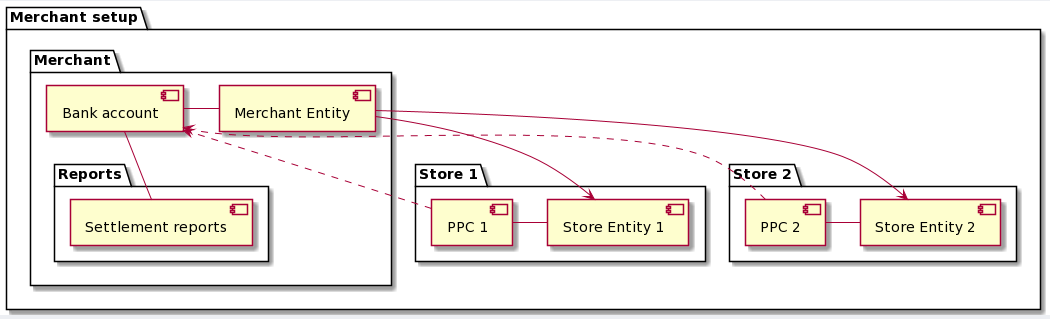
This section describes the possible merchant setups and highlights crucial data for in-app transaction processing.
At the core of the structure is the merchant, who owns at least one store. Merchants and stores are represented by abstract entities. Usually, the merchant will configure one bank account at the merchant entity to receive the settlement. However, it is possible to configure a separate bank account at each store as well. The settlement reports are in turn tied to the bank account(s), since they contain the breakdown of the received bank statement.
To enable the processing of in-app transactions, each store needs a Payment Provider Contract (PPC) linked to it, which is uniquely defined by the contract UUID. Each PPC contains a reference to the bank account which will be used for settlement of transactions processed with this contract.
To ensure proper reporting, the merchant (or the franchise) needs to maintain a mapping of the stores and PPC UUIDs, since the later one is needed during transaction processing. The same PPC UUID needs to be used for processing refunds, which alternatively can be processed from terminals connected to the store where the transaction was processed.
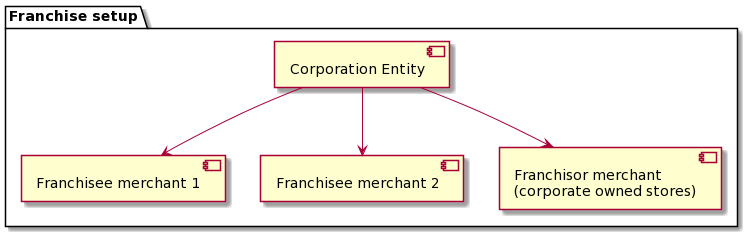
In case the merchant is part of a franchise structure, there will be an additional corporation level in the hierarchy, below which the corporate owned merchant structure and any number of franchisee merchant structures are located.
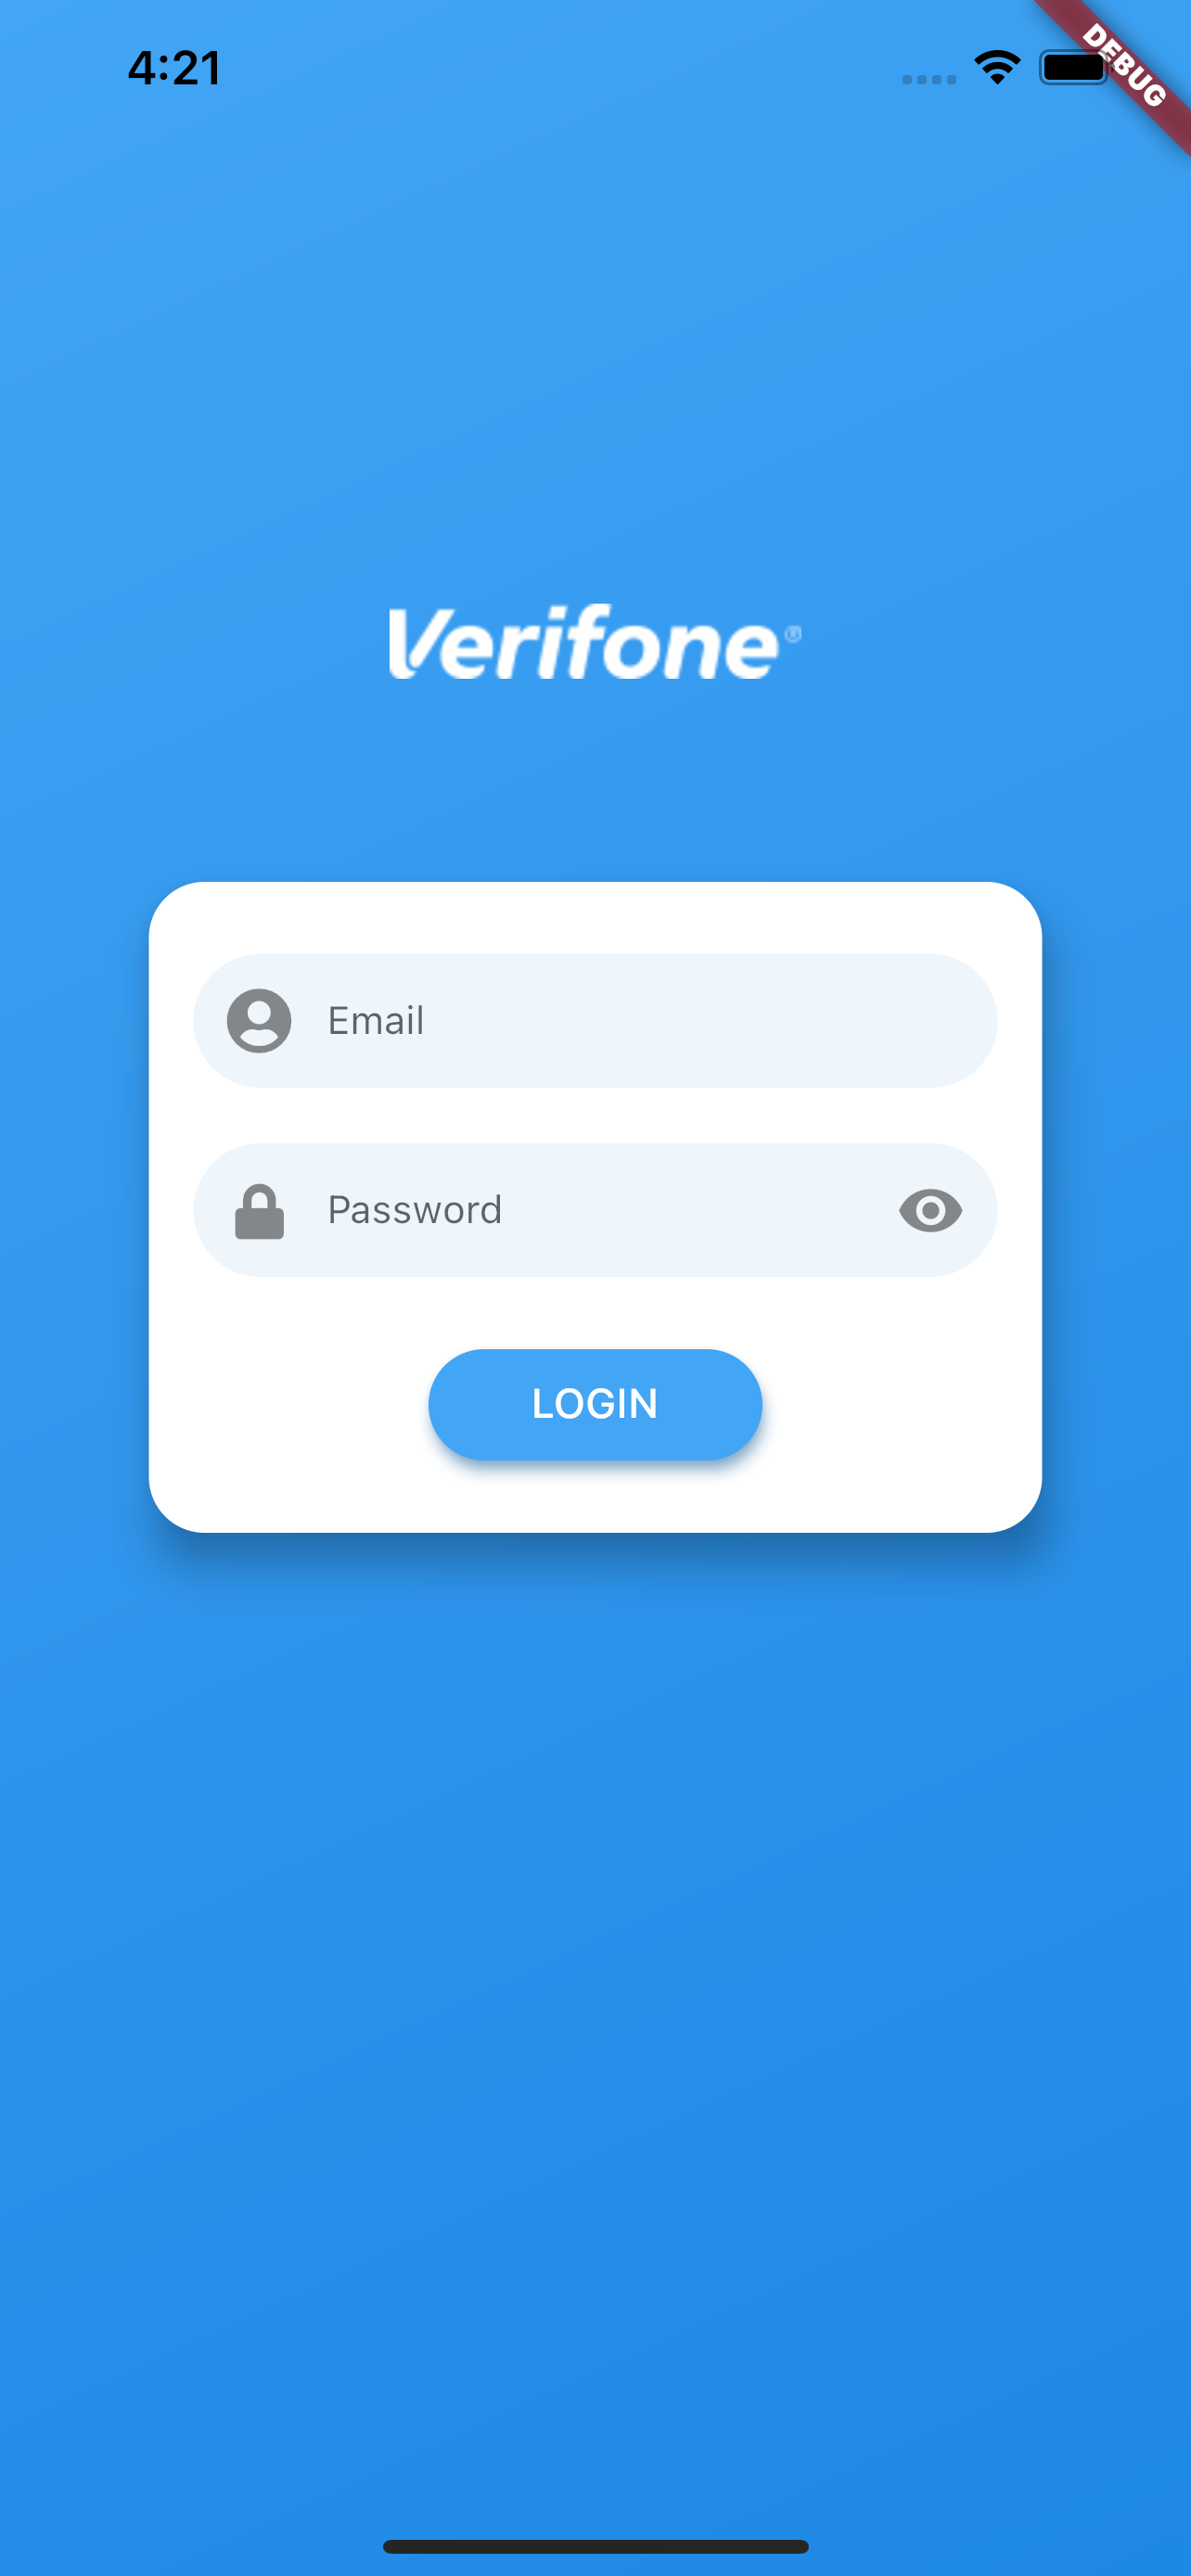
User management flows
It is assumed that the merchant already has an existing user management including, e.g., account creation and login inside the merchant app.
Billing agreement management
A billing agreement is needed to process in-app transactions. It is best practice to manage the billing agreement at the merchant backend and not store any sensitive data inside the merchant app.
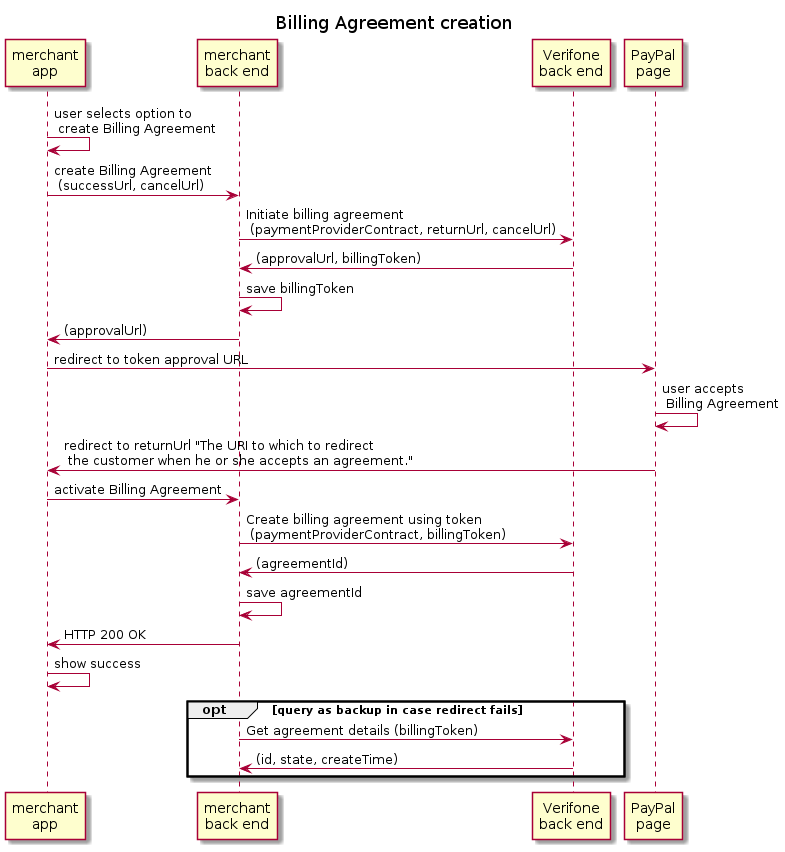
Create Billing Agreement
The creation of the billing agreement is initiated by the user within the merchant app, e.g., during account setup, account configuration or before the first PayPal transaction.
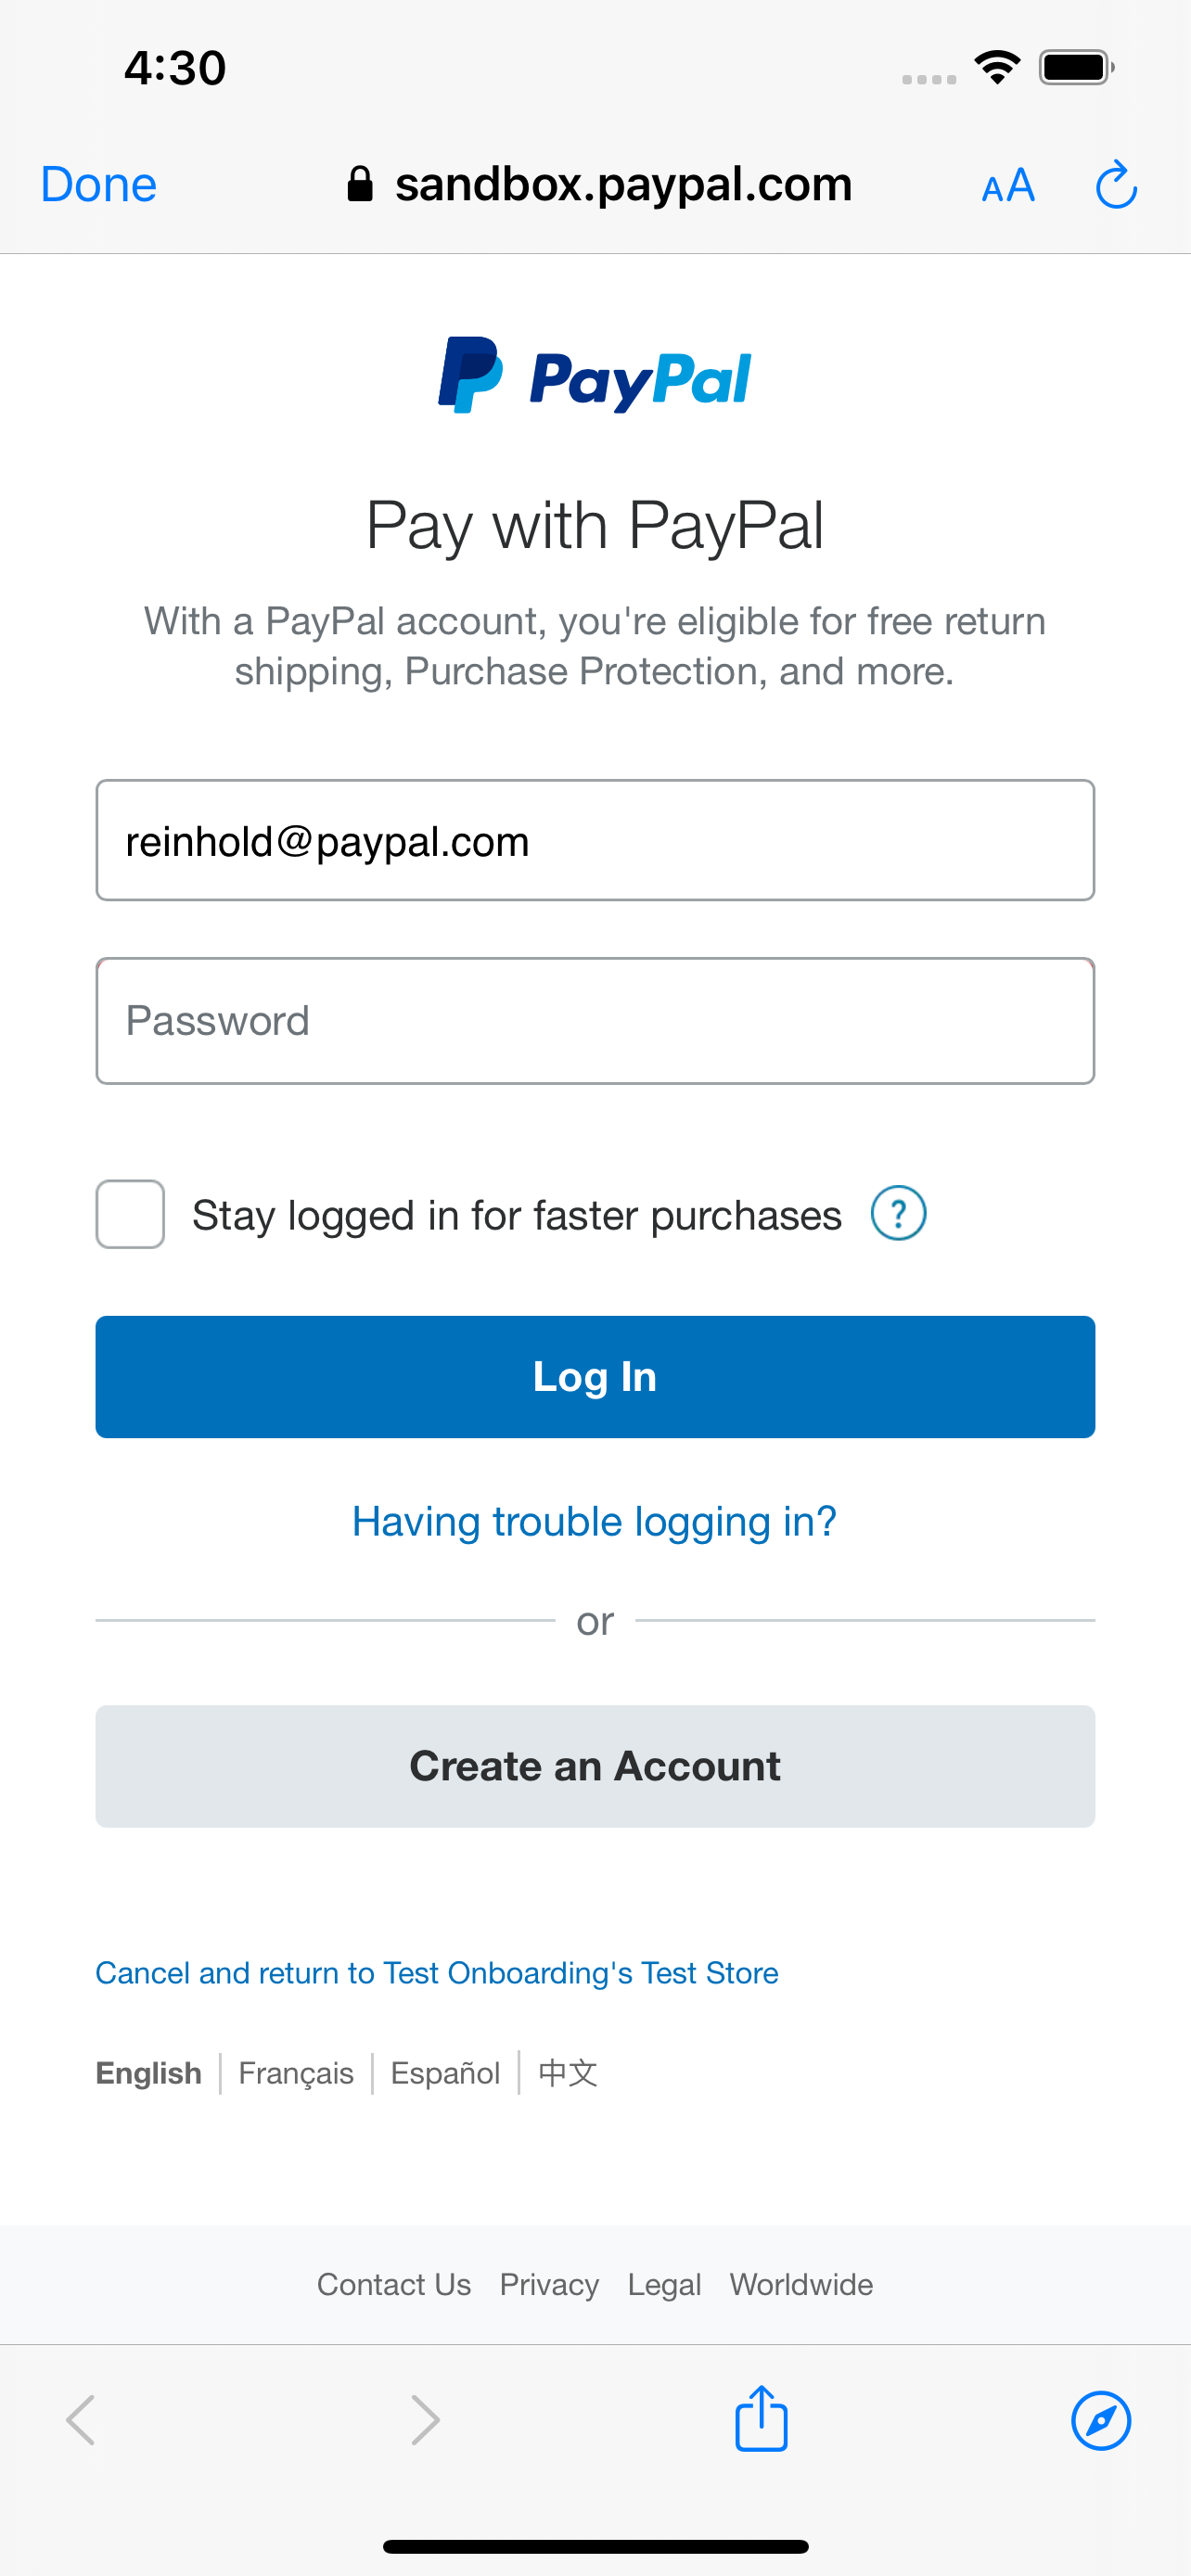
Therefore, the merchant backend needs to initiate the billing agreement to receive the approvalUrl and the billingToken, which is a temporary reference until the final agreementId is created.
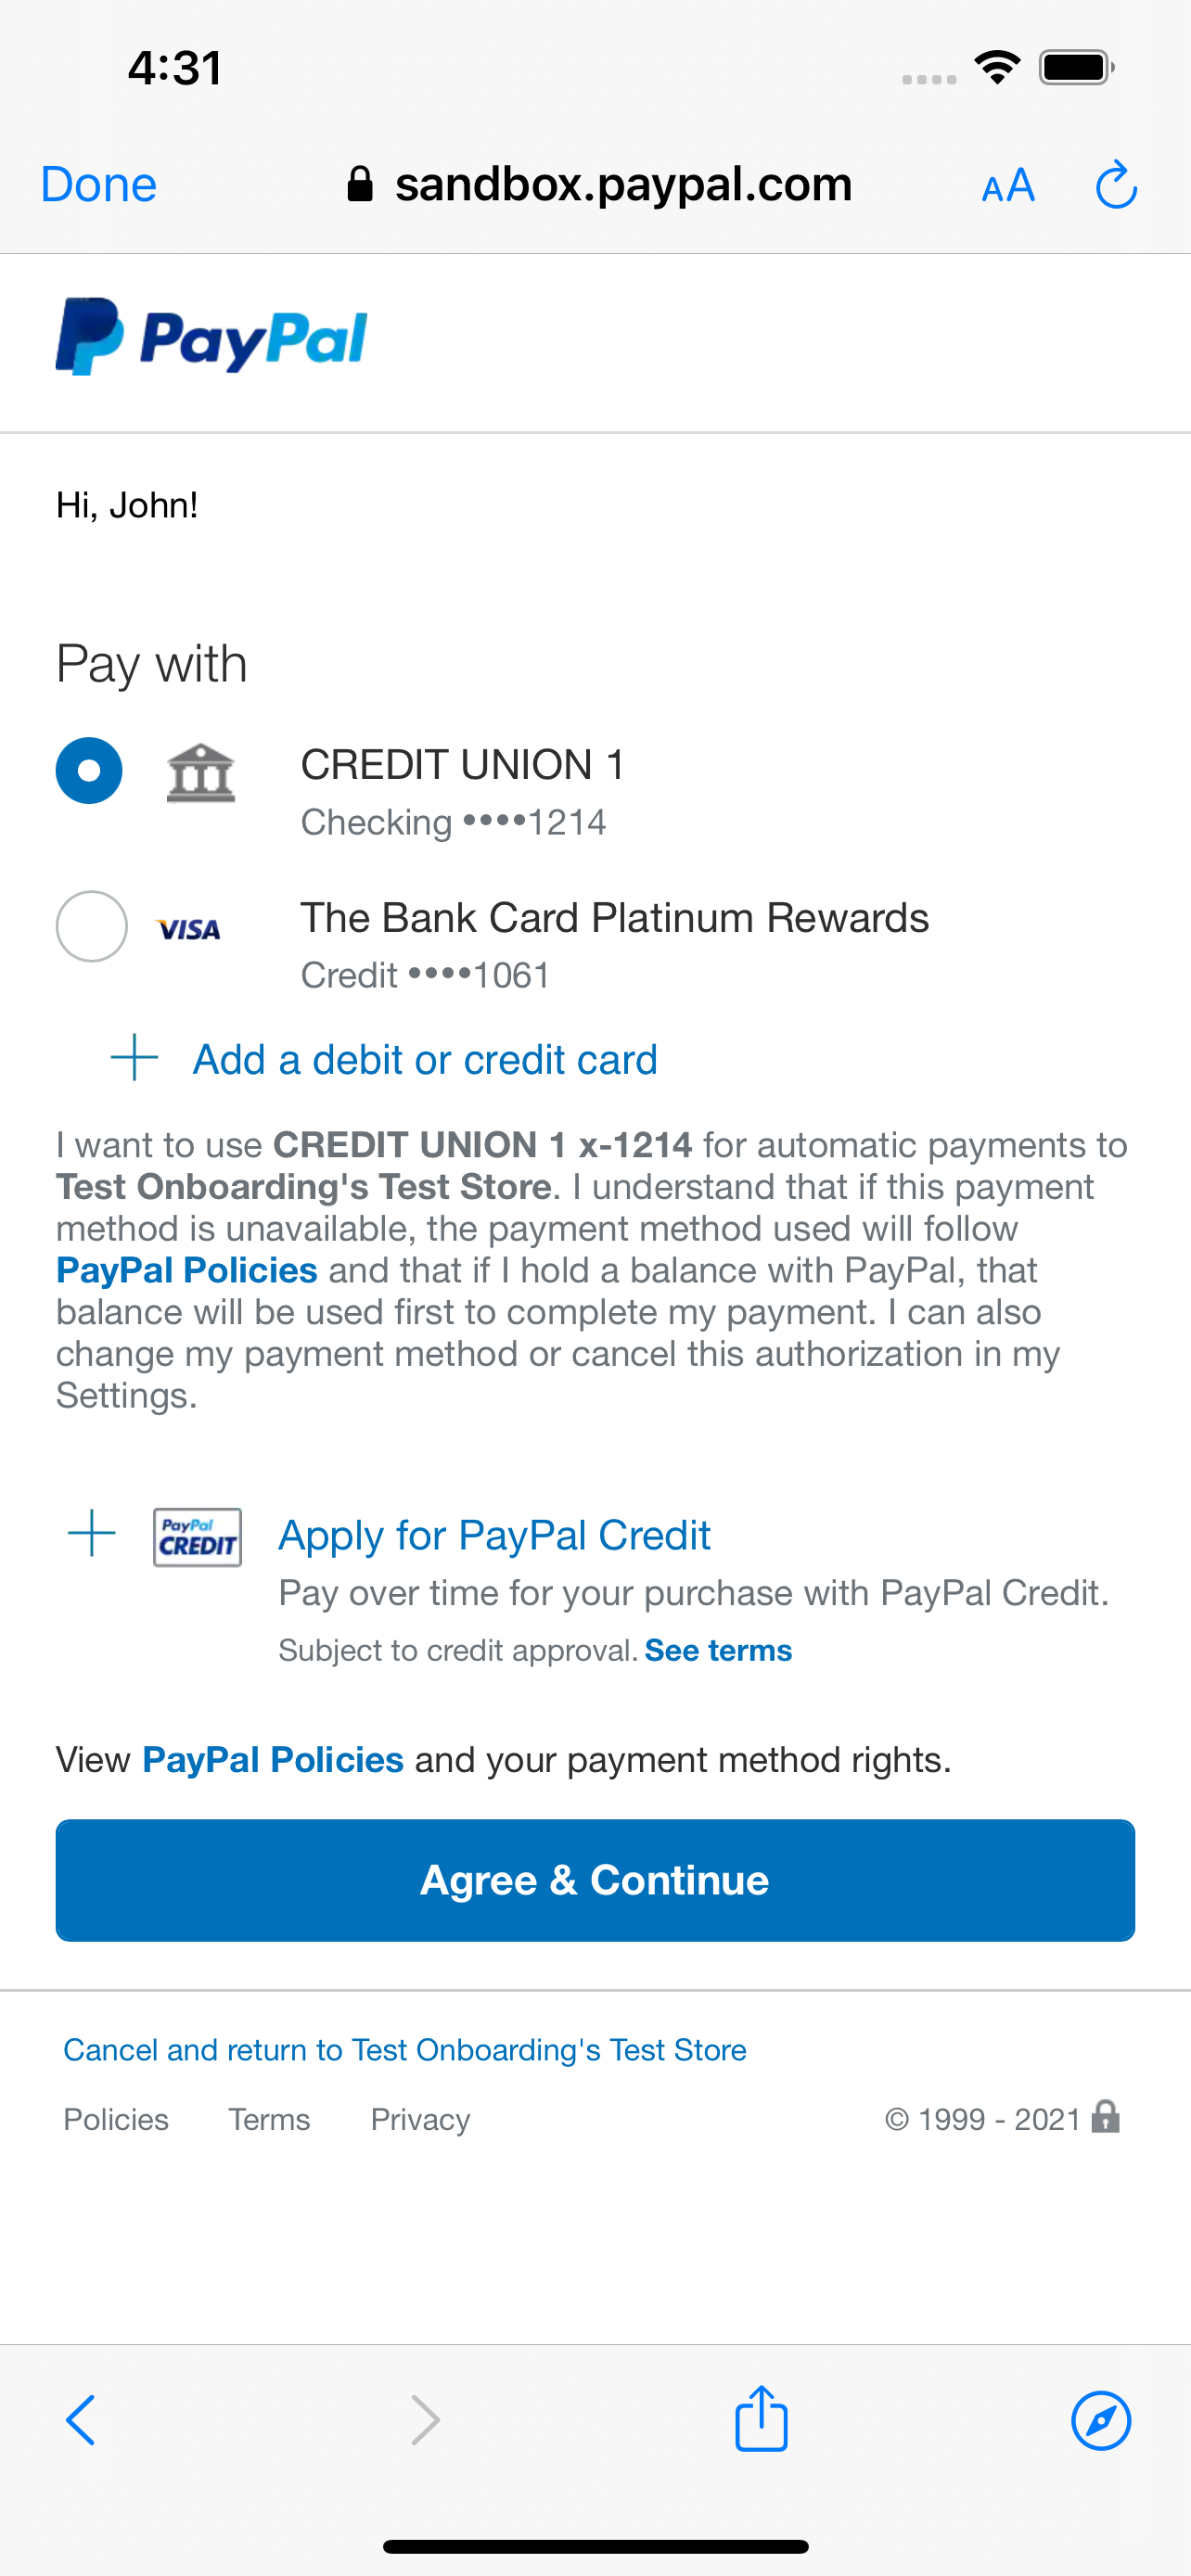
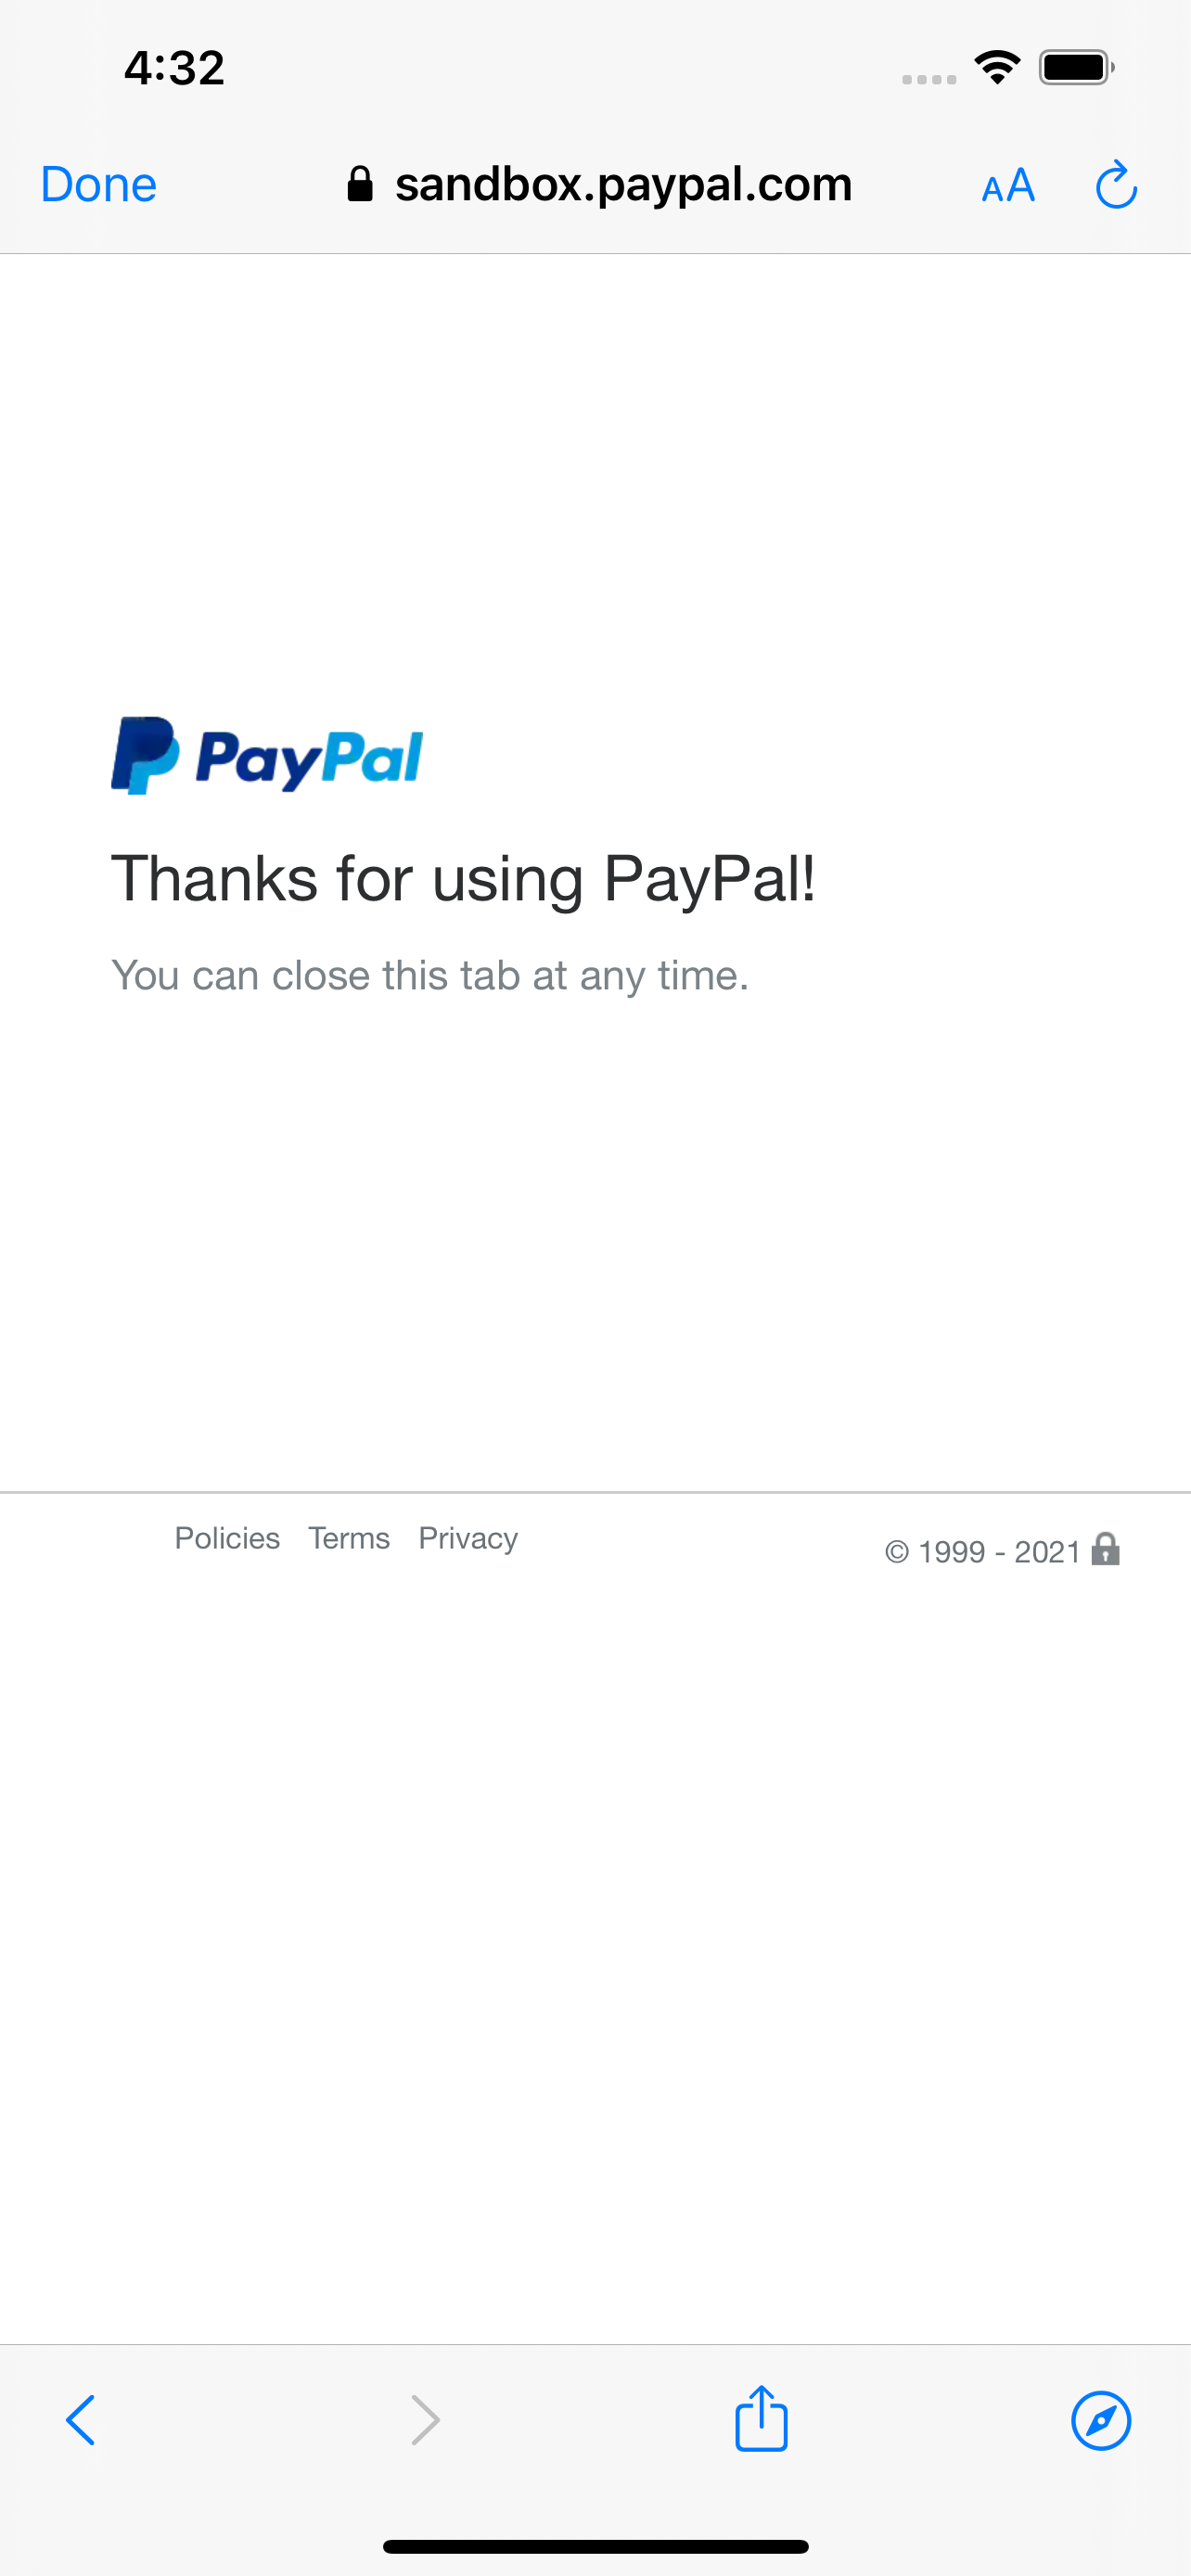
The user needs to be redirected to the approvalUrl to log into his/her PayPal account and confirm the billing agreement.
Once the user got redirected after the confirmation, the final step is to create the billing agreement and receive the agreementId, which needs to be saved on the merchant backend and linked to the user account.
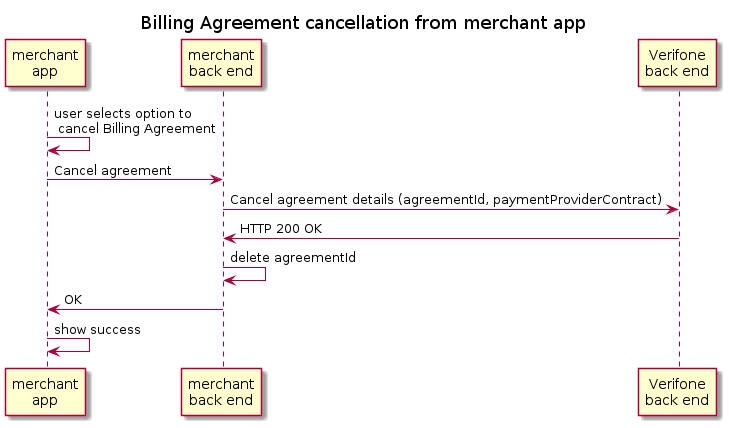
Cancel Billing Agreement
The merchant app needs to provide an option to cancel the billing agreement linked to the user account.
The merchant backend then collects the required data to perform the cancel request towards the Verifone backend.
Once the successful response is received, the agreementId is deleted from the user account and the same is confirmed to the user inside the app.
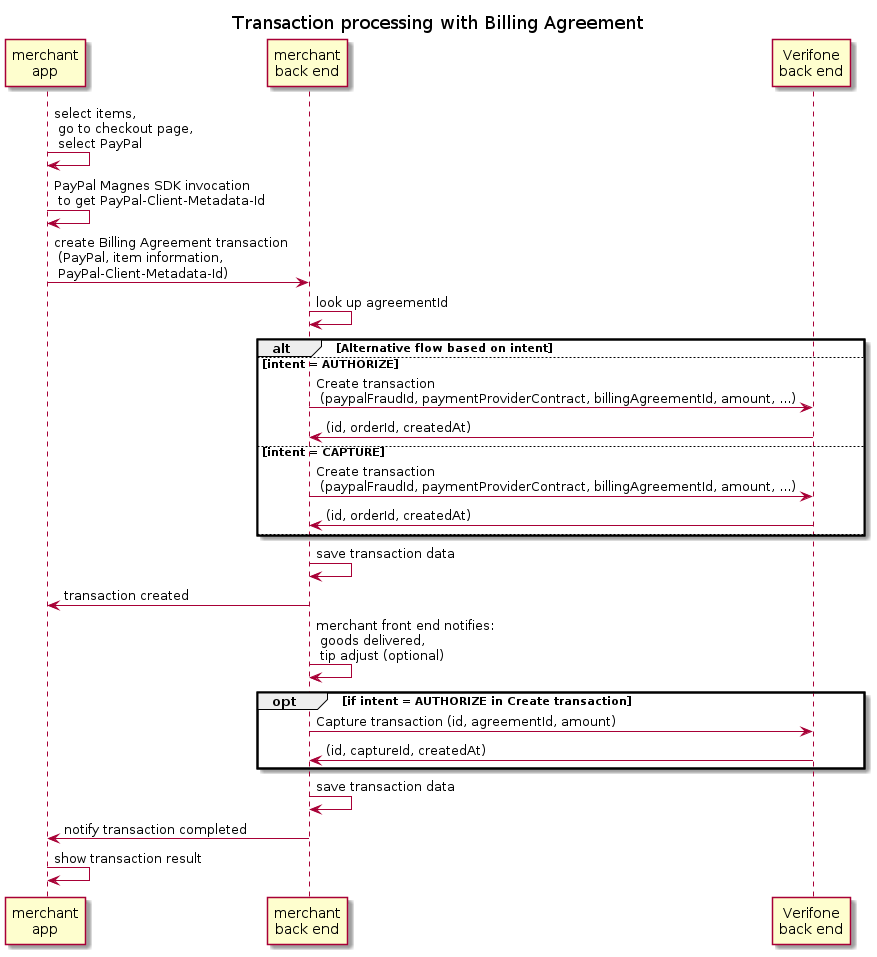
Transaction processing with Billing Agreement
PayPal risk management
PayPal requires the integration of their Magnes SDK, which is a portion of PayPal's fraud and risk management. From the Magnes SDK description:
With direct access to the mobile application, Magnes accesses necessary information from the device and provides the data to PayPal Risk Services for early risk identification and mitigation. Magnes is implemented in the form of a library available for the Android and iOS platforms.
The high-level steps to integrate the Magnes SDK in PayPal transaction processing are shown below:
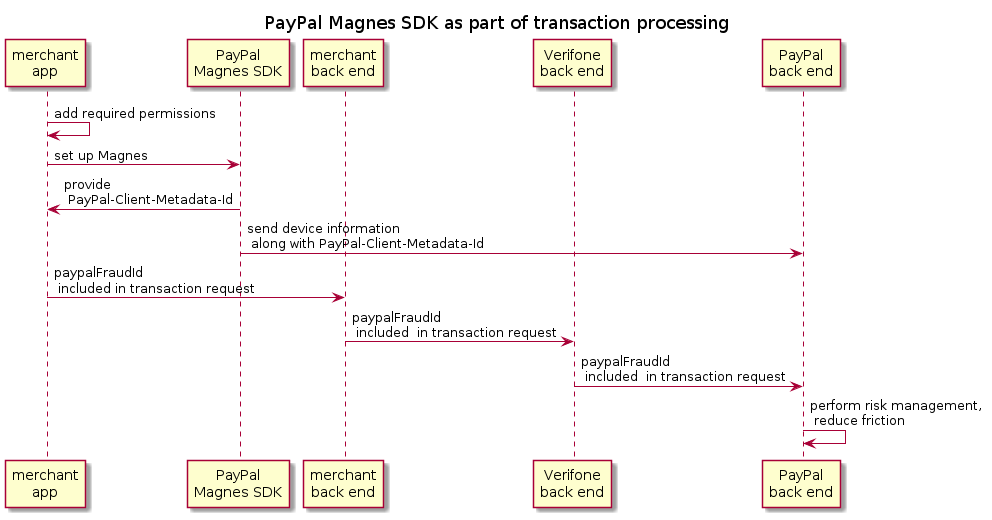
Further implementation details can be found in the PayPal Magnes SDK documentation.
Transaction processing
Reference merchant app implementation
This section shows sample screens of the app, showcasing above flows for Billing Agreement management and transaction processing. Some code samples are provided as well.
Sample screens
The following sample screens show a transaction with seamlessly integrated creation of billing agreement:
|

|
|
|
|
|
|
|
|
|
*Steps 6, 7 and 8 are only needed when the first transaction is being processed. With a billing agreement in place, the flow jumps from 5 to 9 (e.g., when the second transaction is being processed).
Platforms for app development
App development options and limitations
There are several possibilities to develop an app to be run on Android and iOS:
- separate development for each platform
- Android
- programming language: Kotlin, Java
- UI: traditional imperative, declarative (Jetpack Compose)
- communication libs: okhttp, ktor
- iOS
- Swift, Objective C
- UIKit, SwiftUI
- Android
- cross platform development
- progressive web apps: HTML/CSS, React, Angular, Vue
- hybrid: PhoneGap, Cordova
- compile to native: Xamarin, NativeScript, React Native, Flutter, Kotlin multiplatform mobile
Only compile to native solutions create real apps found in-app stores and are running fast.
Solutions based on JavaScript (e.g., React Native) need additional wrappers for native libraries to be used (e.g., the required PayPal Magnes SDK). This is also true for Xamarin using C#.
Using Kotlin multiplatform mobile, it is necessary to develop UI twice; only non-UI code can be reused.
Development approach used for the reference merchant app implementation
It is not possible to find a solution, where the code can be reused by all possible integrators without change. To reduce effort, cross platform development has been chosen.
Using Flutter (https://flutter.dev/, https://en.wikipedia.org/wiki/Flutter_(software)), there are none of the above limitations. That is why it has been chosen as platform for the example merchant app. It is using Dart (https://dart.dev/, https://en.wikipedia.org/wiki/Dart_(programming_language)) as programming language. Thus, examples below are in this language (or GraphQL).
Communication to server
Beside OAuth2 for user login, GraphQL (https://graphql.org) is used for communication with merchant server. It is a query language for APIs similar to REST.
App is using Dart package GraphQL client (https://pub.dev/packages/graphql).
Billing Agreement management
Create Billing Agreement
App is sending the following GraphQL mutation for creation of billing agreement:
mutation CreateBillingAgreement
mutation CreateBillingAgreement($paymentOptionId: ID, $successUrl: String!, $cancelUrl: String!) {
  createBillingAgreement(paymentOptionId: $paymentOptionId, successUrl: $successUrl, cancelUrl: $cancelUrl) {
    id,
    url,
    state
  }
}
Parameters of mutation (successUrl, cancelUrl) are sent to PayPal to be used as return url after processing of PayPal website. In case of success, server returns a billing agreement (id, url, state).
An optional payment option can be specified.
Seamless confirmation of Billing Agreement
App launches web browser with url returned by server. Flutter plugin url_launcher (https://pub.dev/packages/url_launcher) is used:
launch url
BillingAgreement agreement = await createBillingAgreement();
if ((agreement != null) && (await canLaunch(agreement.url))) {
  await setAgreementId(agreement.id);
  await launch(agreement.url);
}
To return to the app at the receipt of url (deep link), the app must be configured according to operating system.
Android
Application manifest must include an intent filter for activity:
intent filter for deep link
<meta-data android:name="flutter_deeplinking_enabled" android:value="true" />
<intent-filter android:autoVerify="true">
  <action android:name="android.intent.action.VIEW" />
  <category android:name="android.intent.category.DEFAULT" />
  <category android:name="android.intent.category.BROWSABLE" />
  <data android:scheme="verishop" />
</intent-filter>
iOS
In an iOS application, the same is done by changing Info.plist:
Info.plist
<key>CFBundleURLTypes</key>
<array>
  <dict>
    <key>CFBundleTypeRole</key>
    <string>Editor</string>
    <key>CFBundleURLName</key>
    <string>routes</string>
    <key>CFBundleURLSchemes</key>
    <array>
      <string>verishop</string>
    </array>
  </dict>
</array>
<key>FlutterDeepLinkingEnabled</key>
<true/>
Back in the app, routing must be set according to received return url. Using Flutter, this is done independent from OS. onGenerateRoute is used in build function of app main widget.
flutter routing
class MyApp extends StatelessWidget {
  @override
  Widget build(BuildContext context) {
    ...
    onGenerateRoute: (settings) {
      final uri = Uri.parse(settings.name);
      if (uri.pathSegments.length == 2 && uri.pathSegments.first == 'agreement') {
        final action = uri.pathSegments[1];
        if (action == 'success' || action == 'cancel') {
          return MaterialPageRoute(builder: (context) => DashboardScreen(action: action));
        }
        if (action == 'transaction') {
          return MaterialPageRoute(builder: (context) => PlaceOrderScreen(action: action));
        }
        ...
      }
      ...
    }
  }
}
In this example, return url 'verishop://agreement/success' and 'verishop://agreement/cancel' are redirected to DashboardScreen. In case of successful billing agreement during transaction (url 'verishop://agreement/transaction'), it is routed to PlaceOrderScreen.
A successful billing agreement must be activated using following GraphQL mutation:
mutation ActivateBillingAgreement
mutation ActivateBillingAgreement($id: String) {
  activateBillingAgreement(id: $id) {
    id,
    state
  }
}
In case of success, the server returns the state 'ACTIVE'.
Cancel Billing Agreement
The app is sending the following GraphQL mutation for cancellation of billing agreement:
mutation CancelBillingAgreement
mutation CancelBillingAgreement($id: String) {
  cancelBillingAgreement(id: $id) {
    id,
    state
  }
}
In case of success, the server returns the state 'CANCELLED'.
Set Billing Agreement as default payment option
Billing agreements are stored on server for the user, as payment option (name, agreement). The option is returned to the app at user login and can be used during transaction without creating agreement again.
Transaction flow
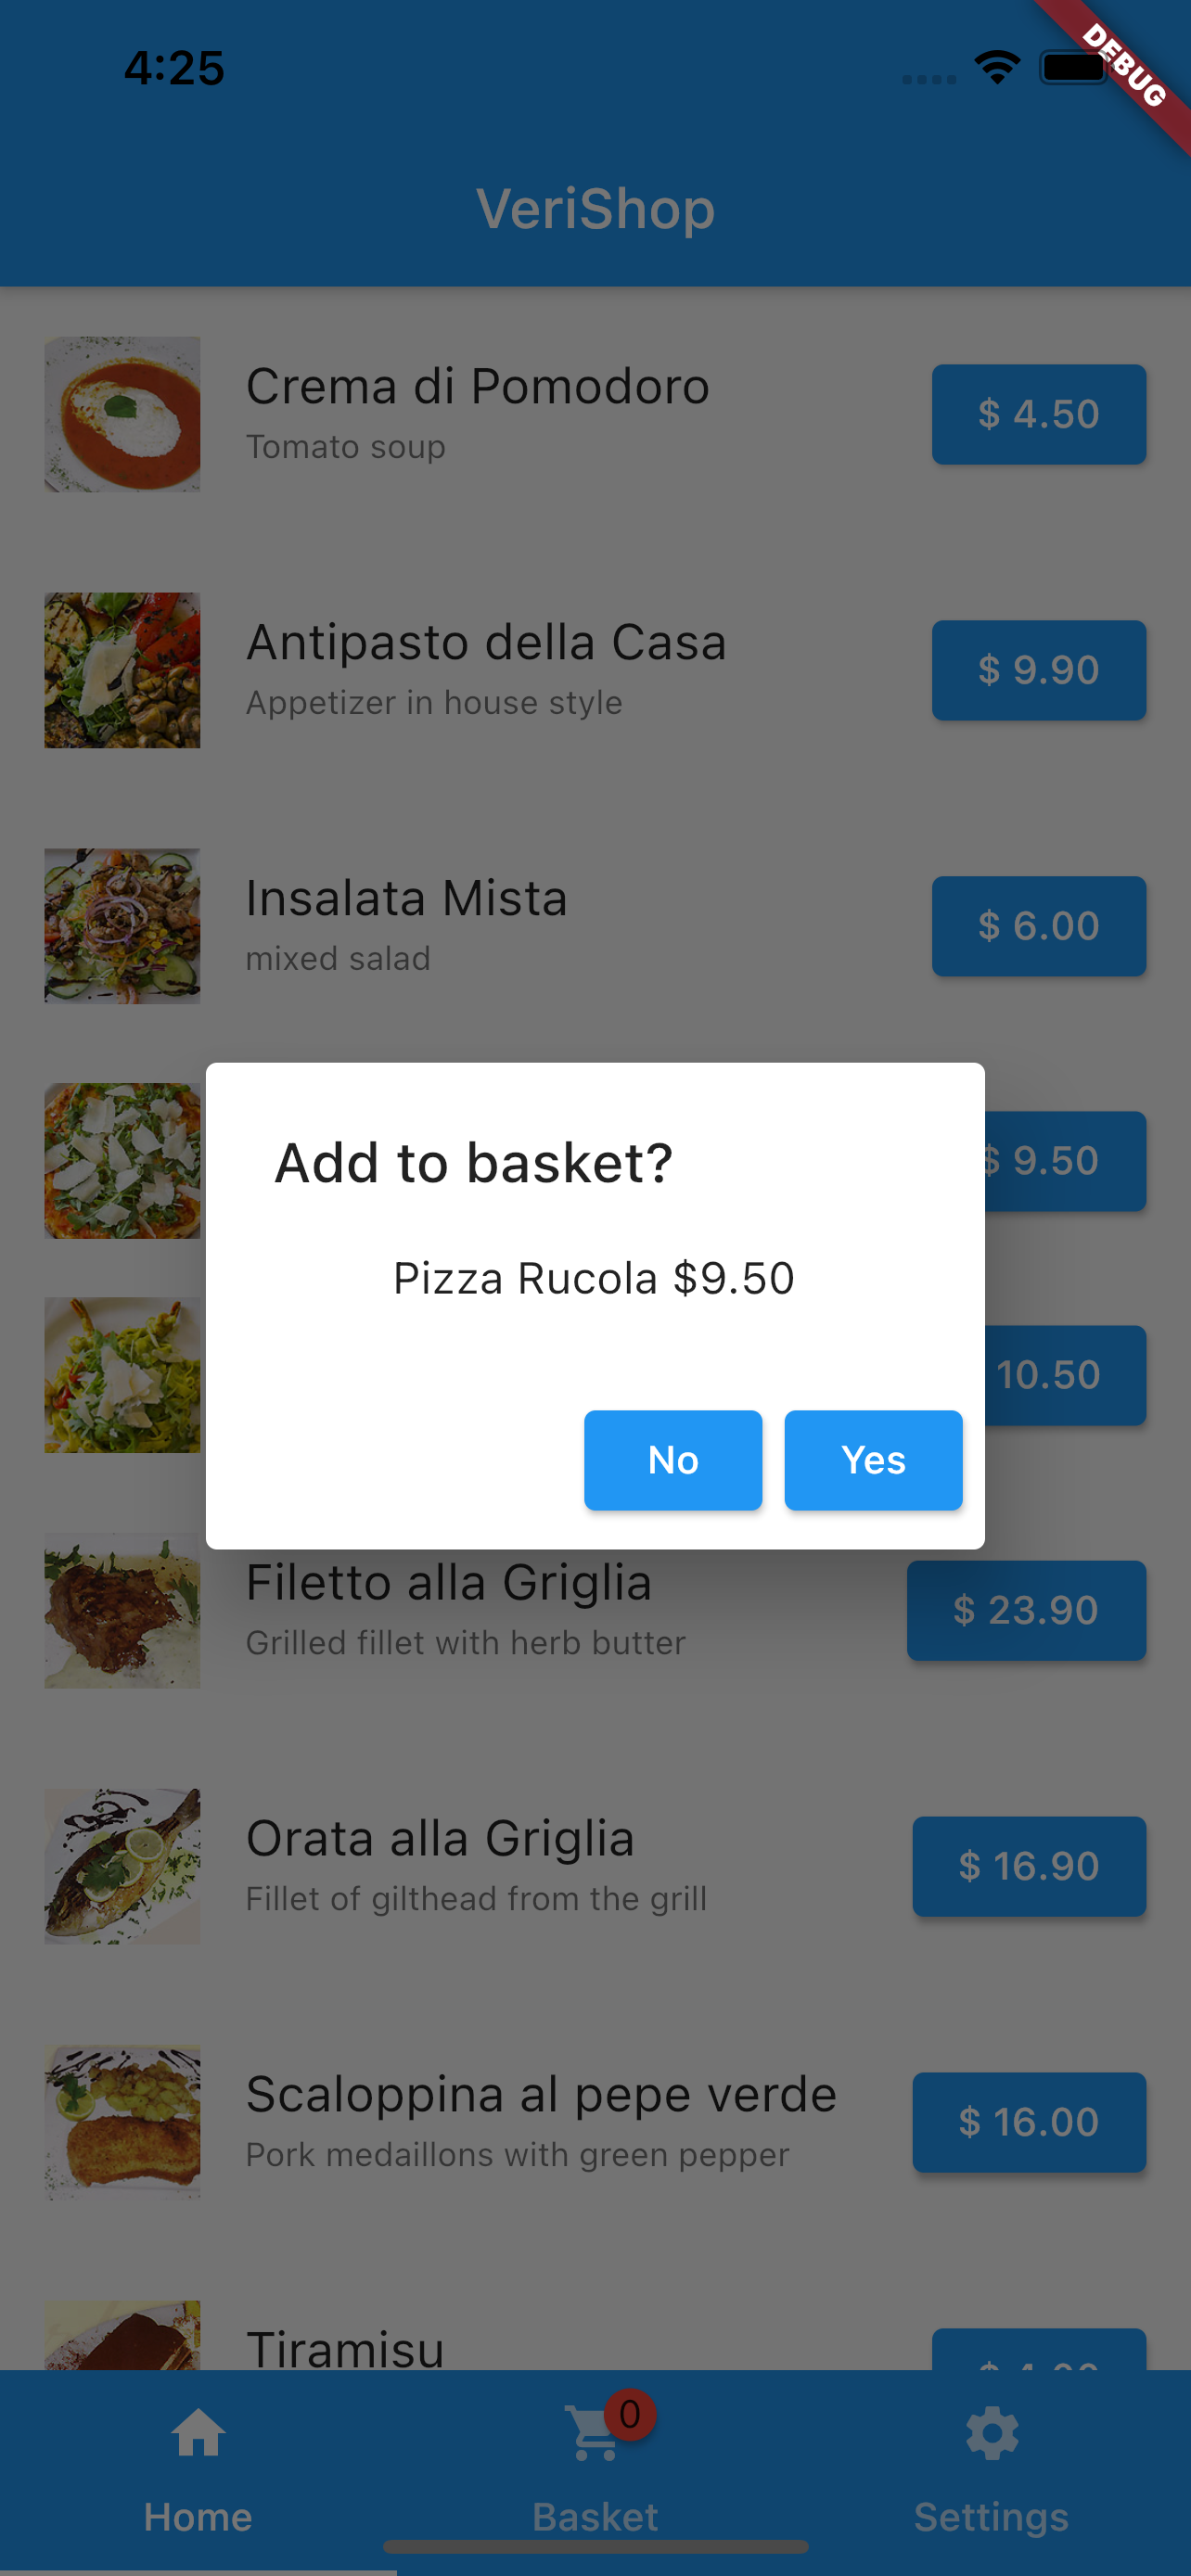
Create Basket
On home screen, the app shows a list of items with title, description, picture, price, and tax.
items.dart
class SaleItem {
  String title;
  String description;
  String picture;
  int price;
  int tax;
  SaleItem(this.title, this.description, this.picture, this.price, this.tax);
  String getFormattedPrice([int quantity = 1]) => formatAmount(price * quantity);
}

List _items = [];
The item list is sent by server to the app.
Using Flutter for each item, a widget is built as one row of a list:
create row for item
Widget _buildRow(BuildContext context, int i) {
  final item = getSaleItem(i);
  return Padding(
    padding: const EdgeInsets.only(top: 10.0, bottom: 10.0),
    child: ListTile(
      leading: Icon(context, 'assets/images/${item.picture}'),
      title: Text('${item.title}', style: _biggerFont),
      subtitle: Text('${item.description}', style: _smallerFont),
      trailing: ElevatedButton(
        child: Text('\$ ${item.getFormattedPrice()}'),
        onPressed: () => _add2basket(context, item))));
}
Additional to picture, title, and description, it shows a button with price. Pressing this button adds the item to the basket.
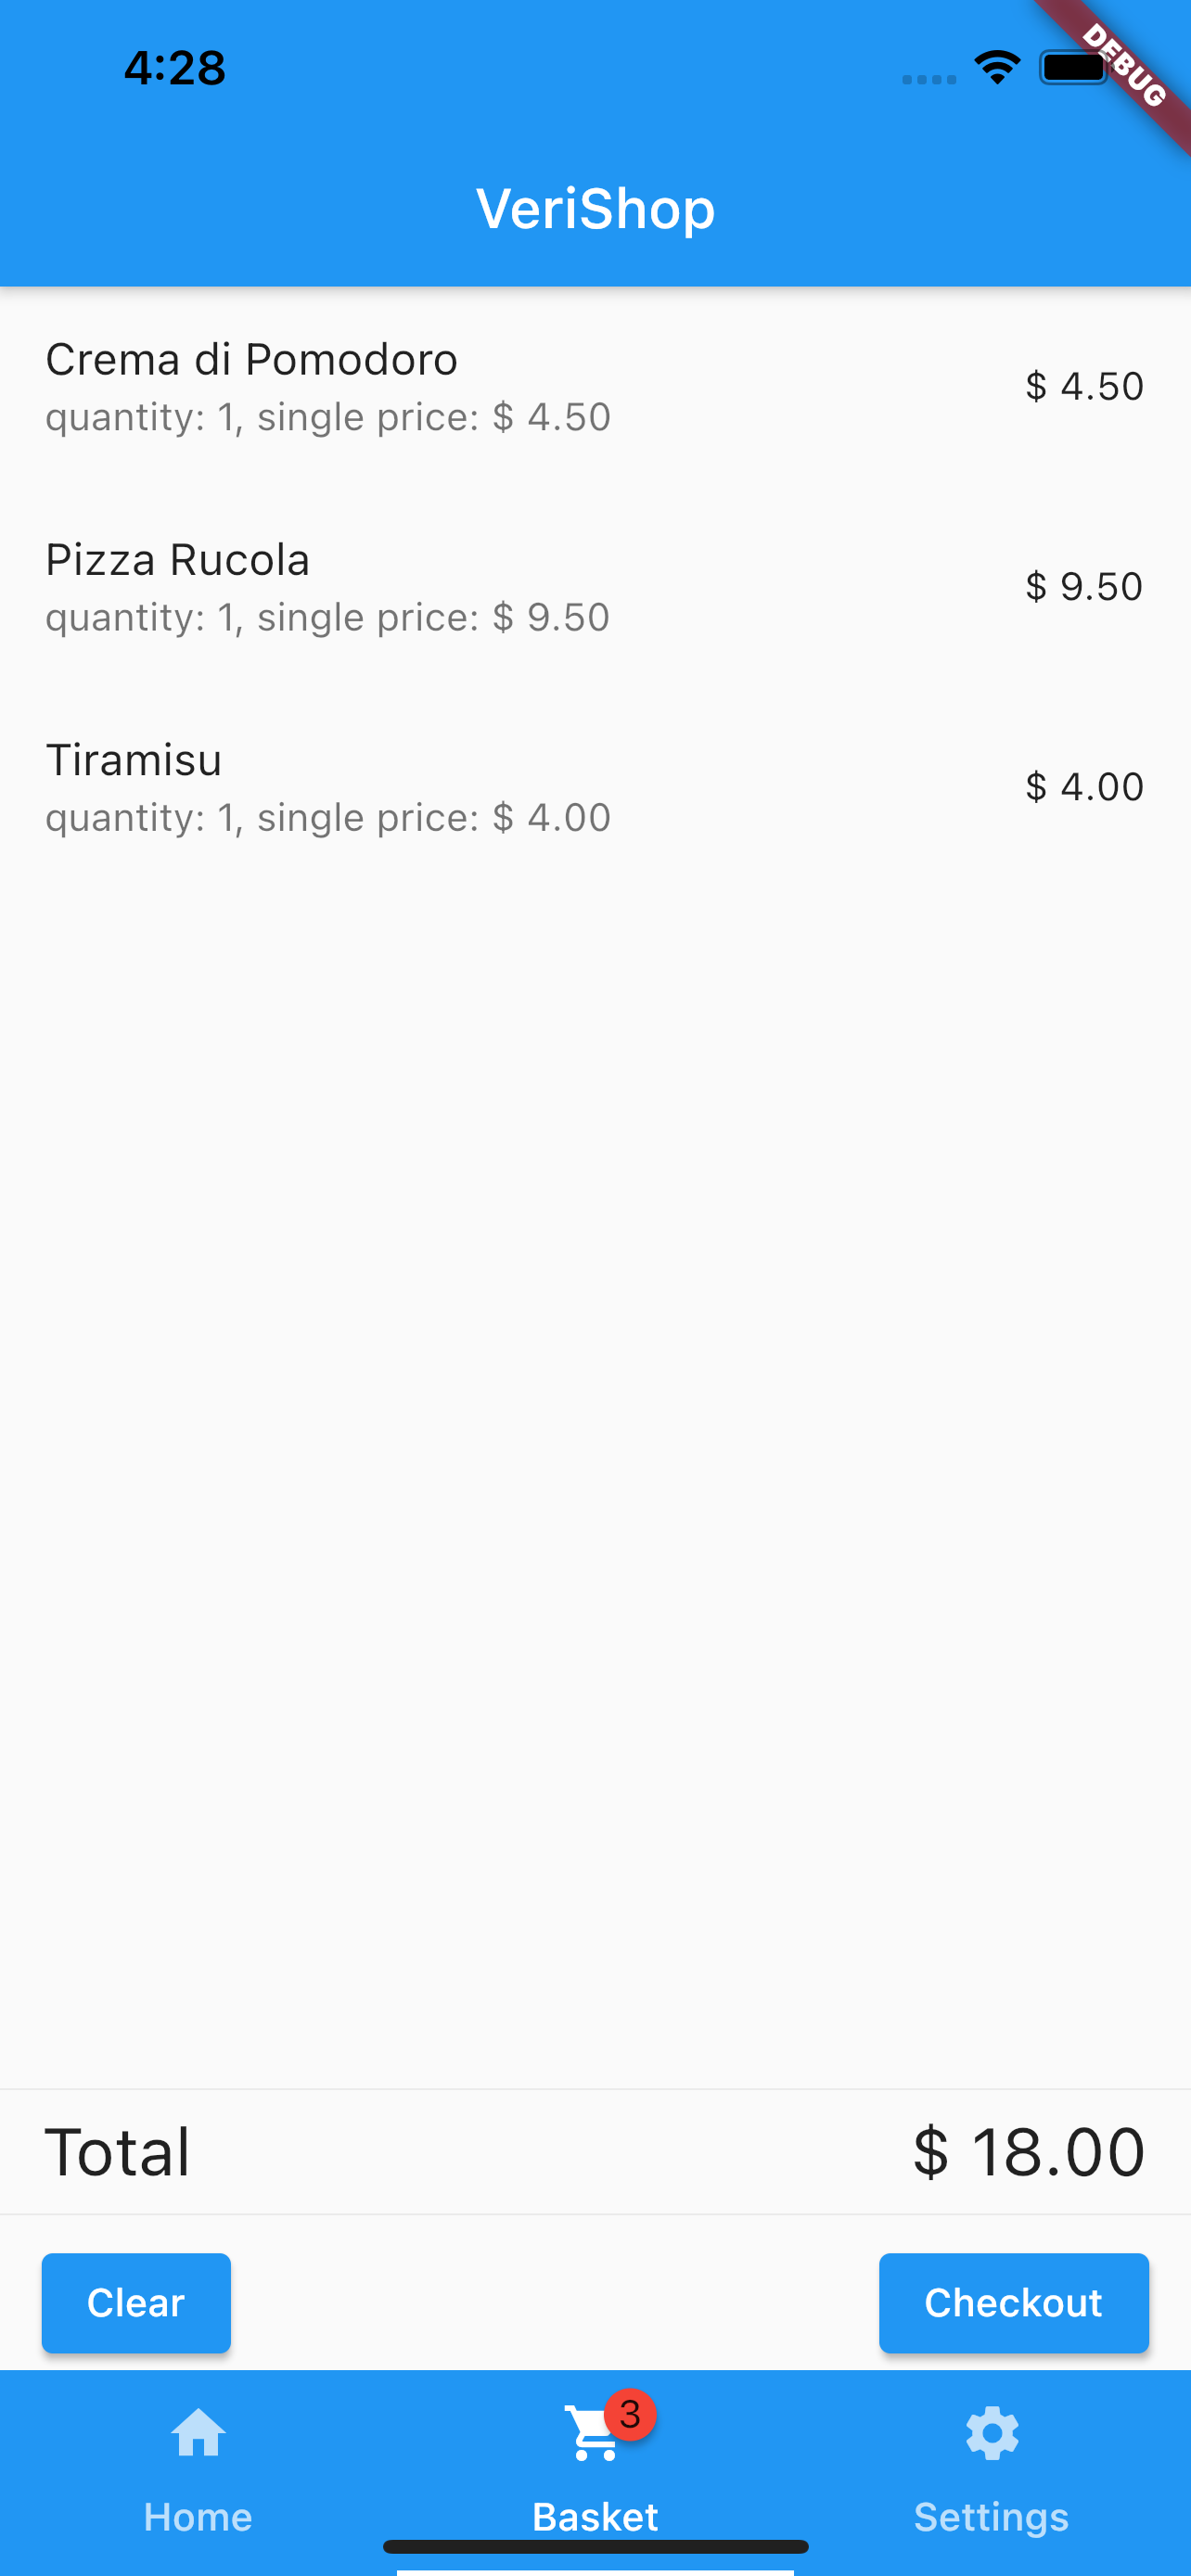
The basket screen shows a list of basket items and total amount. Additionally, it redirects to checkout page, if the corresponding button is pressed.
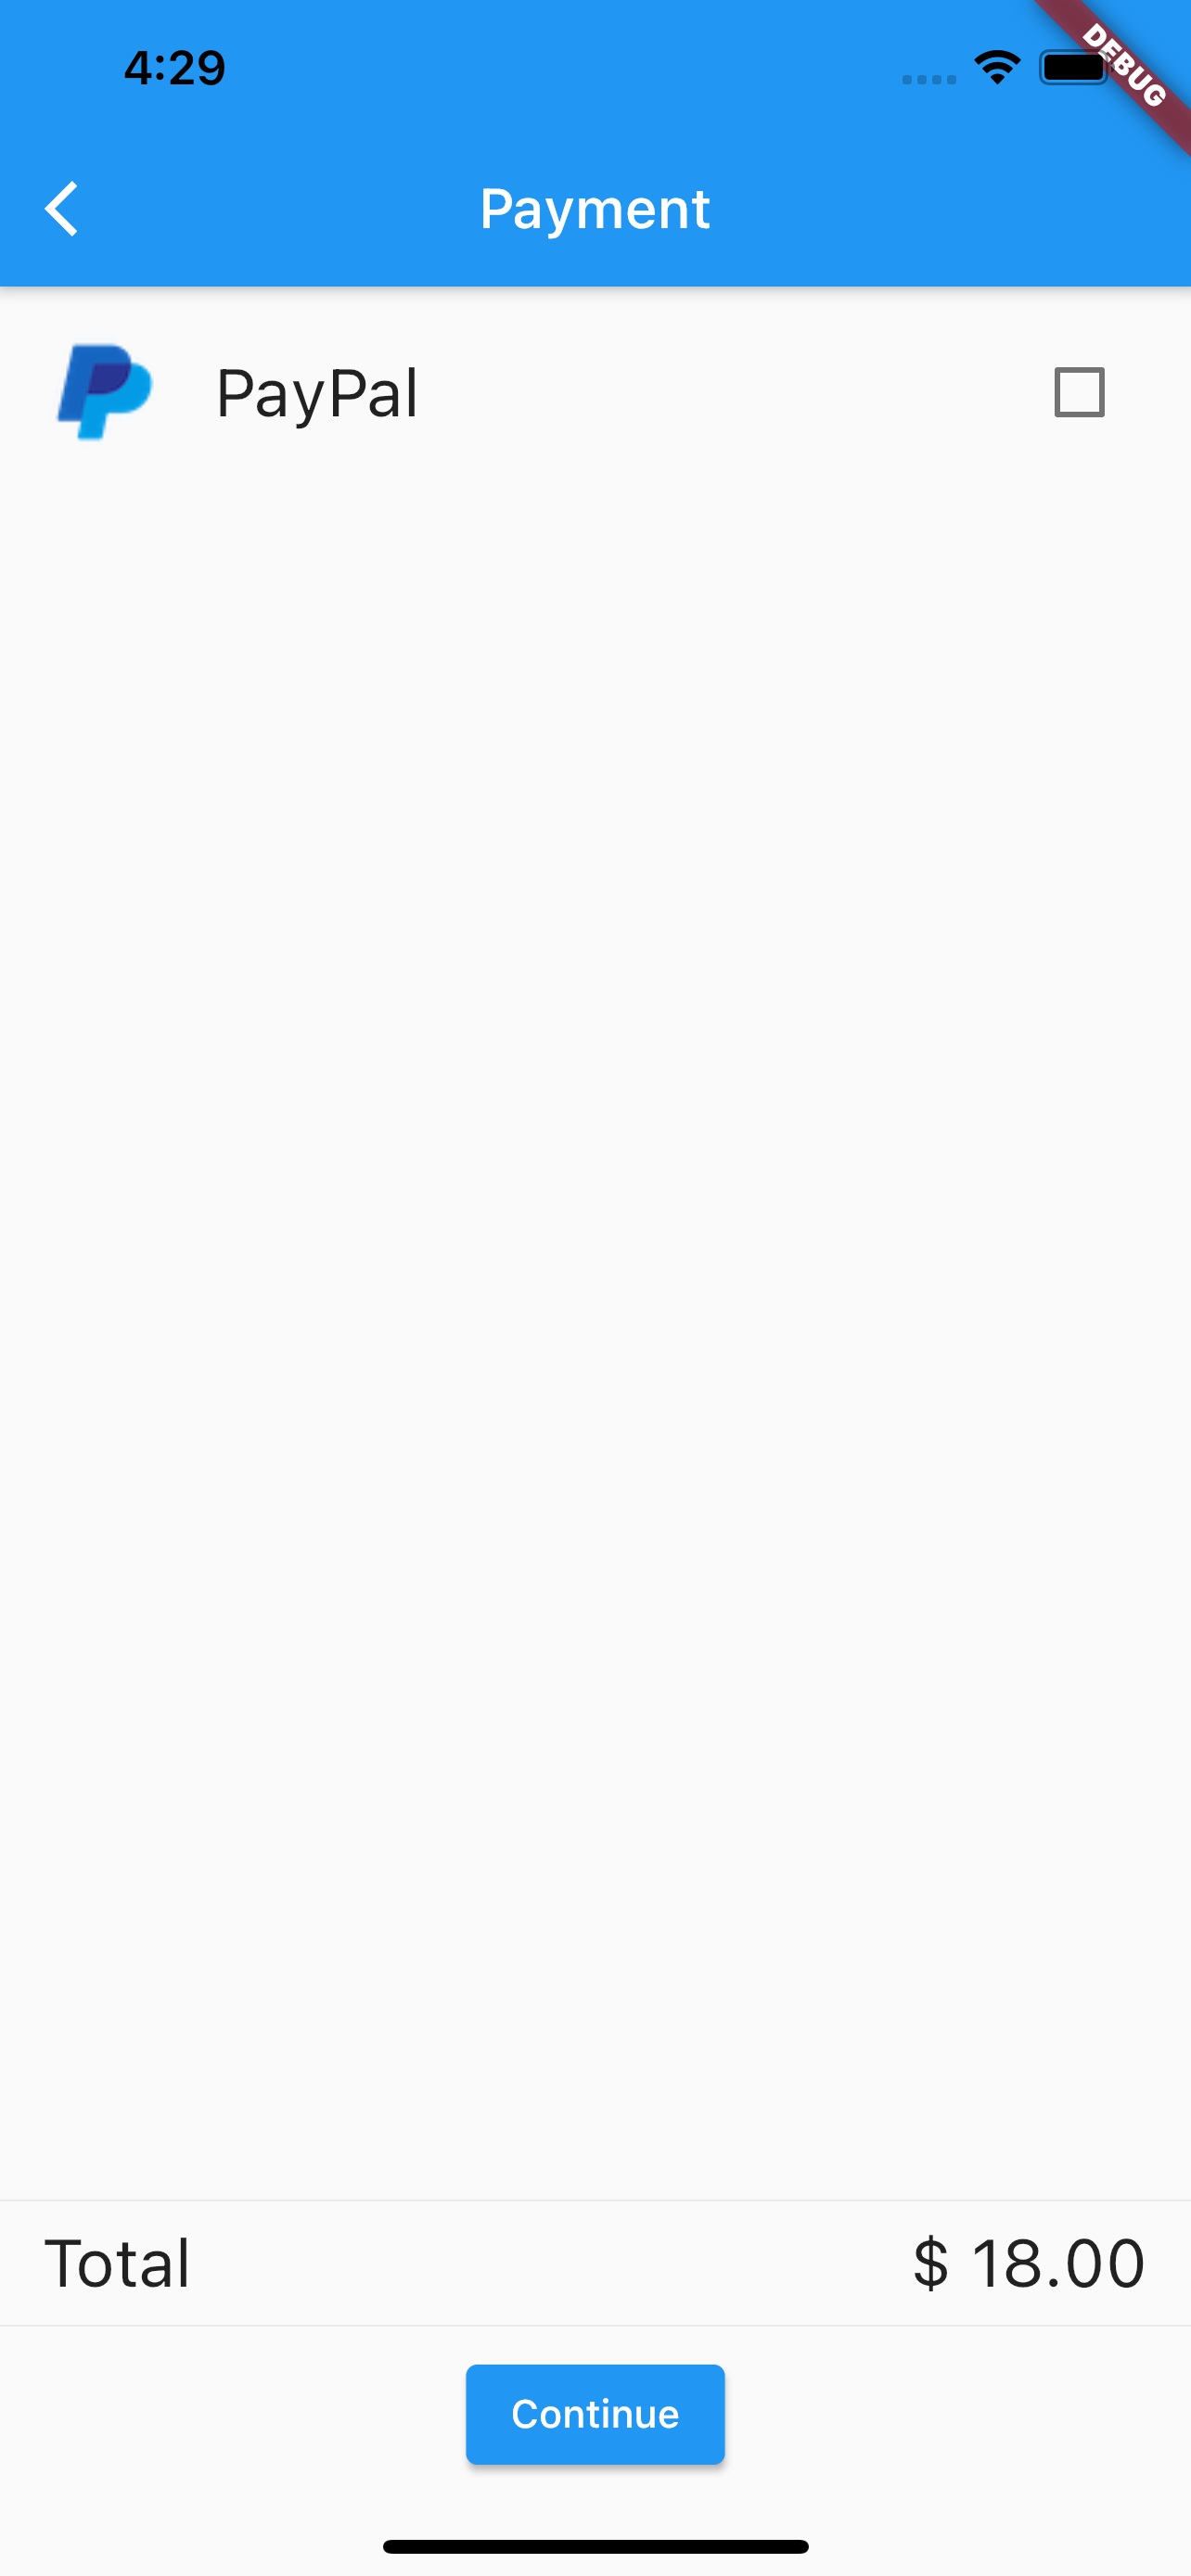
Checkout screen
This screen shows payment option(s) returned by server. For each item in the list, an icon (if image exists in assets), name (e.g., PayPal) and checkbox are shown.
show payment option(s)
Widget _optionRow(BuildContext context, AppState model, int i) {
  final optionName = model.options[i].name;
  final imageFile = 'assets/images/${optionName.toLowerCase()}.png';
  return ListTile(
    title: Text('$optionName', style: biggerFont),
    leading: icon(context, imageFile),
    trailing: Checkbox(
      onChanged: (value) {
        setState(() {
          _activeOption = optionName;
        });
      },
      value: _activeOption == optionName,
    ),
  );
}
Active option is stored in the estate variable _activeOption. Corresponding checkbox is checked. In this case, no billing agreement must be created during transaction.
If no checkbox is checked, the user can select it. In this case, billing agreement will be created if the user presses Continue before switching to the "place order" screen.
select payment option
ElevatedButton(
onPressed: model.isAgreementActive(_activeOption)
? () => Navigator.push(context, MaterialPageRoute(
builder: (context) => PlaceOrderScreen(),
))
: () => createAgreement(context, true, model.getOptionByName(_activeOption).id),
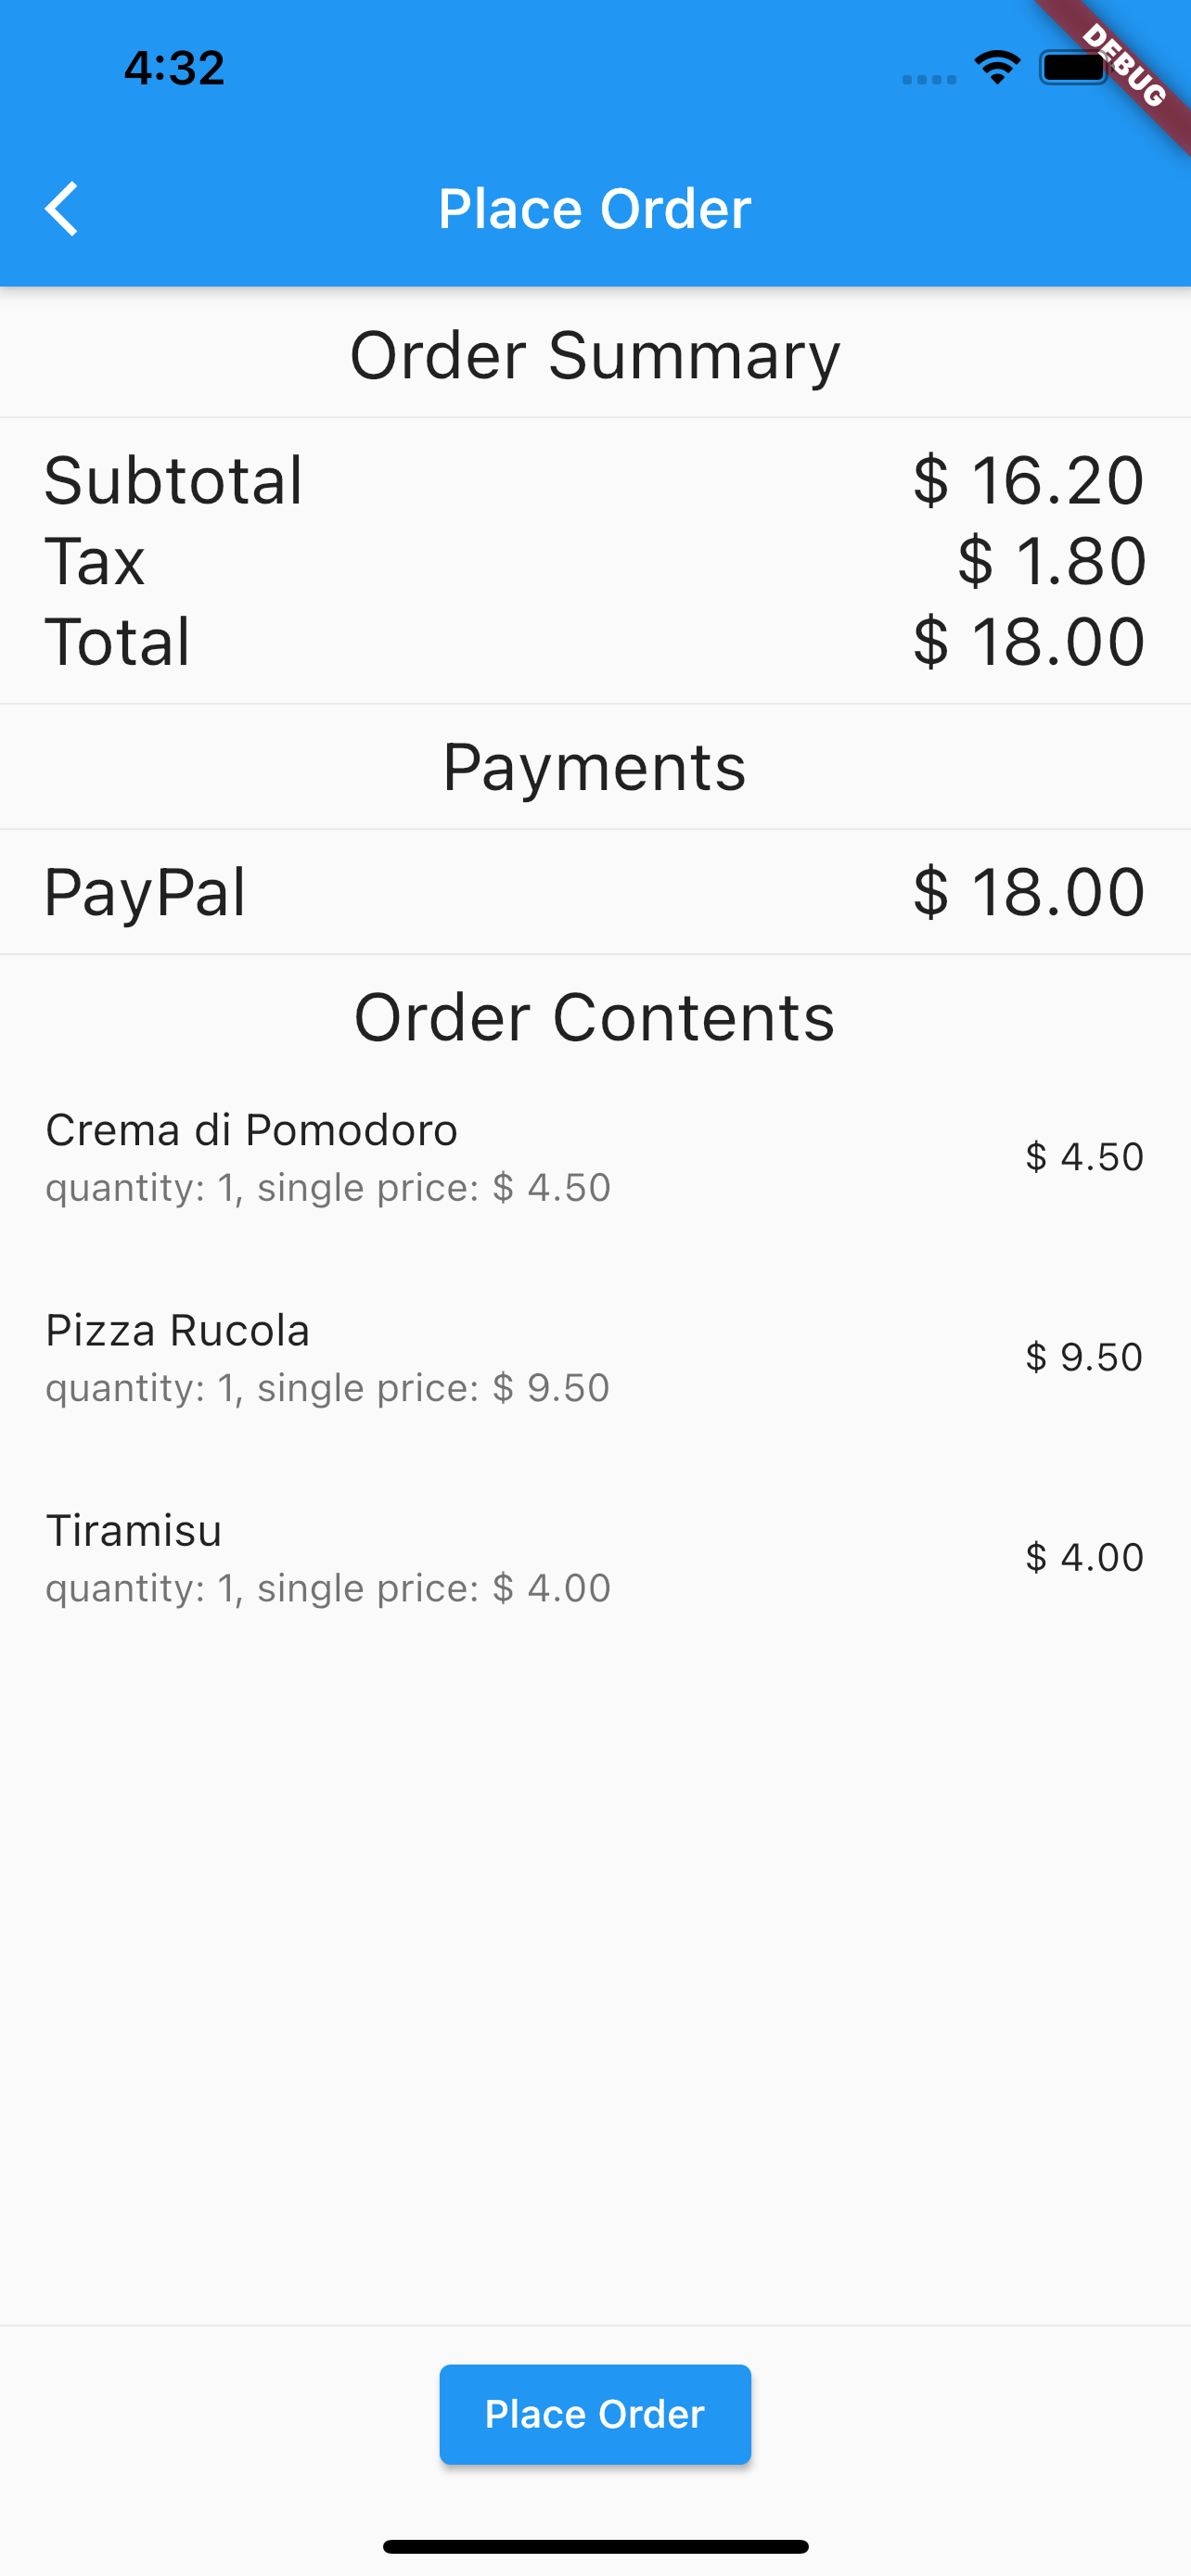
child: Text('Continue'))"Place order" screen
This screen shows transaction details (subtotal, tax, total, selected payment option, basket items) again before starting transaction via pressing place order.
In this case, the following GraphQL mutation is sent to merchant server:
transaction
mutation transaction($agreementId: ID!, $totalAmount: AmountInput!, $items: [ItemInput], $fraudId: ID) {
  transaction(agreementId: $agreementId, totalAmount: $totalAmount, items: $items, fraudId: $fraudId) {
    id,
    state
  }
}
fraudId is used for PayPal Magnes SDK, see below.
After processing, the app switches to payment result screen.
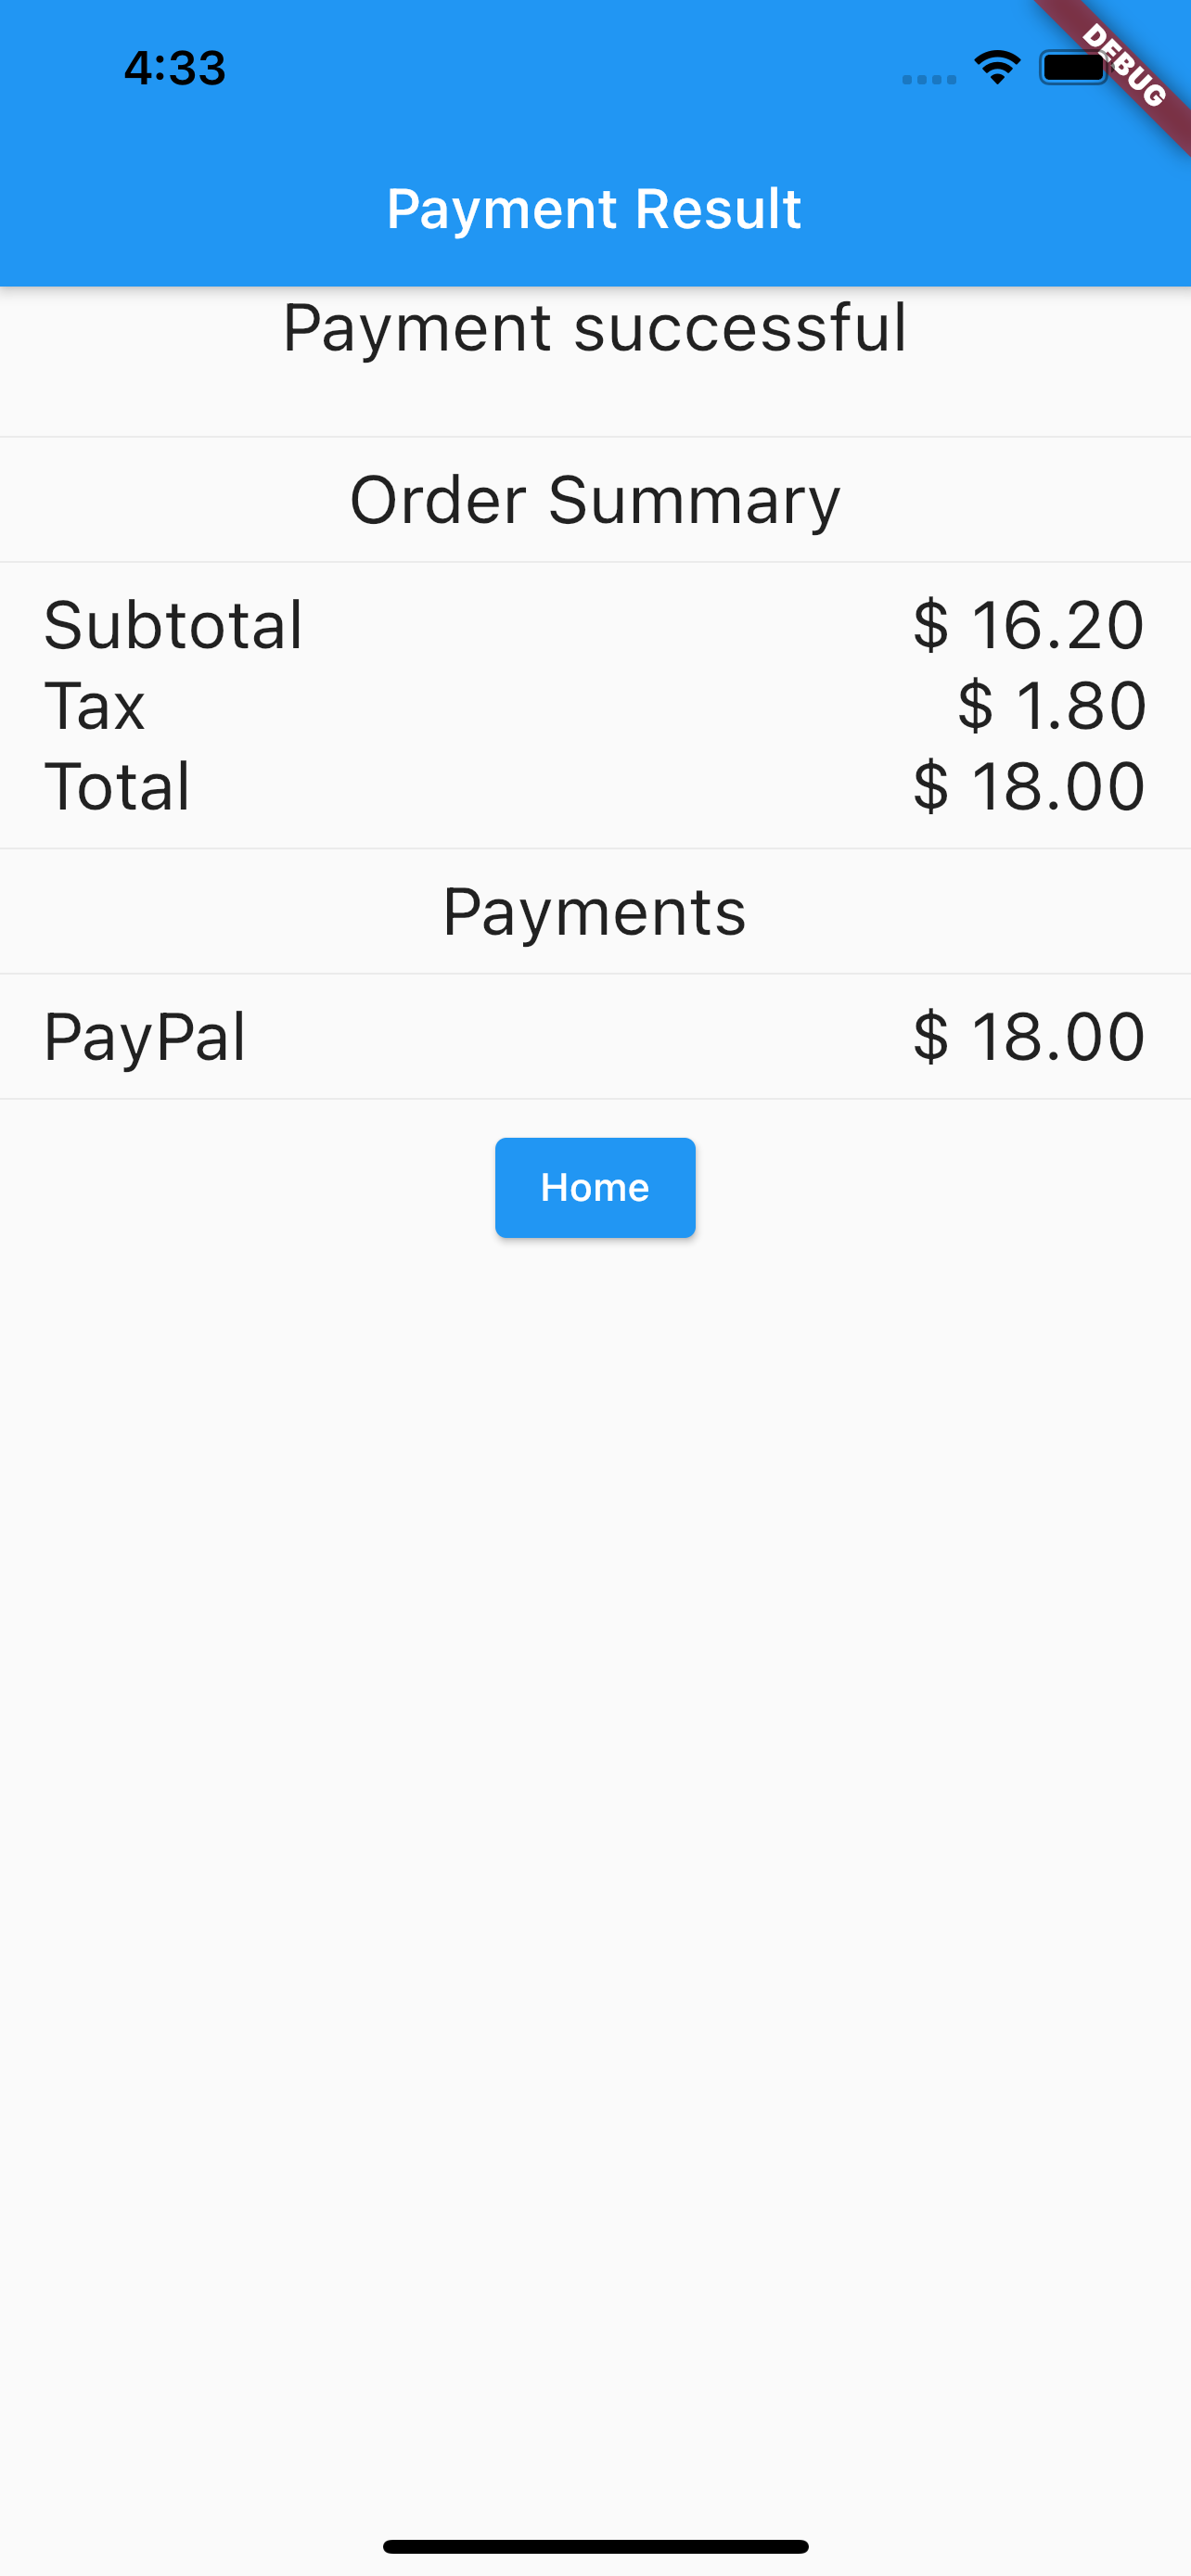
Payment result
This screen shows transaction result (success or error) and some transaction details.
Additionally, there is a button that redirects to Home Screen.
In case of successful transaction, the basket is cleared.
PayPal Magnes SDK
Magnes implements functions (setUp, collect, collectAndSubmit), which are used by merchant app:
- setUp is called once at startup of application
- collectAndSubmit is called during transaction. It returns the PayPal-Client-Metadata-Id which is sent as fraudId to the merchant server.
While SDK can be used directly for pure Android or iOS apps, using a platform independent framework makes it necessary to implement an abstraction layer. The solution for Flutter is based on messages, see https://flutter.dev/docs/development/platform-integration/platform-channels?tab=ios-channel-swift-tab. The following example is using MethodChannel for Dart part of Magnes setup:
Magnes setup
const platform = const MethodChannel('verishop.verifone.com/magnes');

Future<bool> magnesSetup() async {
  bool result = false;
  try {
    result = await platform.invokeMethod('setup');
  } on PlatformException catch (e) {
    print('Failed to setup magnes: ${e.message}');
  }
  return result;
}
Reference merchant backend implementation
Merchant server is implemented using following technologies:
- programming language TypeScript
- node.js with express framework
- Mongo DB
- GraphQL
- OAuth2
eComm API
This documentation does not describe all details of implementation. The main focus is on the description of integration for PayPal Ecomm API provided by Verifone.
Some TypeScript code fragments using node.js express and bent are provided as examples.
Billing agreement
Creation
To create a new billing agreement, send a POST to the endpoint '/billingAgreement/initiate'. The Parameters of payload are payment provider contract id (ppcId) and URLs for return and cancel. An additional authorization header for basic authentication is necessary.
const post = bent('POST', 'json', 201, {
  authorization: paymentOption.auth
}, paymentOption.baseUrl)
const obj = await post('/billingAgreement/initiate', {
  paymentProviderContract: paymentOption.ppcId,
  returnUrl: successUrl,
  cancelUrl: cancelUrl
})
A successful result will include approvalUrl and billingToken.
Activation
The endpoint for activation of an agreement is '/billingAgreement/create'. The payload should include parameters ppcId and billingToken received on creation.
const post = bent('POST', 'json', 201, {
  authorization: option.auth
}, option.baseUrl)
const obj = await post('/billingAgreement/create', {
  paymentProviderContract: option.ppcId,
  billingToken: agreement.token,
})
The result message includes parameter state which should be 'ACTIVE'.
Cancellation
The endpoint for cancellation is '/billingAgreement/$id/cancel'. ppcId is necessary as parameter in the payload.
const post = bent('POST', 'buffer', 200, {
  authorization: option?.auth
}, option.baseUrl)
await post(`/billingAgreement/${agreement.agreementId}/cancel`, {
  paymentProviderContract: option.ppcId
})
Transaction
Messages for transactions should use the '/transactions' endpoint. The payload should include ppcId, billingAgreementId and a transaction object (amount, items, etc.). Additional headers x-vfi-api-idempotencyKey and paypalFraudId are necessary.
transaction request
const headers: Record<string, string> = {
  authorization: option.auth,
  'x-vfi-api-idempotencyKey': uuidV4(),
  paypalFraudId: fraudId
}
const post = bent('POST', 'json', 201, headers, option.baseUrl)
const initObj = await post('/transactions', {
  paymentProviderContract: option.ppcId,
  billingAgreementId: agreement.agreementId,
  ...transObj
})
Example of an API used between merchant app and backend
The complete API of the merchant server as GraphQL schema:
type Query {
  merchant: Merchant!
  merchants: [Merchant]
  user: User!
  users: [User]
}

type Mutation {
  createBillingAgreement(paymentOptionId: ID, successUrl: String!, cancelUrl: String!): BillingAgreement!
  activateBillingAgreement(id: ID!): BillingAgreement!
  cancelBillingAgreement(id: ID!): BillingAgreement!
  transaction(agreementId: ID!, totalAmount: AmountInput!, items: [ItemInput], fraudId: ID): Transaction!
  createUser(merchantId: ID, name: String!, password: String!): User!
  createMerchant(name: String!): Merchant!
  createPaymentOption(merchantId: ID, name: String!, baseUrl: String, auth: String, ppcId: String): PaymentOption!
  createSaleItem(merchantId: ID, title: String!, description: String, picture: String, price: Int!, tax: Int): SaleItem!
  removeSaleItem(title: String!): Boolean!
}

input AmountInput {
  value: Int!
  currency: String!
}

input ItemInput {
  name: String!
  unitAmount: AmountInput!
  taxAmount: AmountInput!
  quantity: Int
}

type Amount {
  value: Int!
  currency: String!
}

type Item {
  name: String!
  unitAmount: Amount!
  taxAmount: Amount!
  quantity: Int
}

enum State {
  PENDING,
  ACTIVE,
  CANCELLED
}

scalar Date

type PaymentOption {
  id: ID!
  name: String!
  billingAgreement: BillingAgreement
}

type BillingAgreement {
  url: String
  state: State
  id: ID!
}

type Transaction {
  id: ID!
  created: Date!
  state: String
  totalAmount: Amount!
  items: [Item]
}

type Merchant {
  id: ID!
  name: String!
  users: [User]
  saleItems: [SaleItem]
}

type SaleItem {
  title: String!
  description: String
  picture: String
  price: Int!
  tax: Int!
}

type User {
  id: ID!
  name: String!
  paymentOptions: [PaymentOption]
  transactions: [Transaction]
}
Besides queries (one or all merchants or users), it includes mutations used by the merchant app: create, activate and cancel billing agreement, transaction. Other mutations are used for server administration: create user, create merchant, create payment option, create, and remove sale item.