Installation
This tutorial was written while focusing on the default WordPress theme.
Installation of the Verifone Hosted cart plugin can and should be done just like for any other plugin. Overall, there are two possible ways of installing the plugin:
- Via the user interface (UI)
- Manually, by copying the plugin files to the appropriate location inside the WordPress installation
Installation via the UI
Follow these steps below to install the Verifone Hosted cart via WordPress:
- Before proceeding, make sure you have downloaded the Verifone Payment Module.
- Log in to the WordPress administration panel (generally located at <URL>/wp-admin).
-
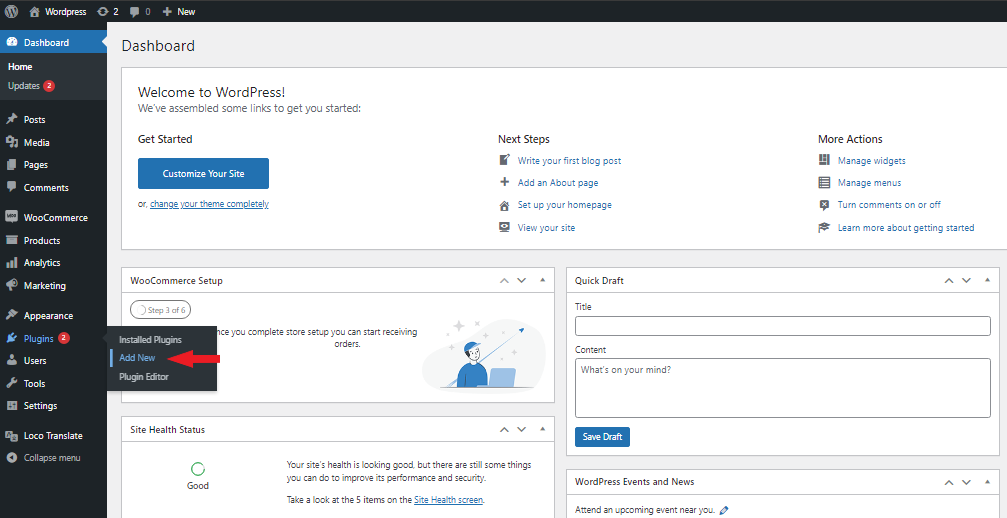
Navigate to Plugins and click on Add new.

-
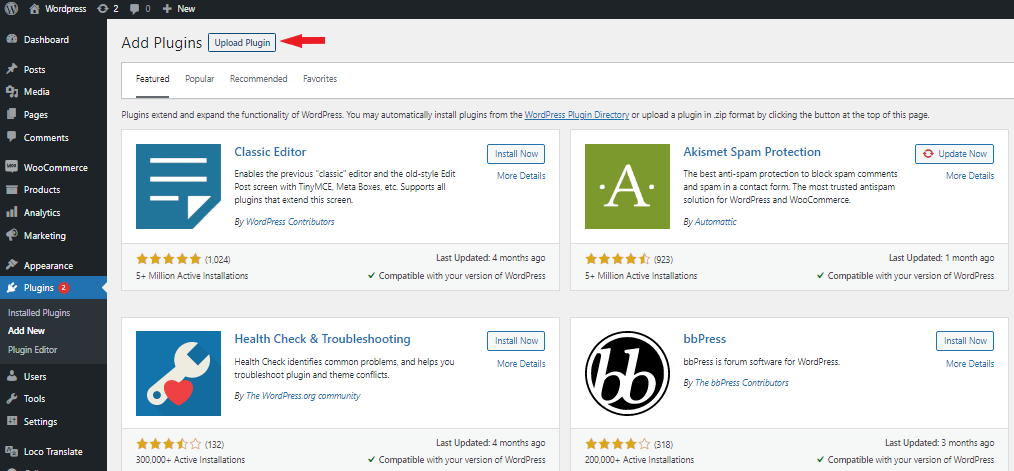
On the Add Plugins page, click on Upload plugin.

-
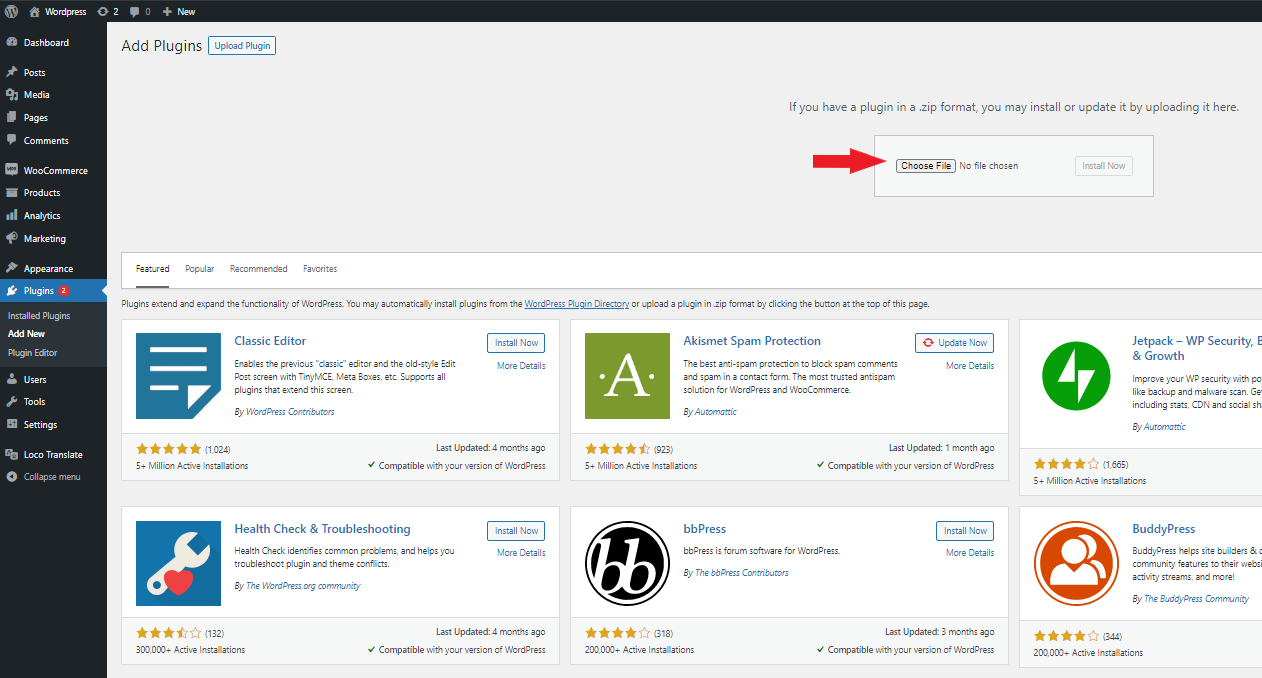
Click on Choose File, select your file and press Install now. The plugin folder must be in a .zip format. No other format is accepted at this time.

-
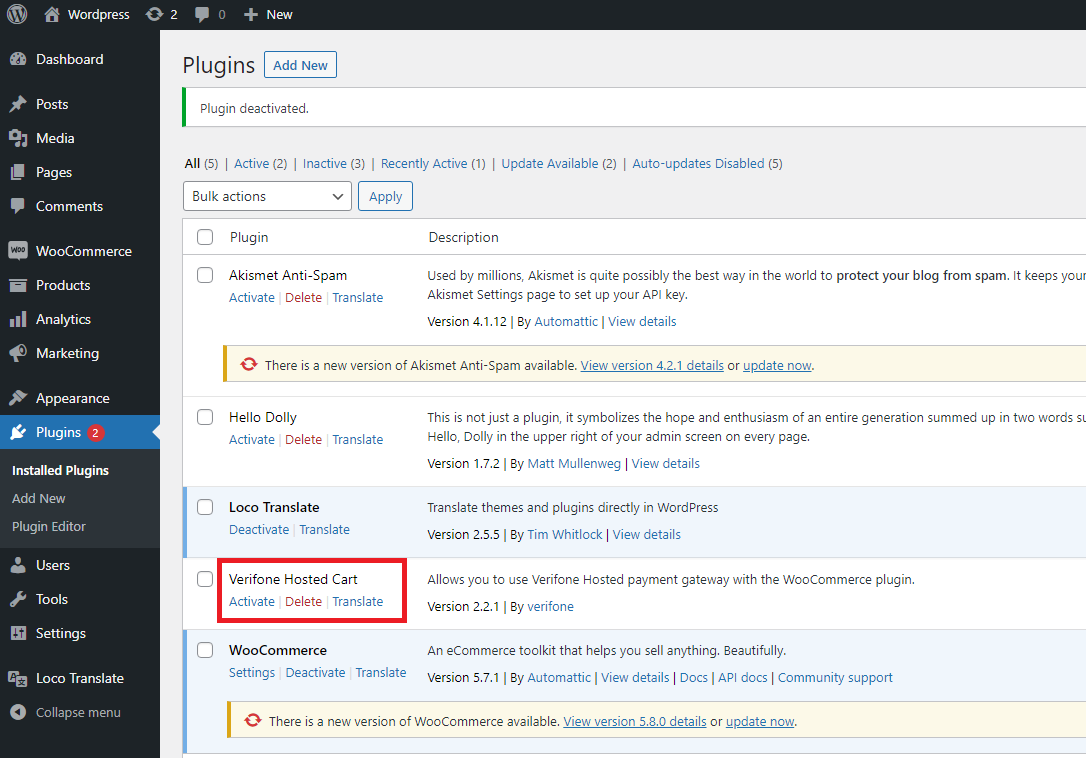
After installing the plugin, navigate to Plugins → Installed Plugins (or simply use the navigation menu on the left-hand side) and click on Activate to enable the plugin.

Manual installation
To install the plugin manually by copying the plugin files to the appropriate location inside the WordPress installation, follow these steps:
- Navigate to your WordPress installation folder.
- Inside this folder, you should see a folder called wp-content. Navigate to that folder.
- Inside the wp-content, you should see another folder called plugins. Navigate to the plugins folder.
- Inside the plugins folder, copy and paste ALL the Verifone-hosted cart files as they are listed.
- If you cannot see the folders mentioned above, then your WordPress installation is incorrect.
Once the installation is complete, make sure to configure the Verifone settings.
