Manual Setup
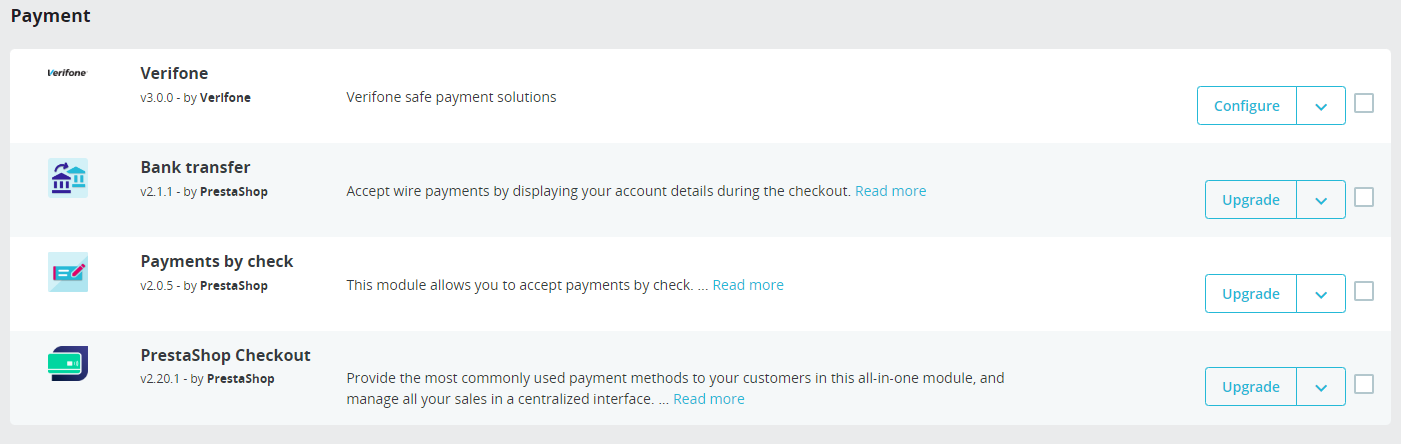
After installing the Verifone Payment Module into your PrestaShop admin, you will need to configure the correct credentials that will associate it to your Verifone account.
-
Click on Configure to add your information (you can find all the details in your Verifone Central account).
Account settings
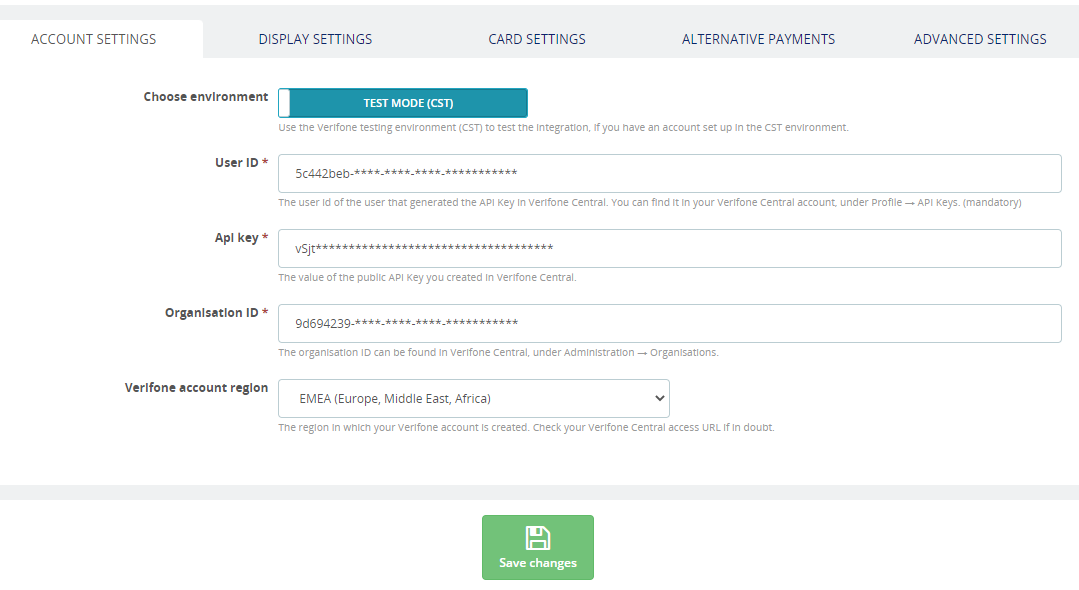
The information in the Account settings area is mandatory. Once the User ID, API Key and Organization ID fields are completed, click on Save changes.
- Choose environment: By toggling this setting you can switch between production and test mode. You can use the Verifone Sandbox (CST) environment to test your integration (for this, you will need to have an account set up in the test environment). If the Test mode (CST) option is switched ON, you will need to use the information from your test account (user ID, API key, organization ID, PPC etc).
- User ID: The ID of the user that generated the API key in Verifone Central. You can find this information in your Verifone Central account, under Profile → API Keys.
- API Key: The value of the API Key you created in Verifone Central. Read here for more details on how to update an expiring API key.
- Organization ID: The Organization ID can be found in Verifone Central, under Administration → Organizations. There might be several organizations available as part of your account hierarchy. When filling in the organization ID here, make sure you pick the ID of the organization connected to your Payment Provider Contract. You can check that by clicking on the organization and searching for the associated payment provider contracts.
- Verifone account region: The region in which your Verifone account is created.
Display settings
This area allows you to configure the look and feel of your payment page.
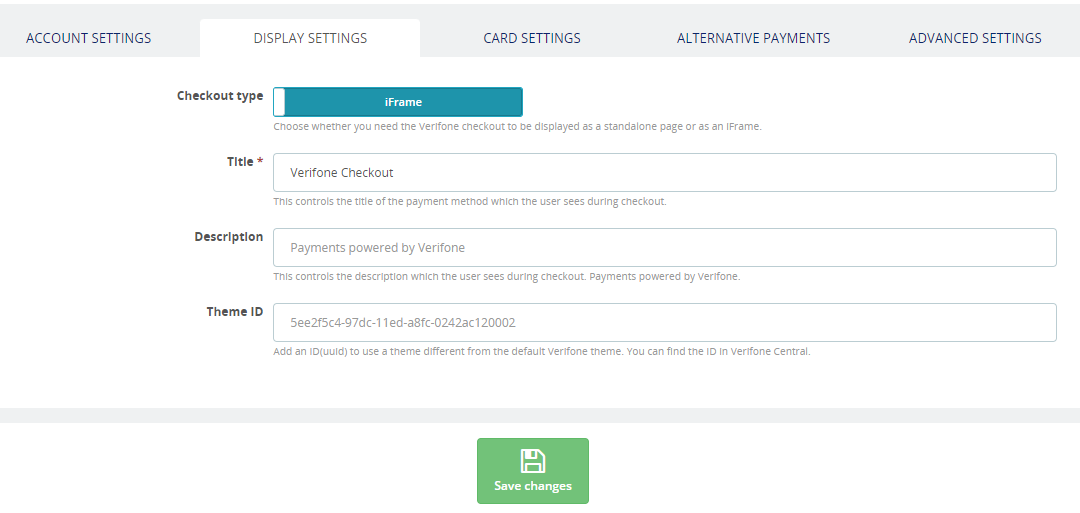
- Checkout type: You can choose whether you need the Verifone checkout to be displayed as a standalone page (HPP) or as an iFrame.
- Title: This controls the title of the payment method which the shopper sees during checkout.
- Description: This controls the description which the shopper sees during checkout.
- Theme ID: Allows you to setup a custom theme for your payment page, by using the tool available in your Verifone Central account. Once the theme is created, you will be able to pick up the theme ID and fill it in the Display settings section. More on themes can be found here.

Setting up your payment methods
You will need to enable and set up at least 1 payment method option. Either enable the Card payments option from the Card settings tab, or/and select an alternative payment method from the Alternative payments tab.
Card settings
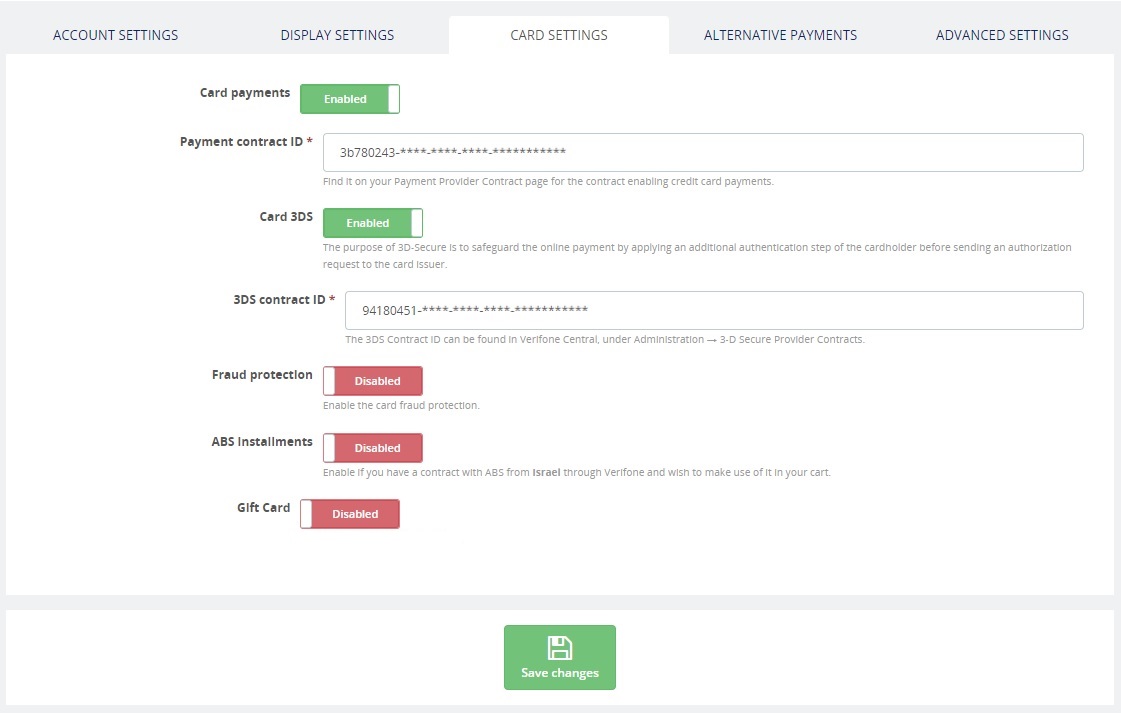
Once the Card payments option is enabled you need to provide information about your Payment provider contract ID. You can find this info in your Verifone Central account, under Administration → Payment Provider Contracts. Make sure you collect the ID belonging to the Payment Provider Contract that enables card payments.
- If you enable the Card 3DS option, you need to provide information about your 3DS Contract ID. The 3DS Contract ID can be found in your Verifone Central account, under Administration → 3-D Secure Provider Contracts.
- If you enable the Fraud Protection option, you must introduce your Fraud Contract ID information (to get your Fraud Contract ID information, log in to Verifone Central, go to the Administration tab and click on Added value services > Fraud protect). Access the Fraud protection documentation to view the Fraud Protect-related information and how to set your fraud_protection_contract from Verifone Central.
- Enable the ABS Installments (valid only for Israel) option, if you are using Verifone as a gateway services provider in conjunction with an acquiring contract with from ABS.
If you enable the Gift Cards option, you need to provide information about your Gift card contract ID. You can find this info in your Verifone Central account, under Administration → Payment Provider Contracts. Make sure you collect the ID belonging to that payment provider contract that enables gift card payments.
Alternative payments
Based on your agreement with Verifone, there might be alternative payment methods that you would like to provide to your shoppers as options available on the payment page.
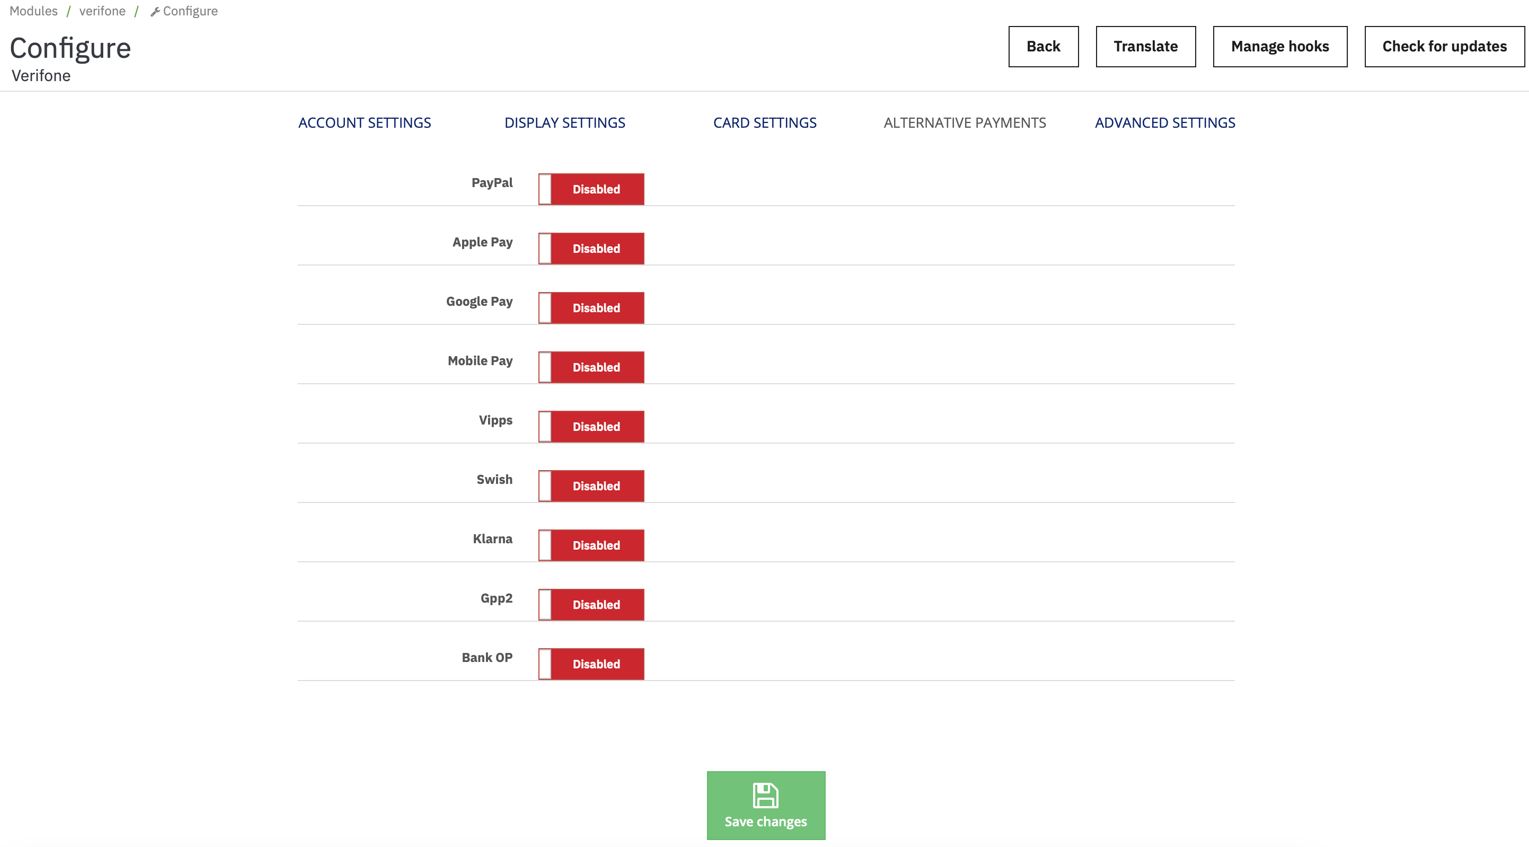
- PayPal
- PayPal payment provider contract ID: The ID can be found in Verifone Central, under Administration → Payment Provider Contracts, after selecting the contract available for PayPal as a service provider.
- Apple Pay/Google Pay/MobilePay/Vipps
- SCA (Strong Customer Authentication): Given that wallet payment providers already have Delegated Authentication rights to perform Strong Customer Authentication, we recommend setting this to “wallet”.
- Apple Pay/Google Pay/Mobile Pay/Vipps Payment Provider Contract ID: The ID can be found in Verifone Central, under Administration → Payment Provider Contracts, after selecting the contract available to process card payments through the desired wallet-type APM.
- Swish
- no additional fields should be configured
- Klarna
- no additional fields should be configured
- GPP2
- GPP2 payment provider contract ID: The ID can be found in Verifone Central, under Administration → Payment Provider Contracts, after selecting the contract available for GPP2 as a service provider.
- Bank OP
- Bank OP payment provider contract ID: The ID can be found in Verifone Central, under Administration → Payment Provider Contracts, after selecting the contract available for Bank OP as a service provider.
Advanced settings
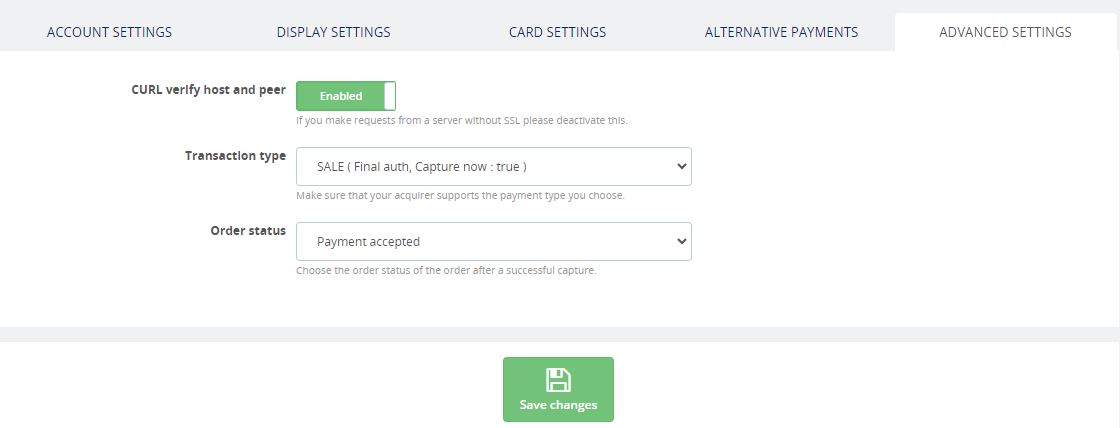
- CURL verify host and peer: Enable this setting to avoid plugin requests to time out. Highly recommended if both host and peer are using HTTPS (TLS).
- Transaction type
- Pre-auth - Preauthorization acts as a reservation on your cardholder’s account. Once you are able to ship the products and decide to withdraw the amount, you can then capture the payment. Preauthorization allows you more time to capture the payment (it is usually 30 days but this needs to be checked with acquirer, as it might vary depending on card schemes/ merchant category code). Also make sure Verifone supports this transaction type for the acquiring solution you are using.
- Auth - Authorization also acts as a reservation on your cardholder’s account – that you can capture later on, once you ship the products to your customers. The difference between authorization and preauthorization is that you only have up to 7 days allowed by the time you decide to capture the amount. Here as well, check that Verifone supports this transaction type for the acquiring solution you are using.
- Sale - The sale transaction implies authorization and capture are done in one single step.
- Order Status – Choose the order status of the order after a successful capture.
- Once all needed options are selected, click on Save changes.