Use Invoice4U with Pay by Link
Overview
Invoice4U payment documents will be available in Pay by Link after the service is activated by Verifone.
The payment document will be generated automatically after the transaction is captured and will be sent to the shopper's mailbox. For each transaction, the details regarding the payment document will be available in your Verifone Central account.
Availability
Invoice4U via Pay by Link is available for Merchant Cashier and Merchant Supervisor roles.
Workflow
-
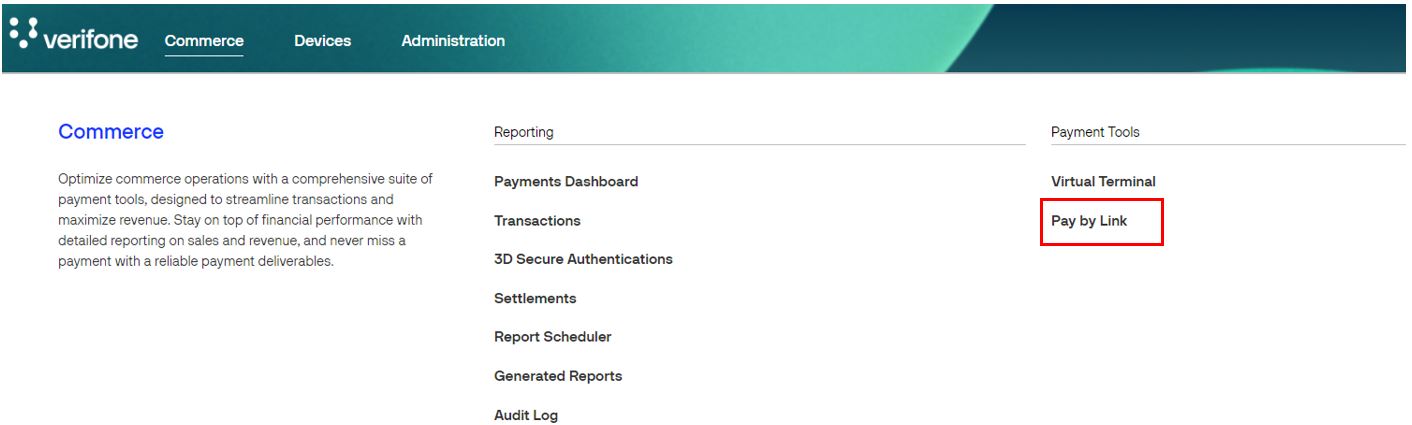
Log in to your Verifone Central account. Navigate to Commerce > Payment Tools > Pay by Link.
-
On the Payment Links page, click on the Create Payment Link button at the top of the page.

Payment settings
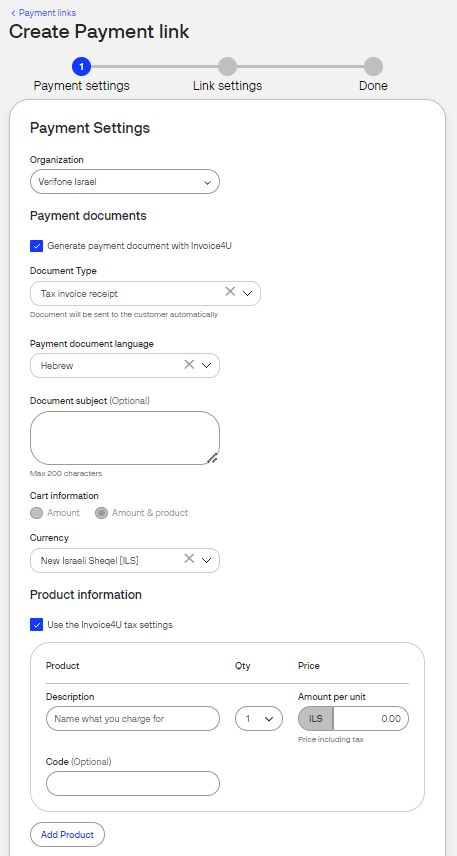
- Select in the Payment Settings page your Organization information.
-
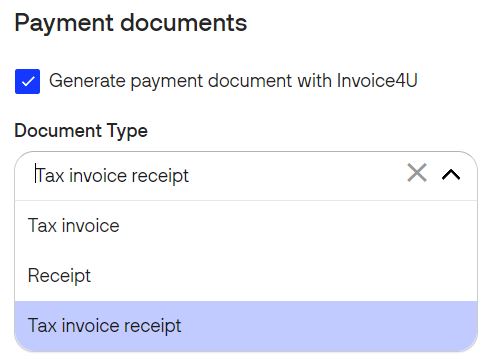
In the Payment documents field, check the Generate payment document with Invoice4U box, if you want to generate a commercial document for this transaction and select the Document type.
- Tax Invoice
- Receipt
- Tax Invoice Receipt
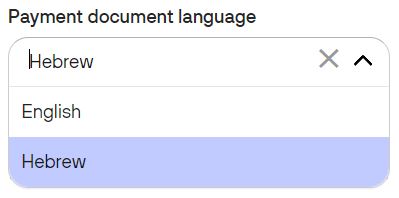
- Select the Payment document language between Hebrew and English.
- If the Tax invoice or Tax invoice receipt are chosen in the Document type section, the Product Information fields will be displayed.
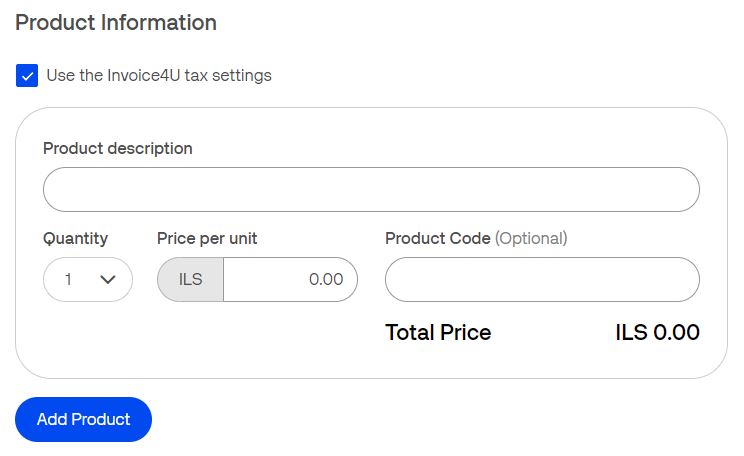
- When using the Invoice4U tax settings - the default tax settings set in your Invoice4U account will be applied to your products. Set the product name (Product description), quantity (Quantity), price per unit (tax included), and the optional stock keeping unit ID (Product Code). Use the Add Product button to add additional product lines.
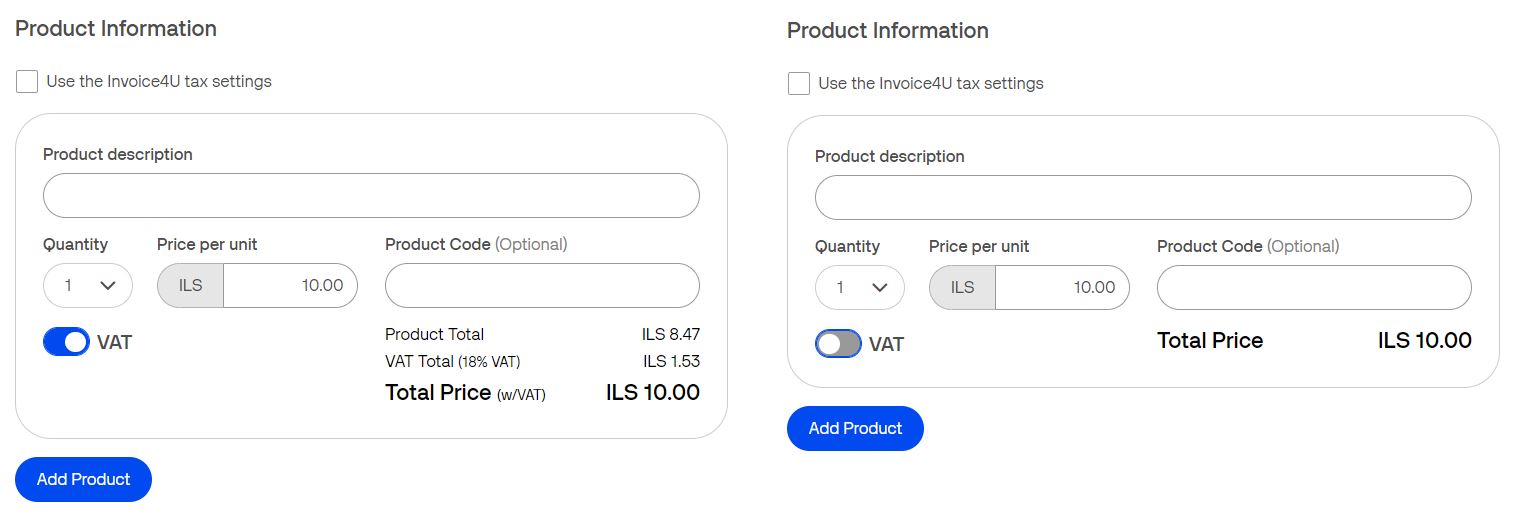
- Add custom tax - in addition to setting the product name (Product description), quantity (Quantity), price per unit, and the optional stock keeping unit ID (Product Code), you can also specify per product line item whether the VAT applies (with current value of 18%, as per Israeli VAT) or not (0% tax rate), by selecting the VAT toggle button.
- When using the Invoice4U tax settings - the default tax settings set in your Invoice4U account will be applied to your products. Set the product name (Product description), quantity (Quantity), price per unit (tax included), and the optional stock keeping unit ID (Product Code). Use the Add Product button to add additional product lines.
- (optional) Add the Merchant Reference to identify the transaction or link this transaction to an order ID generated by your own inventory system.
-
Select the available Payment methods. If you want to perform a sale transaction (authorization + capture), check the Automatically send transaction for capture checkbox. If you leave the Automatically send transaction for capture checkbox unchecked, you have to manually perform the authorization and the capture. Refer to the table below for more information:
PRE-AUTHORIZATION A pre-authorization reserves funds for authorization on customer's account or card, to ensure that the shopper will be able to pay when the invoice is due.
AUTHORIZATION An authorization transaction puts funds on hold. An AUTHORISATION refers to funds on hold which cannot be adjusted - also referred to as a final authorization. CAPTURE A capture of funds for a final authorization. The money is withdrawn from the customer’s account. SALE A single step transaction which is automatically captured. This can be thought of as an authorization and capture combined.
This is often also referred to as a "purchase" transaction in some regions. You can opt for the Authorization + Capture (Sale) step for subscriptions, digital goods, etc.
Note: As a merchant, you might prefer to choose Authorization and Capture separately if you are unsure of the availability of your products in stock.
- Go to the Customer Details section and fill in the specific information (first name/last name/ email address - used to send the payment document).
Once the payment settings have been completed, click on Continue to link settings to proceed.
Link settings screen
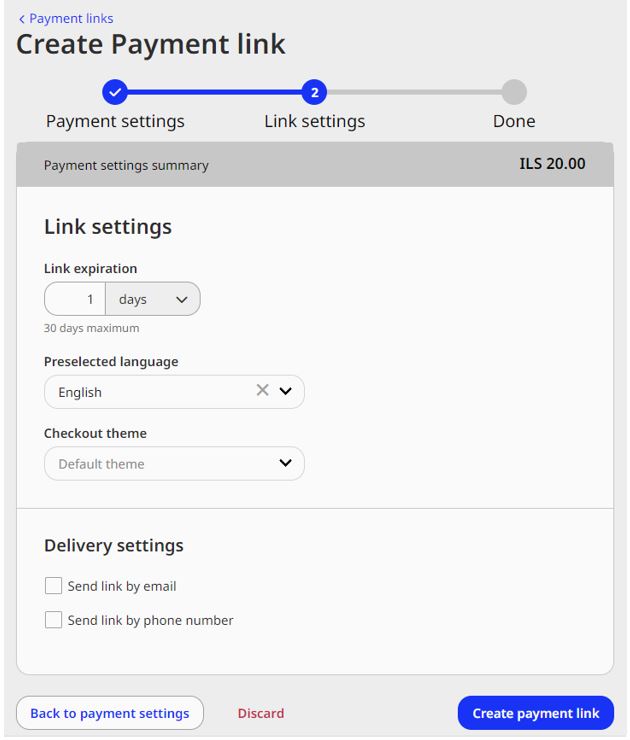
- Set the Link Expiration time to choose for how long a payment link should remain valid. The maximum is 30 days from the time you created the link. Once expired, the customer cannot access the payment link.
- Choose the Preselected language used in the checkout interface.
- Set a Checkout theme of your choice to personalize the Pay by Link checkout page. The Default theme can be chosen (the template theme provided by Verifone) or a customized theme can be created via the Checkout Themes editor.
- (optional) If you want to send the link directly to the customer using one of the methods provided, you can check Send link by email or Send link by phone number or both.
Once the configuration has been completed, click on Create payment link to proceed.
Done screen
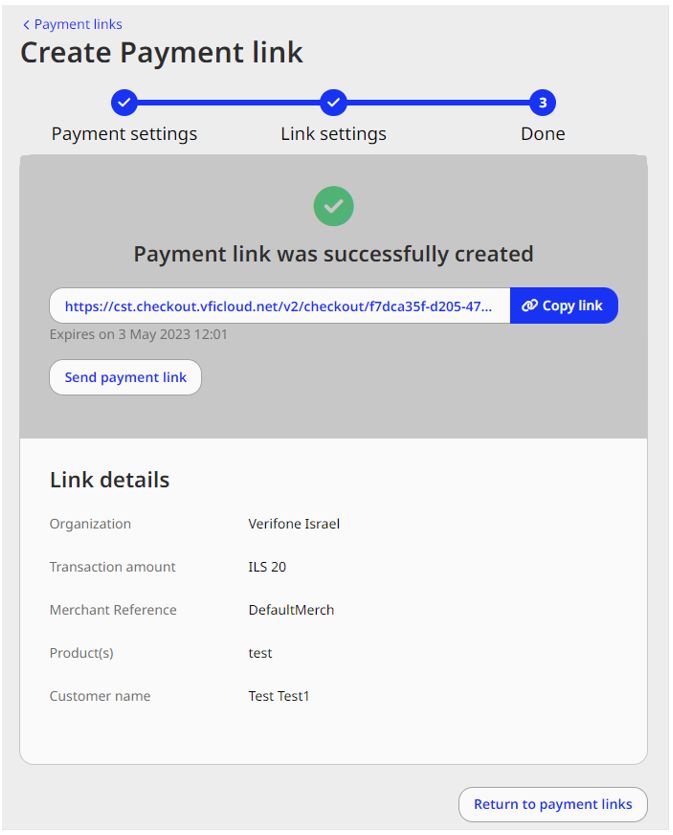
A confirmation screen will be displayed.
The payment link can be copied to clipboard, by pressing the Copy link button or can be send by email or SMS, by selecting Send payment link.