Additional checkout fields
Overview
Define additional checkout fields to be displayed in the shopping cart, helping you collect extra information from your shoppers. You can configure custom fields to be displayed at both product and order levels.
Availability
This functionality is available for all 2Checkout accounts.
How do I receive additional checkout fields?
Customer-specific information collected via custom additional fields is sent in several ways:
- in the "Order notification email" - sent by the 2Checkout system, information filled by your customers will be sent along with all the order information in the Additional Information section.
- in the "IPN (Instant Payment Notification)" - if this service is enabled, the additional fields are included in the HTTP POST sent by the 2Checkout system.
Additional checkout fields are not included by default in the IPN HTTP POST. To include these fields, as well as other additional order information you have to check CUSTOM_FIELDS[] on the IPN Settings page.
The following IPN variables are available:
additional checkout fields
| Field | Description | |
|---|---|---|
| IPN_CUSTOM_TEXT[] | Array with all the custom fields texts set per order. | |
| IPN_CUSTOM_VALUE[] | Array with all client input corresponding to the text. | |
|
Example |
||
| IPN_CUSTOM_TEXT[] | 0 | Where did you first hear about us? |
| 1 | Would you like to receive regular updates? | |
| IPN_CUSTOM_VALUE[] | 0 | From a friend |
| 1 | CHECKED | |
Product additional checkout fields (dynamic fields):
Product name: 123456
Product ID in the 2Checkout system: 123456
| Field | Description | |
|---|---|---|
| IPN_CUSTOM_123456_TEXT[] | array with all the custom fields texts set per product. | |
| IPN_CUSTOM_123456_VALUE[] | array with all client input corresponding for the text. | |
| Example | ||
| IPN_CUSTOM_123456_TEXT[] | 0 | Product code |
| IPN_CUSTOM_123456_VALUE[] | 0 | 123456 |
Additional information can be found in the Merchant Control Panel in these sections:
Create custom fields
- Go to Setup → Ordering options.
- Click Manage additional order fields.
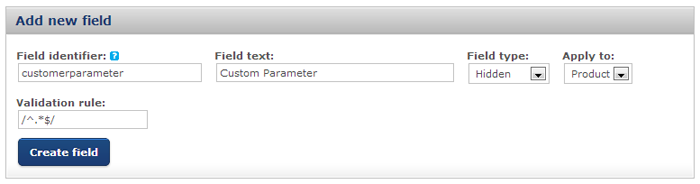
- Use the Add new field section to define each new field. Enter the Field identifier. Use unique identifiers for all your fields. Note: This field accepts only alpha-numeric characters. If you leave this field empty, 2Checkout generates a random value as an identifier.
- Enter the Field text (the name of the field).
- Set the Field type. There are four available types.
- Textbox allows shoppers to write what they want in the field. You can use it to collect feedback or opinions on the shopping experience, for instance.
- Checkbox allows shoppers to select various options. You can use it for a quick survey.
- Listbox displays a drop-down list your shoppers can select items from.
- Hidden helps you define custom URL parameters for tracking purposes. For details on this option, read our dedicated article.
- Use the Apply to drop-down to choose whether the field should apply at the product or order level.
- Use the Validation rule field to specify the regular expression to validate the field values. Note: Not supported on Inline Checkout. The field can be set, but it will be ignored during the checkout process.
- Click Create field to save the new field.
Set additional checkout fields for products
Requirement
Follow the steps in the Create custom fields section to create new fields and apply them at the Product level. Then, follow the steps below to assign the field to a product.
- Go to Setup → Products.
- Click Edit on the product you want to assign the field to.
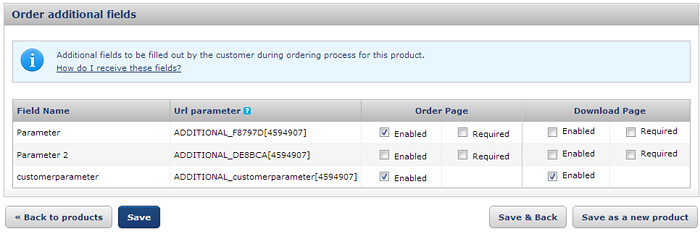
- Go to the Information tab and scroll to the bottom of the screen. You'll find the previously defined additional fields in the Order additional fields section. All new fields are disabled by default.
- Check the Enabled option on the Order page column corresponding to the field you want to use. Check the Required checkbox if you want the field to be mandatory during the checkout process.
- Click Save.
Set additional checkout fields for orders
Requirement
Follow the steps in the Additional fields settings page in your Merchant Control Panel to create new fields and apply them at the Order level. Then, follow the steps below to assign the field to order.
- Go to Setup → Ordering options.
- Scroll down to the Additional order fields section and got to the Click here to create and manage link.
- To create a new additional field, follow these steps:
- Go to the Add new field section
- Fill in all the fields displayed
- Click Create field to save the new field.
- To edit an existing additional field, you need to:
- Go to Dashboard → Setup → Ordering options → Additional fields settings
- Scroll below the Additional fields settings section
- Choose the field you want to modify and update its fields.
- Scroll to the bottom of the page and click Update fields to save your new settings.
- To delete an additional field, leave the field empty and click on the Update fields button. Those fields assigned to products will be deleted as well.
- To activate an existing additional field, see the steps below:
- Go to Dashboard → Setup → Ordering options → General
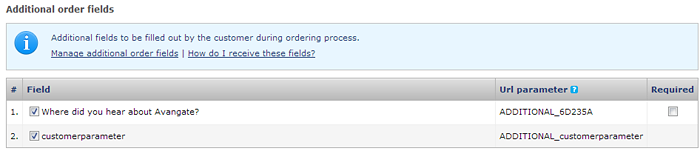
- Scroll down below the Additional order fields section.
- In the list of additional fields, check the checkbox next to the field you want to use.
- Check the Required checkbox if you want the field to be mandatory during the checkout process.
- Click Save Settings at the bottom of the page.
Additional field types
- Textbox - a text field that allows the customer to enter text information about the additional field.
- Checkbox - a small checkable box that allows the customer to enable or disable an element. It can be checked or left empty.
- Listbox - it displays a scroll-down list of elements that allow the customer to select one or more items from the list contained within the static text box.
- Hidden - it cannot be seen or modified by customers.
Pre-fill additional information fields
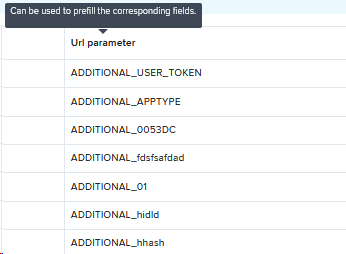
You can pre-fill the additional information fields by passing the &ADDITIONAL parameter in the URL.
The parameter would look like this: &ADDITIONAL_(insert additional field identifier here)[product id]=(insert value here).
For example, if you want to pre-fill the additional information field with 'test.com', your checkout buy-link would look like this:
&ADDITIONAL_92E8A6[4674306]=test.com
Where ADDITIONAL_92E8A6 is the URL parameter as shown in your Merchant Control Panel.