Implement Google Universal Analytics in ConvertPlus and InLine Checkout (with GTM)
Overview
You can implement Google Universal Analytics and Google Tag Manager tracking tools to help you track and monitor your ConvertPlus and InLine checkout orders to improve the shopping experience and increase the conversion rate.
Availability
Google Universal Analytics and Google Tag Manager can be set for all 2Checkout accounts.
Google Universal Analytics Settings
Implement Google Universal Analytics
To implement Google Universal Analytics through Google Tag Manager (GTM) for your ConvertPlus and InLine Checkout, follow these steps:
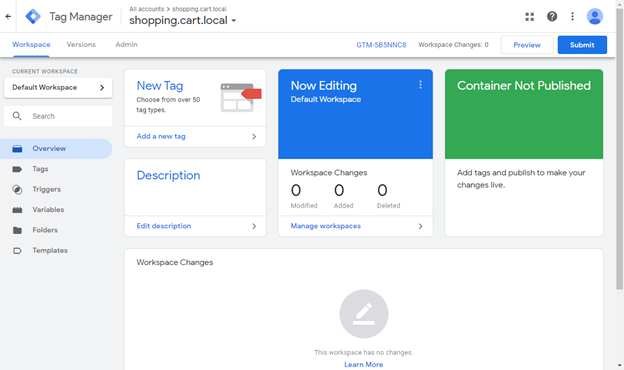
1. In your browser window, navigate to Tag manager → All accounts.
2. Click on the Create Account button.

3. Fill in all the required fields:
- Account Name
- Country
- Container name
- Target platform → Web
4. Click on the Create button.
5. Copy the Google Tag Manager Container ID. It will be used in the 2Checkout Merchant Control Panel for the Google Tag Manager set-up.

Create a Google Universal Analytics Settings variable in Google Tag Manager
If you already have a Google Universal Analytics Settings variable with your Google Universal Analytics Tracking ID, then skip to step 5.
If you do not have a Google Universal Analytics Settings variable created for your website tracking, you will need to create one to add the Google Universal Analytics property to which you want to send data by following these steps:
1. In your Google Tag Manager account, navigate to Variables → User-Defined Variables → New.
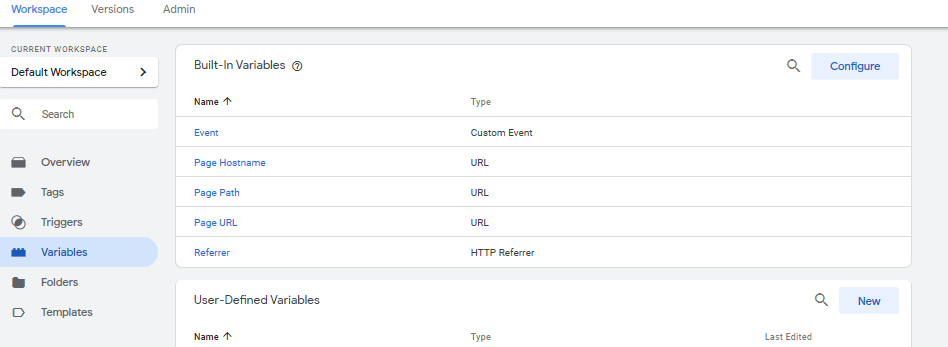
2. From the list provided by Google, select the Google Universal Analytics Settings option as Variable Type. Name your variable “Google Analytics Settings”, so you can easily identify it.
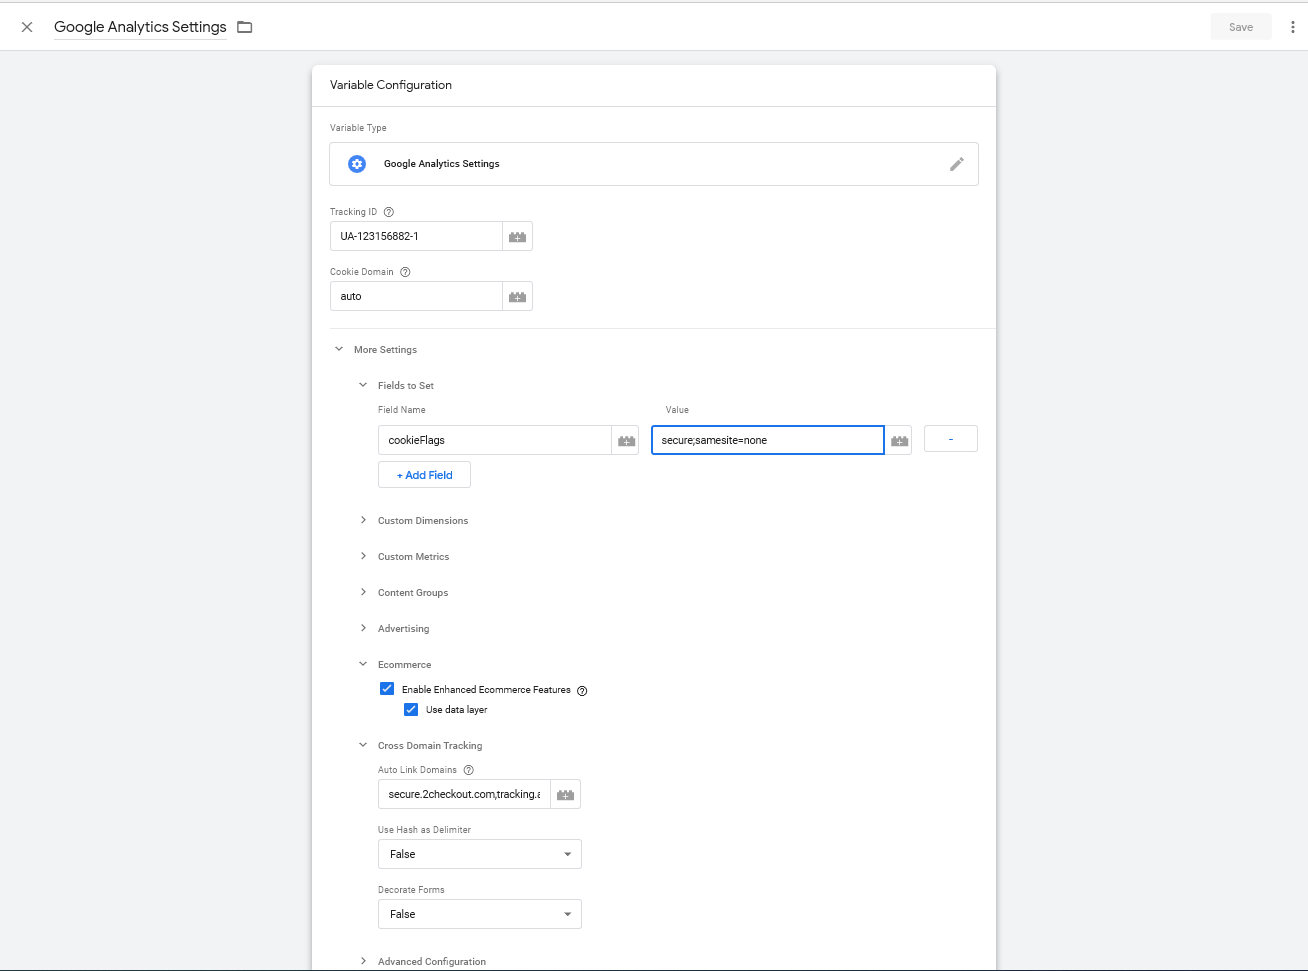
3. Under Tracking ID add the Google Universal Analytics Tracking ID to which you wish to send data.
4. To get your Google Universal Analytics Tracking ID, navigate to Google Universal Analytics → Admin → Tracking Info → Tracking Code. You will find the code under Tracking ID. Copy and add it to your variable.
![]()
5. For cross-domain tracking between your website and the 2Checkout shopping cart, you need to configure cross-domain settings in the Google Universal Analytics variable. This set-up is needed so that Google Universal Analytics counts a shopper coming from your website to the 2Checkout shopping cart, as the same visitor.
Go to More Settings → Cross Domain Tracking and type the following domains separated by a comma in the field named Auto Link Domains: secure.2checkout.com,tracking.avangate.net.
6. Append flags to the Google Universal Analytics cookie with “secure” and “samesite=none”. To do this, in the Google Universal Analytics Settings variable, click on Fields to set, add a new field and type cookieFlags as Field Name and samesite=none as Value secure, as in the example below.
7. Click Save.
Create the trigger for the Google Universal Analytics Convert Plus Tag
1. In Google Tag Manager, click on the Triggers section and then click to add a new trigger.

2. Create two triggers to track the Convert Plus and InLine shopping carts:
- One for non-interactive events: checkout and purchase.
- One for interactive events: removeFromCart (for the removeFromCart type of event, the user interacts with an element on the page by clicking the Remove from cart button. This is why this type of event is considered an interactive event by Google Universal Analytics) and addToCart.
Create the non-interactive event trigger
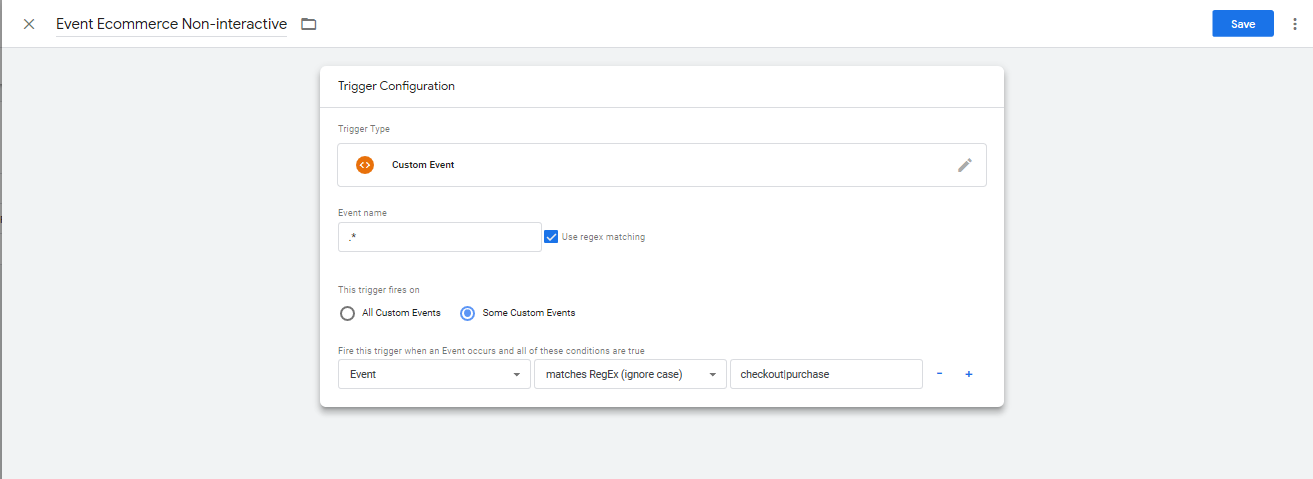
- Name your trigger Event Ecommerce Non-interactive.
- From the list provided, choose Custom event as Trigger Type.
- In the field Event name, type .* and check the box Use RegEx matching.
- For the "This trigger fires on" section, select Some custom events.
- As rule, fill in the boxes with Event matches RegEx (Ignore case) checkout|purchase.
- Click Save.
Create the interactive event trigger
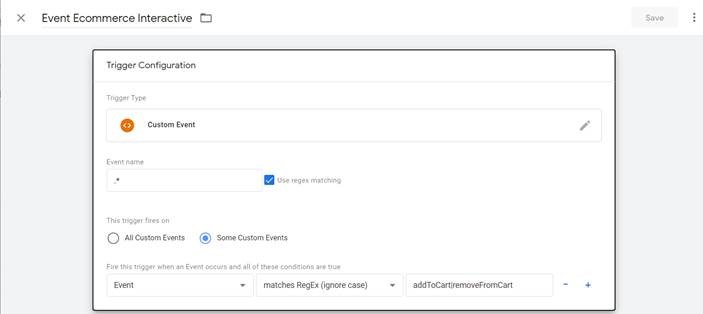
- Name your trigger Event Ecommerce Interactive.
- From the list provided, choose Custom event as Trigger Type.
- In the field Event name, type .* and check the box Use RegEx matching.
- For the "This trigger fires on" section, select Some custom events.
- As rule, fill in the boxes with Event matches RegEx (Ignore case) addToCart|removeFromCart .
- Click Save.
Create the tag for ConvertPlus eCommerce tracking in Google Tag Manager
- In the Google Tag Manager interface, click on New Tag.
- Create two tags to track the ConvertPlus & InLine shopping carts.
- One tag for non-interactive events: checkout and purchase
- One tag for interactive events: removeFromCart
Create the tag for Non-interactive events
- Name your tag "Google Analytics Convert Plus – Event Type Non-Interactive”, to keep track of your tags easier.
- From the list provided by Google, select the option “Google Analytics: Universal Analytics” as Tag Type.
- For Category type Ecommerce, select Event as Track Type.
- For Action, select Event from the list provided by Google.
- In the Non-Interaction Hit field, select True.
- For the “Google Universal Analytics Settings” section, select your Google Universal Analytics Settings variable that contains the Google Analytics ID of your account.
- Check the box Enable overriding settings in this tag.

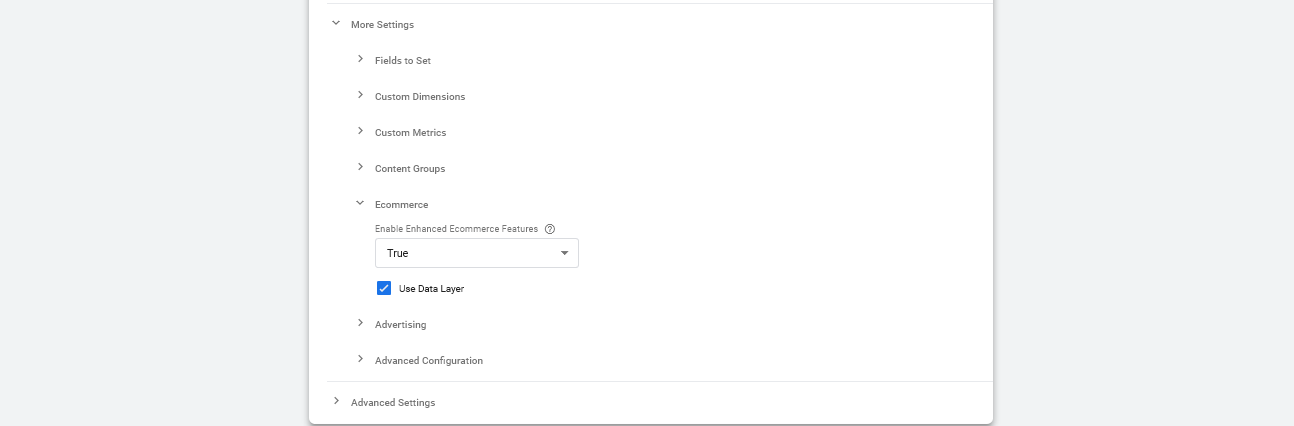
8. Under More Settings → Ecommerce → Enable Enhanced Ecommerce Features, select True.
9. Check the Use Data Layer box to capture eCommerce information from the data layer provided by 2Checkout.
10. In the Triggering section, select the previously configured trigger for non-interactive events: Event Ecommerce Non-interactive.

11. Click Save.
Create the tag for Interactive events
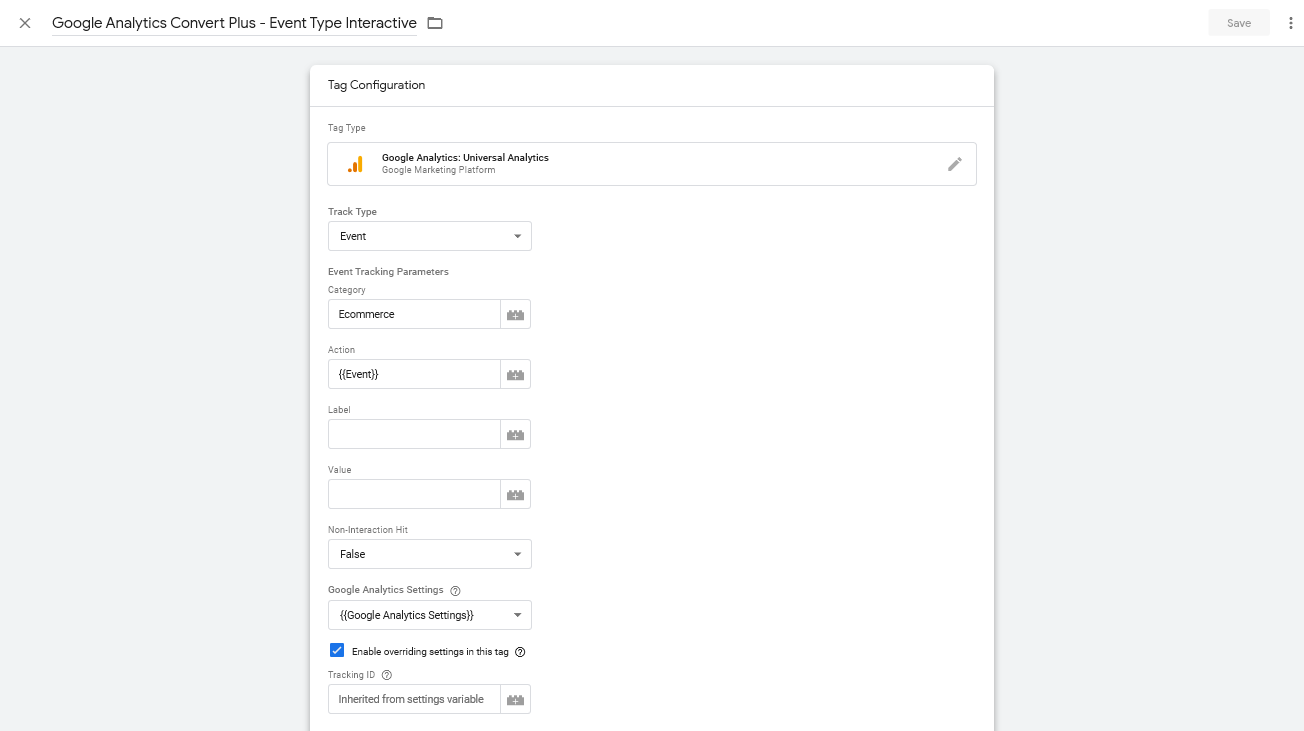
- Name your tag “Google Analytics Convert Plus – Event Type Interactive”, to keep track of your tags easier.
- From the list provided by Google, select the Google Analytics: Universal Analytics option as Tag Type.
- Select Event as Track Type.
- Select Ecommerce for Category type.
- From the list provided by Google, select Event for Action.
- In the Non-Interaction Hit field, select False.
- For the Google Universal Analytics Settings section, select your Google Universal Analytics Settings variable that contains the Google Analytics ID of your account.
- Check the Enable overriding settings in this tag box.
9. Under More Settings → Ecommerce → Enable Enhanced Ecommerce Features, select True.
10. Check the Use Data Layer box to capture eCommerce information from the data layer provided by 2Checkout.

11. In the Triggering section, select the previously configured trigger for Interactive events: Event Ecommerce Interactive.

12. Click Save.
Enable Enhanced Ecommerce in your Google Universal Analytics account
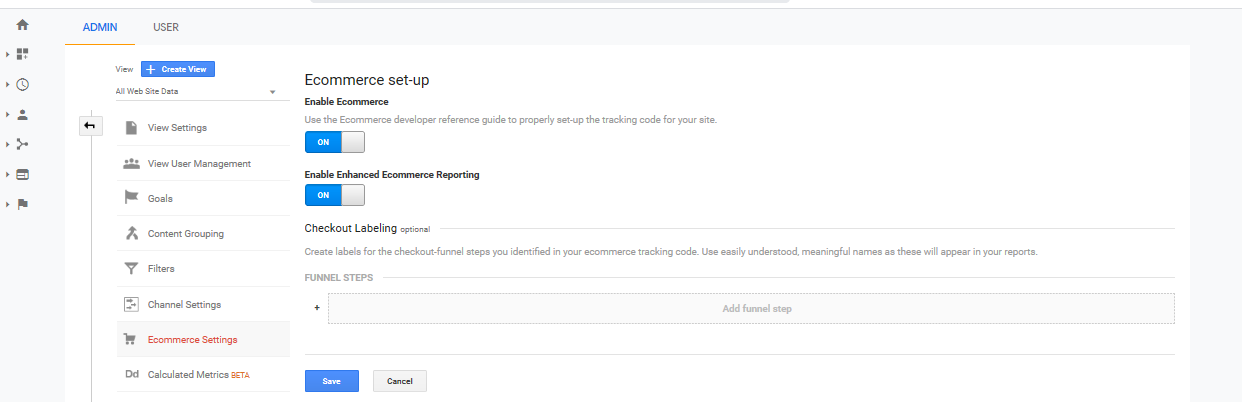
1. To enable Enhanced Ecommerce in your Google Universal Analytics account, go to Admin → View Settings → Ecommerce settings.
2. Make sure the settings for Enable Ecommerce & Enable Enhanced Ecommerce Reporting are both ON.
This information applies to Google Universal Analytics without GTM as well.
Exclude the 2Checkout domains from the referral list
To exclude the 2Checkout domains from the referral list in your Google Universal Analytics account, follow these steps:
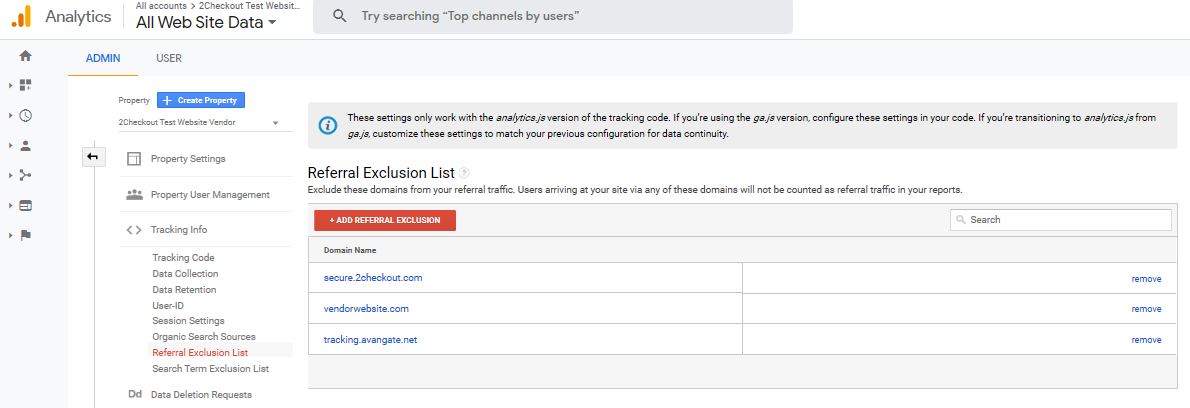
1. Go to Admin → Property settings → Tracking info → Referral Exclusion List.
2. Add your website’s domain and the following 2Checkout domains: secure.2checkout.com and tracking.avangate.net.
This information applies to Google Universal Analytics without GTM as well.
Test your Google Universal Analytics Settings
To test if your Google Universal Analytics settings are correct, follow the steps below (make sure your browser is not set to Incognito mode):
1. Download and install the Tag Assistant Companion browser extension found here.
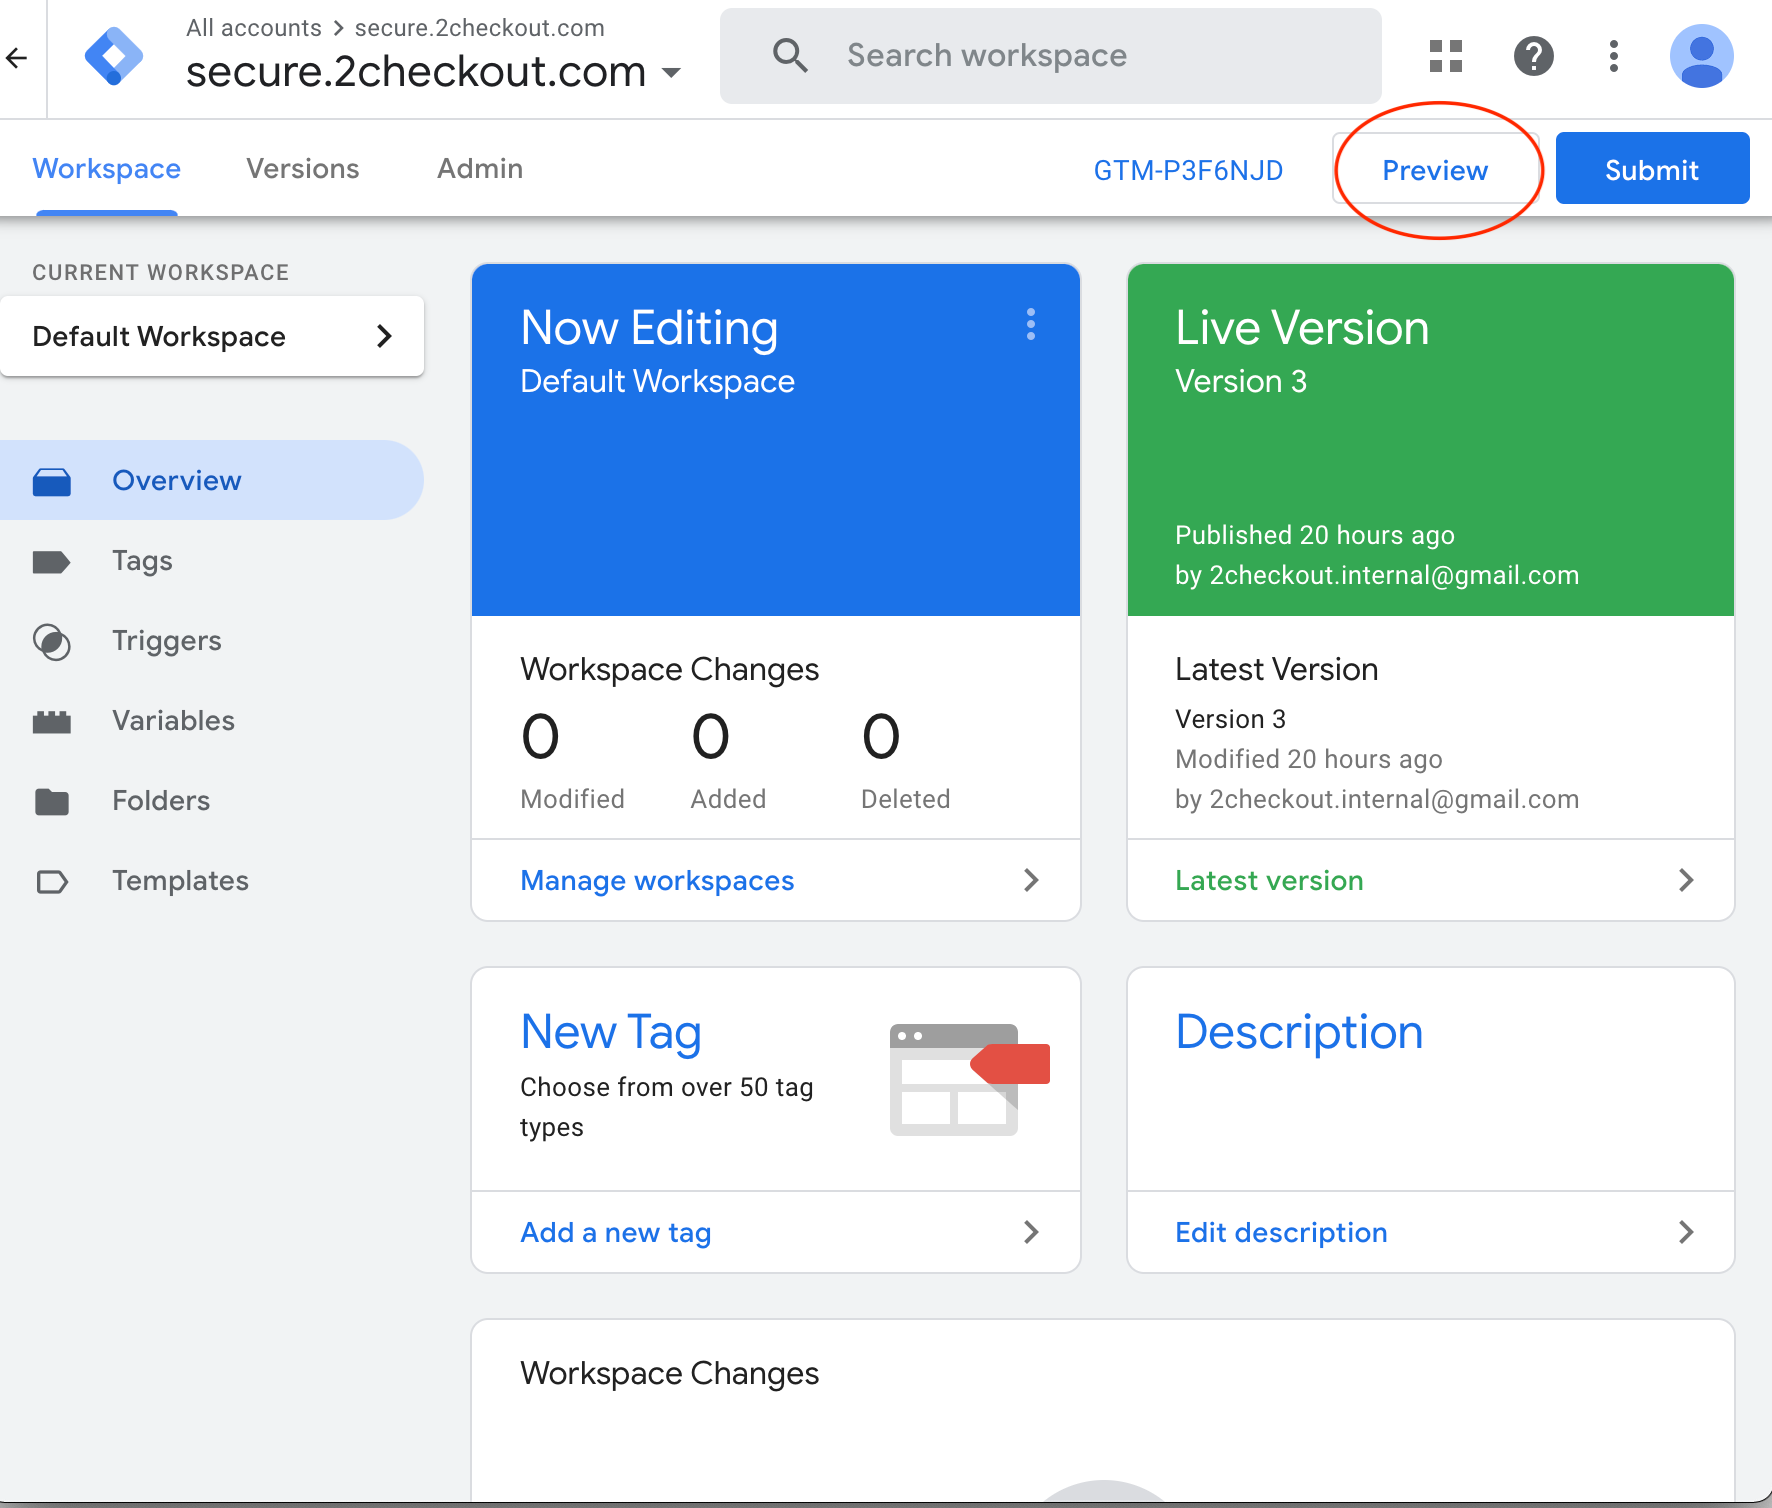
2. Click on Preview.
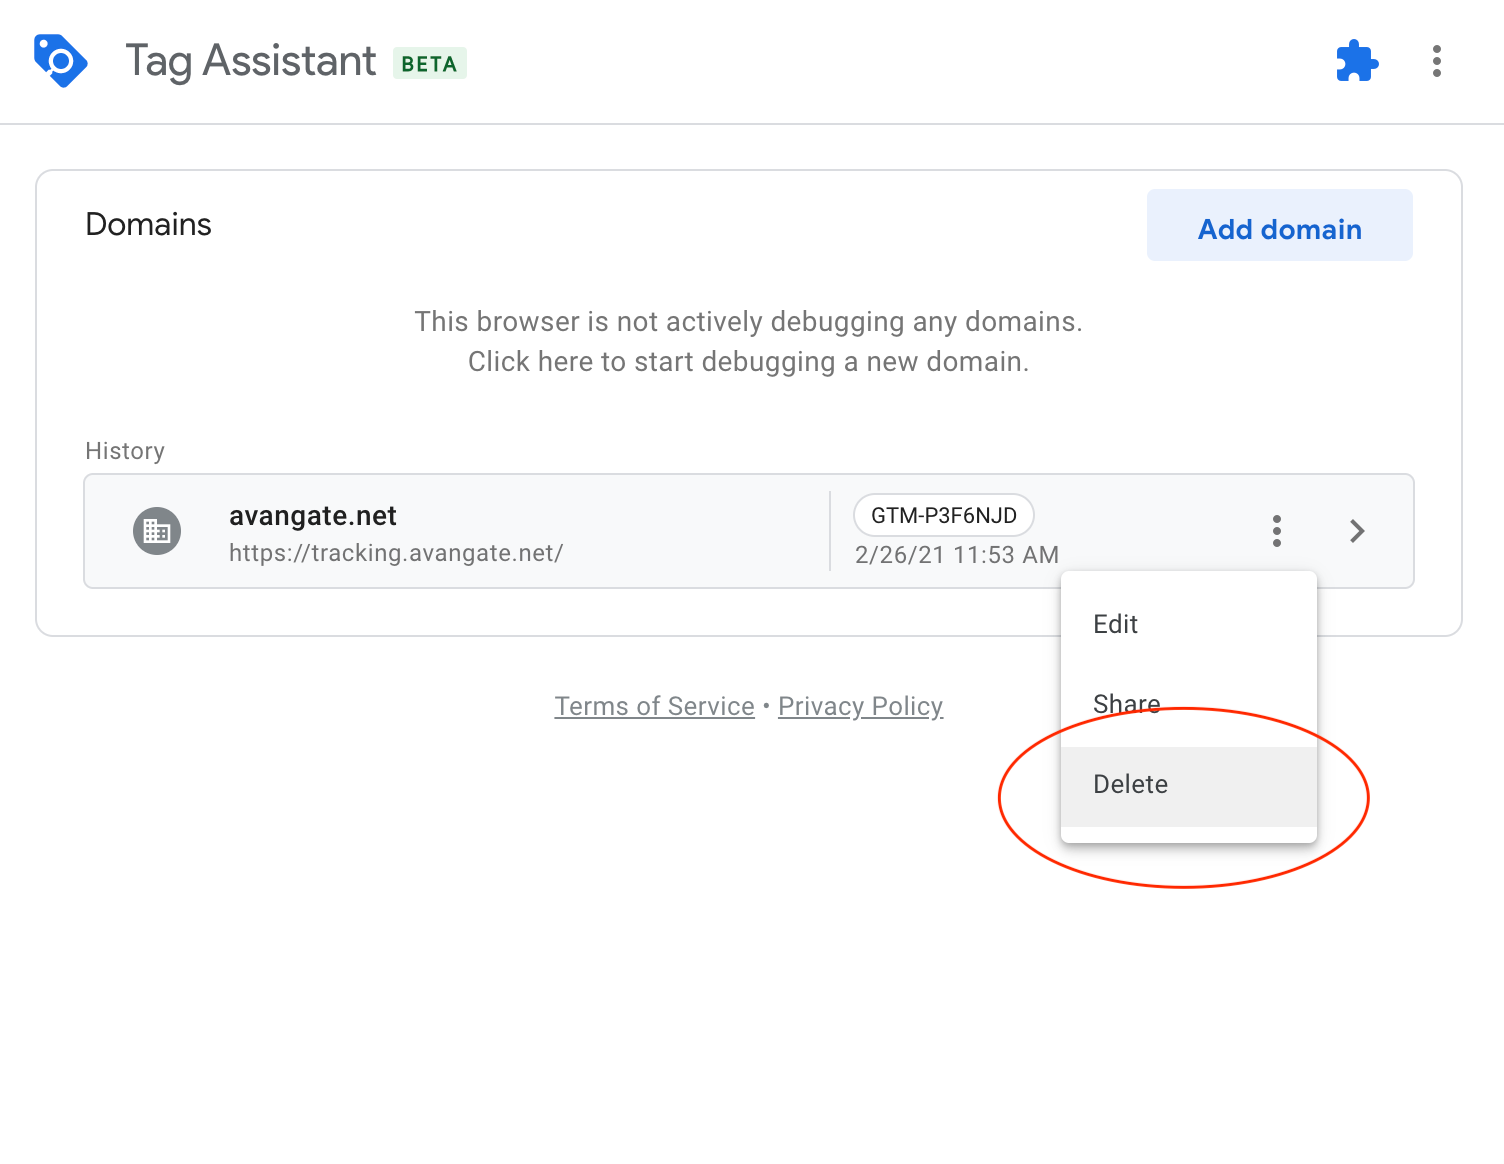
3. Delete all existing domains.
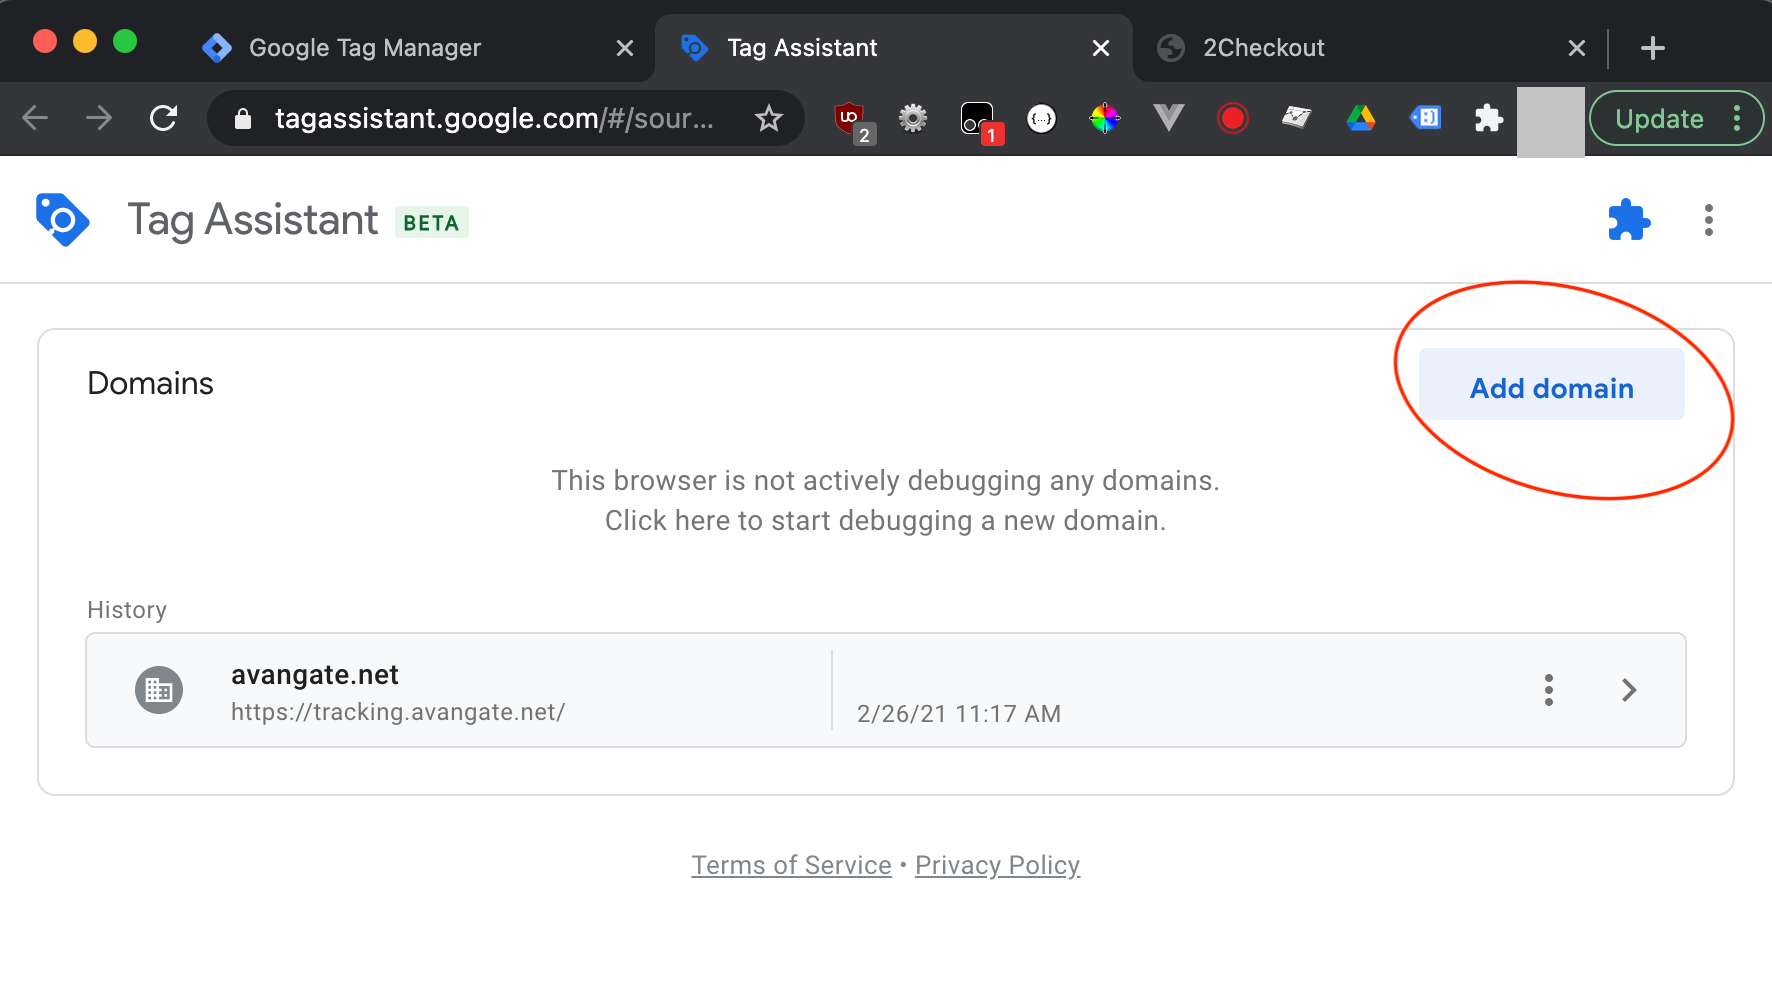
4. Click on Add domain.
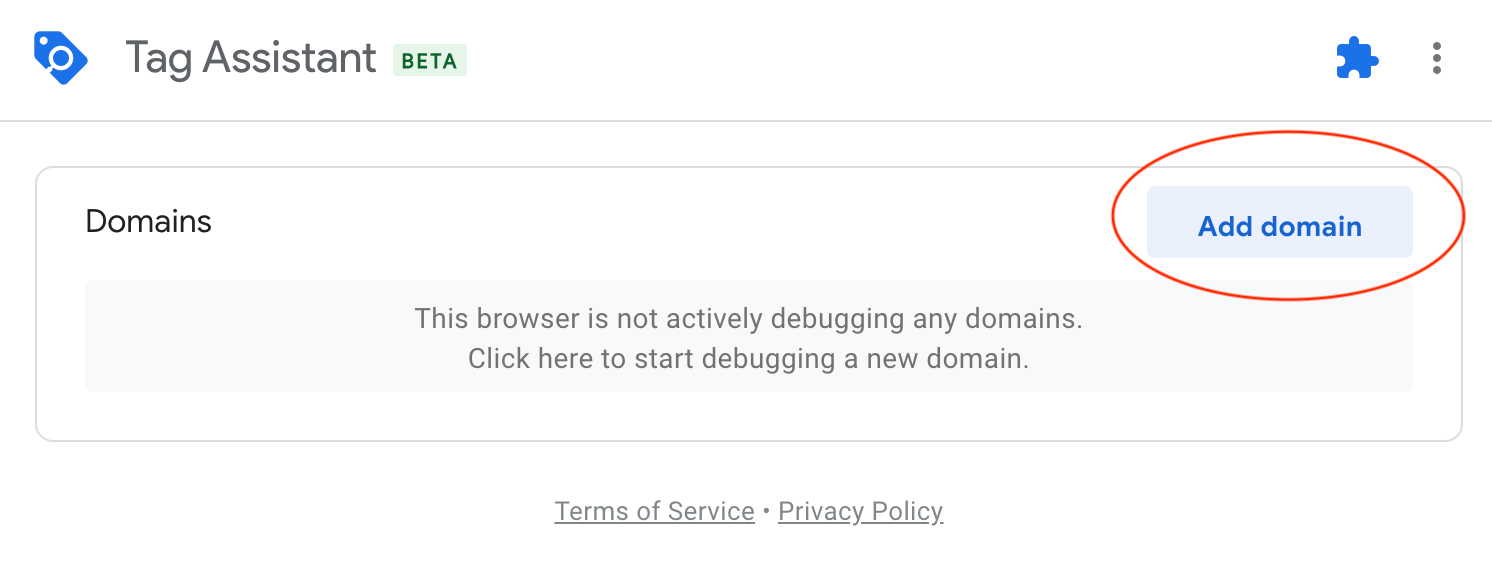
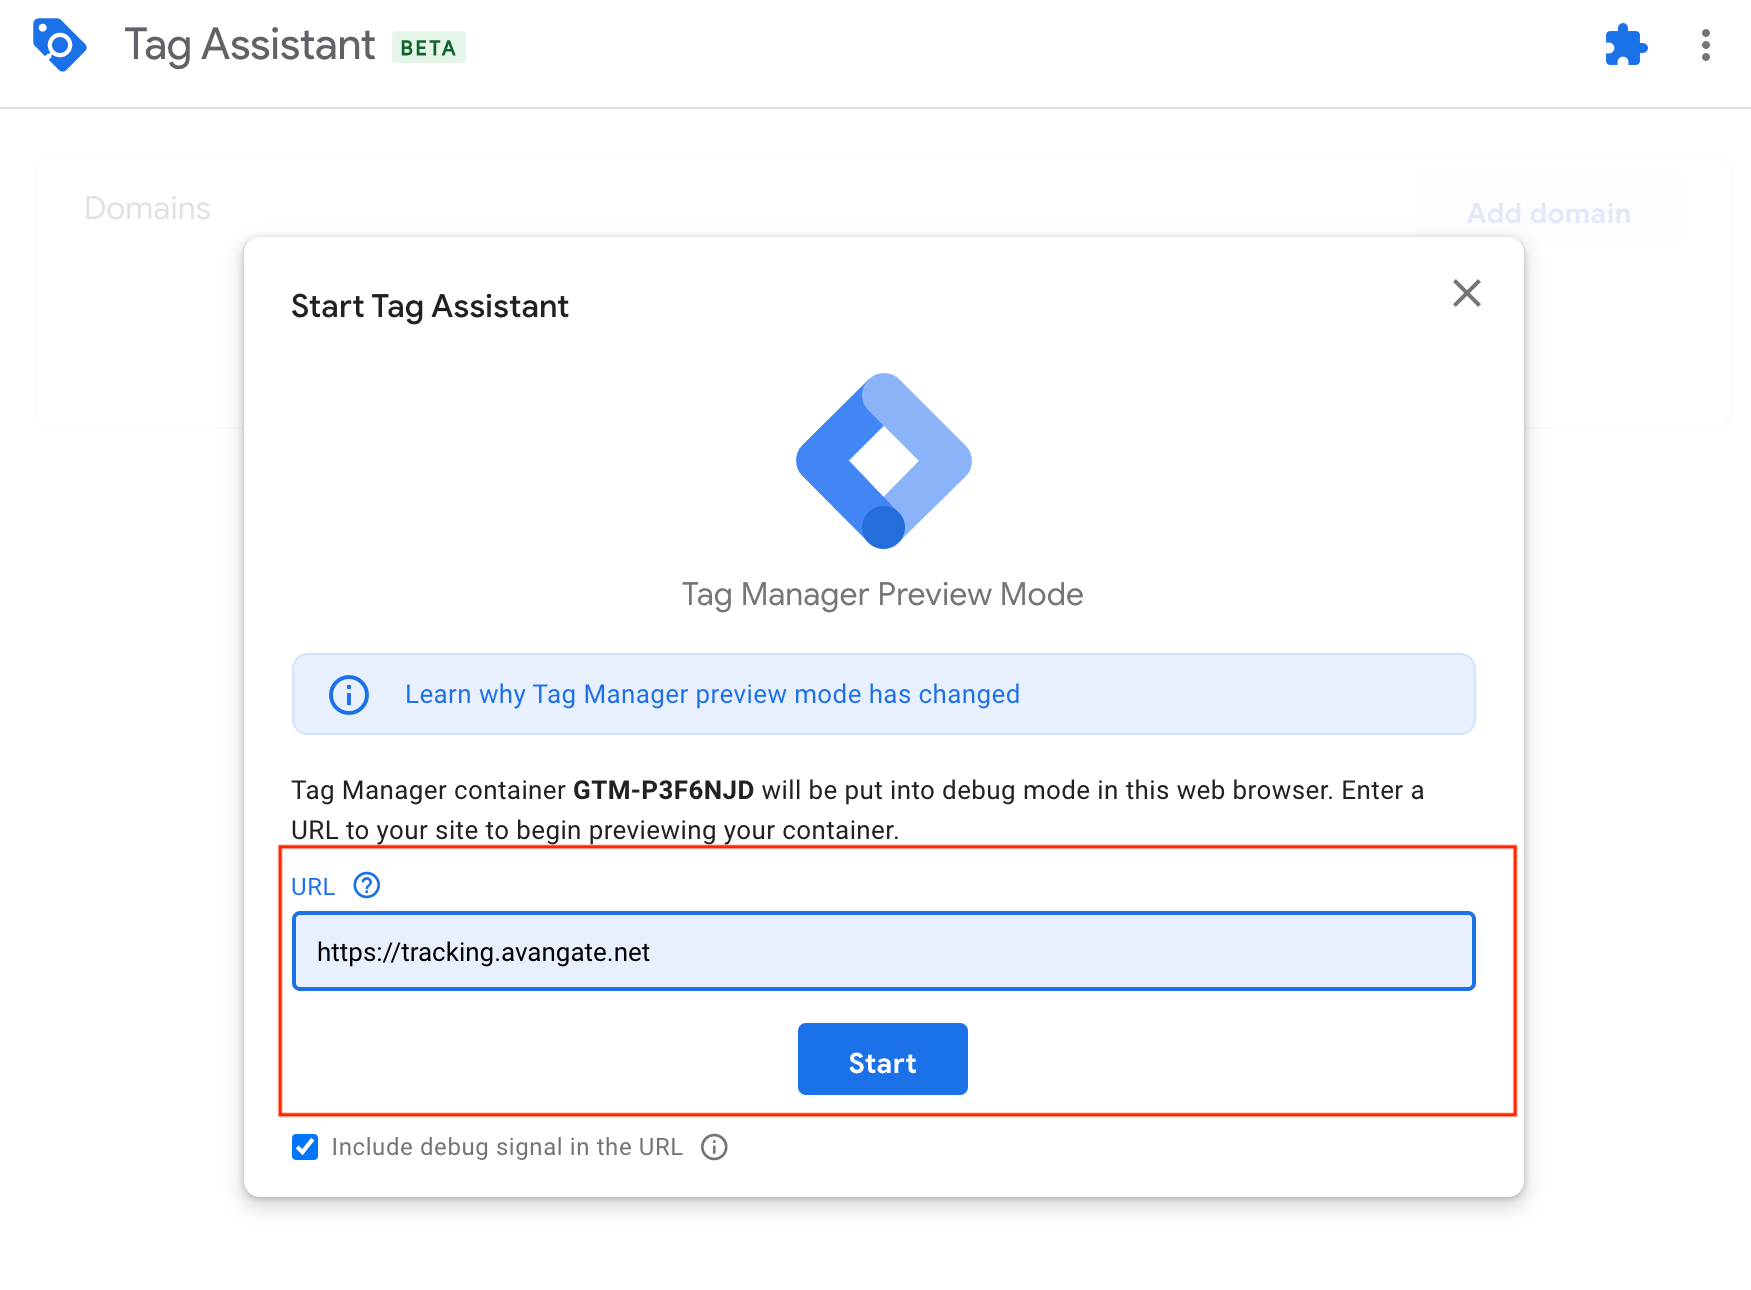
5. Add https://tracking.avangate.net/ and click Start.
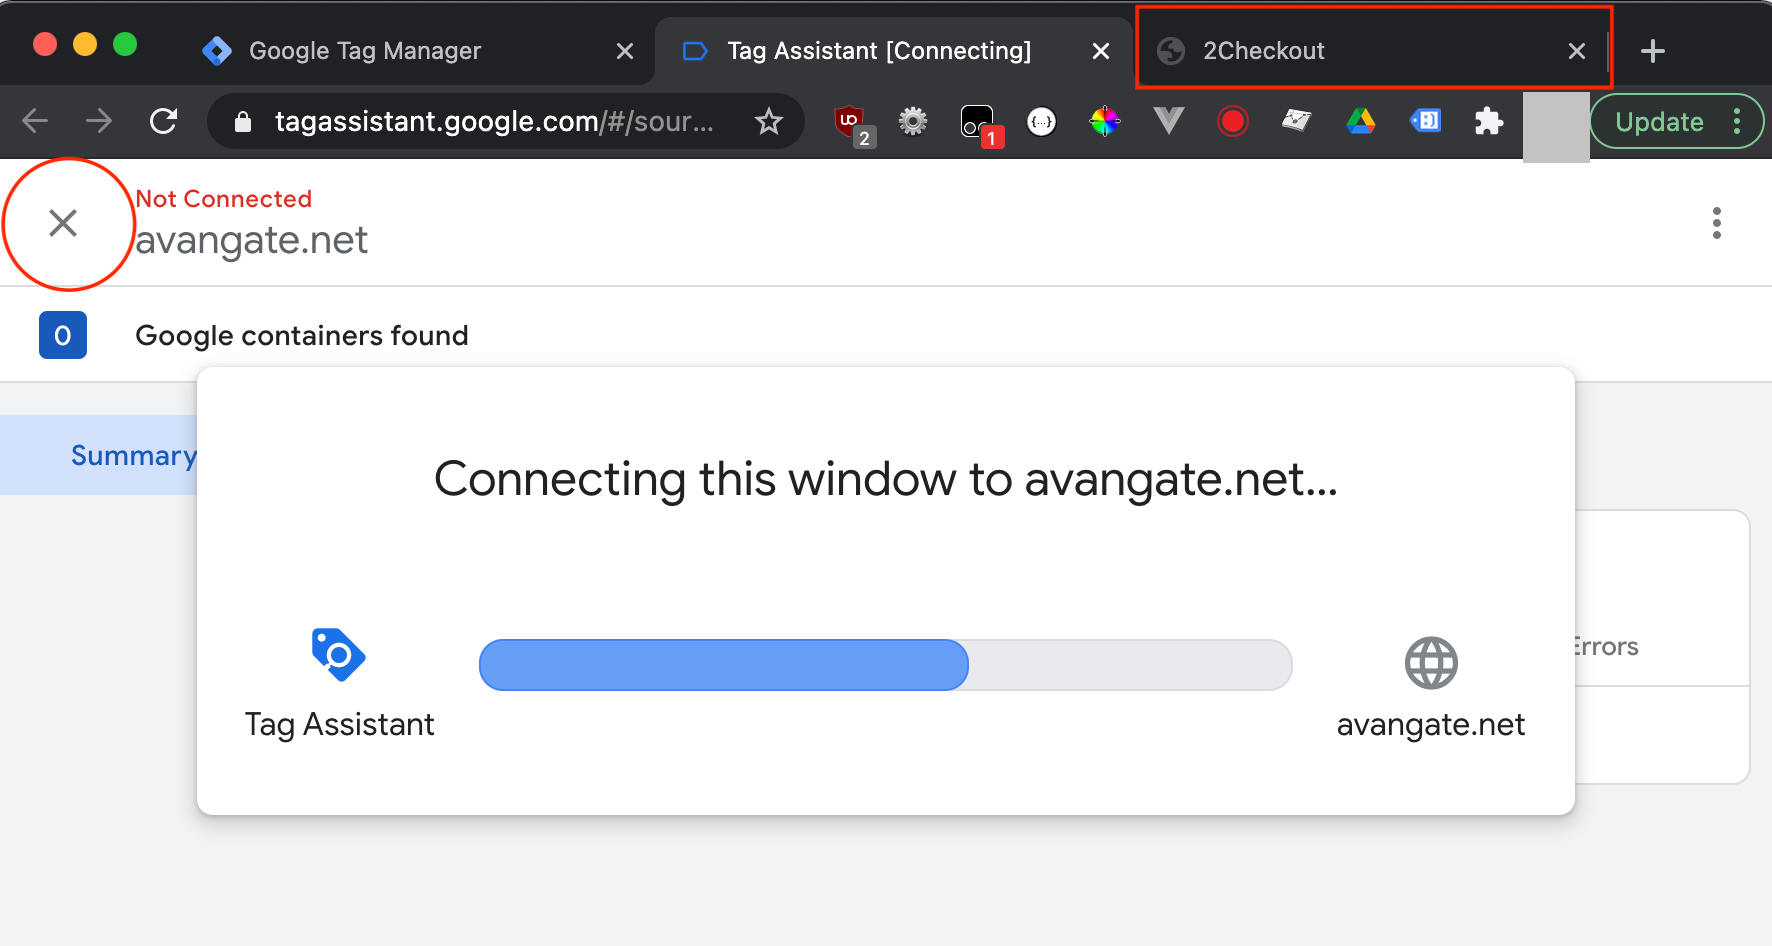
6. Go back to the Google Tag Manager tab but DON’T close the tab with tracking.avangate.local.
![]()
7. Click on X in the top-left corner.
8. In the Tag Assistant Tab, click on Add domain.
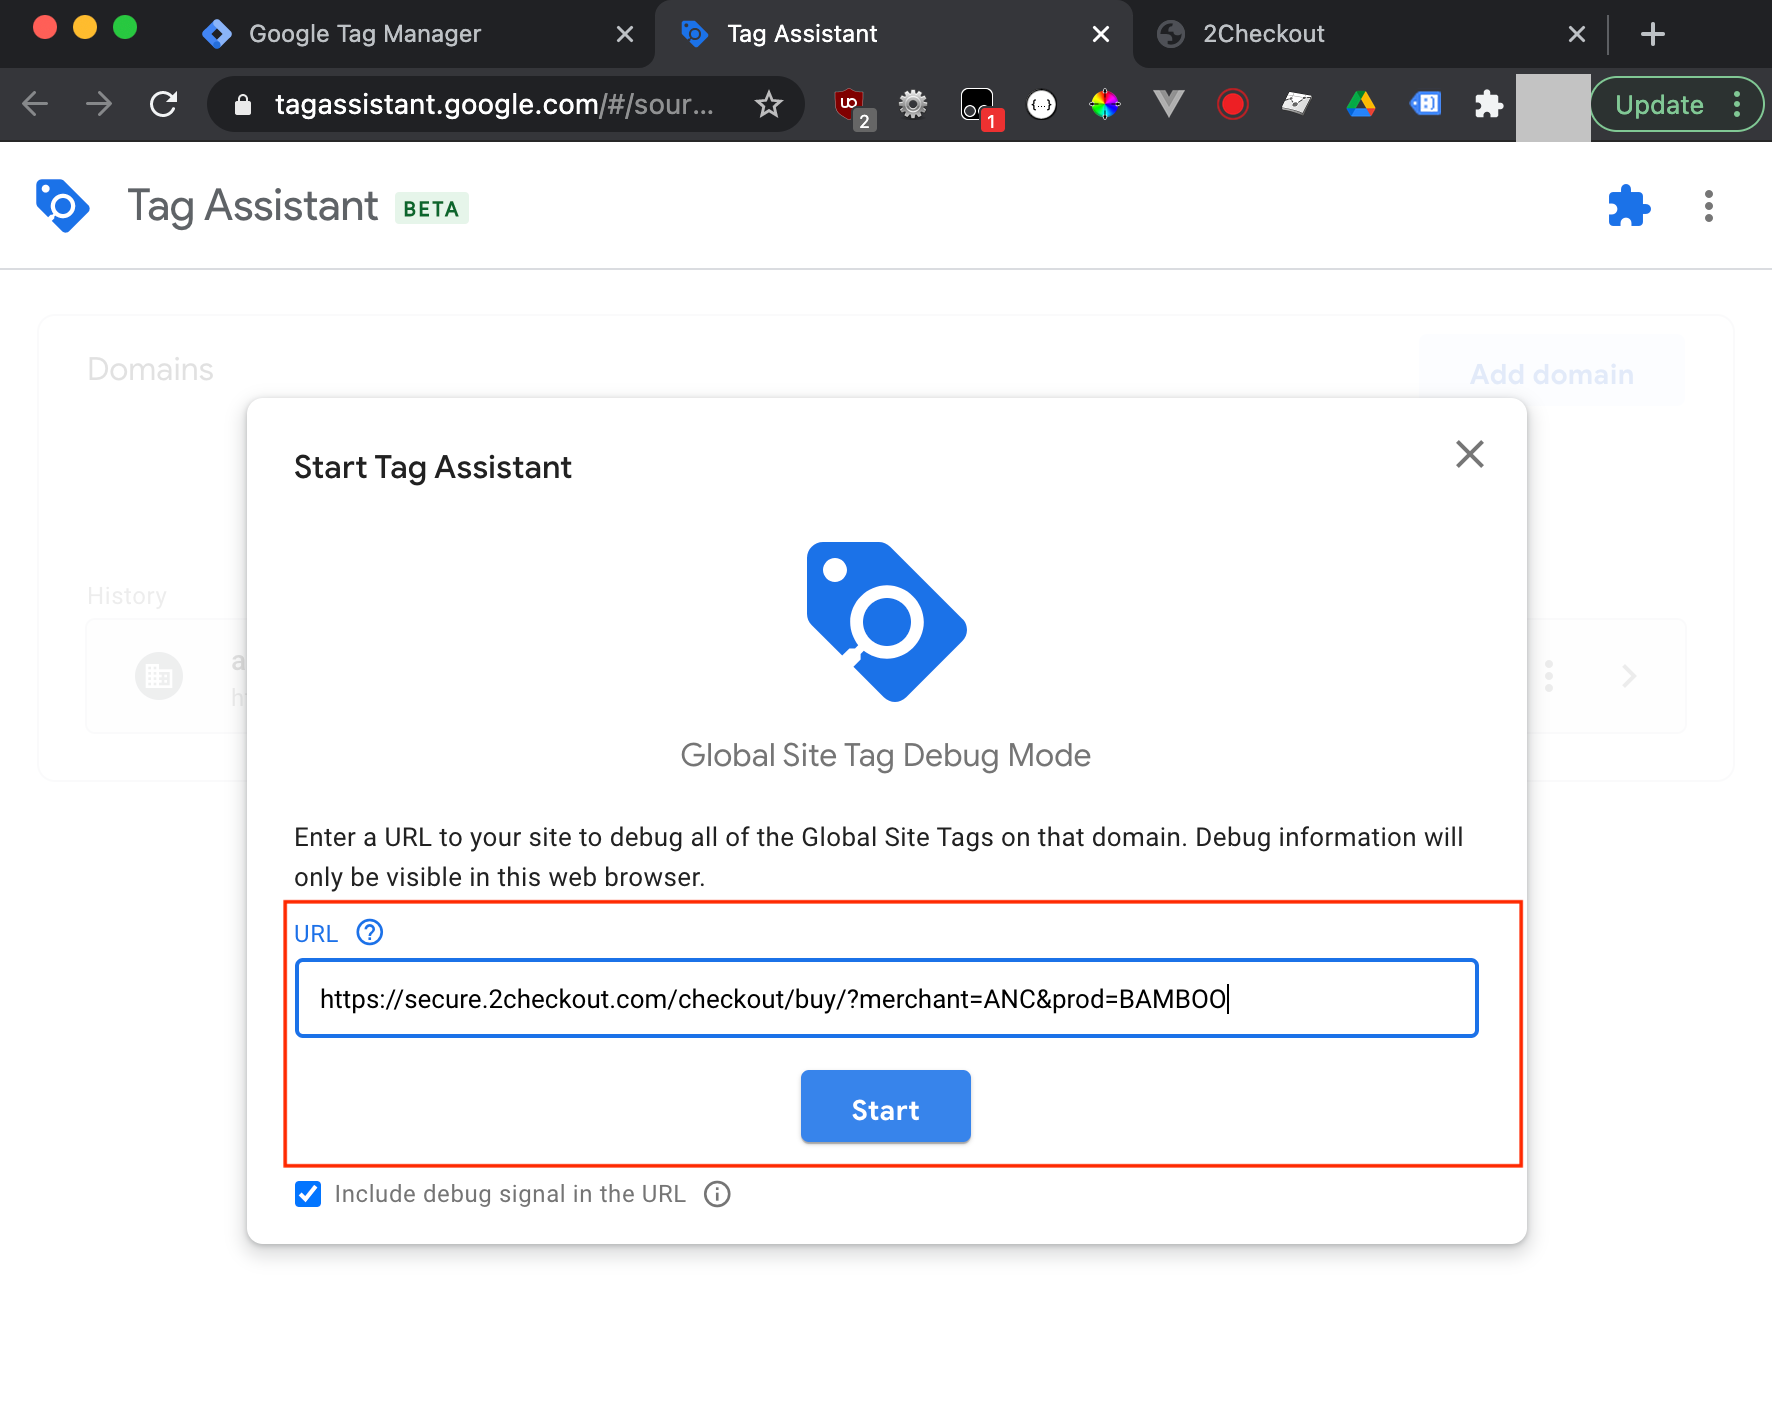
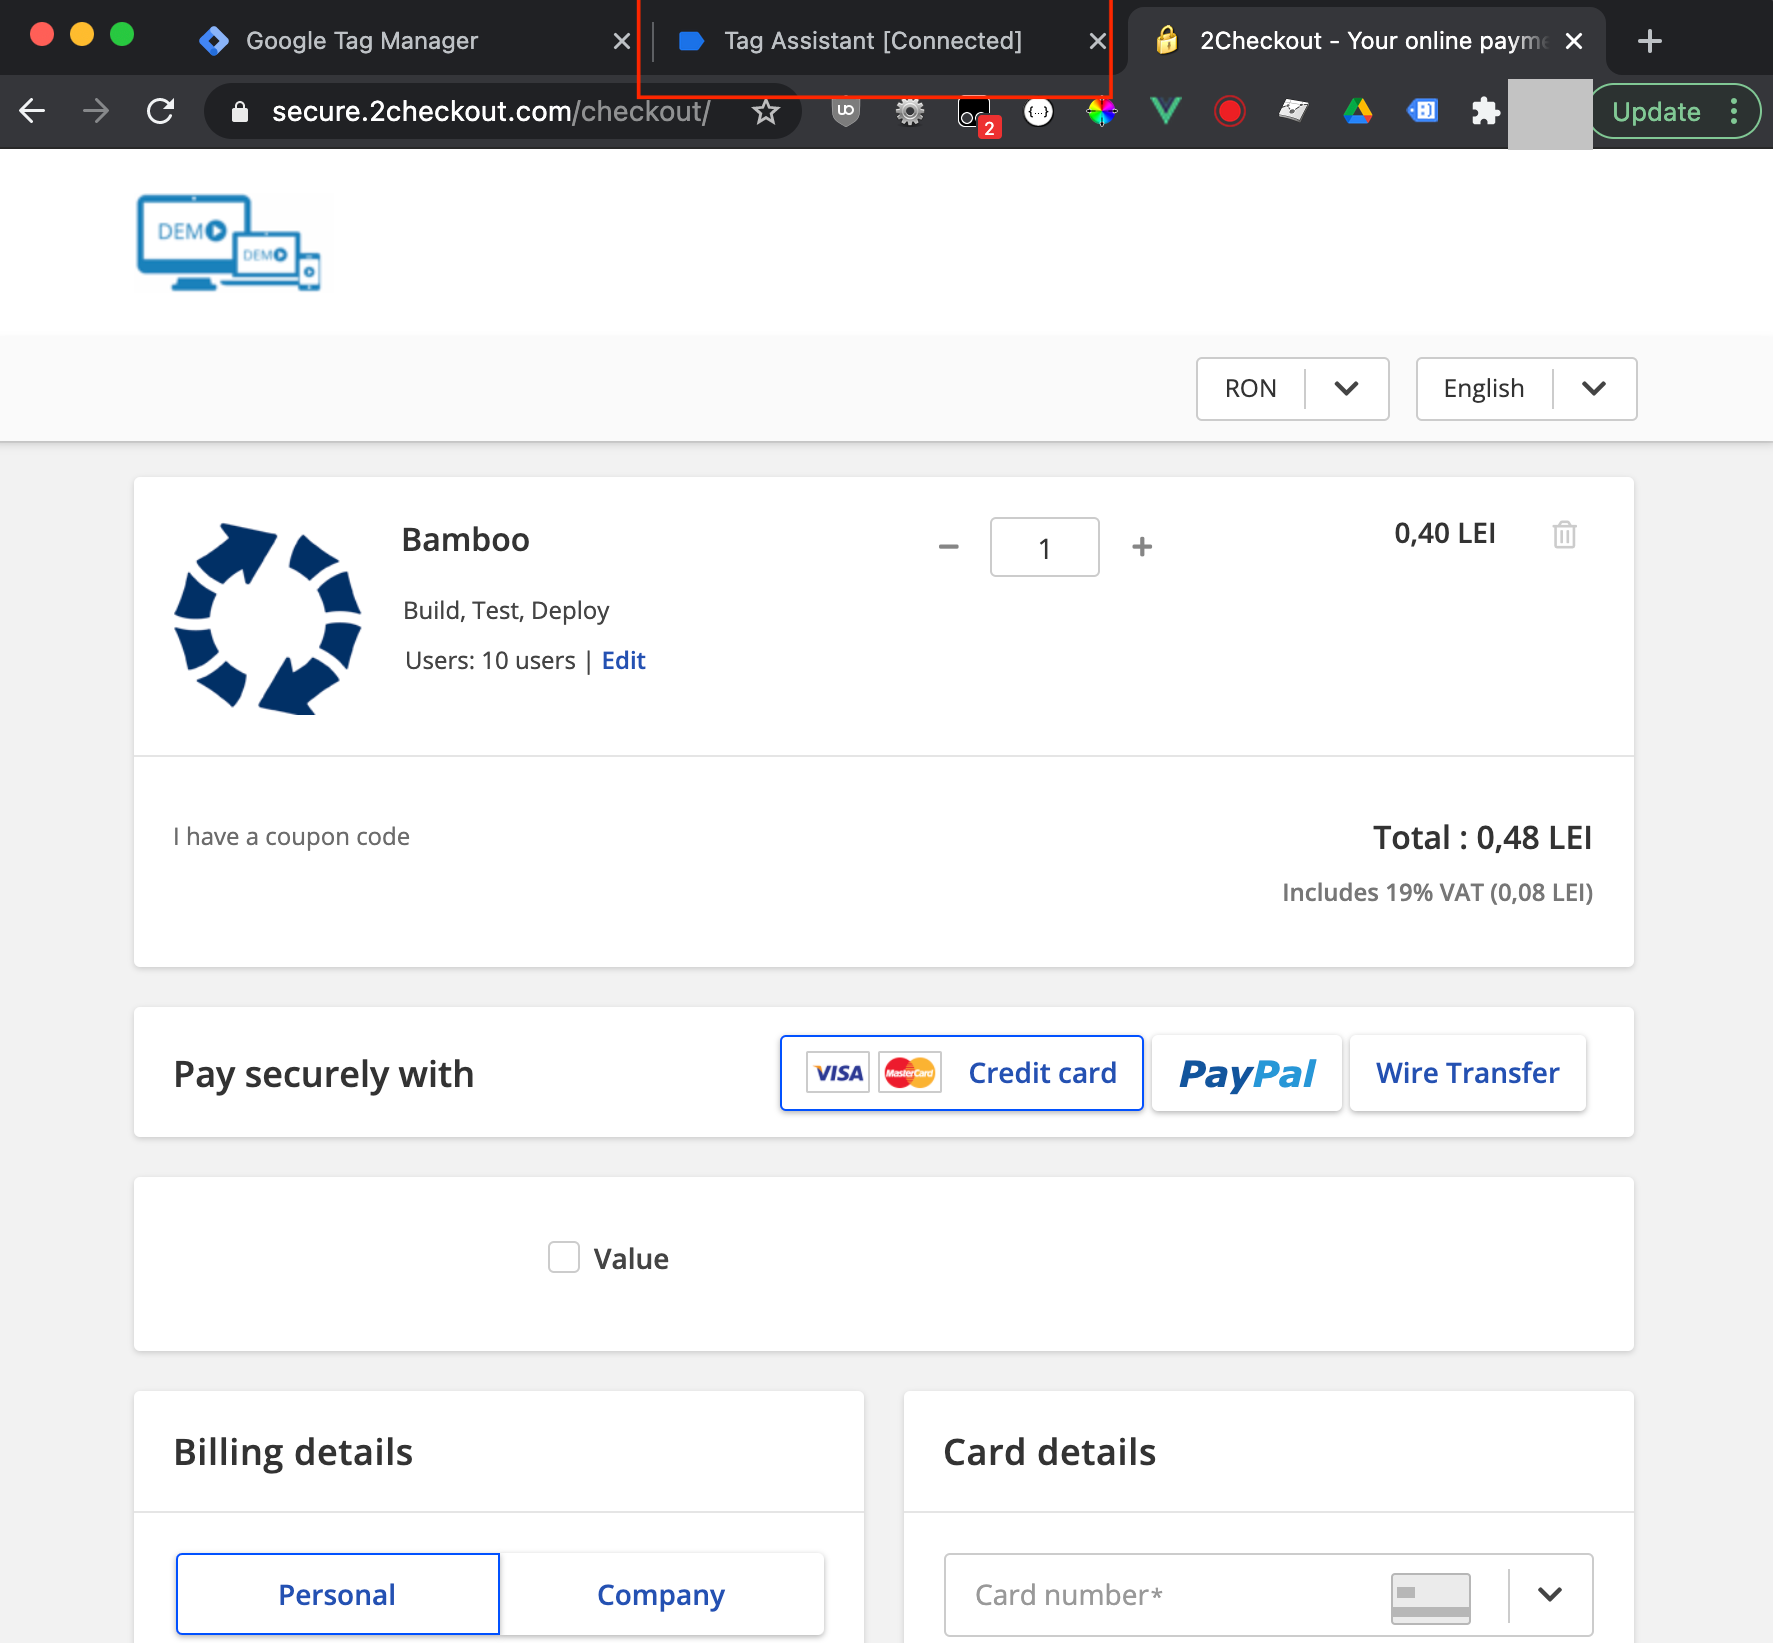
9. Enter the buy-link you want to debug and click Start.
10. Go back to the Google Tag Manager debugger tab.
11. Click on the Enable button behind the “Connecting this window to avangate.net” pop-up.
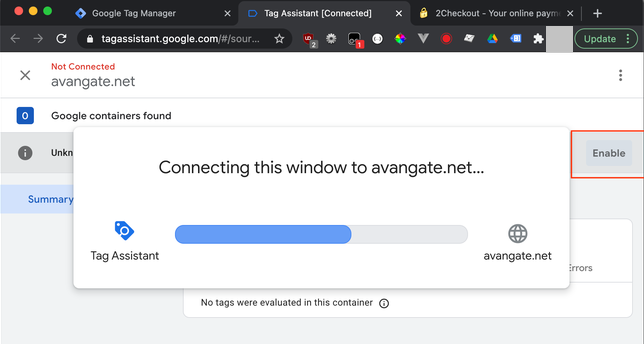
12. Click on Continue.
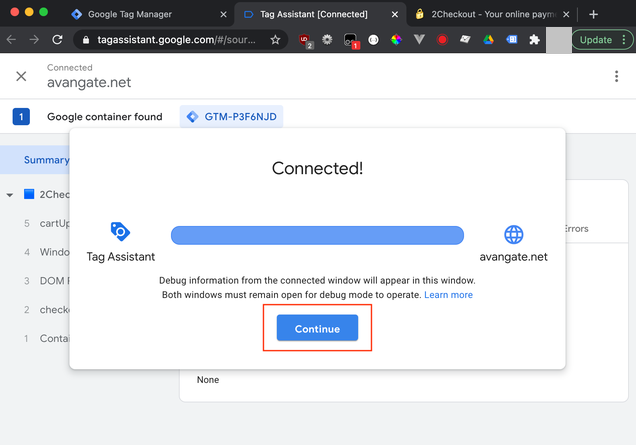
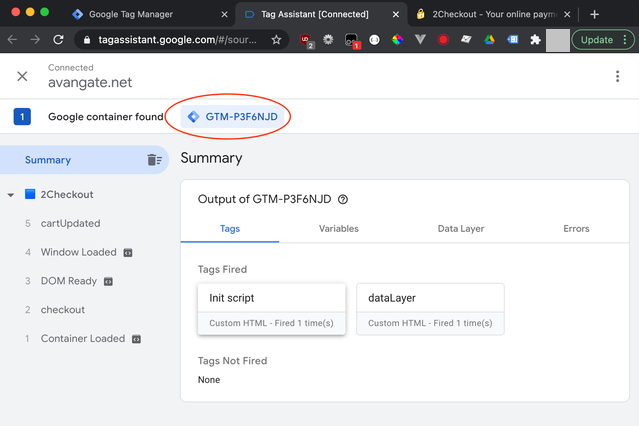
13. You are now debugging tracking.avangate.net, but this domain receives tags from the shopping cart.
Submit and publish your settings

Merchant Control Panel Settings
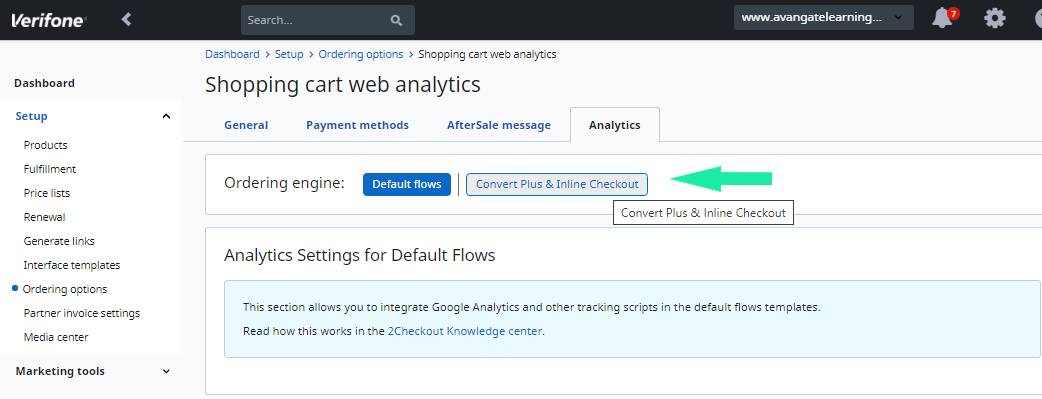
The Analytics section in your Merchant Control Panel allows you to integrate Google Universal Analytics or/and Google Tag Manager in the ConvertPlus or InLine ordering engines and thus track the behavior of your shoppers on the 2Checkout pages.
Follow these steps to complete your analytics integration:
- Log into your Merchant Control Panel.
- Navigate to Setup → Ordering options.
- Click on the Analytics tab.
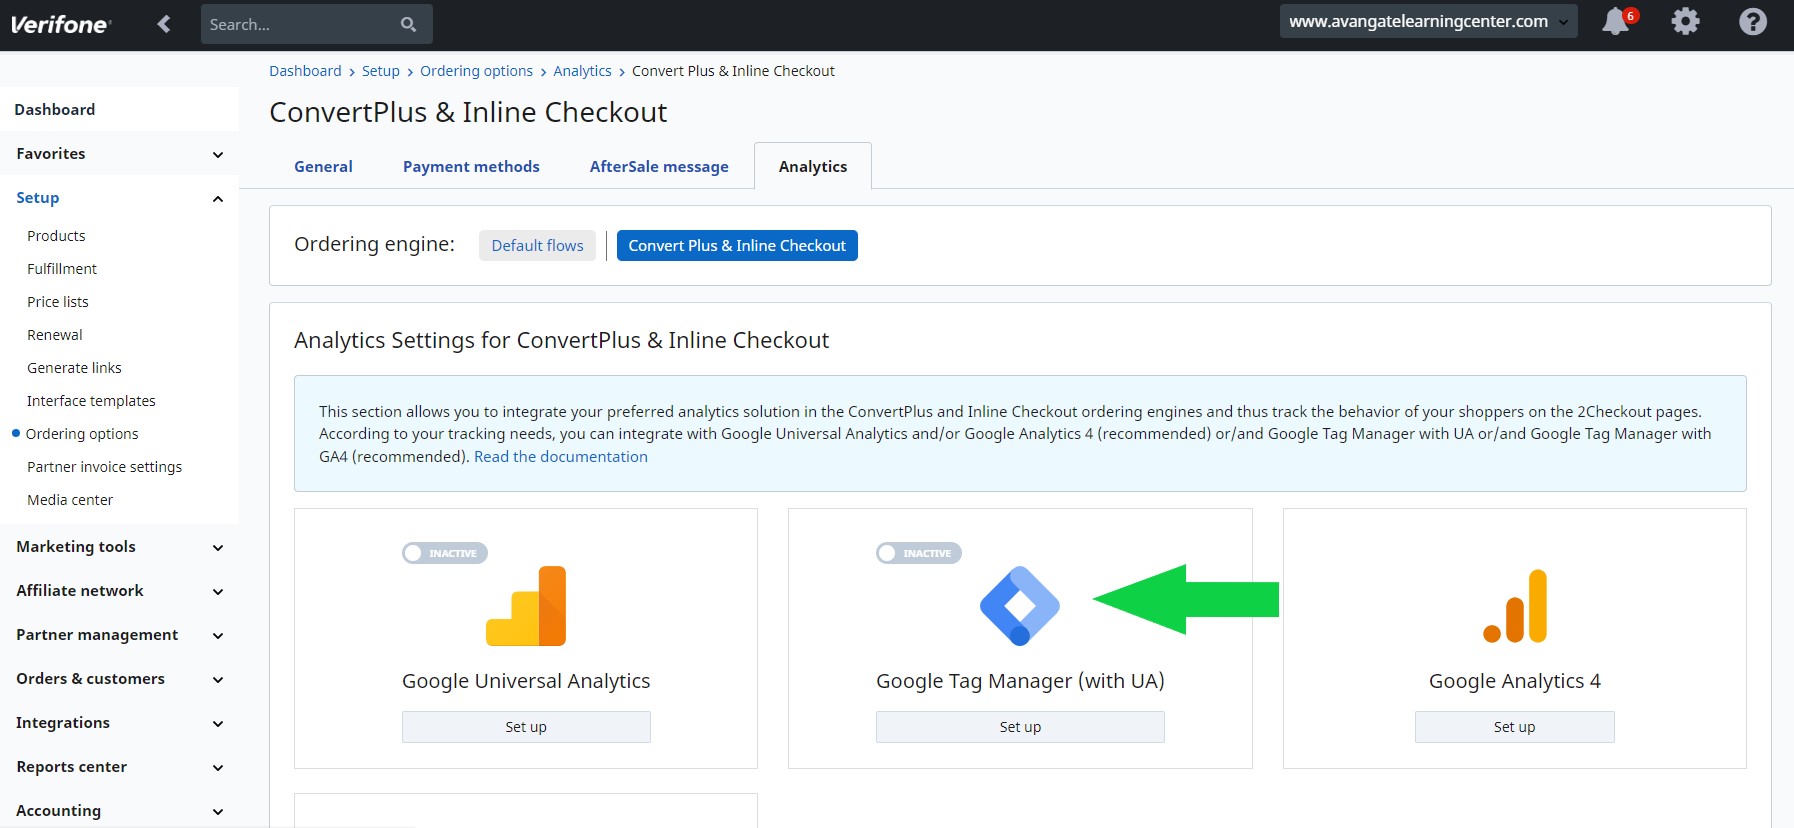
- Click on the ConvertPlus and InLine Checkout tab.
5. In the Google Tag Manager box, click on Set up.
6. Fill in the Google Tag Manager code (Here is how you obtain it) and click Save.
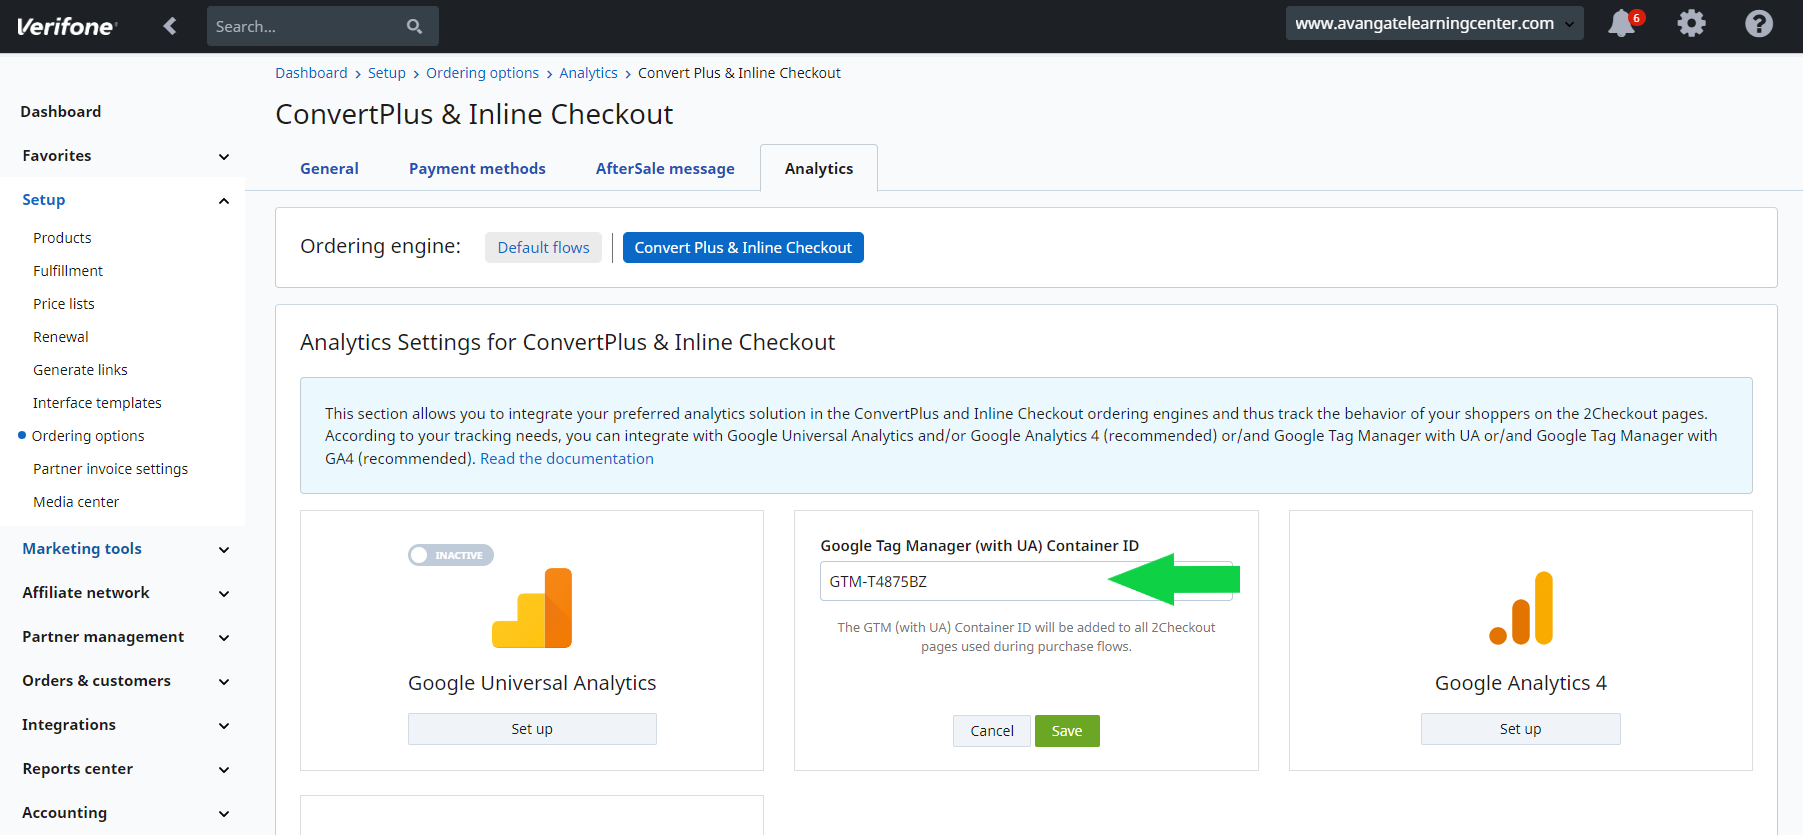
7. Complete the integration by using the slider to activate Google Tag Manager. It is not recommended to activate both Universal Analytics and Google Tag Manager to send data to the same Google Universal Analytics view, otherwise, duplicate data will occur.

1. 2Checkout data layer for tracking through Google Tag Manager is placed in an iFrame. This data layer has an eCommerce object, that contains eCommerce information built on the structure required by Google Universal Analytics reporting for the following events: checkout, add to cart, product impressions (for cross-sells), purchase, and remove from cart.
2. For fully enhanced eCommerce reporting in Google Universal Analytics, it is recommended that you send information to Google Universal Analytics from your website that includes product impression, product detail, and add to cart. More information on enhanced eCommerce reporting and how to send Product View and Add to Cart data to Google Universal Analytics can be found here: https://developers.google.com/tag-manager/enhanced-ecommerce
3. In addition to the eCommerce object, the data layer also contains an event called cartUpdated that includes additional parameters with information on the shopping cart. These parameters can be used to capture further information in custom dimensions. Refer to the Google Documentation on how to build custom dimension through Google Tag Manager: https://support.google.com/tagmanager/answer/6164990?hl=en .