Regular promotions
Overview
Apply discounts to specific products added to the shopping cart. Volume discounts impact the unit price applied by the platform.
If you haven’t started to leverage upselling and cross-selling by now, you may be leaving money on the table. Keep reading to find strategies for each and how you can choose between the two tactics.
Availability
Available for all 2Checkout accounts, and both Channel Manager and resellers if you (merchant) use the products in both channels.
How regular promotions work
The 2Checkout system automatically applies regular product promotions when the shopping cart contains a product you assigned the promotion to.

Add a regular promotion
- Log in to your Merchant Control Panel account.
- Navigate to Marketing tools -> Promotions -> Regular promotions.
- Click Add regular promotion.
- Give a suggestive title and description to your promotion. Shoppers can see the promotion title during purchase.
- Add localized promotion names for any of the supported languages. The 2Checkout shopping cart automatically displays localized promotion names based on the selected shopping cart language.
- Select when you want the promotion to run. You can limit promotions to a specific time interval or let them run indefinitely. To start a promotion as soon as you mark it Active, leave the start date empty. If you don't set the end date, the promotion will stop when the maximum number of orders has been reached or will continue to run if the maximum number of orders is unlimited.
- Select whether to apply the product promotion to eCommerce orders, partner orders (Channel Manager) or both.
- Select the coupon/voucher type:
- Single - one voucher to impact multiple orders;
- Multiple - individual and unique, per-order vouchers.
- (Optional) If the cumulative promotion option is enabled on your account, select if the regular promotion is cumulative (can be added over another regular promotion) or not.
- (Optional) If the promotion is cumulative, you need to select the tax category for the discounted product as well, by selecting an option from the Product tax category drop-down list.
- Choose whether to restrict the promotion to a number of orders, or apply it for all orders. This option is only available for single coupons.
- Choose whether or not to limit the promotion based on the product quantity. Any product quantity above this limit will be sold at full price.
- Fill in the promotion coupon/voucher code. The maximum length of a coupon code is 255 alphanumeric characters.
- Single: enter the coupon values manually
- Multiple: either add the values manually one coupon per line or use the coupon generator available in the Control Panel to generate 5, 10, 20, 30, 50, or 100 vouchers at a time and either append them to an existing list or replace existing items. The generator creates random vouchers that resemble this: D8C10E32. 2Checkout recommends limiting the number of coupon codes to a maximum of 25000.
- Select the discount type:
- Percentage
- Fixed
- Choose whether or not to apply discounts automatically. Only available for single coupons. This option applies discounts to all selected products in all orders, without allowing shoppers to enter the coupon manually.
- Choose whether or not to publish the promotion to the 2Checkout Affiliate Network.
- Activate the promotion.
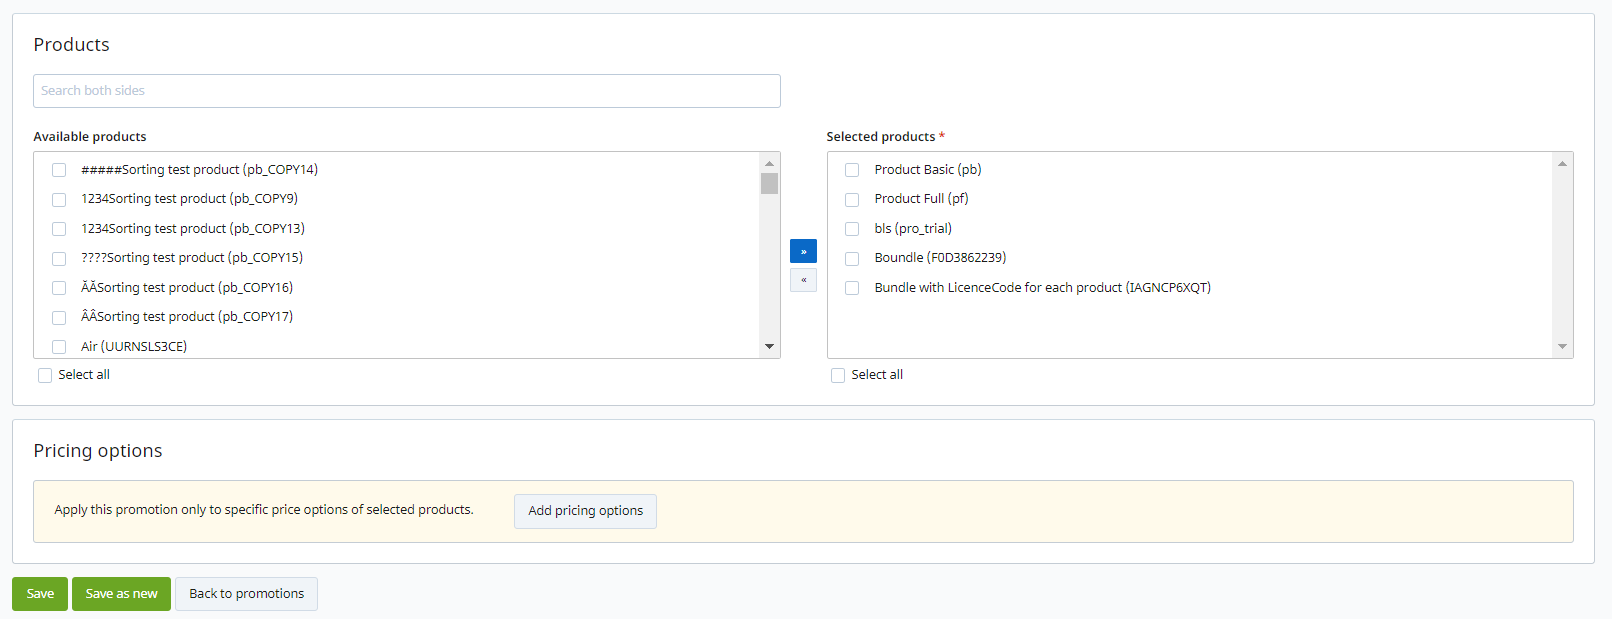
- Select the products to be included in the promotion.
- Click Save.
Duplicate an active promotion
Users can duplicate an active promotion in the Merchant Control Panel. This will improve the user experience and simplify the actions needed to add a new promotion.
The feature is available for users who are offering promotions and can be activated from all the pages from the Promotion tabs.

To use the feature, follow the steps below:
- Go to Marketing tools -> Promotions -> Select an active promotion that you want to Save as new.
- Click on Save as new button.

3. The promotion will be cloned as Inactive; the name will be by default Copy of cloned promotion.
4. A new code will be generated.
5. Click on the Actions icon to activate the promotion.
6. Click on the Activate button.

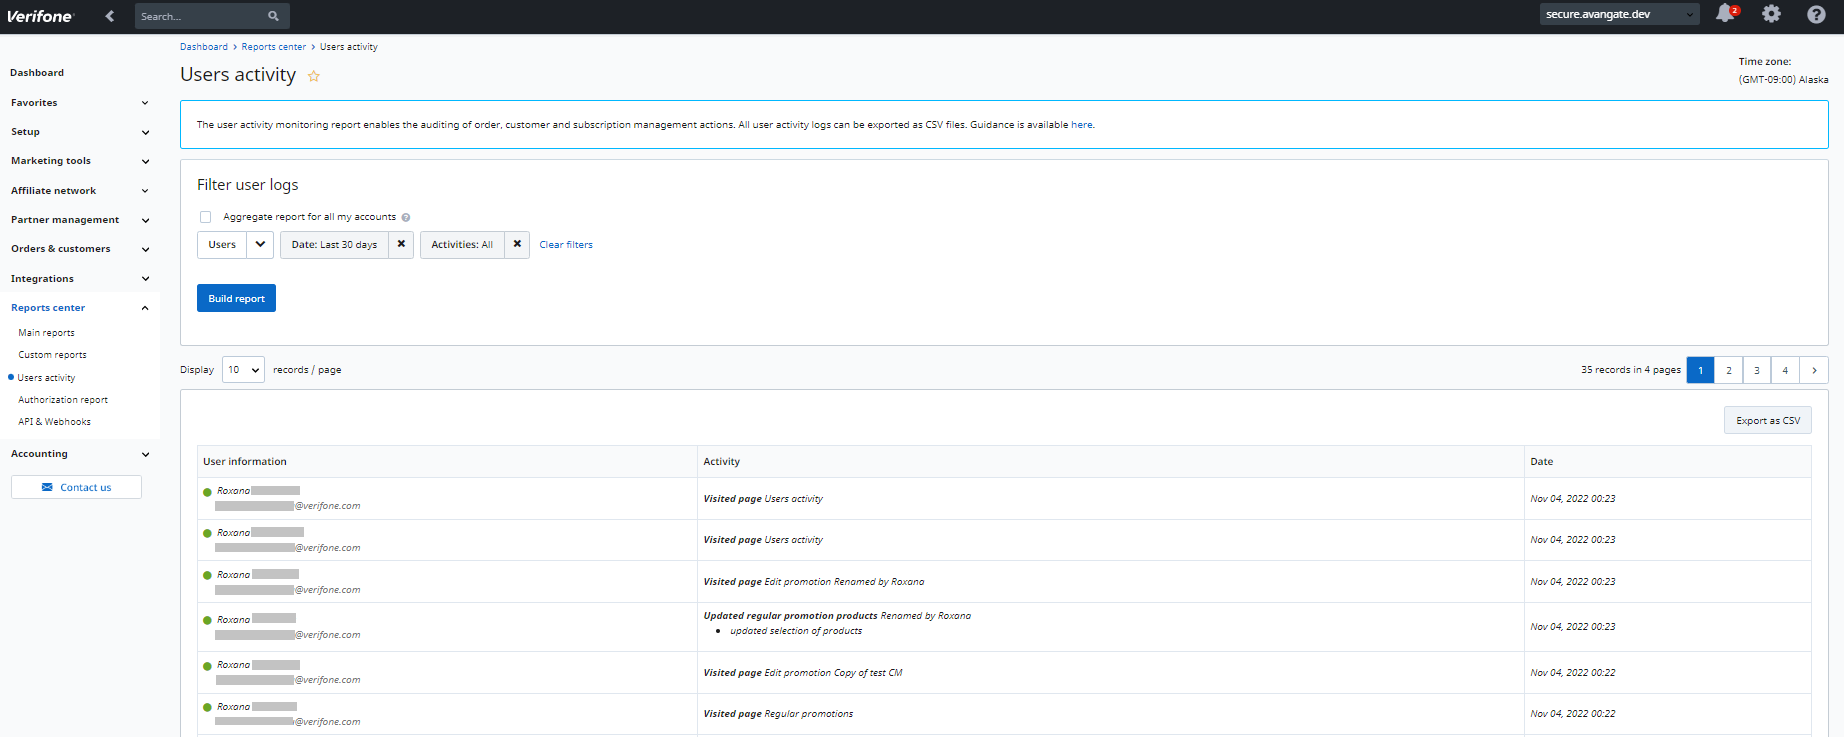
7. The actions will be visible in the User Activity reports tab.

