Implement Facebook Pixel in ConvertPlus and Inline carts through Google Tag Manager
Last updated: 26-Nov-2025
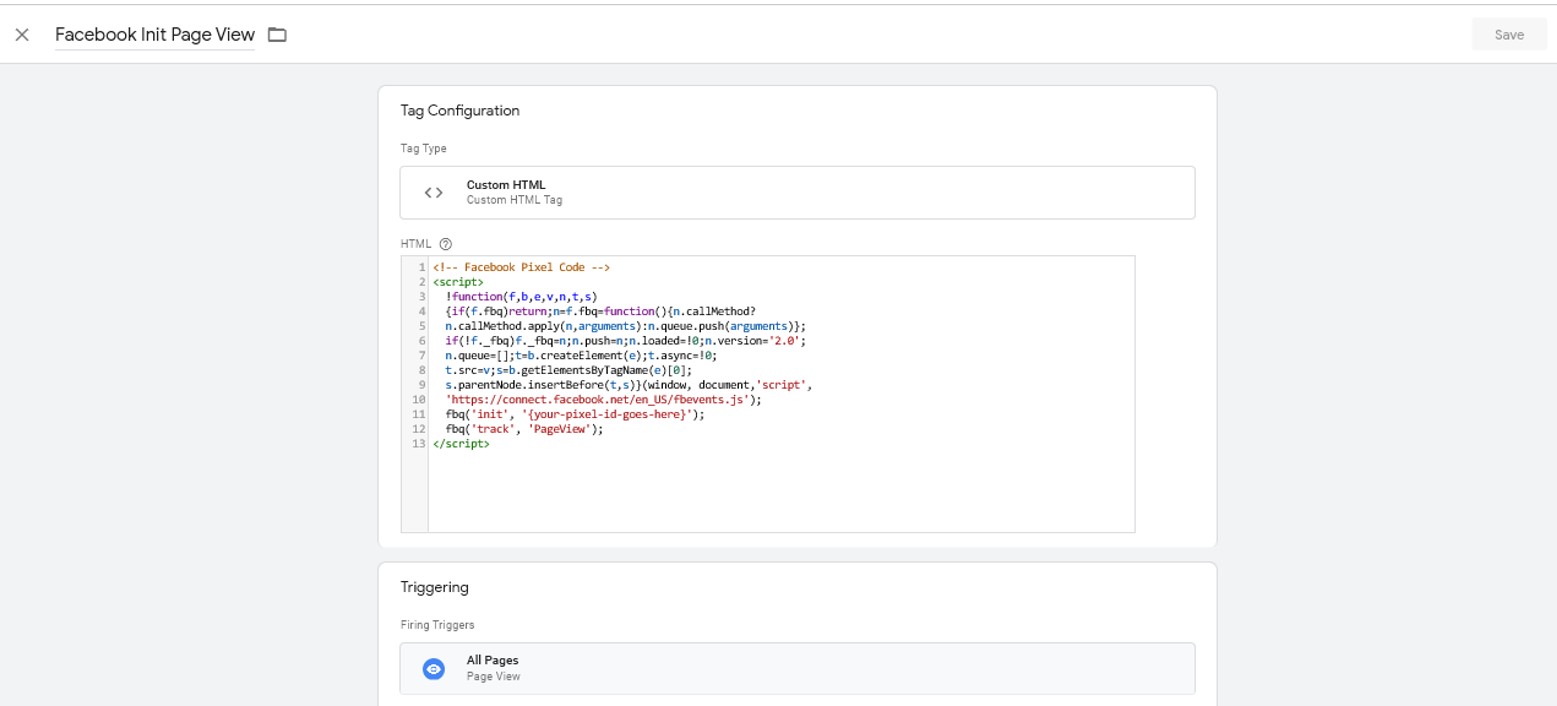
A. Create a tag for Facebook Pixel Page View Initialization
Create this tag if you don’t already have a Facebook Pixel tag on your website that fires on all pages where you have the Google Tag Manager code.
- Click to create a new tag.
-
As Tag Type select Custom HTML. In the script below, under '{your-pixel-id-goes-here}' type your Facebook pixel. The script below is the Pixel Base Code and can be found in the Facebook/Meta Pixel documentation.
<!-- Facebook Pixel Code --> <script> !function(f,b,e,v,n,t,s) {if(f.fbq)return;n=f.fbq=function(){n.callMethod? n.callMethod.apply(n,arguments):n.queue.push(arguments)}; if(!f._fbq)f._fbq=n;n.push=n;n.loaded=!0;n.version='2.0'; n.queue=[];t=b.createElement(e);t.async=!0; t.src=v;s=b.getElementsByTagName(e)[0]; s.parentNode.insertBefore(t,s)}(window, document,'script', 'https://connect.facebook.net/en_US/fbevents.js'); fbq('init', '{your-pixel-id-goes-here}'); fbq('track', 'PageView'); </script> - As Triggering select All Pages.
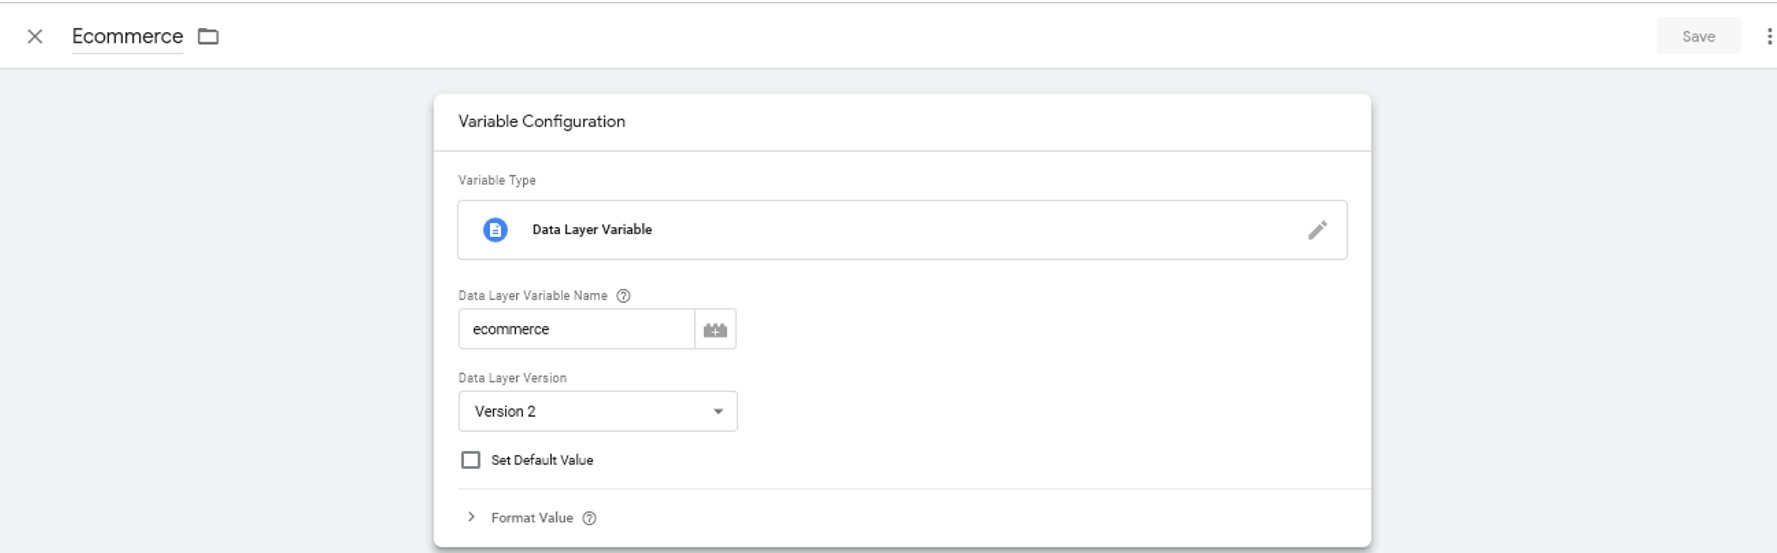
B. Create a User-defined variable in Google Tag manager called “ecommerce”
- Click on New, to create a new user-defined-variable.

- As Variable Type, select Data Layer Variable.
- As Data Layer Variable Name, add ecommerce in the field.
- As Data Layer Version select Version 2.
C. Create a User-defined variable in Google Tag Manager for Facebook called ConvertPlus - FacebookEventsScript
- Click on New to create a new user-defined-variable.

- As Variable Type select Custom JavaScript.
-
In the Custom JavaScript section paste the below code.
function(){
  var attr = {};
  attr.currency = "USD";
  attr.content_type = "product";
  var fbContents,fbIds,fbNames,i;
//function fbData
var fbData = function() {
fbContents = [];
    fbIds = [];
    fbNames = [];
    attr.num_items = {{ecommerce}}.items.length;
    for(i=0;i<{{ecommerce}}.items.length;i++){
      fbContents.push({
       'id':{{ecommerce}}.items[i].item_id,
       'name':{{ecommerce}}.items[i].item_name,
       'quantity':{{ecommerce}}.items[i].quantity
      });
     	fbIds.push({{ecommerce}}.items[i].item_id);
      fbNames.push({{ecommerce}}.items[i].item_name);
   	 }
    attr.contents = fbContents;
    attr.content_ids = fbIds;
    attr.content_name = fbNames;
	};
  if({{Event}} === 'begin_checkout'){
    attr.value = {{ecommerce}}.actionField.checkout_valueUSD;
    fbData();
  }
  if({{Event}} === 'purchase'){
   attr.value = {{ecommerce}}.actionField.valueUSD;
    fbData();
  }
  return attr;
}
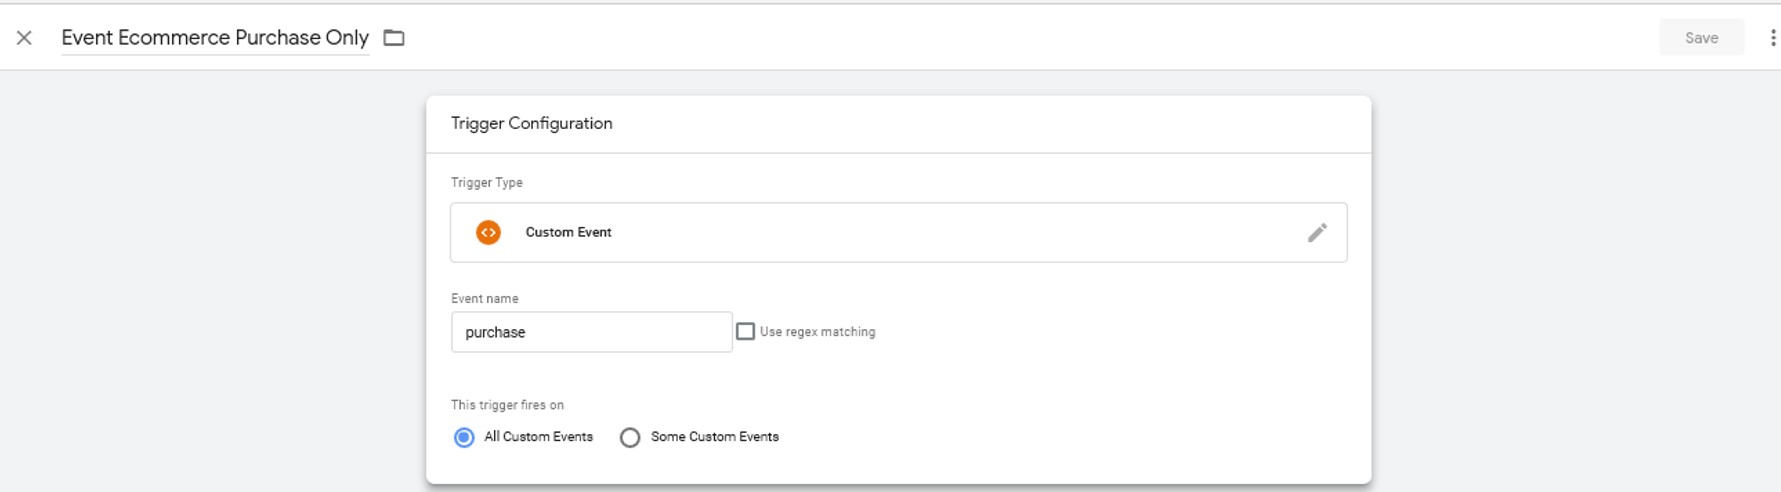
D. Create a trigger specifically for the purchase event
Create a new trigger which is restricted only to the purchase event and name it Event Ecommerce Purchase Only.
- As Trigger Type, select Custom Event.
- As Event name, type purchase.
- For this trigger to fire on, select All Custom Events.
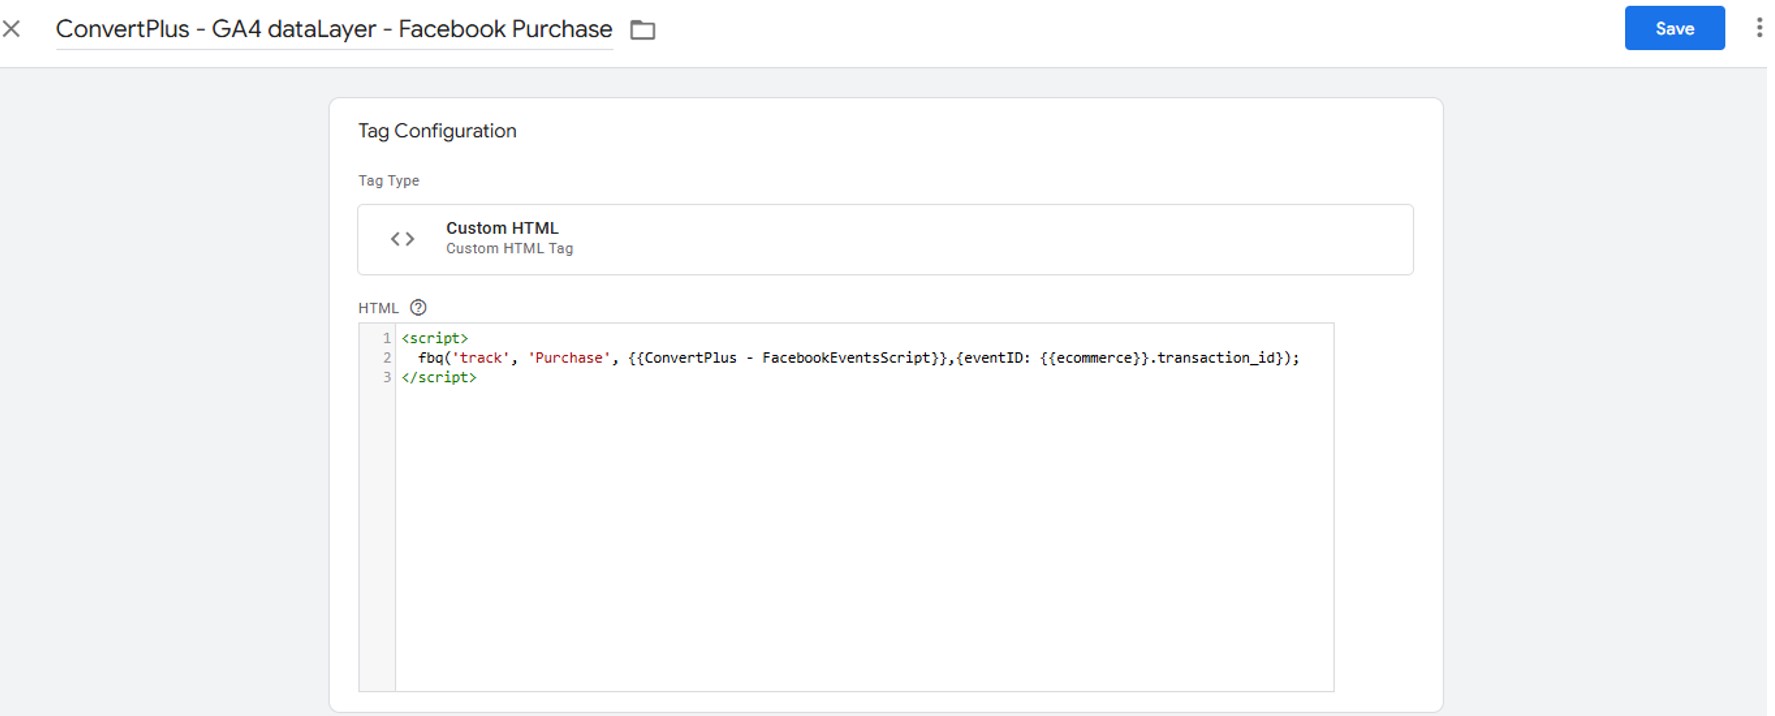
E. Create a tag for the Facebook Pixel for the purchase event
- Create a new tag named for example Facebook Purchase ConvertPlus.
- As Tag Type select Custom HTML.
-
In the HTML section, paste the following code:
<script> fbq('track', 'Purchase', {{ConvertPlus - FacebookEventsScript}},{eventID: {{ecommerce}}.transaction_id}); </script> - For Triggering, select the Trigger for Event Ecommerce Purchase only, the trigger that is only restricted to the purchase event.
Optional! – send information with the Facebook Pixel at checkout if needed
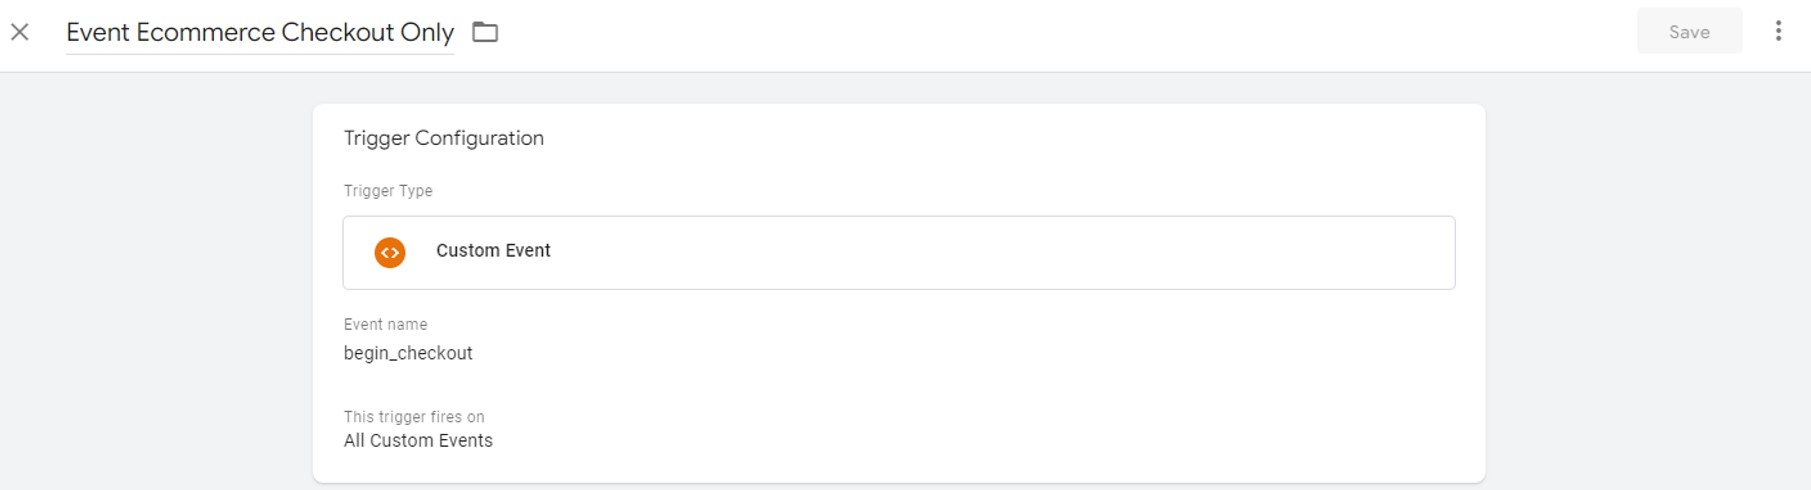
Create a trigger specifically for the checkout event
Create a new trigger which is restricted only to the purchase event and name it Event Ecommerce Checkout Only.
- As Trigger Type, select Custom Event.
- As Event name, type begin_checkout.
- For this trigger to fire on, select All Custom Events.
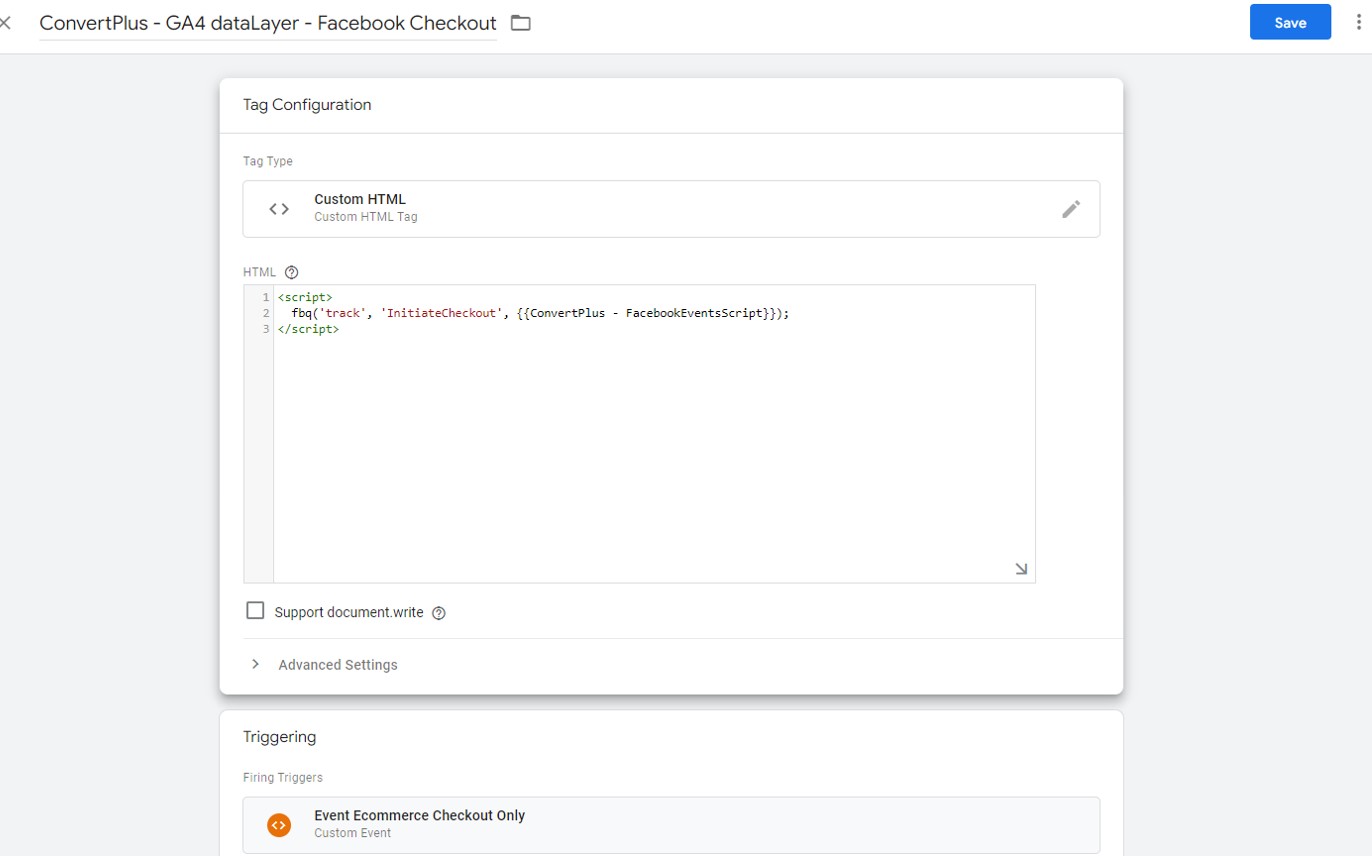
Create a tag for the Facebook Pixel for the checkout event
- Create a new tag named for example Facebook Checkout ConvertPlus.
- As Tag Type select Custom HTML.
-
In the HTML section, paste the following code:
<script> fbq('track', 'InitiateCheckout', {{ConvertPlus - FacebookEventsScript}}); </script> - For Triggering, select the Trigger for Event Ecommerce Checkout only, the trigger that is only restricted to the checkout event.